

Well, my home has welcomed a 10-week old German Shepherd this past Sunday. She's a beautiful girl puppy, weighing in at almost 25 pounds right now. She is going to easily double this weight once she's full grown. It has taken me from Sunday until this morning to finally settle on her name - Riley Brooke.
Anyway, we went to Wal-Mart and Pet Smart and, gee, dog beds are expensive. Wow!!! So, I sent my hubby back to Wal-Mart to buy supplies so I could DIY a pet bed. All that was needed was: a fleece holiday blanket on Clearance Sale ($2.50 and it's dog-themed - yay!!!) and 2 jumbo pillows ($3.97 each).
Total cost for my Puppy/Dog Bed: $11.00...
Below, I will explain how I made mine. Added bonus, mine easily comes apart so you can launder the blanket and the pillows and then reassemble.

Size: Approximately 24" x 32"
Materials:
--1 Fleece Blanket, measures 50" x 60"
--2 Jumbo Pillows, measures 20" x 28"
--(4) 1" buttons
--(6) elastic ponytail holders
--pins to keep border on one side secure while sewing
--Needle and thread (I used turquoise so it would show up in the pics)


Directions:
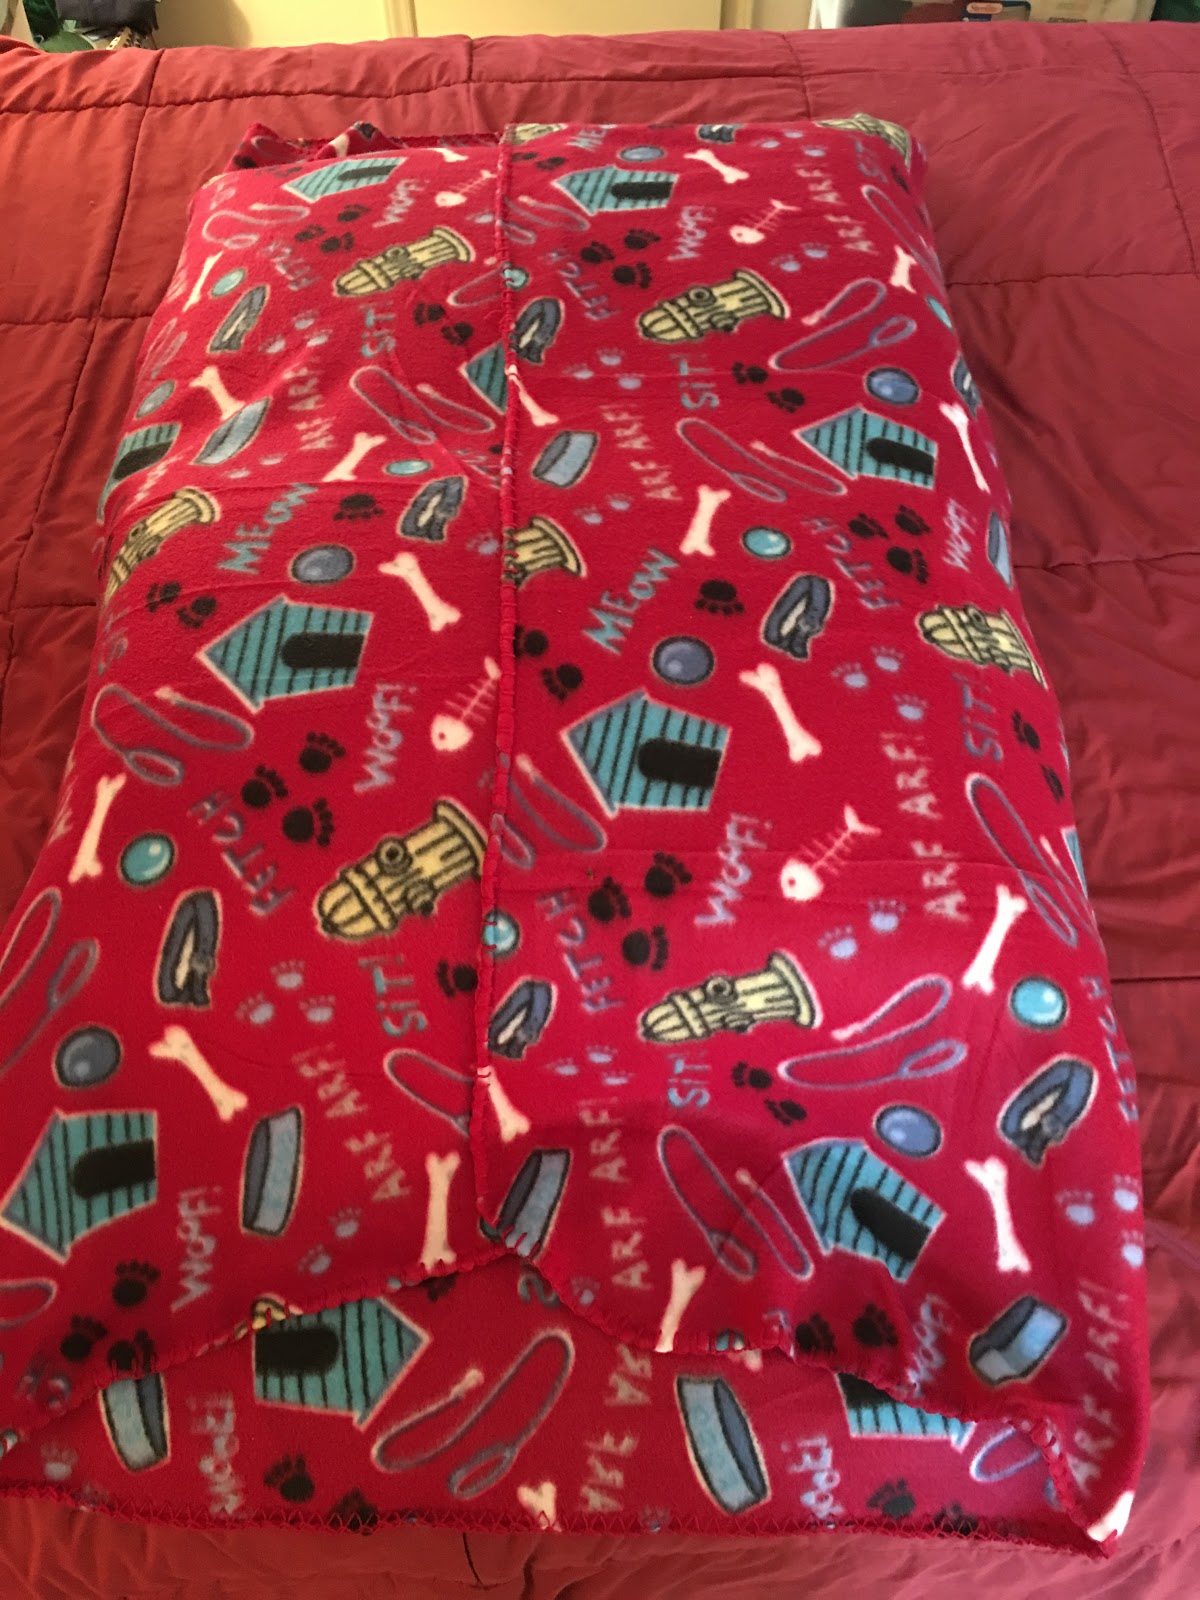
1. First you will want to lay your blanket flat and place the pillows in the center. (see my pic)
 2. Fold the left side and right side inward to make sure you have about a 2" overlap.


Now on the left side panel, I added my 4 buttons about 7-8" apart. (see my pic)
 3. At this point, you are ready to attach the ponytail holders. 4 ponytail holders are going to be placed on the right side, on top, attached 2" inward (where you can fill the rough edge), directly across from the 4 buttons. (see my pic)

The 2 remaining ponytail holders will be placed - one on each end, at the center. (see my pic)

 And, that's it for attaching and sewing on everything. Easy, peasy, right?
Now, for the assembly.
1. First you are going to secure the ponytail holders around the buttons. Depending on the size of your ponytail holders, you may have to wrap it multiple times around the buttons. I think for mine, it may have been 5 or 6 times. I just used ponytail holders I had on hand.
2. Next, you are going to fold the ends - just like when you're wrapping a present. Fold left side in to the center, fold right side in to the center, and then bring the center ponytail holder up to secure to the nearest button. Again, you may have to wrap this ponytail holder multiple times to secure.
3. Complete #2 on the opposite end.
And, that's it for a quick, simple and CHEAP way of making a Puppy/Dog Bed for larger animals.
Here's a completed pic of the bottom of the bed.
 Flip it over and you're done!!! To launder, unwrap ponytail holders from buttons. Wash gentle and air dry. Reassemble and it's ready to use again...

And, here are a few pics of my puppy, Riley Brooke, enjoying her new bed. The finished bed measures 24" x 32".


I'd love to hear your feedback/thoughts on this simple project for your new canine family member. If you make this, please hashtag (#rilla2u).
Anyway, we went to Wal-Mart and Pet Smart and, gee, dog beds are expensive. Wow!!! So, I sent my hubby back to Wal-Mart to buy supplies so I could DIY a pet bed. All that was needed was: a fleece holiday blanket on Clearance Sale ($2.50 and it's dog-themed - yay!!!) and 2 jumbo pillows ($3.97 each).
Total cost for my Puppy/Dog Bed: $11.00...
Below, I will explain how I made mine. Added bonus, mine easily comes apart so you can launder the blanket and the pillows and then reassemble.
Large Puppy/Dog Bed

Size: Approximately 24" x 32"
Materials:
--1 Fleece Blanket, measures 50" x 60"
--2 Jumbo Pillows, measures 20" x 28"
--(4) 1" buttons
--(6) elastic ponytail holders
--pins to keep border on one side secure while sewing
--Needle and thread (I used turquoise so it would show up in the pics)


Directions:
1. First you will want to lay your blanket flat and place the pillows in the center. (see my pic)

Now, you will open the right side back out, flat. I turned the side 2" in to sew edging. I sewed by hand. You can use your sewing machine if wanted. With only sewing in 1 (one) side, I just found it simpler to complete by hand. It only took me a few minutes to complete this. I used pins to secure and removed as I sewed edging.


The 2 remaining ponytail holders will be placed - one on each end, at the center. (see my pic)


Now, for the assembly.
1. First you are going to secure the ponytail holders around the buttons. Depending on the size of your ponytail holders, you may have to wrap it multiple times around the buttons. I think for mine, it may have been 5 or 6 times. I just used ponytail holders I had on hand.
2. Next, you are going to fold the ends - just like when you're wrapping a present. Fold left side in to the center, fold right side in to the center, and then bring the center ponytail holder up to secure to the nearest button. Again, you may have to wrap this ponytail holder multiple times to secure.
3. Complete #2 on the opposite end.
And, that's it for a quick, simple and CHEAP way of making a Puppy/Dog Bed for larger animals.
Here's a completed pic of the bottom of the bed.


And, here are a few pics of my puppy, Riley Brooke, enjoying her new bed. The finished bed measures 24" x 32".


I'd love to hear your feedback/thoughts on this simple project for your new canine family member. If you make this, please hashtag (#rilla2u).
PIN and SHARE this project on your boards.
Copyright:
This is an original design by me, Rilla Edwards of The Perfect Stitch. Please respect that and not copy/share my pattern but provide a link to my blog.
No comments:
Post a Comment