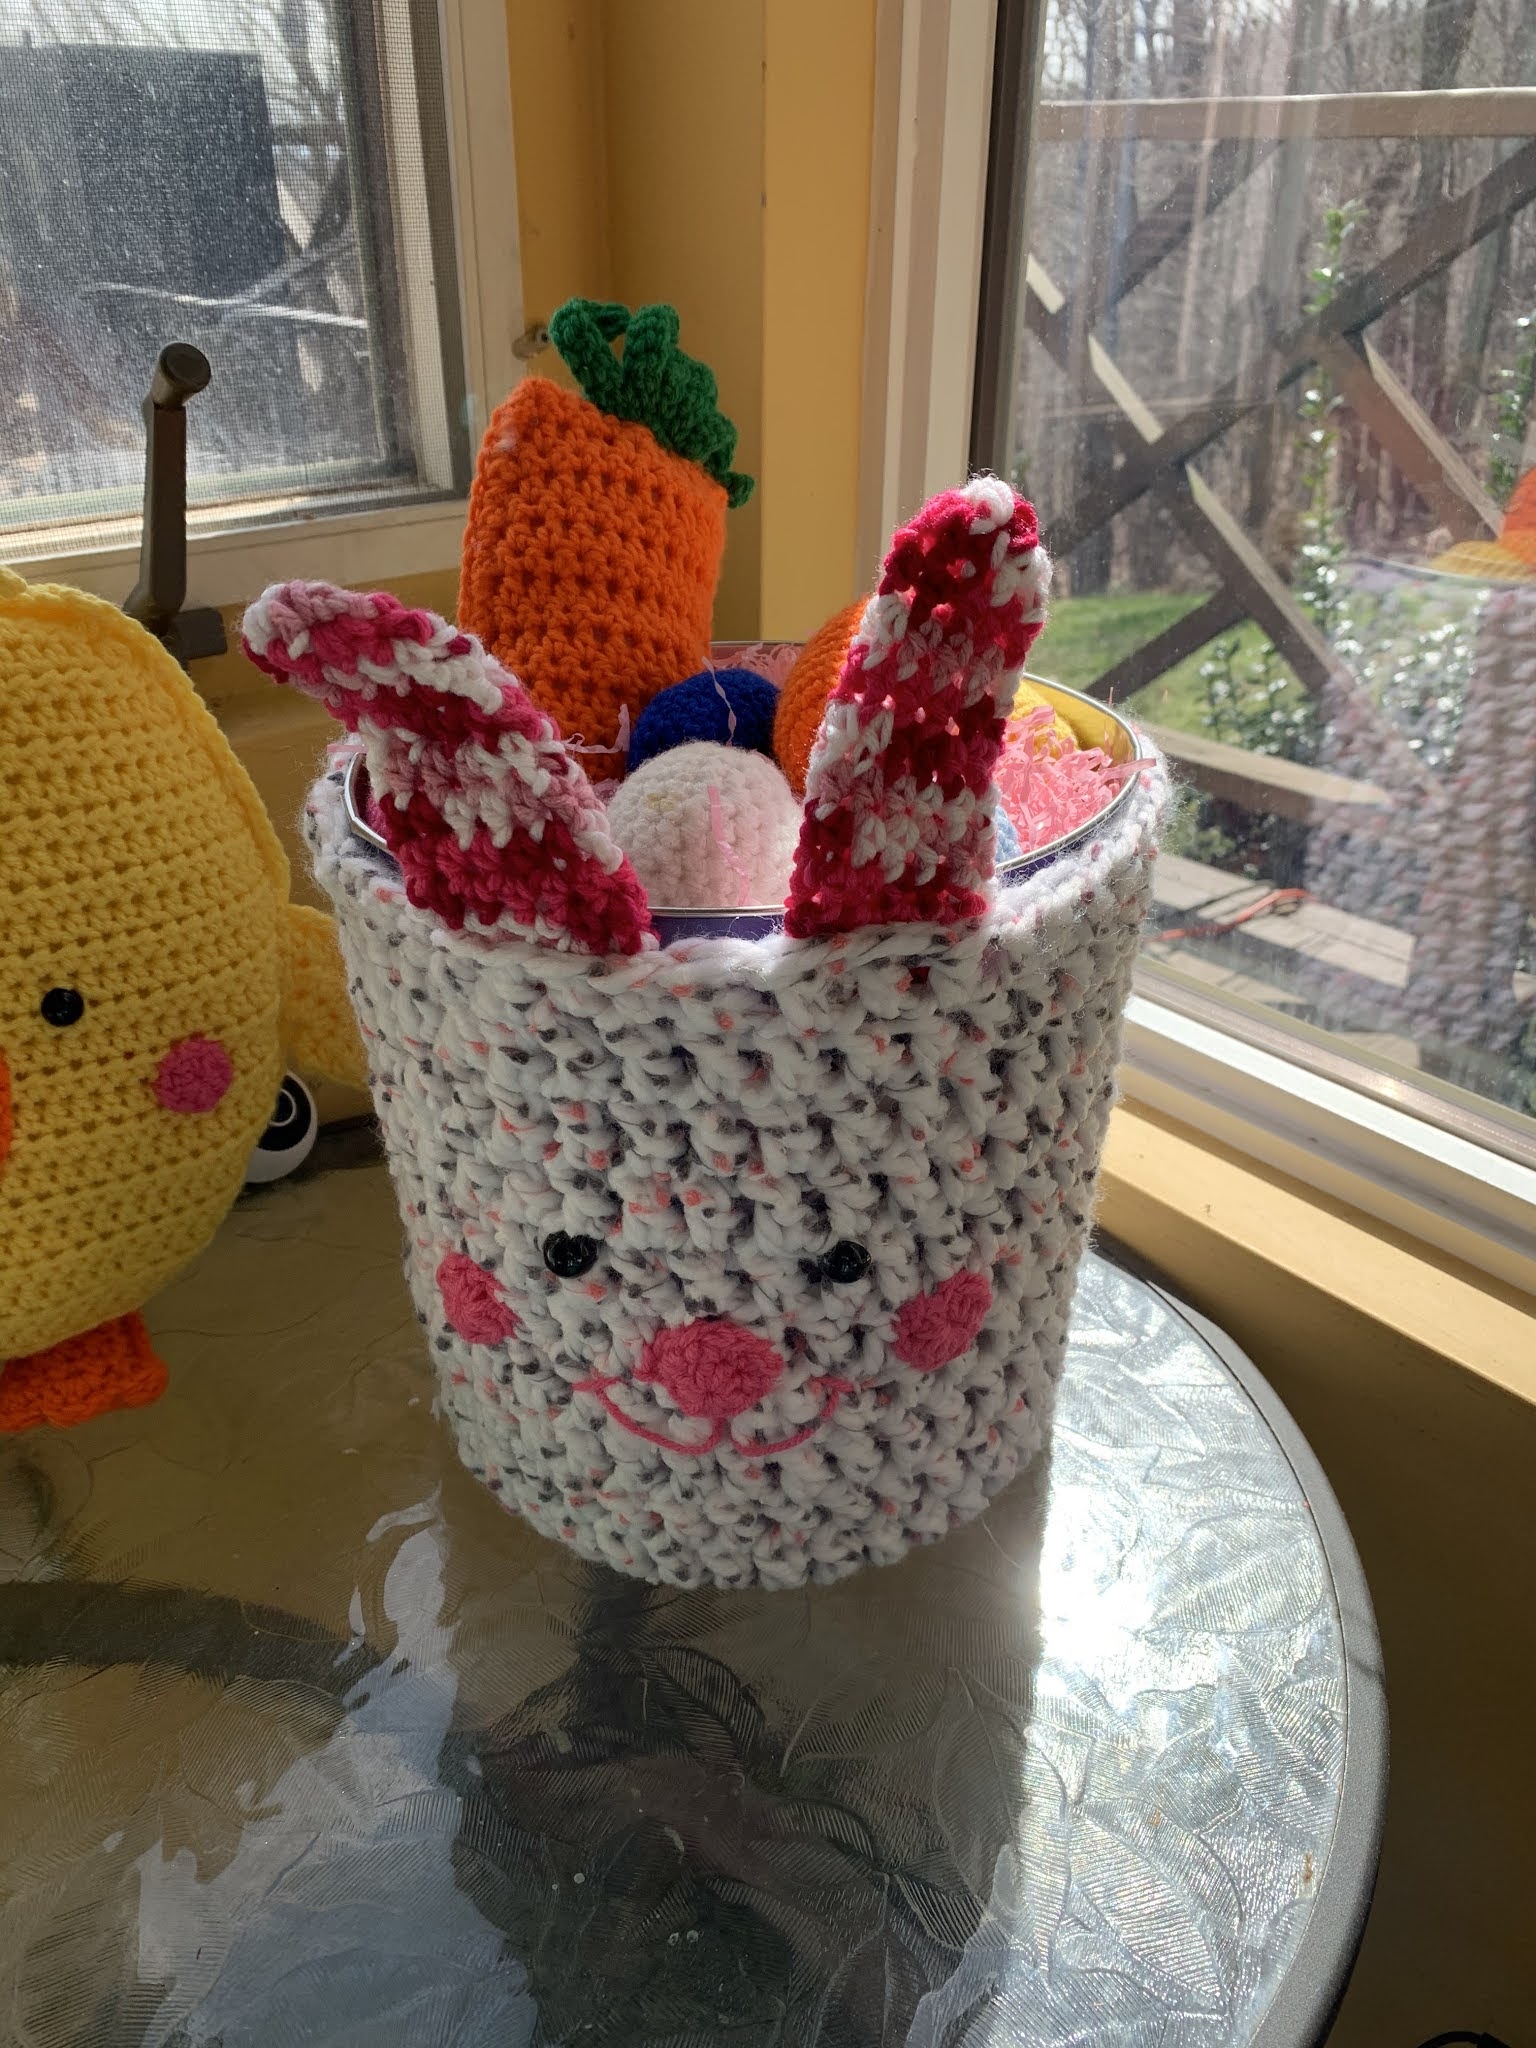
Easter Bunny Tin Cover
Here’s a great repurpose project for your spring decor. I used my empty Christmas popcorn tin can.
U.S. Stitch Abbreviations:
Ch: chain
St: stitch(es)
Sl st: slip stitch
SC: single crochet
HDC: half double crochet
DC: double crochet
Rep: repeat
FO: fasten off
MR: magic ring
Materials:
I used 2 skeins of Baby Bee’s Sugar Pom Pom yarn in Oh, Sweetums. Each skein is 55 yds. This is a #6 super bulky yarn. I used a 10mm hook. So, the cover was very quick to make.
For the face, I used (2) 20mm black safety eyes. And, then #4 worsted weight yarn in pink for the nose and cheeks. I used a 5.0mm hook for the cheeks, ears and nose.
I used a tapestry needle for weaving ends and embroidery.
Directions:
Cover:
1. 10 DC into MR. Sl st join. (10)
2. Ch3 counts as first DC. DC in same st as Ch3. 2DC in each st around. Sl st join. (20)
3. Ch3 counts as first DC. DC in same st as Ch3. *1DC in next st. 2DC in next st.* Rep around from * to *. Sl st join. (30)
4. Ch3 counts as first DC. DC in same st as Ch3. *1DC in next 2 st. 2DC in next st.* Rep around from * to *. Sl st join. (40)
5. In BLO for this round, Ch3 counts as first DC. DC in same st as Ch3. *1DC in next 2 st. 2DC in next st.* Rep around from * to *. Sl st join. (40)
6. Ch3 counts as first DC. DC in same st as Ch3. *1DC in next 2 st. 2DC in next st.* Rep around from * to *. Sl st join. (40)
Now, continue working round 6 until you complete enough rounds to reach the rim. I used both skeins to complete.
Cheeks ( make 2):
1. HDC 6 into MR. Sl st join and ch1. (6)
2. 2 HDC in first st and 1 HDC in next st. Complete around. Sl st join. FO and leave a long tail to attach. (9)
Nose:
1. 6SC into MR. Sl st join and Ch1. (6)
2. 2 HDC in each of the first 4 st. FO and leave tail for attaching. (8)
When I attached the nose, I used the pink yarn to make a mouth. See my pics for help with this. I just did simple embroidery.
Ears (make 2):
(For the ears and Pompom tail, I used #4 worsted weight yarn in Pink Multi.)
1. 6SC into MR. Do not join. Use a stitch marker to keep track of the first stitch and move up ea hi round accordingly. (6)
2. 2SC in first st, 1SC in next st. Rep around. (9)
3-12. SC around. At end of Round 12, FO and leave a long tail for attaching.
Tail:
I wrapped the yarn around my hand 75 times. Tied a double knot in the center. Cut the loops and attached to the back of the cover.
Here are a few more pics with it filled with eggs and a carrot...
Happy Crocheting...
Legal:
--don't use/claim my design as your own
--don't use/claim my pics as your own
--okay to make and sale your finished work
--don't share my pattern electronically or in print format (without prior consent) but provide a link to my blog
Social Media:
If you are on the following sites, let's connect and hook up...
- Pinterest: Rilla2u
- Twitter: Rilla2u
- Facebook: /rilla.edwards
- Instagram: Rilla2u