Thursday, August 30, 2018

Taffy Blues Baby Blanket

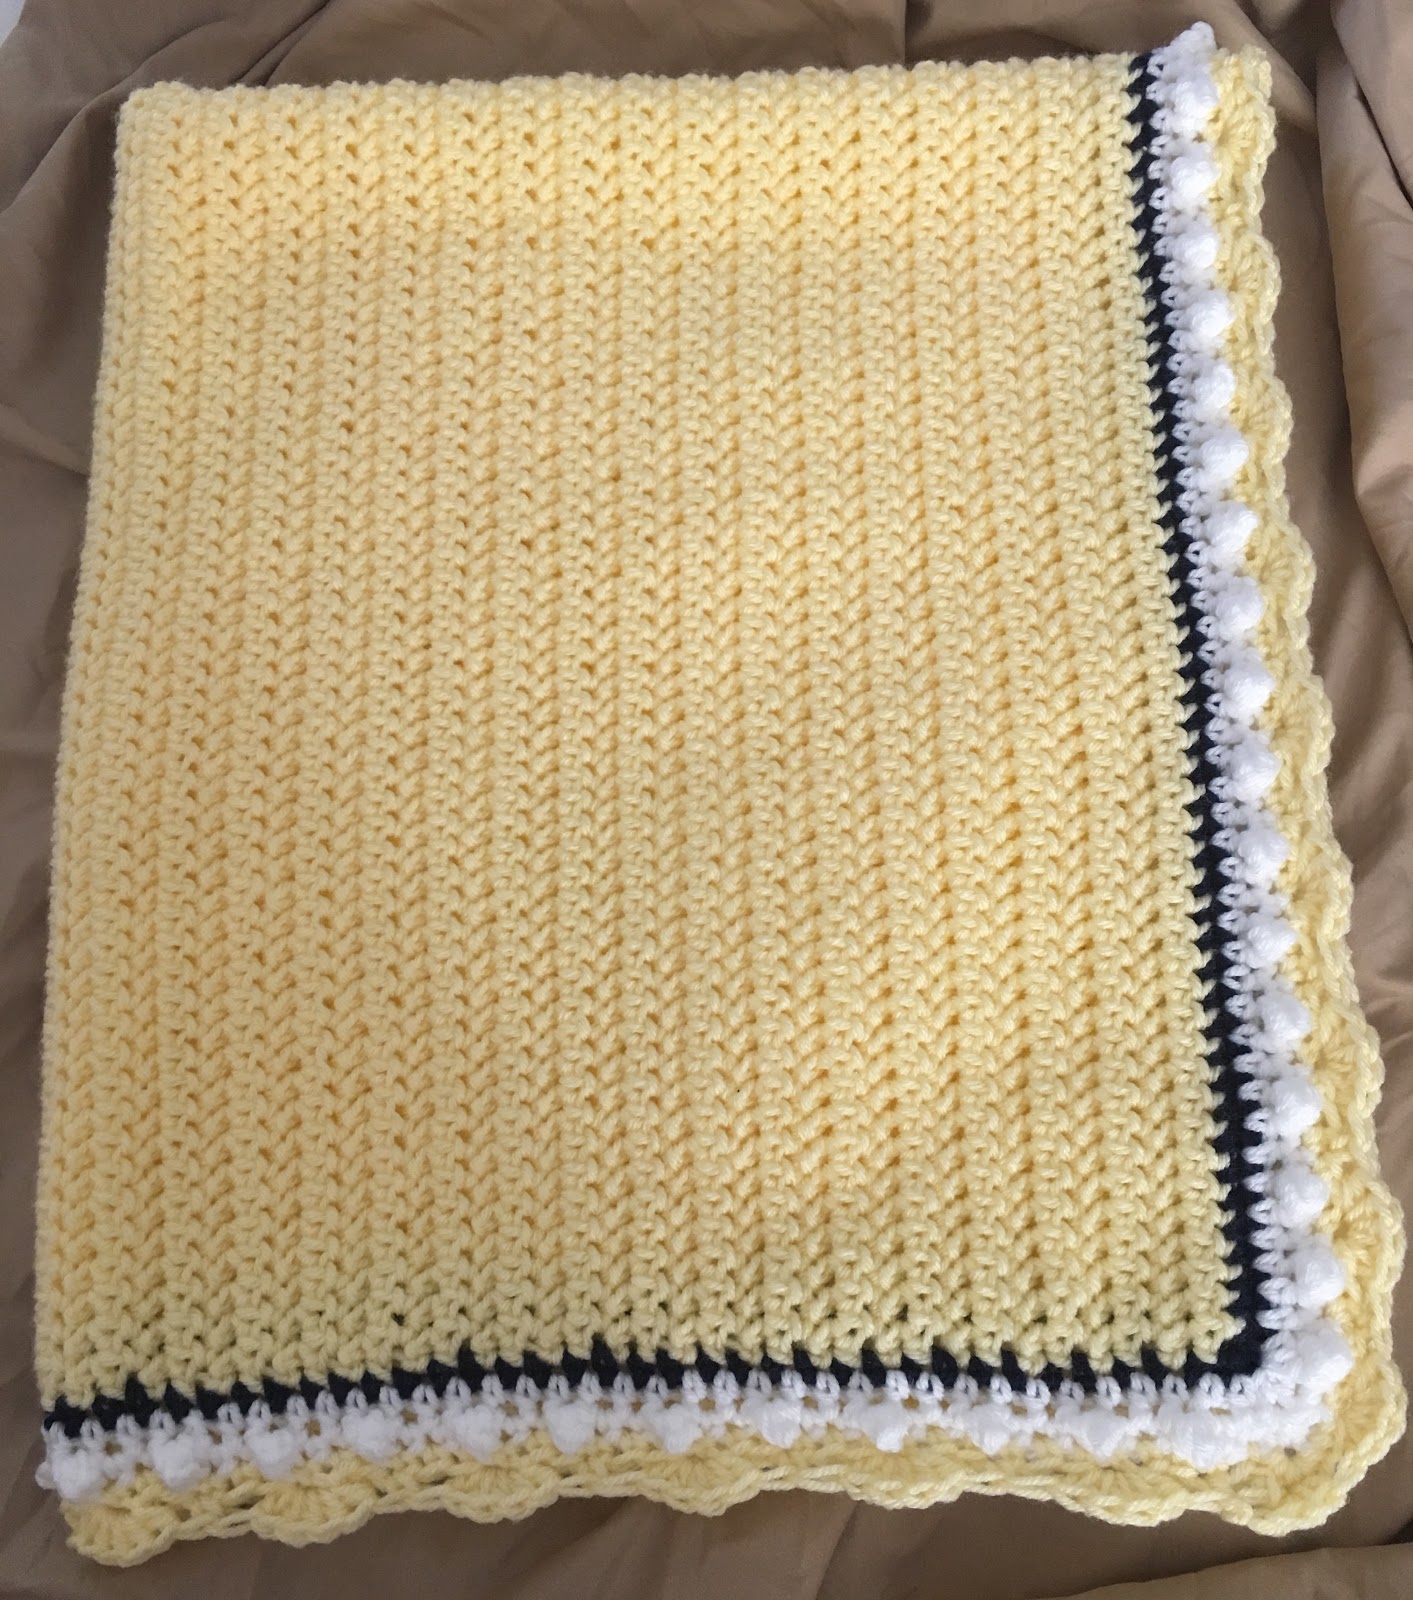
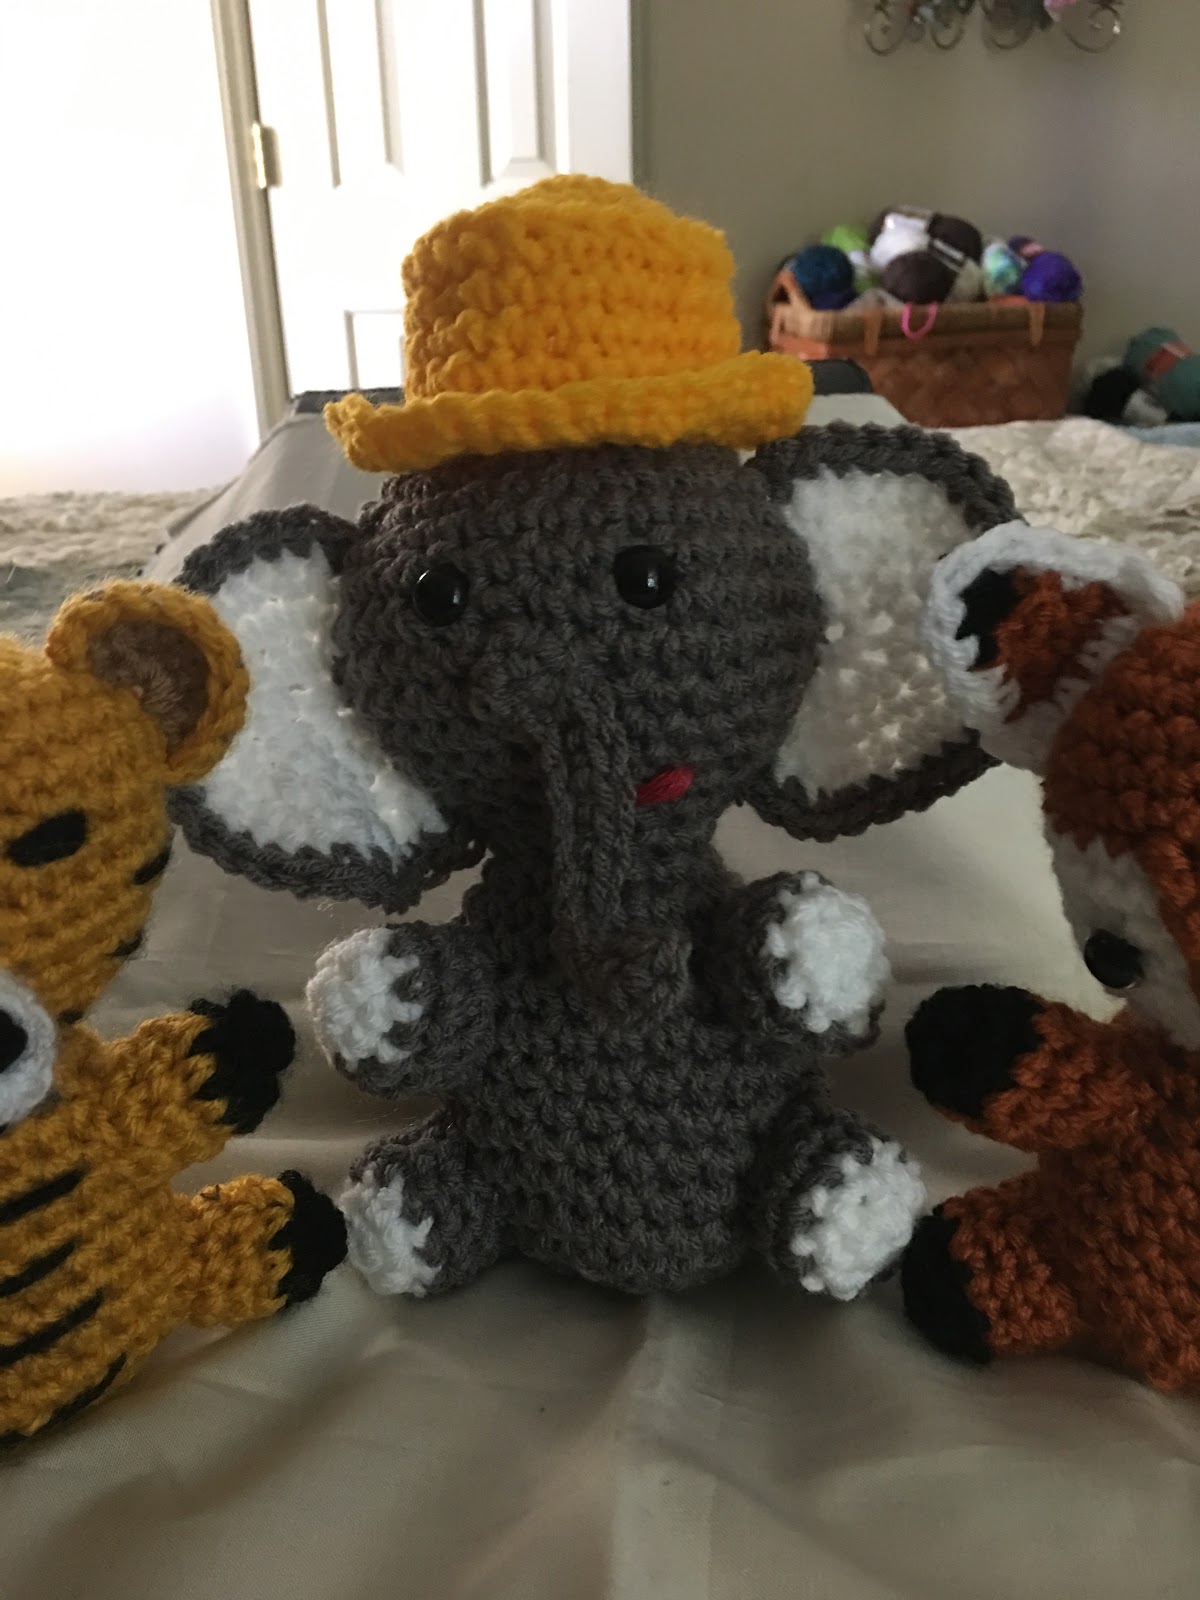
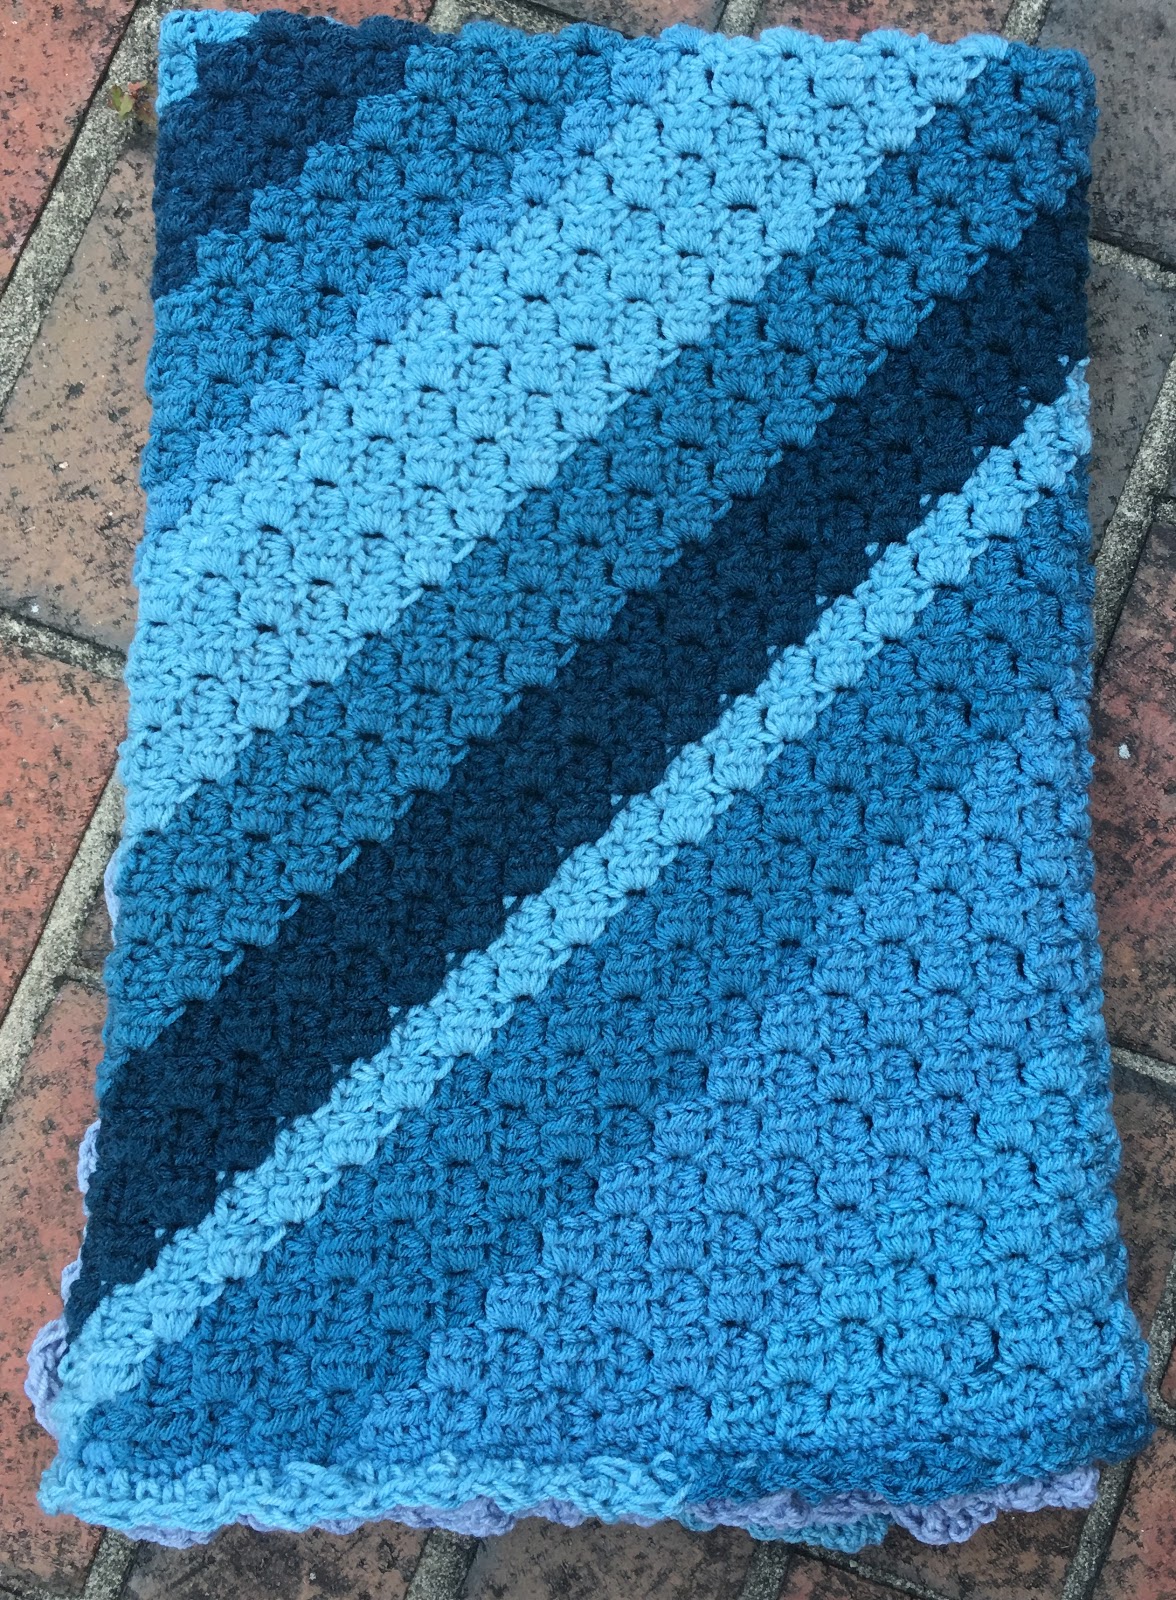
How cute is this “Taffy Blues” Baby Blanket?  I crocheted it within a few days, using the C2C method of crocheting for the blanket portion and then added a border.  The blanket portion uses 4 of Yarn Bee’s Sugarwheels.  The 5th one is for the border and uses less than half.  The remainder would be great to make matching accessories — a hat, booties, bib, etc...

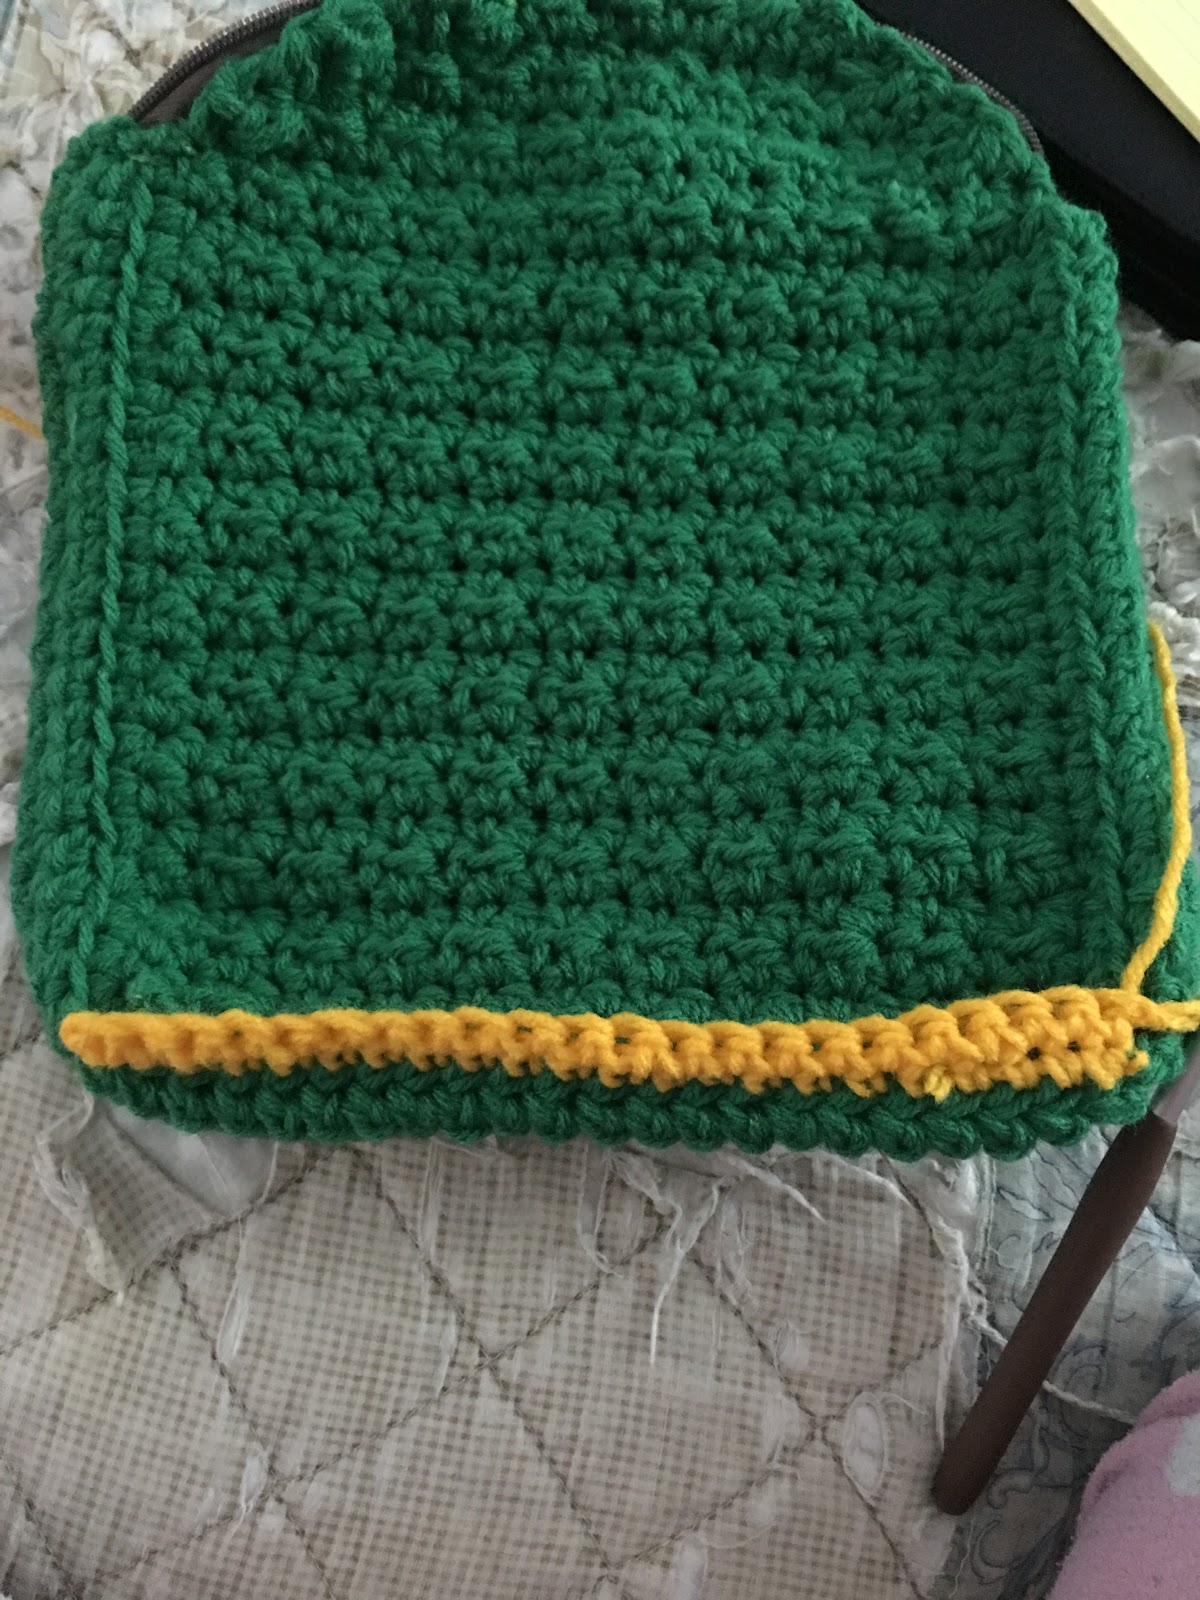
I’m not affiliated with Yarn Bee in any form or fashion but I have to say I love working with the Sugarwheel yarns.  The gradual color changes makes for beautiful projects.  Check out my Forestry C2C Blanket in “Gelato is My Motto” — varying shades of greens that is simply gorgeous.  Here’s the LINK for the FREE pattern...

Taffy Blues Baby Blanket
Size:  Approximately 39” x 39”

Materials:
—6.0mm hook
—(5) Yarn Bee’s Sugarwheel in “Taffy Happy”
—tapestry needle for weaving

U.S. Stitch Abbreviations:
Ch:  chain
St:  stitch(es)
Sl st:  slip stitch
SC:  single crochet
HDC:  half double crochet
DC:  double crochet
TC:  triple crochet
Sk:  skip
Rep:  repeat
FO:  fasten off

Special Note:
The blanket portion is made using the C-2-C (Corner-2-Corner) method with HDC st and ch 5.

Directions:
Blanket portion:
1.  I used 2 Sugarwheels for increase rows.  (54)
2.  I then used 2 Sugarwheels for the decrease rows.
Border:
1.  Join yarn in any st with a sl st and Ch1.  SC in same st and in each st around, placing 3 SC in each corner.  Sl st join to first st.
2.  Ch 4 (counts as first TC).  SC in the next 2 st.  TC in next st.  SC in the next 2 st.  TC in next st.  SC in the next 2 st.  Sk a st.  DC in the next 3 st.  TC into the skipped st.  Then start steps again:  *TC in the next st, SC in next 2 st (rep this 3 times), then sk next st, DC into the next 3 st and go back and place a TC into the skipped st.* Rep from * to * around the blanket, placing 3 TC st in each corner.  (Note: if for some reason, the pattern isn’t working out evenly with your number of stitches, then you can adjust the repeats accordingly to make it work by adding an extra SC st, if needed...)

The varying shades of blue in this blanket are simply gorgeous.  This project worked up fairly quickly and makes a great gift for any little boy.

Enjoy!!!
Happy Crocheting...

Legal:
--don't use/claim my design as your own
--don't use/claim my pics as your own
--okay to make and sale your finished work 
--don't share my pattern electronically or in print format (without prior consent) but provide a link to my blog

Wednesday, August 29, 2018

Santa Bath Mitt

It’s hard to believe Fall is right around the corner and Christmastime not too far off.  Time sure seems to fly by way too fast...

I’ve been thinking on quick and easy seasonal projects for the beginner and “seasoned” Crocheter that can be worked up fairly quickly - to keep or to gift to family and friends!!!  And, projects that aren’t too heavy on the wallet.

So, I wanted to start with a bathtime project.  Here’s the first in my Bath Mitt Series - Santa himself.  This is made to fit toddlers/kids hands.  Bath time will surely become more than just bathing; quite possibly more playtime...lol.

I used cotton yarn for this project.

Santa Bath Mitt
Happy Crocheting...

Legal:
--don't use/claim my design as your own
--don't use/claim my pics as your own
--okay to make and sale your finished work 
--don't share my pattern electronically or in print format (without prior consent) but provide a link to my blog

Monday, August 20, 2018

Fall Pumpkin Wreath

Happy Monday to all of you!!!  I’m excited to share one of my latest designs - “Fall Pumpkin Wreath.”  My design has a different take than the standard, rectangular-shaped piece that is made and wrapped around a Wreath form. I wanted something a bit different.  I wanted a wreath that looked "mesh-like..."

Now, this project is not a quick to make wreath.  It takes a little time to make all the needed crochet squares to have a "full wreath".  And, then it's optional if you want to make the stem, curlicue and facial features.  I think it looks good plain - maybe just add a bow/ribbon.  It is a beginner friendly project. So, please don't be intimidated. 

I used Chenille stems (aka pipe cleaners) to attach each square to the foam wreath.  You could use a wire wreath form if preferred.

How cute would this look, if done, as a Snowman, Santa, Uncle Sam (4th of July), Turkey (Thanksgiving-themed) -- basically any month/holiday???  It does require more yarn, but I think, overall, it is worth it...

Fall Pumpkin Wreath 
Size:  12" wreath

Materials:
--8mm hook
--#4 worsted weight yarn in Orange, Black, Brown and Green (I used Hobby Lobby's Crafter's Secret Big Idea - Orange - 810 yds/skein; and then a very small amount of Green, Brown and Black)
--12" foam wreath (or you could opt to use a wire wreath)
--tapestry needle for weaving 

U.S. Stitch Abbreviations:
Ch:  chain
Sl st:  slip stitch
St:  stitch(es)
SC:  single crochet
HDC:  half double crochet
MR:  magic ring
Rep:  repeat
FO:  fasten off

Directions:
1.  Ch21.  HDC in 2nd ch from hook and across.  Ch1 and turn.  (20)
2.  HDC in each st across.  Ch1 and turn.  (20)
3-20.  Rep #2.  At the end of Row 20, FO and weave ends.
You will need to make anywhere from 22 -25 squares.  I made 22 for my wreath, but I think it could've used 3 more.

Once you have the squares made, you will want to fold each square, accordian-style and then tightly secure a Chenille stem in the center.
Now, you are ready to start attaching each piece to your wreath.  Make sure to secure each Chenille stem tightly around the wreath form.
Here is a picture of the wreath completed.  I think it looks just fine like this -  maybe add a bow or weave some ribbon, OR, maybe attach a small plaque (wood or metal) with a word on it across the wreath...


Stem:
1.  With brown yarn, 6 HDC into MR.  Sl st join to first st.  Ch1.  (6)
2.  1 HDC in each st around.  Sl st join and Ch1.  (6)
3.  2 HDC in first st, 1 HDC in next st.  Rep around.  Sl st join and Ch1.  (9)
4.  1 HDC in each st around.  Sl st join and Ch1.  (9)
5-8.  Rep #4.  At the end of Round 8, FO and leave a tail for attaching.  (9)

Curlicue:
1.  With green yarn, Ch21.  2 SC in 2nd ch from hook.  2 SC in each ch across.  FO and leave tail for attaching.

 Eyes/Nose (make 3):
1.  With black yarn, double-stranded, Ch2.  1 SC in 2nd ch from hook.  Ch1 and turn.  (1)
2.  2 SC in st.  Ch1 and turn.  (2)
3.  2 SC in first st, 1 SC in next st.  Ch1 and turn.  (3)
4.  1 SC in each st across.  Ch1 and turn.  (3)
5.  2 SC in first st, 1 SC in next st, 2 SC in last st.  Ch1 and turn.  (5)
6.  1 SC in each st across.  FO and leave a tail for attaching.  (5)

Mouth:
1.  With black yarn, double-stranded, Ch17.  3 DC into the 3rd Ch from the hook.  Sl st into the next 6 Ch.  3 DC into the next ch.  Sl st into the next 6 Ch.  4 DC into the last Ch.  Rotate to work on the opposite side of the base ch.  Sl st into the next 3 Ch.  3 DC into the next Ch.  Sl st into the next 6 Ch.  3 DC into the next Ch.  Sl st into the last 3 Ch.  FO and leave a long tail for attaching. 

And, here it is, with a stem, curlicue and face added....
I hope you all will enjoy this pattern.  I would love to see your creations.  You can email me a picture(s) of your completed project and I will add it to my blog post; you can also hashtag(#rilla2u) on Instagram; or share your post on my Crocheting & Crafting Facebook page...

Let's connect on Social Media:
Instagram:  Rilla2u
Pinterest:  Rilla2u
Ravelry:  Rilla2u
Facebook:  /rilla.edwards (Crocheting & Crafting page)
Twitter:  Rilla2u
  
Happy Crocheting...

Legal:
--don't use/claim my design as your own
--don't use/claim my pics as your own
--okay to make and sale your finished work 
--don't share my pattern electronically or in print format (without prior consent) but provide a link to my blog

Sunday, August 19, 2018

Baby Twilight - My Little Pony

Happy Sunday afternoon to everyone - near and far!!!  I’ve had a productive past few days working on new projects and finishing up some old ones.  I have several new projects I’m really eager to share as soon as I get them completed. So, please be sure to keep a lookout on my blog posts for some very cool, new projects.

For today, however, I wanted to share my version of “My Little Pony” in Baby Twilight using the same basic Amigurumi pattern I designed for Tiger Buddy, Foxy Fox and Mr. Elephant.  My granddaughter loves watching “My Little Pony” so this is for you, Miss Arielle!!!

Baby Twilight- My Little Pony 
Happy Crocheting...
Legal:
--don't use/claim my design as your own
--don't use/claim my pics as your own
--okay to make and sale your finished work 
--don't share my pattern electronically or in print format (without prior consent) but provide a link to my blog

Sunday, August 12, 2018

Buttercup Michelin Baby Blanket with Bib Logo

This super cute and squishy soft blanket is my, “Buttercup Michelin Baby Blanket.” The appliqué is Bib himself!!!  I designed this blanket for one of my hubby's co-workers, and, of course, they work for Michelin.  So, I decided to use a soft yellow, blue and white yarns to complete this project.

I used Hobby Lobby’s, “I Love This Yarn,” and a 6.0 mm hook to complete this.


Buttercup Michelin Baby Blanket with Bib Logo

Size:  Approximately 30" x 36"

Materials:
--6.0mm hook
--"I Love This Yarn" in Buttercup (3 skeins), Navy (1 skein) and White (1 skein)
--tapestry needle for weaving

U.S. Stitch Abbreviations:
Ch:  chain
Sl st:  slip stitch
St:  stitch(es)
SC:  single crochet
HDC:  half double crochet
HHDC:  herringbone half double crochet
PS:  popcorn stitch
Sk:  skip
Rep:  repeat
Y/O:  yarn over
FO:  fasten off

Note:  I love using the HHDC stitch, however, you can simply use the HDC stitch.  I think the HHDC creates a beautiful texture.  Below, I have shared the link to my short video tutorial on Youtube to help with learning this stitch...

Special Stitches:
1.  HHDC Stitch:   y/o and insert hook into stitch, y/o and draw back thru the stitch, then pull thru first loop on hook, y/o and pull remaining 2 loops on the hook thru. Here's a LINK  to my video tutorial of the HHDC stitch...
2.  Popcorn Stitch (PS):  4 SC stitches into same stitch, remove hook from last loop and insert hook (front to back) into first SC st.  Then join hook back into 4th loop and pull loop through to secure.

Directions:
1.  Ch 101.  HHDC into 2nd ch from hook and across.  Ch1 and turn.  (100)
2.  1 HHDC into each st across.  Ch1 and turn.  (100)
3-74.  Rep #2.  At the end of Row 74, FO and weave ends.  (100)

Border:
1.  Join Navy yarn with a sl st and Ch 1 into any st.  SC in same st.  SC around, placing 3 SC in each corner.  Sl st join to first st and FO.  Weave ends.
2.  Join White yarn with a sl st and Ch 1.  1 HHDC in each st around.  3 HHDC in each corner.  Sl st join to first st and Ch1.
3.  SC in same st as Ch1 and into next st.  *PS in next st, SC in next 2 st* rep from * to * around, placing 3 HHDC in each corner.  Sl st join to first st and FO.  Weave ends.
4.  Join Buttercup yarn with a sl st and Ch1.  SC in same st as Ch1 and around, placing 3 SC in each corner.  Sl st join to first st and Ch1.
5.  SC in same st as Ch1.  *Sk 2 st, 5 HHDC into next st, Sk 2 st, SC in next st,* rep from * to * around, placing 3 HHDC in each corner.  Sl st join and FO.  Weave ends. 


And, here is my Bib applique pattern with a "Michelin" sash...I will share the applique pattern as soon as I finish up fine tuning it!!!
Happy Crocheting...
Legal:
--don't use/claim my design as your own
--don't use/claim my pics as your own
--okay to make and sale your finished work 
--don't share my pattern electronically or in print format (without prior consent) but provide a link to my blog

Wednesday, August 8, 2018

Frog Backpack - Toddler-Sized...

With the new school year approaching, I wanted to make a backpack.  So, I settled on designing a Frog Backpack - toddler-sized.

I used double-stranded #4 worsted weight yarn to make the backpack itself so it was sure to be sturdy.   The Frog’s “tummy” is the front pocket.  I attached a zipper to the top - this was very easy to attach.

The Frog Backpack measures approximately 8 1/2” x 11” x 2”.  The perfect size for little hands.

Frog Backpack
Size:  Approx.  8 1/2" x 11" x 2"

Gauge:  12 HDC stitches x 10 rows = 4"

Materials:
--5.5mm hook
--#4 worsted weight yarn in green, yellow and a small amount of black and red
--12" zipper (optional) - you could opt to use buttons, make a flap or make a strap
--tapestry needle for weaving
--needle for attaching zipper
U.S. Stitch Abbreviations:
Ch:  chain
Sl st:  slip stitch
St:  stitch(es)
SC:  single crochet 
SC2tog:  single crochet 2 stitches together (creates a decrease stitch)
HDC:  half double crochet
HDC2tog:  half double crochet 2 stitches together (creates a decrease stitch)
FLO:  front loops only
MR:  magic ring
FO:  fasten off
Rep:  repeat

Directions:
--I used double-stranded yarn.
--The front and back panels are made exactly the same.  

Panels (make 2):
1.  With 2 strands of yarn held together, Ch23.  HDC in 2nd ch from hook, *SC in next ch, HDC in next ch,* rep from * to * across.  Ch1 and turn.  (22)
2.  HDC in first st, SC in next st.  Rep across.  Ch1 and turn.  (22)
3-22.  Rep #2.  (22)
23.  HDC2tog, *SC in next st, then HDC next st,* rep from * to * across until you come to the last 2 st.  HDC2tog.  Ch1 and turn.  (20)
24.  Rep #23.  (18)
25.  Rep #23.  (16)
26.  Rep #23.  (14)
27.  Rep #23.  (12)
28.  Rep #23.  FO and weave ends.  (10)

Make a second panel.

Now, you are going to be working on the sides and the bottom.  You will use one of your panels to complete this.

Sides/Bottom:
1.  Join double-stranded yarn on the right side of your panel in the end stitch of Row 22.  Sl st join and Ch1.  Into same st, SC evenly down (this will give you 22 stitches), then SC evenly across the bottom (22 stitches), then SC evenly up the left side (22 stitches).  Ch1 and turn.  (66)
2.  Into the FLO, SC around.  Ch1 and turn.  (66)
3.  Working in both loops, SC in each st.  Ch1 and turn.  (66)
4-6.  SC in each st.  Ch1 and turn.  At the end of Round 6, FO and leave a long tail for attaching.  (66)
See below picture.
Now, you will join your 2 panels together.  You can whipstich the panels together or you can sl st the panels together.  I whipstitched mine.  Just match up your panels and join from Row 22 down, across and up again together.  
I then attached my zipper.  I used pins and positioned it across the top and sides.  I then worked from the side, across the top and down the side of one side of the zipper.  I then repeated on the other side of the zipper.  
Front Pocket:
The front side of the backpack will be the side that shows Round 2 of working in the FLO of the sides/bottom, which essentially shows the back loop of Round 2 unworked. 
1.  I joined yarn in the bottom, right corner of Round 2 of the back loop stitch that was unworked.  I then ch1.  SC in same st.  SC 21 times.  Ch1 and turn.  (22)
2.  SC in each st across.  Ch1 and turn.  (22)
3-11.  Rep #2.
12.  SC2tog, SC 18 times, SC2tog.  Ch1 and turn.  (20)
13.  SC2tog, SC 16 times, SC2tog.  Ch1 and turn.  (18)
14.  SC2tog, SC 14 times, SC2tog.  Ch1 and turn.  (16)
15.  SC2tog, SC 12 times, SC2tog.  Ch1 and turn.  (14)
16.  SC2tog, SC 10 times, SC2tog.  FO and leave a long tail to whipstitch each side.  Leave across the top open.  
 Mouth:
1.  With red yarn, Ch24.  FO and attach.  See pics for help with placement.
Eyes (make 2):
1.  With green yarn, 6 SC into MR.  Sl st join to first st and Ch1.  (6)
2.  2 SC in each st around.  Sl st join to first st and Ch1.  (12)
3.  2 SC in first st, 1 SC in next st.  Rep around.  Sl st join to first st and Ch1.  (18)
4.  1 SC in the first 5 st.  FO and leave a tail for attaching.

Eye center (make 2):
1.  With black yarn, 6 SC into MR.  Sl st join to first st and FO.  Leave tail for attaching to eye.  (6)

Attach each eye center to the eye.  Then attach the eyes on each side of the front panel.  See my pics for help with placement.

Straps (make 2):
--I used yellow yarn to make my straps.  You can opt to use green or whatever color of your choosing.
--Please note your number of rows for the straps could be different than mine.  So, you may need to make more or fewer rows. 

1.  Leave a long enough beginning tail for attaching.  Ch4.  SC in 2nd ch from hook and across.  Ch1 and turn.  (3)
2-40.  1 SC in each st across.  Ch1 and turn.  At the end of Row 40, however, FO and leave a long enough tail for attaching.  (3)

Attach each strap on each side of the back panel.  You will want to make sure to secure the straps.  I whipstitched rows 1-3 to the panel and then on the bottom I whipstitched rows 38-40 to the panel.
And, that's it for this simple "Frog Backpack" - Toddler-sized.  I hope you all will enjoy this pattern design as much as I do.  

Here, is a pic of my 3-year-old grandson, Gabriel, sporting his new "Frog Backpack..."
Happy Crocheting...
Legal:
--don't use/claim my design as your own
--don't use/claim my pics as your own
--okay to make and sale your finished work 
--don't share my pattern electronically or in print format (without prior consent) but provide a link to my blog

Mr. Elephant

And, today, here is Mr. Elephant - same pattern as Foxy Fox and Tiger Buddy with just a few changes!!!

I did use a larger hook size for Mr. Elephant so he stands a few inches taller.  And, I added him a bright yellow hat.  You can use a smaller hook size, if so desired. 

This pattern has so much versatility.  You can make so many different animals with this ONE, simple pattern.

Easy, fun and kids are sure to enjoy.

Mr. Elephant 
Size:  Approximately 7” tall without hat; 8" tall with hat

Materials:
-5.5mm hook
-#4 worsted weight yarn in Gray, White and Yellow; a very tiny amount of Red to embroider mouth
-Stitch marker
-2 eyes
-Polyfil
-Tapestry needle for weaving

U.S. Stitch Abbreviations:
Ch:  chain
Sl st:  slip stitch
St:  stitch(es)
SC:  single crochet
SC2TOG:  single crochet 2 stitches together to create a decrease) 
MR:  magic ring
FO:  fasten off
Rep:  repeat

Directions:
The pattern is worked from the top of the head down.  This pattern is worked in the round so you will need to use a stitch marker (I typically use a bobby pin) to keep track of the first and last stitch of each round.  Move stitch marker up with the first stitch of each new round.

1.  With Gray, 6 SC into MR.  Pull to tighten to form ring.  (6)
2.  2 SC in each st around.  (12)
3.  2 SC in first st, 1 SC in next st.  Rep around.  (18)
4.  2 SC in first st, 1 SC in next 2 st.  Rep around.  (24)
5.  2 SC in first st, 1 SC in next 3 st.  Rep around.  (30)
6.  2 SC in first st, 1 SC in next 4 st.  Rep around.  (36)
7-11.  1 SC in each st around.  (36)
12.  SC2tog, 1 SC in next 4 st.  Rep around.  (30)
13.  SC2tog, 1 SC in next 3 st.  Rep around.  (24)
14.  SC2tog, 1 SC in next 2 st.  Rep around.  (18)
15.  SC2tog, 1 SC in next st.  Rep around.  (12)
16.  1 SC in each st around.  (12)
***Stuff head with polyfil.***
17.  2 SC in first st, 1 SC in next st.  Rep around.  (18)
18.  2 SC in first st, 1 SC in next 2 st.  Rep around.  (24)
19.  2 SC in first st, 1 SC in next 10 st, 2 SC in next st, 1 SC in next 12 st.  (26)
20.  2 SC in first st, 1 SC in next 12 st, 2 SC in next st, 1 SC in next 12 st.  (28)
21-26.  1 SC in each st around.  (28)
27.  SC2tog, 1 SC in next st.  Rep around until you have 2 st left.  SC2tog.  (18)
28.  SC2tog, 1 SC in next st.  (12)
***Stuff body with polyfil.***
29.  SC2tog.  Rep 5 more times.  Leave a long enough tail to weave in and out of this round to close up bottom.  (6)

Tusk:
1. Ch14.  SC in 2nd ch from hook.  SC in the next 8 ch.  2 SC in each of the last 4 ch.  FO.  Leave a tail for attaching.  (See pics for help with placement)

Ears (make 2):
1.  With White yarn, 6 SC into MR.  Pull to tighten but do NOT join.  Ch1 and turn.  (6)
2.  2 SC in each st across.  Ch1 and turn.  (12)
3.  2 SC in first st, 1 SC in next st.  Rep across.  Ch1 and turn.  (18)
4.  2 SC in first st, 1 SC in next 2 st.  Rep across.  FO and weave ends.  (24)
5.  Join Gray yarn.  Ch1.  1 SC in each st across.  FO and leave a long enough tail for attaching. 
(See my pics for help with placement) (24)  

Legs/Arms (make 4):
1.  With White yarn, 6 SC into MR.  (6)
2.  2 SC in first st, 1 SC in next st.  Rep around.  Sl st join to first st and FO.  Weave ends.  (9)
3.  Join Gray yarn in first st.  1 SC in each st around.  (9)
4.  1 SC in each st around.  (9)
5.  1 SC in each st around.  Sl st join to first st and FO.  Stuff with polyfil.  Leave a tail for attaching.  (See pics for help with placement)  (9) 

Eyes:
I used black eyes and attached at Round 9.  If this was going to be for a baby or small child, I would have simply crocheted or embroidered the eyes.  

Mouth:  
With Red yarn, embroider mouth.  

Pompom Tail:
1. With Gray and White yarn held together, wrap 12-15 times around 3 fingers.  Tie in double know in center.  Trim and fluff.  Attach to back side of body.  

Hat (optional):
1.  With Yellow yarn, 6 SC into MR.  (6)
2.  2 SC in each st around.  (12)
3.  2 SC in first st, 1 SC in next st.  Rep around.  (18)
4.  2 SC in first st, 1 SC in next 2 st.  Rep around.  (24)
5.  In BLO, 1 SC in each st around.  (24)
6.  In both loops, 1 SC in each st around.  (24)
7-9.  Rep #6.  (24)
10.  In FLO, 2 SC in first st, 1 SC in next 2 st.  Rep around.  (32)
11.  In both loops, 2 SC in first st, 1 SC in next 2 st.  Rep around.  FO.  Leave a long enough tail to attach hat to the head.  (40)

And, here he is with Foxy Fox and Tiger Buddy...

Happy Crocheting...

Legal:
--don't use/claim my design as your own
--don't use/claim my pics as your own
--okay to make and sale your finished work 
--don't share my pattern electronically or in print format (without prior consent) but provide a link to my blog

Tuesday, August 7, 2018

Foxy Fox

Here’s my newest design, a “Foxy Fox”.  I made him from the same basic pattern as my Tiger Buddy. So, he’s approximately 6” tall.  For him, I used “I Love This Yarn” from Hobby Lobby in Burnt Pumpkin, White and Black.

This was easy and quick to make.  The head and body are made in one piece - so less ends to weave. He’s super cute and sure to be loved by kids and adults, alike.


Foxy Fox Pattern
Size:  Approximately 6” tall

Materials:
-4.5mm hook
-#4 worsted weight yarn in Burnt Pumpkin (or similar color), Black & White
-Stitch marker
-2 eyes
-Polyfil
-Tapestry needle for weaving

U.S. Stitch Abbreviations:
Ch:  chain
Sl st:  slip stitch
St:  stitch(es)
SC:  single crochet
SC2TOG:  single crochet 2 stitches together to create a decrease) 
MR:  magic ring
FO:  fasten off
Rep:  repeat

Directions:
The pattern is worked from the top of the head down.  This pattern is worked in the round so you will need to use a stitch marker (I typically use a bobby pin) to keep track of the first and last stitch of each round.  Move stitch marker up with the first stitch of each new round.

1.  With Burnt Pumpkin yarn, 6 SC into MR.  Pull to tighten to form ring.  (6)
2.  2 SC in each st around.  (12)
3.  2 SC in first st, 1 SC in next st.  Rep around.  (18)
4.  2 SC in first st, 1 SC in next 2 st.  Rep around.  (24)
5.  2 SC in first st, 1 SC in next 3 st.  Rep around.  (30)
6.  2 SC in first st, 1 SC in next 4 st.  Rep around.  (36)
7.  1 SC in each st around.  (36)
8.  1 SC in each st around.  Sl st join to first st and FO.  Weave ends.  (36)
9.  Join White yarn, 1 SC in each st around (continue with stitch marker to work in the round).  (36)
10-11.  Rep #9.  (36)
12.  SC2tog, 1 SC in next 4 st.  Rep around.  (30)
13.  SC2tog, 1 SC in next 3 st.  Rep around.  (24)
14.  SC2tog, 1 SC in next 2 st.  Rep around.  (18)
15.  SC2tog, 1 SC in next st.  Rep around.  FO White yarn and join Burnt Pumpkin.  (12)
16.  With Burnt Pumpkin yarn, 1 SC in each st around.  (12)
***Stuff head with polyfil.***
17.  2 SC in first st, 1 SC in next st.  Rep around.  (18)
18.  2 SC in first st, 1 SC in next 2 st.  Rep around.  (24)
19.  2 SC in first st, 1 SC in next 10 st, 2 SC in next st, 1 SC in next 12 st.  (26)
20.  2 SC in first st, 1 SC in next 12 st, 2 SC in next st, 1 SC in next 12 st.  (28)
21-26.  1 SC in each st around.  (28)
27.  SC2tog, 1 SC in next st.  Rep around until you have 2 st left.  SC2tog.  (18)
28.  SC2tog, 1 SC in next st.  (12)
***Stuff body with polyfil.***
29.  SC2tog.  Rep 5 more times.  Leave a long tail to weave in and out of this round to close up bottom.  (6)

Nose:
1.  With Burnt Pumpkin yarn, Ch2.  1 SC in 2nd ch from hook.  Ch1 and turn.  (1)
2.  2 SC in st.  Ch1 and turn.  (2)
3.  2 SC in first st, 1 SC in next st.  Ch1 and turn.  (3)
4.  1 SC in each st across.  Ch1 and turn.  (3)
5.  2 SC in first st, 1 SC in next st, 2 SC in last st.  Ch1 and turn.  (5)
6.  1 SC in each st across.  FO and leave a long enough tail for attaching.  (5)

Nose Tip:
1.  With Black yarn, 3 SC into MR.  Sl st join to first st.  FO and leave a tail for attaching to nose.  (3)

Assembly:
1.  Attach nose tip to nose.  (See my pics for help with placement).
2.  Attach nose to center of head, with Round 6 of nose flush with Round 8 of head.


Ears (make 2):
1.  With Black yarn, Ch2.  1 SC in 2nd ch from hook.  Ch1 and turn.  (1)
2.  2 SC in st.  FO and join Burnt Pumpkin yarn.  Ch1 and turn.  (2)
3.  2 SC in first st, 1 SC in next st.  Ch1 and turn.  (3)
4.  1 SC in each st across.  Ch1 and turn.  (3)
5.  2 SC in first st, 1 SC in next st, 2 SC in last st.  FO and join White yarn.  Ch1.  (5)
6.  With White yarn, 1 SC in each st evenly around ear.  Sl st join to first st and FO.  Leave a long enough tail for attaching ears to the head.  (See my pics for help with placement)

Legs/Arms (make 4):
1.  With Black yarn, 6 SC into MR.  (6)
2.  2 SC in first st, 1 SC in next st.  Rep around.  Sl st join to first st and FO.  Weave ends.  (9)
3.  Join Burnt Pumpkin yarn in first st.  1 SC in each st around.  (9)
4.  1 SC in each st around.  (9)
5.  1 SC in each st around.  Sl st join to first st and FO.  Stuff with polyfil.  Leave a tail for attaching.  (See pics for help with placement)  (9) 

Eyes:
I used black eyes and attached at Round 12.  If this was going to be for a baby or small child, I would have simply crocheted or embroidered the eyes. 

Tail:
1. With White yarn, 6 SC into MR.  (6)
2.  1 SC in each st around.  Sl st join to first st and FO White yarn.  (6)
3.  Join Burnt Pumpkin yarn.  1 SC in each st around.  (6)
4.  1 SC in each st around.  Sl st join to first st and FO.  Leave a long enough tail for attaching.  (6)
5.  Attach tail to the back, lower portion of the body.  (See pics for help with placement)

Happy Crocheting...

Legal:
--don't use/claim my design as your own
--don't use/claim my pics as your own
--okay to make and sale your finished work 
--don't share my pattern electronically or in print format (without prior consent) but provide a link to my blog

Sunday, August 5, 2018

Tiger Buddy

My granddaughter, Miss Arielle, asked me a week or so ago if I would make her a “crocheted tiger.”  I told her, at the time, of course I would.  Well, on Saturday, she reminded me about her tiger.  So, I stopped working on my “green blanket” (lol) and set out to design her a cute, unique and loveable tiger.

My “Tiger Buddy” is made in one piece — so less ends to weave!!!  He stands approx 6” tall.  I used RHSS yarn and a 4.5mm hook.

I will add the pattern soon - once I make him a few buddies...so PIN and come back to this post.

Tiger Buddy
Size:  Approximately 6” tall

Materials:
-4.5mm hook
-RHSS yarn in Gold, Black, Taupe/Tan and White
-Stitch marker
-Polyfil
-Tapestry needle for weaving

U.S. Stitch Abbreviations:
Ch:  chain
Sl st:  slip stitch
St:  stitch(es)
SC:  single crochet
SC2TOG:  single crochet 2 stitches together to create a decrease) 
MR:  magic ring
FO:  fasten off
Rep:  repeat

Directions:
The head and body is made in one piece. The pattern is worked from the top of the head down.  This pattern is worked in the round so you will need to use a stitch marker (I typically use a bobby pin) to keep track of the first and last stitch of each round.  Move stitch marker up with the first stitch of each new round.

1.  With Gold yarn, 6 SC into MR.  Pull to tighten to form ring.  (6)
2.  2 SC in each st around.  (12)
3.  2 SC in first st, 1 SC in next st.  Rep around.  (18)
4.  2 SC in first st, 1 SC in next 2 st.  Rep around.  (24)
5.  2 SC in first st, 1 SC in next 3 st.  Rep around.  (30)
6.  2 SC in first st, 1 SC in next 4 st.  Rep around.  (36)
7.  1 SC in each st around.  (36)
8-11.  Rep #7.  (36)
12.  SC2tog, 1 SC in next 4 st.  Rep around.  (30)
13.  SC2tog, 1 SC in next 3 st.  Rep around.  (24)
14.  SC2tog, 1 SC in next 2 st.  Rep around.  (18)
15.  SC2tog, 1 SC in next st.  Rep around.  (12)
16.  1 SC in each st around.  (12)
***Stuff head with polyfil.***
17.  2 SC in first st, 1 SC in next st.  Rep around.  (18)
18.  2 SC in first st, 1 SC in next 2 st.  Rep around.  (24)
19.  2 SC in first st, 1 SC in next 10 st, 2 SC in next st, 1 SC in next 12 st.  (26)
20.  2 SC in first st, 1 SC in next 12 st, 2 SC in next st, 1 SC in next 12 st.  (28)
21-26.  1 SC in each st around.  (28)
27.  SC2tog, 1 SC in next st.  Rep around until you have 2 st left.  SC2tog.  (18)
28.  SC2tog, 1 SC in next st.  (12)
***Stuff body with polyfil.***
29.  SC2tog.  Rep 5 more times.  Leave a long tail.  (6)
***Add more polyfil, if necessary.***

Do not weave the tail in and out of Round 29 yet to close up.

Stripes and Eyes: 
1.  With tapestry needle, you will want to use a long piece of black yarn.  I tied the end into a double knot.  I then inserted my needle from the bottom center opening up to the head (through the polyfil).  I made 2 black stripes at the center top (forehead).  I then made the eyes.  

Stop here for a moment and make your nose/mouth to add to the head before continuing with the stripes.
Nose/Mouth:
 1.  With White yarn, 6 SC into MR.  (6)
2.  2 SC in first st, 1 SC in next st.  Rep around.  (9)
3.  1 SC in each st around.  FO and leave tail for attaching.
4.  With Black yarn embroider nose tip and mouth.  (See my pics for help)
5.  Attach below eyes, centered.  

Now, you can continue with making your stripes.  I made 3 stripes on each side of the nose.  I then made stripes on the body portion.  I then worked stripes up the backside, center.  And, last I weaved my needle back down through the polyfil to the bottom.  Trimmed excess tail. 
 Once you are finished making the stripes, then you can use the tail from Round 29 and weave in and out of the last 6 stitches to close up the bottom.  Weave ends.  
Ears (make 2):
 1.  With Taupe/Tan yarn, 6 SC into MR.  Pull tail to tighten, but do NOT join.  Ch1 and turn.  (6)
2.  2 SC in first st, 1 SC in next st.  Rep across.  FO yarn and weave ends.  (9)
3.  Join Gold yarn in first st.  Ch1.  SC in first st and across.  FO and leave tail for attaching.  (9)
4.  Attach ears to each side of the head.  (See pics for help with placement)

Legs/Arms (make 4):
 1.  With Black yarn, 6 SC into MR.  (6)
2.  2 SC in first st, 1 SC in next st.  Rep around.  Sl st join to first st and FO.  Weave ends.  (9)
3.  Join Gold yarn in first st.  1 SC in each st around.  (9)
4.  1 SC in each st around.  (9)
5.  1 SC in each st around.  Sl st join to first st and FO.  Leave a tail for attaching.  (See pics for help with placement)  (9)

Pompom Tail:
1.  I held Gold and Black yarn together and wrapped 10 times around 2 of my fingers.  I then tied in a double knot in the center.  I then trimmed and fluffed.  Attach to back of the body.  
 This pattern is so versatile.  You can virtually make any animal you want.  Be sure to check out my other posts for my Foxy Fox and Mr. Elephant versions...


And, here’s my granddaughter with her Tiger...
Happy Crocheting...

Legal:
--don't use/claim my design as your own
--don't use/claim my pics as your own
--okay to make and sale your finished work 
--don't share my pattern electronically or in print format (without prior consent) but provide a link to my blog