Showing posts with label Kid’s Blankets. Show all posts

Friday, March 27, 2020

Wolf Hoodie Blanket...

Check out my newest design:  a “Wolf Hoodie Blanket” for my close friend’s godson, Noah. He is a lover of wolves and preteen so I thought he would enjoy a Hoodie Blanket.

For this project, I used Yarn Bee’s blanket yarn. This was my first time using this yarn and I enjoyed working with it as much as Bernat’s brand. I purchased the yarn at Hobby Lobby. The complete project was made with a 10.0mm hook.

The final measurement from top of head to bottom of blanket is 57" x 42".  The perfect size for a pre-teen kid.

My grandsons fell in love with it. So, this is sure to be a much-loved project with the boys in your life.

I will hopefully ADD the PATTERN this weekend. Be sure to PIN and check back frequently for the complete directions.
Wolf Hoodie Blanket


And, here is the new owner, Noah, excited and happy with his new Wolf Blanket...

Happy Crocheting...

Sunday, February 2, 2020

Twin-Sized Baseball Blanket

My grandson, Gabriel, asked me to make him a “Baseball Blanket.”  He was getting a new bed and said he needed a new handmade blanket from his mamaw.

So, in the Fall of 2019, I started on his blanket with the colors Red, White and Blue for the base of the blanket itself.  I used Green and Tan for the field and on the border.  The yarn is Hobby Lobby’s, “I Love This Yarn.”  You can use your favorite yarn brand; just note the overall size may vary slightly.

Initially, I designed this pattern on a graph to complete as a graphgan but later decided to make the blanket first and then make the baseball and field as appliqués.  I will include my graph for those who want to complete this project as one piece.

I’m including general directions below in how I made this blanket.  I will follow-up with detailed instructions as soon as I have a chance to type it up.

Gabriel’s Baseball Blanket

Below is an upclose picture of the border.  I absolutely loved how it turned out.  I think it really adds to the beauty of this blanket.

Here is an upclose picture of the baseball and field.  I was extremely pleased with the end result of this.

And, a picture of the completed blanket.  It measures Twin-sized.  I debated back and forth on whether or not to add my baseball bat appliqué pattern to this blanket (you can find this freebie by typing “Play Ball” in my search engine).  Gabriel, however, was happy with it, as is.


Here is my original graph design.  Please note, 1 white and 1 blue section is not showing on the graph.  The pattern is as follows:
15 Rows Red
10 Rows White
15 Rows Blue 

You will repeat pattern a total of 4 times.  Or, to your desired size.  As you can see in the above picture, I appliquéd the field in the center of section 2 and section 3 of the red, white and blue.  

Here is how I made the appliqué sections:
1.  First, I crocheted the green portion of my field;
2.  Next,  I crocheted the brown portion; I made the bases and appliqued to create first, second, third and home base;
3.  Then, I crocheted the baseball;
4.  Now, I attached the brown section to the field then the baseball above;
5.  Last I attached to the center of the blanket.  

Border:
I used brown, white and green to create my border.  

Happy Crocheting...

Legal:
--don't use/claim my design as your own
--don't use/claim my pics as your own
--okay to make and sale your finished work
--don't share my pattern electronically or in print format (without prior consent) but provide a link to my blog

Social Media:
If you are on the following sites, let's connect and hook up...
  • Instagram:  Rilla2u
  • Pinterest:  Rilla2u
  • Twitter:  Rilla2u
  • Facebook:  /rilla.edwards 

Thursday, August 30, 2018

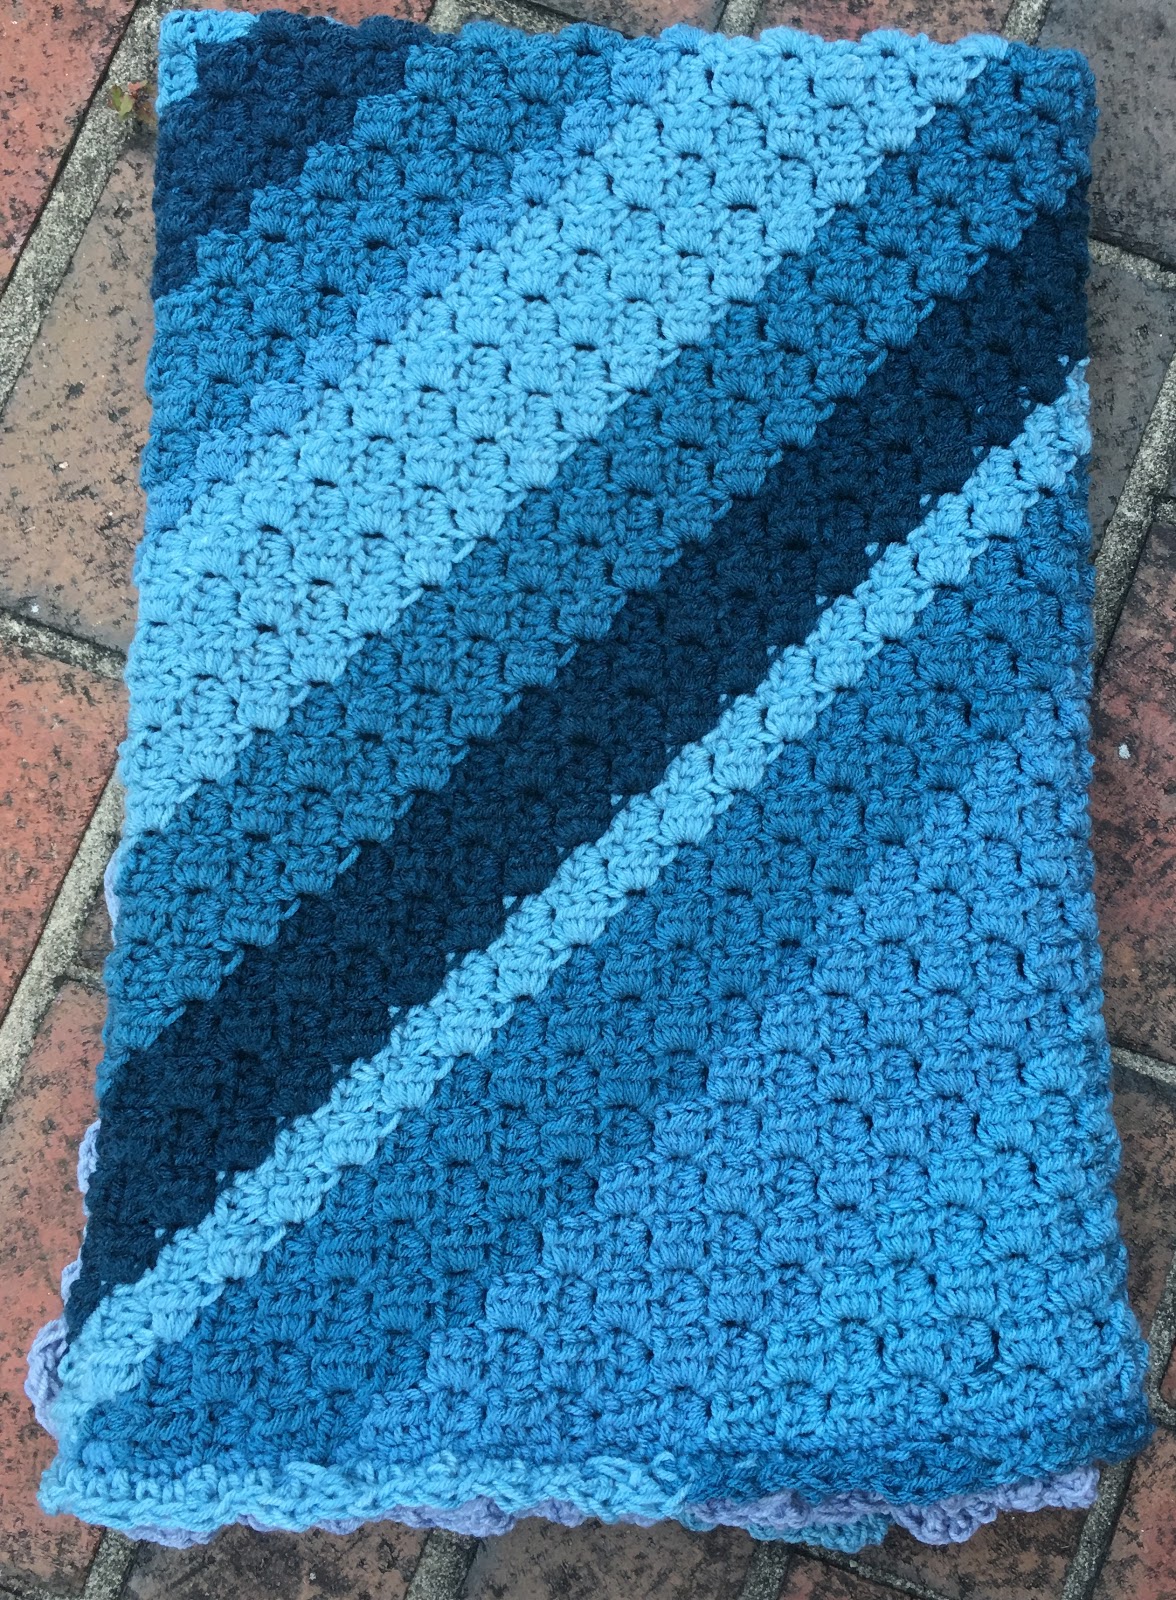
Taffy Blues Baby Blanket

How cute is this “Taffy Blues” Baby Blanket?  I crocheted it within a few days, using the C2C method of crocheting for the blanket portion and then added a border.  The blanket portion uses 4 of Yarn Bee’s Sugarwheels.  The 5th one is for the border and uses less than half.  The remainder would be great to make matching accessories — a hat, booties, bib, etc...

I’m not affiliated with Yarn Bee in any form or fashion but I have to say I love working with the Sugarwheel yarns.  The gradual color changes makes for beautiful projects.  Check out my Forestry C2C Blanket in “Gelato is My Motto” — varying shades of greens that is simply gorgeous.  Here’s the LINK for the FREE pattern...

Taffy Blues Baby Blanket
Size:  Approximately 39” x 39”

Materials:
—6.0mm hook
—(5) Yarn Bee’s Sugarwheel in “Taffy Happy”
—tapestry needle for weaving

U.S. Stitch Abbreviations:
Ch:  chain
St:  stitch(es)
Sl st:  slip stitch
SC:  single crochet
HDC:  half double crochet
DC:  double crochet
TC:  triple crochet
Sk:  skip
Rep:  repeat
FO:  fasten off

Special Note:
The blanket portion is made using the C-2-C (Corner-2-Corner) method with HDC st and ch 5.

Directions:
Blanket portion:
1.  I used 2 Sugarwheels for increase rows.  (54)
2.  I then used 2 Sugarwheels for the decrease rows.
Border:
1.  Join yarn in any st with a sl st and Ch1.  SC in same st and in each st around, placing 3 SC in each corner.  Sl st join to first st.
2.  Ch 4 (counts as first TC).  SC in the next 2 st.  TC in next st.  SC in the next 2 st.  TC in next st.  SC in the next 2 st.  Sk a st.  DC in the next 3 st.  TC into the skipped st.  Then start steps again:  *TC in the next st, SC in next 2 st (rep this 3 times), then sk next st, DC into the next 3 st and go back and place a TC into the skipped st.* Rep from * to * around the blanket, placing 3 TC st in each corner.  (Note: if for some reason, the pattern isn’t working out evenly with your number of stitches, then you can adjust the repeats accordingly to make it work by adding an extra SC st, if needed...)

The varying shades of blue in this blanket are simply gorgeous.  This project worked up fairly quickly and makes a great gift for any little boy.

Enjoy!!!
Happy Crocheting...

Legal:
--don't use/claim my design as your own
--don't use/claim my pics as your own
--okay to make and sale your finished work 
--don't share my pattern electronically or in print format (without prior consent) but provide a link to my blog