Showing posts with label Baby/Toddler Blankets. Show all posts

Wednesday, March 17, 2021

Saturday, February 6, 2021

Teal Twist Throw Blanket

Teal Twist Throw Blanket 

I made this super soft and cozy throw blanket using Bernat Blanket yarn.  It is a super easy pattern and works up really fast!!!

Size: 41” Width x 60” Length

Materials:
--10.0mm hook
--4 big skeins (10.5 oz) of Bernat Blanket yarn in “Teal Twist” = 880 yards
--tapestry needle for weaving

U.S. Stitch Abbreviations:
Ch:  chain
St:  stitch(es)
Sk:  skip
Sl st:  slip stitch
DC:  double crochet
Rep:  repeat
FO:  fasten off

Note:  Ch 3 counts as first DC in each row

Directions:
1.  Ch 102.  DC in the 4th st from ch and across. (99 + beginning ch 3= 100 DC). Ch 3 and turn. 
2.  Skip first st of row. Ch 3 is first st. DC in each st across. Ch 3 and turn. (100) 

I continued my rows until I completed using 4 big skeins of yarn.  I’m 5’9” and the length and width is snuggle perfect for me. 

Here’s my grandson staying warm with it...

Happy Crocheting...

Legal:
--don't use/claim my design as your own
--don't use/claim my pics as your own
--okay to make and sale your finished work
--don't share my pattern electronically or in print format (without prior consent) but provide a link to my blog

Social Media:
If you are on the following sites, let's connect and hook up...
  • Instagram:  Rilla2u
  • Pinterest:  Rilla2u
  • Twitter:  Rilla2u
  • Facebook:  /rilla.edwards 

Sunday, March 8, 2020

Fox Blanket...

For this "Fox Blanket," I used a graph I found on Pinterest.  I used "I Love This Yarn" from Hobby Lobby and a 6.0mm hook.

Here’s the Fox Graph Link that I used to complete this project.

This blanket was made using the C2C (Corner-2-Corner) Crochet method.  I used HDC stitches and chain 5.  To finish, I used black yarn and SC stitches around.  As you can see in the pictures, the blanket is reversible. 

Front Side:


Back Side:

And, here are a few extras I made to go with this Fox Blanket:  a Fox Hat, Diaper Cover with Fox tail, a pair of Booties and a Baby Bib with a Fox applique...
 
I'm very happy with this completed Fox project.  It is a customer order for someone who loves foxes.  

Happy Crocheting... 
Legal:
--don't use/claim my design as your own
--don't use/claim my pics as your own
--okay to make and sale your finished work
--don't share my pattern electronically or in print format (without prior consent) but provide a link to my blog

Social Media:
If you are on the following sites, let's connect and hook up...
  • Instagram:  Rilla2u
  • Pinterest:  Rilla2u
  • Twitter:  Rilla2u
  • Facebook:  /rilla.edwards 


Friday, February 21, 2020

Rainbow Scrappy Blanket

For an upcoming baby shower gift, I decided to use up some of my scrap yarn in an assortment of rainbow colors.

I used a 6.0mm hook and a mix of “I Love This Yarn” from Hobby Lobby and Red Heart Super Saver yarn.  I used HDC for the bright-colored rows with color changes after every second row.  For the white rows, I used a SC and DC in the same stitch, skip 1 stitch and repeat. I completed 4 white rows at the end of each of the color sequence rows.

And, of course, I had to add a pair of cute booties and hat to complete the ensemble.  The hat was made using DC stitches.  I started with 10 DC in a MR and increased until the diameter I wanted.  I then completed 4 more rounds.  I then switched yarn and completed 2 SC rounds.

Overall, I’m very pleased with the completion of this project.

Again, this was a baby project I completed freestyle.  I did not write a pattern down but, as you can read from the details above, it was not a hard project to complete.

Rainbow Scrappy Blanket


Happy Crocheting...
Legal:
--don't use/claim my design as your own
--don't use/claim my pics as your own
--okay to make and sale your finished work
--don't share my pattern electronically or in print format (without prior consent) but provide a link to my blog

Social Media:
If you are on the following sites, let's connect and hook up...
  • Instagram:  Rilla2u
  • Pinterest:  Rilla2u
  • Twitter:  Rilla2u
  • Facebook:  /rilla.edwards 

Thursday, February 20, 2020

UNC Theme-Colored Blanket

Here is my UNC-themed color blanket with matching booties and hat for a baby shower gift.  This project was quick and easy to make.  I used worsted weight yarn for the hat, booties and blanket.  I used a bulky yarn for the border of the blanket.

This project was completed using basic stitches of SC, HDC and DC.  I made the poms by wrapping the yarn around my hand 35-50 times, tying a double knot at the center to secure and then cutting/trimming to form the pom.

I do not have a pattern for this project since I completely made this freestyle for a quick gift.  I can say for the blanket portion, I used *SC, HDC and DC in the same stitch, skipped two stitches* and repeated.  This creates a beautiful textured blanket.

UNC-Themed Colored Blanket


Happy Crocheting...
Legal:
--don't use/claim my design as your own
--don't use/claim my pics as your own
--okay to make and sale your finished work
--don't share my pattern electronically or in print format (without prior consent) but provide a link to my blog

Social Media:
If you are on the following sites, let's connect and hook up...
  • Instagram:  Rilla2u
  • Pinterest:  Rilla2u
  • Twitter:  Rilla2u
  • Facebook:  /rilla.edwards 


Cow Blanket...

Cow Blanket 
I made this super cute girlie Cow Blanket with the matching booties and hat for a baby shower gift.  I used worsted weight yarn for the blanket itself, booties and hat.  I used a bulky yarn for the cow applique.  

I found the cutest little cow buttons to add to the booties.  I'm not sure if the buttons came from Hobby Lobby or Wal-Mart.  

Everything was made using basic SC, HDC and DC stitches.  The pom for the hat was made by wrapping the pink yarn around four of my fingers 50 times, securing the center with a double knot and then cutting/trimming to form the pom.  

I do not have a pattern for this project.  I competed it freestyle. 


Happy Crocheting...
Legal:
--don't use/claim my design as your own
--don't use/claim my pics as your own
--okay to make and sale your finished work
--don't share my pattern electronically or in print format (without prior consent) but provide a link to my blog

Social Media:
If you are on the following sites, let's connect and hook up...
  • Instagram:  Rilla2u
  • Pinterest:  Rilla2u
  • Twitter:  Rilla2u
  • Facebook:  /rilla.edwards 


Friday, July 26, 2019

Ares Swirl Blanket

I’ve had the privilege of spending the last 9 days in Oklahoma getting to know my little cousin, Ares. He is 4 months old, chunky and all-around adorable.  I’m completely smitten!!!  I have thoroughly enjoyed my time with him.

So, as crocheters often do, I had to whip up a special blanket for him.  I used Yarn Bee’s Sugarwheel in Green Tea Swirl.  It sorta reminds me of Harry Potter...lol.  I used 2 skeins of yarn (355 yds/skein) and a 6.0 mm hook.

This blanket measures approximately 30” x 30”.  For the blanket portion, I used the C2C (Corner-2-Corner) method with DC stitches.  I think the border I created makes this extra cute...

Ares Swirl Blanket...

And, here’s a picture of my sweet Ares...
Happy Crocheting...


Thursday, June 13, 2019

Everything is Peachy Baby Blanket...


I have been forever behind on getting my blog updated with all of the new patterns I have been working on.  Springtime has just been busy around the house, with home schooling my grandson, umpiring baseball and working on new projects.

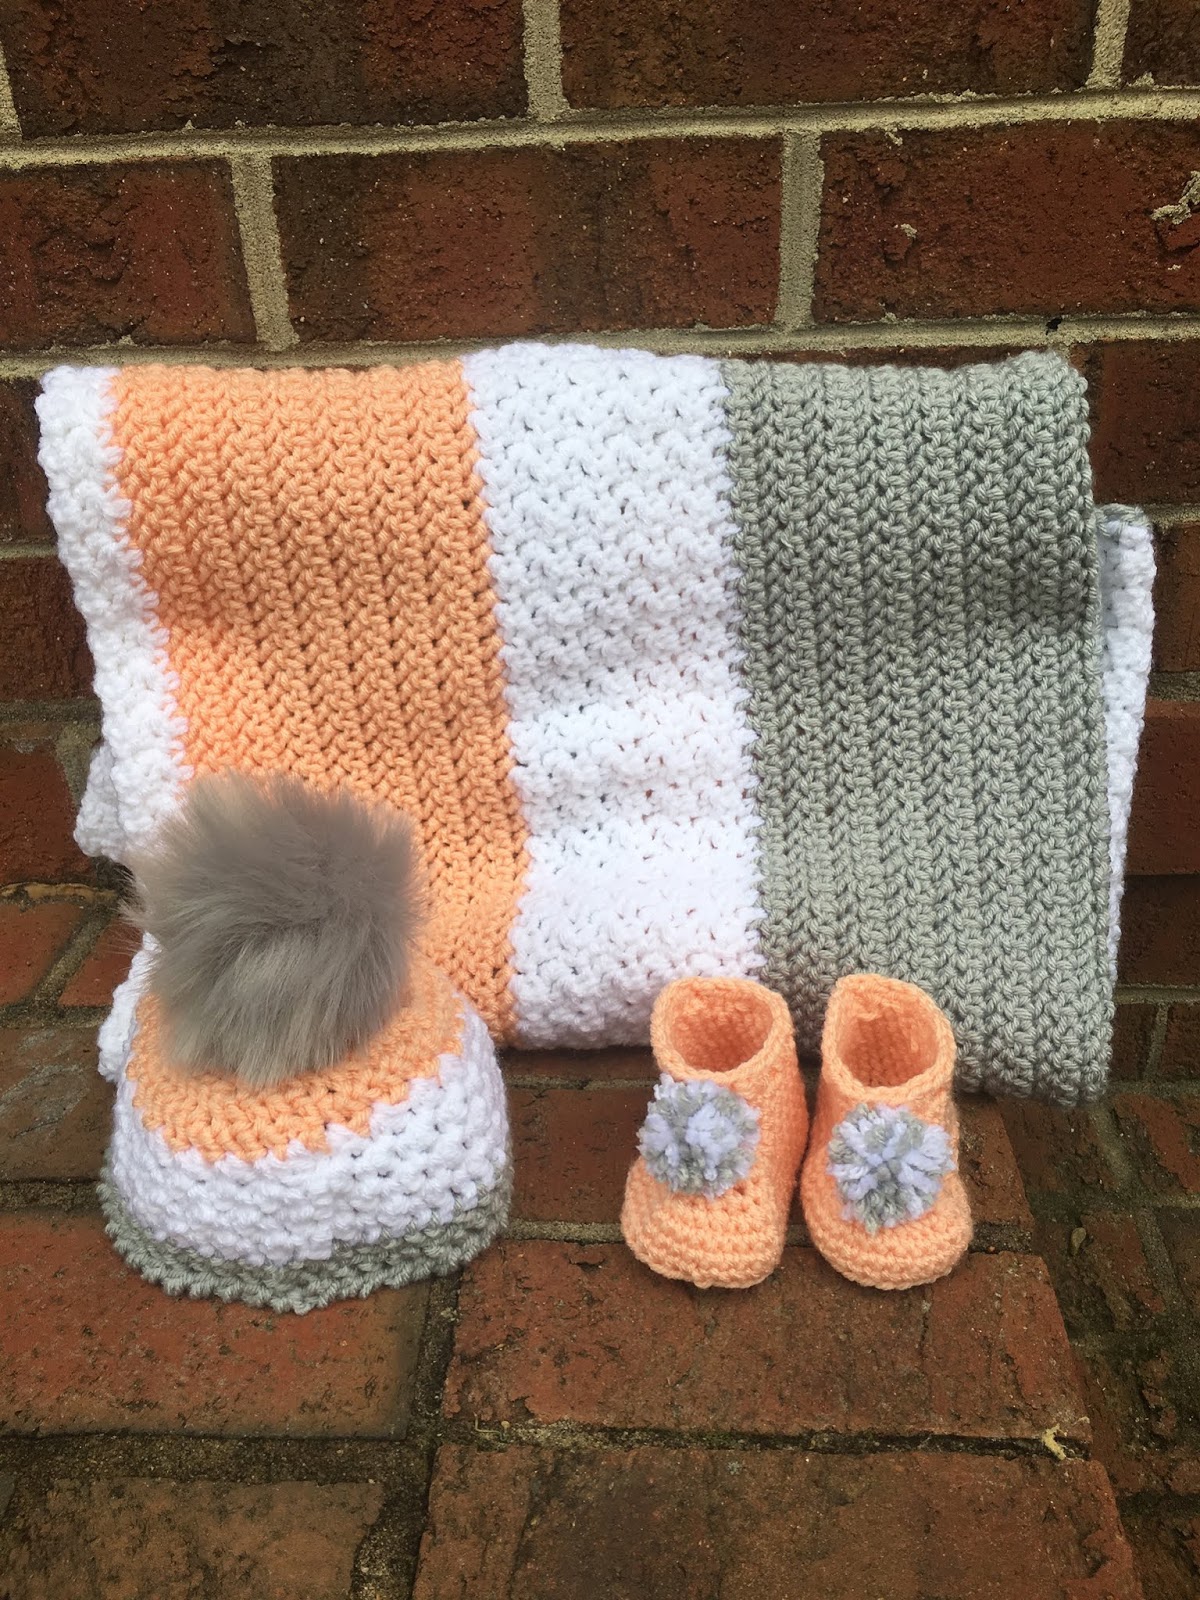
And, then deciphering my scribbled notes has proved to be a little time consuming...lol.  I made this design for a co-worker of my hubby's for a baby shower gift.  And, I absolutely love the combination of peach, white and gray.  It is so girly and just happy colors.

I used #4 worsted weight yarn, "I Love This Yarn," from Hobby Lobby.

“Everything is Peachy” Baby Blanket Pattern
Size:  30” x 36”

Materials for the Blanket:
-- 6.0mm hook
--1 skein each of #4 worsted weight yarn in Light Peach, White and Gray (I used “I Love This Yarn,” from Hobby Lobby)
--tapestry needle for weaving

U.S. Stitch Abbreviations:
Ch:  chain
St:  stitch(es)
Sl st:  slip stitch
SC:  single crochet
HHDC:  herringbone half double crochet
DC:  double crochet
Rep:  repeat
FO:  fasten off

Directions:
1.  With Peach, Ch101. HHDC in 2nd ch from hook and each ch across.  Ch1 and turn.  (100)
2-15.  1 HHDC in each st across.  Ch1 and turn.  At the end of Row 15, FO Peach yarn and join White yarn and Ch1.  (100)
16.  With White yarn, *1 SC in the first st, 1 DC in the next st.* Rep from * to * across.  Ch1 and turn.  (100)
17-25.  Rep #16.  At the end of Row 25, FO White yarn and join Gray yarn with a Ch1.  (100)
26.  With Gray yarn, 1 HHDC in each st across.  Ch1 and turn.  (100)
27-40. Rep #26.  At the end of Row 40, FO Gray yarn and join White yarn with a Ch1.  (100)
41.  With White yarn, *1 SC in the first st, 1 DC in the next st.* Rep from * to * across.  Ch1 and turn.  (100)
42-50.  Rep #41.  At the end of Row 25, FO White yarn and join Peach yarn with a Ch1.  (100)

51.  With Peach yarn, 1 HHDC in each ch across.  Ch1 and turn.  (100)
52-65.  1 HHDC in each st across.  Ch1 and turn.  At the end of Row 65, FO Peach yarn and join White yarn and Ch1.  (100)
66.  With White yarn, *1 SC in the first st, 1 DC in the next st.* Rep from * to * across.  Ch1 and turn.  (100)
67-75.  Rep #66.  At the end of Row 75, FO White yarn and join Gray yarn with a Ch1.  (100)
76.  With Gray yarn, 1 HHDC in each st across.  Ch1 and turn.  (100)
77-90. Rep #26.  At the end of Row 90, Ch 1 and turn.  (100)
Border:
1.  With Gray yarn, 1 SC in each st around, placing 3 SC st in each corner.  Sl st join to the first st and FO.  Weave ends.

And, that's it for my gorgeous "Everything is Peachy" Baby Blanket.  Enjoy!!!


I had enough yarn leftover to make a matching hat and booties in newborn-sized.  I used an oversized gray pom for the hat and made small yarn poms for the booties.  I just think the hat and booties are so super cute to go with this blanket.

Here is the LINK to my Everything Is Peachy Hat & Booties...

And, here is my LINK to myEverything Is Peachy Lovey... 

Happy Crocheting...

Legal:
--don't use/claim my design as your own
--don't use/claim my pics as your own
--okay to make and sale your finished work
--don't share my pattern electronically or in print format (without prior consent) but provide a link to my blog

Social Media:
If you are on the following sites, let's connect and hook up...
  • Instagram:  Rilla2u
  • Pinterest:  Rilla2u
  • Twitter:  Rilla2u
  • Facebook:  /rilla.edwards

Tuesday, March 19, 2019

Cobblestone Plaid Blanket

I was asked to make a baby blanket in pink and grey for an upcoming baby shower.  And, plaid, just stuck out in my mind.

This is the first plaid blanket I’ve made using #4 worsted weight acrylic yarn.  I’ve got to say #6 yarn works up a whole lot quicker than #4 yarn...lol.  But, this was a fun project.  I even made a hat and booties to match the blanket.

While working on this project, I kept thinking about cobblestone streets and, aptly, decided to name this blanket, “Cobblestone Plaid.”

This blanket measures 28” x 32”.
Cobblestone Plaid Blanket
Size:  Approximately 28” x 32”

Materials:
—6.0mm hook
—1 skein each of “I Love This Yarn” in Pink, Greybeard and Crushed Raspberry
—tapestry needle for weaving

U.S. Stitch Abbreviations:
Ch:  chain
St:  stitch(es)
Sl St:  slip stitch
SC:  single crochet
DC:  double crochet 
Rep:  repeat
Sk:  skip
FO:  fasten off

Special Note:  
1.  The pattern is worked in multiples of 6 + 2.  You can make this blanket any size you desire, just keep the multiples of 6 + 2 in mind when making your beginning chain row. 

2.  Plaid Stitch: 
Row 1:  3DC st in Pink, then 3 DC st in Grey.  You will repeat with these 2 colors across. Now, remember:  1.  Before completing the 3rd DC st, you will want to join the next color.  2.  You will be carrying your yarn across since you are constantly rotating between the 2 colors.
Row 2:  same as #1 except you will be starting with Pink (goes over previous row’s Grey) and then rotating this row with Crushed Raspberry (this color will go over previous row’s Pink)

3.  Raspberry stitch:  SC, DC, SC in same st.  Skip 2 stitches.  Repeat.  

Directions:
1.  With Pink yarn, ch 92.  Starting in 3rd ch from the hook, complete Row 1 of the Plaid Stitch. (90)
2.  Continue with Plaid Stitch, completing Row 2.  (90)
3-55.  Continue with Plaid Stitch, rotating between rows 1 and 2.  At the end of Row 55, FO and weave ends.  (90)
Border:
1.  With grey yarn, evenly DC around, placing 3 DC st in each corner.  Working on the sides, I placed 2 DC st in each end stitch.  
2.  Rep #1.  At the end of the round, Sl St join to first st and FO.  Weave ends.  Join Crushed Raspberry yarn and Ch1.  
3.  1 SC in each st around, placing 3 SC st in each corner.  Sl St join to first st and Ch1.  
4.  Raspberry stitch (see Special Note) around, placing 3 DC in each corner.  Sl St join to first st.  FO and weave ends.
 

And, here's a few pics of the hat and booties I made to go with this blanket.  I think it looks so pretty and girly.
 
 Happy Crocheting...

Legal:
--don't use/claim my design as your own
--don't use/claim my pics as your own
--okay to make and sale your finished work
--don't share my pattern electronically or in print format (without prior consent) but provide a link to my blog

Social Media:
If you are on the following sites, let's connect and hook up...
  • Instagram:  Rilla2u
  • Pinterest:  Rilla2u
  • Twitter:  Rilla2u
  • Facebook:  /rilla.edwards 


Monday, March 11, 2019

Harmony’s Blanket

I made this beautifully textured blanket for my sweet little cousin, Miss Harmony, who was born in WV and had to spend her first month in the hospital.  After multiple surgeries, she is doing good now.  I used “I Love This Yarn,” from Hobby Lobby and a 6.0mm hook.

Harmony’s Blanket

Size:  Approximately 32" x 36"

Materials:
--6.0mm hook
--1 skein each of #4 worsted weight yarn in pink, yellow, white and gray (I used I Love This yarn from Hobby Lobby)
--tapestry needle for weaving

U.S. Stitch Abbreviations:
Ch:  chain
St:  stitch(es)
Sl st:  slip stitch
SC:  single crochet
HHDC:  herringbone half double crochet
DC:  double crochet
Rep:  repeat
FO:  fasten off

Directions:
1.  With Pink yarn, Ch101.  HHDC in 2nd ch from hook and across.  Ch1 and turn.  (100)
2-12.  1 HHDC in each st across.  Ch1 and turn.  At the end of Row 12, FO Pink yarn and weave ends.  Join White yarn. Ch1.  (100)
13-15.  1 SC in each st across.  Ch1 and turn.  At the end of Row 15, FO White yarn and weave ends.  Join Gray yarn.  Ch1.  (100)


16.  1 SC in first st, 1 DC in next st.  Rep across.  Ch1 and turn.  (100)
17.  1 DC in first st, 1 SC in next st.  Rep across.  Ch1 and turn.  (100)
18-27.  Rep #16 & #17.  At the end of Row 27, FO Gray yarn and weave ends.  Join White yarn.  Ch1.  (100)
28-30.  1 SC in each st across.  Ch1 and turn.  At the end of Row 28, FO White yarn and weave ends.  Join Yellow yarn.  (100)

31-42.  With Yellow yarn, 1 HHDC in each st across.  Ch1 and turn.  At the end of Row 38, FO Yellow yarn and weave ends.  Join White yarn.  (100)
43-45.  1 SC in each st across.  Ch1 and turn.  At the end of Row 15, FO White yarn and weave ends.  Join Pink yarn.  Ch1.  (100)

46.  1 SC in first st, 1 DC in next st.  Rep across.  Ch1 and turn.  (100)
47.  1 DC in first st, 1 SC in next st.  Rep across.  Ch1 and turn.  (100)
48-57.  Rep #46 & #47.  At the end of Row 57, FO Pink yarn and weave ends.  Join White yarn.  Ch1.  (100)
58-60.  1 SC in each st across.  Ch1 and turn.  At the end of Row 54, FO White yarn and weave ends.  Join Gray yarn.  Ch1.  (100)

61-72.  1 HHDC in each st across. Ch1 and turn.  At the end of Row 64, FO Gray yarn and weave ends.  Join White yarn.  Ch1.
73-75.  1 SC in each st across.  Ch1 and turn.  At the end of Row 75, FO White yarn and weave ends.  Join Yellow yarn.   

76.  1 SC in first st, 1 DC in next st.  Rep across.  Ch1 and turn.  (100)
77.  1 DC in first st, 1 SC in next st.  Rep across.  Ch1 and turn.  (100)
78-87.  Rep #76 & #77.  At the end of Row 87, FO Yellow yarn and weave ends.  Join White yarn.  Ch1.  (100)

Border:
88.  With White yarn, 1 SC in each st around, placing 3 SC st in each corner.  Sl st join to first st and FO.  Weave ends.

And, that's it, for this beautifully textured blanket...ENJOY!!!


 And, I included a matching hat in 0 - 3 months size...
Happy Crocheting...

Legal:
--don't use/claim my design as your own
--don't use/claim my pics as your own
--okay to make and sale your finished work
--don't share my pattern electronically or in print format (without prior consent) but provide a link to my blog

Social Media:
If you are on the following sites, let's connect and hook up...
  • Instagram:  Rilla2u
  • Pinterest:  Rilla2u
  • Twitter:  Rilla2u
  • Facebook:  /rilla.edwards 

Ares Blanket

This Blanket was designed and made for my newest little cousin, Ares, who lives in Oklahoma.  I used Red Heart Super Saver yarn in light blue, gray and white.  I used a 6.0mm hook.

I designed the C2C graph on Stitch Fiddle.  I used HDC stitches and Ch5.  This was a fairly quick blanket to make.

Ares Blanket
Size:  Approximately 32" x 36"

Materials:
--6.0mm hook
--1 skein each of #4 worsted weight yarn in light blue, gray and white (I used Red Heart Super Saver yarn)
--tapestry needle for weaving

U.S. Stitch Abbreviations:
Ch:  chain
St:  stitch(es)
Sl st:  slip stitch
SC:  single crochet
HDC:  half double crochet
PS:  popcorn stitch
Rep:  repeat
FO:  fasten off

Special Stitch:
1.  Popcorn Stitch (PS):  4 SC stitches in same st, remove hook from last stitch and place in the first SC stitch made (front to back) and then insert back into the hoop of the last stitch and pull through.  

Directions:
Using my C2C Graph below, start in the lower right hand corner and work the pattern diagonally.  I used HDC stitches with Ch5.  If desired, you can use DC stitches and Ch6.

Once I completed the graph portion of the blanket, I then worked on the border design.

Border:
1-3.  With light blue, HDC in each st around, placing 3 HDC st in each corner.  Sl st join to first st and Ch1.  At the end of Round 3, FO light blue yarn and join gray yarn.
4.  1 SC in each st around, placing 3 SC st in each corner.  Sl st join to first st and Ch1.
5.  *1 SC in first 2 st, then 1 PS in next st.* Rep around, placing 3 SC st in each corner.  Sl st join to first st and Ch1.
6.  Rep #4.  Sl st join to first st and FO.  Weave ends.

Simple, yet so pretty!!!  Enjoy...

C2C Graph
Happy Crocheting...
Legal:
--don't use/claim my design as your own
--don't use/claim my pics as your own
--okay to make and sale your finished work
--don't share my pattern electronically or in print format (without prior consent) but provide a link to my blog

Social Media:
If you are on the following sites, let's connect and hook up...
  • Instagram:  Rilla2u
  • Pinterest:  Rilla2u
  • Twitter:  Rilla2u
  • Facebook:  /rilla.edwards