Friday, October 27, 2017

Christmas Polar Bear Pixel Graph

Well, I've had a stomach bug past 2 days and not up to crocheting...so, I did the next best thing - worked on a Christmas Pixel Graph to make into a blanket!!! I haven't decided yet if I want to do this in blanket yarn, bulky yarn or worsted weight yarn.

I think my Polar Bear turned out super cute and will make a great addition to my seasonal decor.  

So, please feel free to use my graph if you would like. 

Christmas Polar Bear Pixel Graph


 Christmas Polar Bear Blanket Pattern

Size:  approximately 32" x 38"

Materials:
--6.0mm hook
--#4 worsted weight yarn; I used "I Love This Yarn" from Hobby Lobby in Dark Olive (for background) - 1 and 1/2 skeins, Sea Blue & Sungold (for small present) - small amount, Navy & Red (for large present) - small amount, White, Black & Red (for polar bear) - less than 1 skein of each
--tapestry needle for weaving 

U.S. Stitch Abbreviations:
Ch:  chain
Sl st:  slip stitch
St:  stitch(es)
Rep:  repeat
SC:  single crochet
DC:  double crochet 
FO:  fasten off 

Special Note:  This blanket was made using C2C Crocheting.  There's a lot of tutorials on the internet to help you with this.  

Directions:
For the blanket portion, I used my above pixel graph and the standard C2C (Corner-2-Corner) method of Crocheting.  I worked this pattern using Ch6 and DC stitches.  Once I completed the graph portion, I then added the border.

Border:  
1.  With Dark Olive, evenly SC around the perimeter of the blanket, placing 3 SC st in each corner.   Sl st join to first st.  
2-3.  DC in each st around, placing 3 DC st in each corner.  Sl st join to first st.  At the end of Round 3, FO Dark Olive yarn and join White yarn.  
4.  With White yarn, SC around, placing 3 SC st in each corner.  Sl st join to first st.  FO and weave ends.  

Happy Crocheting....

Legal:
--don't claim my pattern/design as your own
--don't use my pictures as your own
--don't share my pattern/design electronically or in print format, without my consent, but provide a link to my blog
--it's okay to make and sale your finished work on any of my patterns/designs; I just ask that you credit me as the designer

Wednesday, October 25, 2017

Ginger Spice Ponytail Ear Warmer & Fingerless Gloves...

Here's another newbie set from my Ginger Spice Tea Cake yarn - a Ponytail Ear Warmer/Headband and a set of Fingerless Gloves.

I really got a lot of "bang for my buck" with the purchase of 2 Ginger Spice Tea Cakes by Caron from Michael's (plus, I bought them while they were on sale)!!!  I made all of the following from the 2 Cakes of yarn:
  • A Hooded Neck Cowl; the pattern can be found here.    
  • A Neck Warmer and a Hat; the pattern can be found here. 
  • And, now a Ponytail Ear Warmer and Fingerless Gloves...

Ginger Spice Ponytail Ear Warmer & Fingerless Gloves


Ginger Spice Ponytail Ear Warmer & Fingerless Gloves Pattern

Difficulty Level:  Easy

Size:  This will fit an average woman's head and hands; but as always, please test as you go to make sure you get your fit...

Materials:
--8mm and 10mm hooks
--Caron Tea Cakes in Ginger Spice or #6 Super Bulky yarn (approximately 1/2 Cake)
--ponytail holder
--2 stitch markers
--tapestry needle for weaving

U.S. Stitch Abbreviations:
Ch:  chain
Sl st:  slip stitch
St:  stitch(es)
SC:  single crochet
SC2tog:  single crochet 2 stitches together (decrease)
SCFP:  single crochet front post
SCBP:  single crochet back post
BLO:  back loops only
FO:  fasten off
Rep:  repeat
Sk:  skip

Special Note:  this Ponytail Ear Warmer is approx. 7" wide; if you do not desire yours to be this wide, then do not do the increase in #5 and #6.  But, work Rows 5-35 with 8 SC stitches.  Also, this fits my head comfortably (I have a 21" head circumference), but you may want to test this around your head before you finish off to make sure it is the right fit for your head!!!

Directions:
Ponytail Ear Warmer:
1.  With a 10.0mm hook, work 12 SC around the ponytail holder.  Sl st join and Ch1.  (12)
2.  2 SC in each st around.  Sl st join and Ch1.  (24)
3.  1 SC in each st around.  Sl st join and Ch1.  (24)
4.  1 SC in each of the first 8 st.  Ch1 and turn.  (8)

Stitch Marker Placement:
From the 8th stitch you just made in #4, count over and place stitch marker in the 5th unworked stitch (from #3).  Then count over 7 stitches and place the 2nd stitch marker.   (The 8 stitches from stitch marker to stitch marker will be joined with the last row)

5.  2 SC in the first st, 1 SC in the next 6 st and 2 SC in the last st.  Ch1 and turn.  (10)
6.  2 SC in the first st, 1 SC in the next 8 st and 2 SC in the last st.  Ch1 and turn.  (12)
7.  1 SC in each st across.  Ch1 and turn.  (12)
8-33.  Repeat #7.  (12)
34.  SC2tog, 1 SC in the next 8 st and SC2tog.  Ch1 and turn.  (10)
35.  SC2tog, 1 SC in the next 6 st and SC2tog.  FO and leave a long tail.  (8)

Joining:
1.  With the long tail, you will whipstitch the 8 stitches from Row 35 to the 8 stitches of Round 3 from stitch marker to stitch marker.

And, that's it!!!  A super easy and bulky Ponytail Ear Warmer for this Fall and Winter to keep your ears toasty warm and your ponytail in place.

Fingerless Gloves:
(make 2)

You will make a rectangular-shaped piece.

1.  With a 10.0mm hook, Ch19.  SC in 2nd ch from hook and across.  Ch1 and turn.  (18)
2.  1 SC in each st across.  Ch1 and turn.  (18)
3-8.  1 SC in BLO of each st across.  Ch1 and turn.  (18)
9.  Switch to an 8.0mm hook.  Working in both loops now and in the remaining rows, 1 SC in each st across.  Ch1 and turn.  (18)
10-15.  1 SC in each st across.  Ch1 and turn.  (18)
16.  For this last row, I worked SCFP and then SCBP in each st across.  FO.  Leave a long tail.

 Assembling: 
You have completed a rectangular-shaped piece.  Now, you will fold your piece over from left to right (or right to left).  Whipstitch to close seam.  But, remember to leave an opening for your thumb.  I whipstitched 1" down the seam, then I skipped over 1 and 1/2" for my thumb opening and then continued to whipstitch the remaining seam.  Weaved ends.

Here's a collage picture of all 5 projects that I completed with the 2 Caron Teak Cakes:


Happy Crocheting


Legal:
--don't claim my pattern/design as your own
--don't use my pics as your own
--okay to make and sale your finished work
--don't share my pattern electronically or in print format (without my consent) but provide a link to my blog

Tuesday, October 24, 2017

Ginger Spice Neck Warmer & Hat

I worked up this "Ginger Spice Neck Warmer and Hat" yesterday.  It was a quick project using super bulky yarn and a 10mm hook.  It's very stylish/fashionable, thick and sure to keep my neck and ears toasty warm in the months ahead.

Ginger Spice Neck Warmer and Hat
Ginger Spice Neck Warmer and Hat Pattern

Difficulty Level:  Easy

Size: 
Hat:  Adult Woman's Head 
Neck Warmer:  5 1/2" wide x 23"long 

Gauge:  I did not gauge this pattern 

Materials:
--10.0mm hook
--1/2 Cake of the Caron Tea Cakes in Ginger Spice 
--(2) 1" buttons
--tapestry needle for weaving

U.S. Stitch Abbreviations:
Ch:  chain
Sl st:  slip stitch
St:  stitch(es)
SC:  single crochet 
DC:  double crochet
HDC: half double crochet
BLO:  back loops only 
MR:  magic ring
FO:  fasten off 
Rep:  repeat 

Special Stitch:
1.  Crossed DC Stitch:  Skip first stitch and work a DC in the next stitch.  Then go back to skipped stitch and work DC stitch.  Repeat.  

Note:  For the Neck Warmer, you will be working in the 3rd stitch that is created from using the HDC  stitch.  By doing this, you will create this beautiful, textured Neck Warmer.

Directions:

Neck Warmer:
1.  Ch51.  HDC in 2nd ch from hook and across.  Ch1 and turn.  (50)
2.  HDC in the third loop of each st across.  Ch1 and turn.  (50)
3-8.  Rep #2.  (50)
FO and weave ends.  

Buttons:
1.  Attach the 2 buttons on the same end of Row 1.  See below pic.  You will then use the stitches on the opposite end, vertically, to join.
Hat: 
1.  8 DC in MR.  Sl st join and Ch1.  (8) 
2.  2 DC in each st around.  Sl st join and Ch1.  (16)
3.  2 DC in first st; 1 DC in next.  Rep around.  Sl st join and Ch1.  (24) 
4.  2 DC in first st; 1 DC in next 2 st.  Rep around.  Sl st join and Ch1.  (32)
5-7.  Crossed DC around.  Sl st join and Ch1.  (32) 
8-9.  SC in BLO of each st around.  Sl st join and Ch1.  (32) 
10.  2 SC in BLO of first st; 1 SC in BLO of next 3 st.  Rep around.  Sl at join and Ch1.  (40) 
11.  2 SC in BLO of first st; 1 SC in BLO of next 4 st.  Rep around.  Sl at join and Ch1.  (48) 
12.  2 SC in BLO of first st; 1 SC in BLO of next 5 st.  Rep around.  Sl at join.  FO and weave ends.  (56) 
Happy Crocheting.... 

Legal:
--don't claim my pattern/design as your own
--don't use my pics as your own
--okay to make and sale your finished work
--don't share my pattern electronically or in print format (without my consent) but provide a link to my blog

Sunday, October 22, 2017

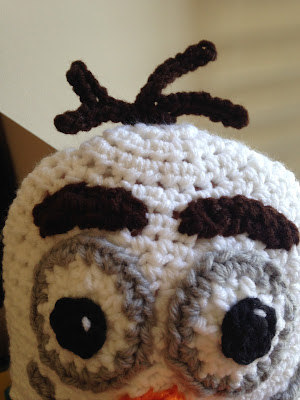
Kid's Olaf Hat

I completed this Kid's Olaf Hat for a customer.  This was a fun project since I'm a huge "Frozen" fan. Pattern can easily be adjusted to make smaller or bigger by simply knowing the head circumference.

Head circumference divided by 3.14 = diameter
Example 18" divided by 3.14 = 5.73

So, you will make increase rounds until the diameter of your circle is 5.5-6.0" across.  Then you will stop increasing, and just continue working rounds until you have the length you want.  By knowing head circumference, you can make sure you size your hat correctly!!!

Kid's Olaf Hat


Olaf Hat Pattern

Difficulty Level:  Easy 

Size:  Hat:  6" diameter x 6 1/2" length; 18" - 20" head circumference
(This is sized for 2-4 year olds but can easily be adjusted for any age.) 

Materials:
--5.0mm and 6.0mm hooks
--#4 worsted weight yarn in white, brown, orange, black and gray 
--small amount of polyfil to stuff nose
--tapestry needle for weaving 

U.S. Stitch Abbreviations:
Ch:  chain
Sl st:  slip stitch
St:  stitch(es)
SC:  single crochet
SC2tog:  single crochet 2 stitches together 
HDC: half double crochet 
MR:  magic ring
FO:  fasten off 
Rep:  repeat

Directions:
Hat:
1.  With 6.0mm hook and white yarn, 8 HDC into MR.  Sl st join and Ch1.  (8)
2.  2 HDC in each st around.  Sl st join and Ch1.  (16)
3.  2 HDC in first st, 1 HDC in next st.  Rep around.  Sl st join and Ch1.  (24)
4.  2 HDC in first st, 1 HDC in next 2 st.  Rep around.  Sl st join and Ch1.  (32) 
5.  2 HDC in first st, 1 HDC in next 3 st.  Rep around.  Sl st join and Ch1.  (40)
6.  2 HDC in first st, 1 HDC in next 4 st.  Rep around.  Sl st join and Ch1.  (48) 
(if you need to make this for an older child, then you will need to continue with increase rows; otherwise continue with #7.)
7.  1 HDC in each st around.  Sl st join and Ch1.  (48)
8-14.  Repeat #7. At the end of round 14, Ch1 and turn.  (48)
(You will not FO yarn.  You will now make the Ear Flaps.) 

Ear Flaps (make 2):
1.  1 HDC in each of the first 10 st.  Ch1 and turn.  (10)
2.  1 HDC in each st across.  Ch1 and turn.  (10)
3.  HDC2tog, 1 HDC in next 6 st, HDC2tog.  Ch1 and turn.  (8)
4.  1 HDC in each st across.  Ch1 and turn.  (8)
5.  HDC2tog, 1 HDC in next 4 st, HDC2tog.  Ch1 and turn.  (6)
6.  1 HDC in each st across.  Ch1 and turn.  (6)
7.  HDC2tog, 1 HDC in next 2 st, HDC2tog.  Ch1 and turn.  (4)
8.  1 HDC in each st across.  FO.  Weave ends.  (4)

1.  Now, for the second Ear Flap, count over to the 15th st and join yarn with sl st and Ch1.  1 HDC in same st as Ch1 and into the next 9 st.  Ch1 and turn.  (10)
2-8.  Repeat as above for first Ear Flap.  At the end of Row 8, FO and weave ends.

Braids (make 2):
1.  I cut (10) 15" long strips of brown yarn for each side of the hat.  I weaved into the center stitch of the last row of the hat.  I then divided the yarn into 3 groups and braided.  I used a small strip of yarn to tie into a double knot to secure the braid.  Each braid measures approximately 7 1/2" long.

Eyes (make 2):
1.  With 6.0mm hook and white yarn, 8 HDC into MR.  Sl st join and Ch1.  (8)
2.  2 HDC into each st around.  Before completing last st, FO white yarn and join gray yarn.  Sl st join and Ch1.  (16). 
3.  With gray yarn, 2 SC in first st, 1 SC in next st.  Rep around.  Sl st join and FO.  Leave tail for attaching.  (24)
Eye Center:
1.  With 6.0mm hook and black yarn, 6 SC into MR.  FO and leave tail for attaching.  Embroider white dot.
2.  Attach eye center to the center of the eye.

Eyebrows (make 2):
1.  With 5.0mm hook and brown yarn, Ch9.  HDC in 2nd ch from hook and next ch.   SC in each of the remaining ch.  FO.  Leave tail for attaching. 

Nose:
1.  With 5.0mm hook and orange yarn, 2 SC into MR.  Sl st join and Ch1.  (2)
2.  2 SC in each st around.  Sl st join and Ch1.  (4)
3.  2 SC in first st, 1 SC in next st.  Rep around.  Sl st join and Ch1.  (6) 
4.  2 SC in first st, 1 SC in next st.  Rep around.  Sl st join and Ch1.  (9)
5.  2 SC in first st, 1 SC in next 2 st.  Rep around.  Sl st join and Ch1.  (12)
6-10.  1 SC in each st around.  Sl st join and Ch1.  At the end of Round 10, FO and leave tail for attaching to hat.  (12)

Mouth:
1.  With 6.0mm hook and gray yarn, Ch24.  FO.  Leave long tail to attach to hat.  (see pics for help with placement)

Teeth:
1.  With 6.0mm hook and white yarn, with sl st and Ch1 into the 5th st from the right ear flap.  SC in same st as Ch1.  SC in the next 5 st.  Ch1 and turn.  (6) 
2.  1 SC in each st across.  Ch1 and turn.  (6)
3.  SC2tog, 1 SC in next 2 st, SC2tog.  FO and weave ends.  (4)

Hair Spike: 
1.  With 5.0mm hook and brown yarn, Ch8.  Sl st in 2nd ch from hook and into next 6 ch.
2.  Ch9.  Sl st in 2nd ch from hook and into next 7 ch.
3.  Ch8.  Sl st in 2nd ch from hook and into next 2 ch.  Ch4.  Sl st in 2nd ch from hook and into next 2 ch.  Then continue to sl st into the remaining 4 ch.  
(Your hair spike is made in one piece...)
                                     Happy Crocheting... 

Legal: 
--don't claim my pattern as your own
--don't use my pics as your own
--don't share my pattern electronically or in print format but provide a link to my blog 
--okay to make and sale any of my patterns; I just ask to be given credit as the designer 
My Little Pony - Pinkie Pie - Hat and Scarf Set

A super cute "My Little Pony - Pinkie Pie" Hat and Scarf set for little girls, ages 2-4.  But, this pattern can be easily adjusted for all ages.  I think the curlicues make this hat so adorable. 

My Little Pony - Pinkie Pie
My Little Pony - Pinkie Pie Hat and Scarf Set

Difficulty Level:  Intermediate 

Size:  
--Hat:  6" diameter x 6 1/2" length; 18"- 20" head circumference
--Scarf:  4" wide x 40" long 
(This is sized for 2-4 year olds but can easily be adjusted for any age.) 

Materials:
--6.0mm hook for hat and scarf
--3.0mm and 4.0mm hooks for eyes and Cutie mark (on hat)
--#4 worsted weight yarn in light pink, dark pink, black, white, blue and yellow
--tapestry needle for weaving 

U.S. Stitch Abbreviations:
Ch:  chain
Sl st:  slip stitch
St:  stitch(es)
SC:  single crochet
HDC:  half double crochet 
HDC2tog:  half double crochet 2 stitches together (decrease)
FPHDC:  front post half double crochet 
BPFHC:  back post half double crochet
MR:  magic ring
FO:  fasten off
Rep:  repeat 
Sk:  skip

Directions:
Hat:
1.  With 6.0mm hook and light pink yarn, 8 HDC into MR.  Sl st join and Ch1.  (8)
2.  2 HDC in each st around.  Sl st join and Ch1.  (16)
3.  2 HDC in first st, 1 HDC in next st.  Rep around.  Sl st join and Ch1.  (24)
4.  2 HDC in first st, 1 HDC in next 2 st.  Rep around.  Sl st join and Ch1.  (32) 
5.  2 HDC in first st, 1 HDC in next 3 st.  Rep around.  Sl st join and Ch1.  (40)
6.  2 HDC in first st, 1 HDC in next 4 st.  Rep around.  Sl st join and Ch1.  (48) 
(if you need to make this for an older child, then you will need to continue with increase rows; otherwise continue with #7.)
7.  1 HDC in each st around.  Sl st join and Ch1.  (48)
8-14.  Repeat #7. At the end of round 14, Ch1 and turn.  (48)
(You will not FO yarn.  You will now make the Ear Flaps.  If you do not want the Ear Flaps, then continue on to the border.) 

Ear Flaps (optional):
1.  1 HDC in each of the first 10 st.  Ch1 and turn.  (10)
2.  1 HDC in each st across.  Ch1 and turn.  (10)
3.  HDC2tog, 1 HDC in next 6 st, HDC2tog.  Ch1 and turn.  (8)
4.  1 HDC in each st across.  Ch1 and turn.  (8)
5.  HDC2tog, 1 HDC in next 4 st, HDC2tog.  Ch1 and turn.  (6)
6.  1 HDC in each st across.  Ch1 and turn.  (6)
7.  HDC2tog, 1 HDC in next 2 st, HDC2tog.  Ch1 and turn.  (4)
8.  1 HDC in each st across.  FO.  Weave ends.  (4)

1.  Now, for the second Ear Flap, count over to the 15th st and join yarn with sl st and Ch1.  1 HDC in same st as Ch1 and into the next 9 st.  Ch1 and turn.  (10)
2-8.  Repeat as above for first Ear Flap.  At the end of Row 8, FO and weave ends.

Border:
1.  With 6.0mm hook and dark pink yarn, join yarn with sl st and Ch1 into any st.  SC in each st around hat.  FO and weave ends. 

Ears (make 2):
1.  With 6.0mm hook and light pink yarn, 6 SC into MR.  Sl st join and Ch1.  (6)
2.  2 SC in first st, 1 SC in next st.  Rep around.  Sl st join and Ch1.  (9)
3.  2 SC in first st, 1 SC in next 2 st.  Rep around.  Sl st join and Ch1.  (12)
4.  2 SC in first st, 1 SC in next 3 st.  Rep around.  Sl st join and Ch1.  (15)
5-8.  1 SC in each st around.  Sl st join and Ch1.  At the end of Round 8, FO and leave a long tail for attaching to hat.  

Eyes (make 2):
1.  With 4.0mm hook and black yarn, 6 SC into MR.  Sl st join and Ch1.  (6)
2.  2 SC in each st around.  Before completing last st, FO black yarn and join light blue yarn.  Sl st join and Ch1.  (12)
3.  With light blue yarn, 2 SC in each st around.  Before completing last st, FO light blue yarn and join white yarn.  Sl st join and Ch1.  (24)
4.  With white yarn, 1 SC in the first 4 st.  1 HDC in the next 2 st.  2 DC in the next st.  1 DC in the next st.  1 HDC in the next 2 st.  1 SC in the next 4 st.  1 HDC in the next 2 st.  1 DC in the next st.  2 DC in the next st.  1 HDC in the next 2 st.  1 SC in the next 4 st.  (26)
5.   1 SC in the first 4 st.  1 HDC in the next 2 st.  2 DC in the next 2 st.  1 DC in the next st.  1 HDC in the next 2 st.  1 SC in the next 4 st.  1 HDC in the next 2 st.  1 DC in the next st.  2 DC in the next 2 st.  1 HDC in the next 2 st.  1 SC in the next 4 st.  FO white yarn.  (30)
For Border:
The eyes are oval-shaped.  For the border you will work from corner to corner.  
6.  Join black yarn with sl st and Ch1 at the corner of Round 5.  SC in same st as Ch1 and into the next 16 st.  FO and leave tail for attaching.  See pics for help.  (17) 
With black yarn embroider 3 eyelashes.  With white yarn embroider 2 dots into the center of the eyes (see pics).


Cutie Mark Applique (make 6:  4 blue and 2 yellow): 
1.  With 3.0mm hook and yarn, 6 SC into MR.  FO and leave tail for attaching.

Attaching Cutie Mark:
The Cutie Mark is attached to each side of the Ear Flaps. 1 yellow and 2 blue on each side of the flaps.  Embroider a string to each mark.  For the yellow, embroider a small piece of blue yarn to look like a string tied; for the blue, embroider a small piece of yellow yarn to look like a string tied.
Extra Small Curlicues:
(make 2:  pink)
1.  With 6.0mm hook, Ch20.  2 HDC in 2nd ch from hook and into each ch across.  FO.  Leave tail for attaching to top of hat.  (38)

Small Curlicues:
(make 2:  pink)
1.  With 6.0mm hook, Ch25.  2 HDC in 2nd ch from hook and into each ch across.  FO.  Leave tail for attaching to top of hat.  (48) 

Large Curlicues: 
(make 6:  pink)
1.  With 6.0mm hook, Ch50.  2 HDC in 2nd ch from hook and into each ch across.  FO.  Leave tail for attaching to top of hat.  (98)

Scarf:
1.  With 6.0mm hook and pink yarn, Ch124.  HDC in 2nd ch from hook and across.  Ch1 and turn.  (123)
2-7.  HDC in first st, *FPHDC in next st, BPHDC in next st.*  Rep from * to * in each st across, placing HDC in last st.  (123)
8.  HDC in each st across.  FO and weave ends.
Border:
9.  With dark pink, join yarn with sl st and Ch1 into any st.  SC in same st as Ch1 and into each st around the scarf.  Sl st join to first st and FO.  Weave ends.  

Fringe:
1.  Using the dark pink yarn, I made 4"- 5" long strips.  I added 2 strips to each stitch on the ends and tied into a double knot which made the fringe approximately 2 - 2 1/4" long.  

Cutie Mark Applique for Scarf (make 3:  1 yellow and 2 blue)
1.  With 6.0mm hook, 6 SC into MR.  Sl st join.  Ch1.  (6)
2.  2 SC in each st around.  Sl st join and FO.  Leave tail for attaching.  (12)
3.  Embroider a string to each mark.  For the yellow, embroider a small piece of blue yarn to look like a string tied; for the blue, embroider a small piece of yellow yarn to look like a string tied.

Note:  I only made the Cutie Mark for one end of the scarf.  You can make it for both ends, if you want.  

Here's a picture of Twilight Sparkle with Pinkie Pie...if you would like to make the hat and scarf for Twilight Sparkle, click HERE.


 Happy Crocheting...

Legal: 
--don't claim my pattern as your own
--don't use my pics as your own
--don't share my pattern electronically or in print format but provide a link to my blog 
--okay to make and sale any of my patterns; I just ask to be given credit as the designer 


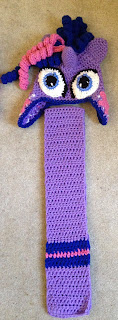
My Little Pony - Twilight Sparkle - Hat and Scarf Set

My Little Pony - Twilight Sparkle - Hat and Scarf Set for little girls.  A fun project that little girls will surely love.

My Little Pony - Twilight Sparkle

My Little Pony - Twilight Sparkle - Hat and Scarf Set

Difficulty Level:  Easy

Size:  
--Hat:  6" diameter x 6 1/2" length; 18" - 20" head circumference
--Scarf:  4" wide x 40 1/2" long 
(This is sized for 2-4 year olds but can easily be adjusted for any age.) 

Gauge:  12 HDC stitches x 8 rows = 4"

Materials:
--6.0mm hook for hat and scarf
--3.0mm, 4.0mm and 5.0mm hooks for features
--#4 worsted weight yarn in light purple, dark pink, black, white, light blue and dark blue 
--very small amount of polyfil to stuff horn 
--tapestry needle for weaving 

U.S. Stitch Abbreviations:
Ch:  chain
Sl st:  slip stitch
St:  stitch(es)
SC:  single crochet
HDC:  half double crochet 
HDC2tog:  half double crochet 2 stitches together (decrease)
MR:  magic ring
FO:  fasten off
Rep:  repeat 
Sk:  skip

Directions:
Hat:
1.  With 6.0mm hook and purple yarn, 8 HDC into MR.  Sl st join and Ch1.  (8)
2.  2 HDC in each st around.  Sl st join and Ch1.  (16)
3.  2 HDC in first st, 1 HDC in next st.  Rep around.  Sl st join and Ch1.  (24)
4.  2 HDC in first st, 1 HDC in next 2 st.  Rep around.  Sl st join and Ch1.  (32) 
5.  2 HDC in first st, 1 HDC in next 3 st.  Rep around.  Sl st join and Ch1.  (40)
6.  2 HDC in first st, 1 HDC in next 4 st.  Rep around.  Sl st join and Ch1.  (48) 
(if you need to make this for an older child, then you will need to continue with increase rows; otherwise continue with #7.)
7.  1 HDC in each st around.  Sl st join and Ch1.  (48)
8-14.  Repeat #7. At the end of round 14, Ch1 and turn.  (48)
(You will not FO yarn.  You will now make the Ear Flaps.  If you do not want the Ear Flaps, then continue on to the border.) 

Ear Flaps (optional):
1.  1 HDC in each of the first 10 st.  Ch1 and turn.  (10)
2.  1 HDC in each st across.  Ch1 and turn.  (10)
3.  HDC2tog, 1 HDC in next 6 st, HDC2tog.  Ch1 and turn.  (8)
4.  1 HDC in each st across.  Ch1 and turn.  (8)
5.  HDC2tog, 1 HDC in next 4 st, HDC2tog.  Ch1 and turn.  (6)
6.  1 HDC in each st across.  Ch1 and turn.  (6)
7.  HDC2tog, 1 HDC in next 2 st, HDC2tog.  Ch1 and turn.  (4)
8.  1 HDC in each st across.  FO.  Weave ends.  (4)

1.  Now, for the second Ear Flap, count over to the 15th st and join yarn with sl st and Ch1.  1 HDC in same st as Ch1 and into the next 9 st.  Ch1 and turn.  (10)
2-8.  Repeat as above for first Ear Flap.  At the end of Row 8, FO and weave ends.

Border:
1.  With 6.0mm hook and dark blue yarn, join yarn with sl st and Ch1 into any st.  SC in each st around hat.  FO and weave ends. 

Ears (make 2):
1.  With 6.0mm hook and purple yarn, 6 SC into MR.  Sl st join and Ch1.  (6)
2.  2 SC in first st, 1 SC in next st.  Rep around.  Sl st join and Ch1.  (9)
3.  2 SC in first st, 1 SC in next 2 st.  Rep around.  Sl st join and Ch1.  (12)
4.  2 SC in first st, 1 SC in next 3 st.  Rep around.  Sl st join and Ch1.  (15)
5-8.  1 SC in each st around.  Sl st join and Ch1.  At the end of Round 8, FO and leave a long tail for attaching to hat.  

Eyes (make 2):
1.  With 4.0mm hook and black yarn, 6 SC into MR.  Sl st join and Ch1.  (6)
2.  2 SC in each st around.  Before completing last st, FO black yarn and join light blue yarn.  Sl st join and Ch1.  (12)
3.  With light blue yarn, 2 SC in each st around.  Before completing last st, FO light blue yarn and join white yarn.  Sl st join and Ch1.  (24)
4.  With white yarn, 1 SC in the first 4 st.  1 HDC in the next 2 st.  2 DC in the next st.  1 DC in the next st.  1 HDC in the next 2 st.  1 SC in the next 4 st.  1 HDC in the next 2 st.  1 DC in the next st.  2 DC in the next st.  1 HDC in the next 2 st.  1 SC in the next 4 st.  (26)
5.   1 SC in the first 4 st.  1 HDC in the next 2 st.  2 DC in the next 2 st.  1 DC in the next st.  1 HDC in the next 2 st.  1 SC in the next 4 st.  1 HDC in the next 2 st.  1 DC in the next st.  2 DC in the next 2 st.  1 HDC in the next 2 st.  1 SC in the next 4 st.  FO white yarn.  (30)
For Border:
The eyes are oval-shaped.  For the border you will work from corner to corner.  
6.  Join black yarn with sl st and Ch1 at the corner of Round 5.  SC in same st as Ch1 and into the next 16 st.  FO and leave tail for attaching.  See pics for help.  (17) 

7.  With white yarn embroider 2 dots into the center of the eyes (see pics).

Cutie Mark Applique (make 2): 
1.  With 3.0mm hook and pink yarn, 6 SC into MR.  Sl st join and Ch1.  (6)
2.  2 SC in each st around.  Sl st join and Ch1.  (12)
3.  2 SC in first st, 1 SC in next st.  Rep around.  Sl st join and Ch5.  (18)
4.  *HDC into 2nd ch from hook and next 3 ch.  Sk next st of Round 3.  Sl st into the next st.  Ch4.  SC in 2nd ch from hook and next 2 ch.  Sk next st of Round 3.  Sl st into the next st.  Ch4.  SC in 2nd ch from hook and next 2 ch.  Sk next st of Round 3.  Sl st into the next st.*  Ch5.  Rep from * to *.  Sl st to first st.  FO.  Leave tail for attaching.  

Attaching Cutie Mark:
The Cutie Mark is attached to each side of the Ear Flaps.  I then used white yarn and embroidered little x shapes and lines.  

Horn:
1.  With 4.0mm hook and purple yarn, 3 SC into MR.  Sl st join and Ch1.  (3)
2.  2 SC in each st around.  Sl st join and Ch1.  (6) 
3.  2 SC in first st, 1 SC in next st.  Rep around.  Sl st join and Ch1.  (9)
4.  2 SC in first st, 1 SC in next 2 st.  Rep around.  Sl st join and Ch1.  (12)
5.  2 SC in first st, 1 SC in next 11 st.  Sl st join and Ch1.  (13)
6.  2 SC in first st, 1 SC in next 12 st.  Sl st join and Ch1.  (14)
7.  2 SC in first st, 1 SC in next 13 st.  Sl st join and Ch1.  (15)
8.  2 SC in first st, 1 SC in next 14 st.  Sl st join and Ch1.  (16)
9.  2 SC in first st, 1 SC in next 15 st.  Sl st join and Ch1.  (17)
10.  2 SC in first st, 1 SC in next 16 st.  Sl st join and Ch1.  (18)
11.  2 SC in first st, 1 SC in next 17 st.  Sl st join and Ch1.  (19)
12.  2 SC in first st, 1 SC in next 18 st.  Sl st join and FO.  Leave tail for attaching to hat.  (20)

Small Curlicues:
(make 3:  2 blue and 1 pink)
1.  With 6.0mm hook, Ch25.  2 HDC in 2nd ch from hook and into each ch across.  FO.  Leave tail for attaching to top of hat.  (48) 

Large Curlicues: 
(make 5:  4 blue and 1 pink)
1.  With 6.0mm hook, Ch50.  2 HDC in 2nd ch from hook and into each ch across.  FO.  Leave tail for attaching to top of hat.  (98)

Scarf:
1.  With 6.0mm hook and purple yarn, Ch13.  HDC in 2nd ch from hook and across.  Ch1 and turn.  (12)
2-10.  1 HDC in each st across.  Ch1 and turn.  At the end of Row 10, switch to dark blue yarn.  Ch1.  (12)
11-12.  With dark blue yarn, 1 HDC in each st across.  At the end of Row 12, switch to pink yarn.  Ch1.  (12)
13.  With pink yarn, 1 HDC in each st across.  Switch back to dark blue yarn.  Turn and Ch1.  (12)
14-15.  With dark blue yarn, 1 HDC in each st across.  At the end of Row 12, switch back to purple yarn.  Turn.  Ch1.  (12)
16-81.  With purple yarn, 1 HDC in each st across.  Ch1 and turn.  At the end of Row 81, switch to dark blue yarn.  Ch1.  (12)
82-83.   With dark blue yarn, 1 HDC in each st across.  At the end of Row 83, switch to pink yarn.  Ch1.  (12)
84.  With pink yarn, 1 HDC in each st across.  Switch back to dark blue yarn.  Turn and Ch1.  (12)
85-86.  With dark blue yarn, 1 HDC in each st across.  At the end of Row 86, switch back to purple yarn.  Turn.  Ch1.  (12)
87-96.  With purple yarn, 1 HDC in each st across.  Ch1 and turn.  At the end of Row 97, FO and weave ends.   

Here's Pinkie Pie with Twilight Sparkle.  If you would like to make the Pinkie Pie Hat and Scarf, then you can find the pattern  HERE!!!

Happy Crocheting...
Legal: 
--don't claim my pattern as your own
--don't use my pics as your own
--don't share my pattern electronically or in print format but provide a link to my blog 
--okay to make and sale any of my patterns; I just ask to be given credit as the designer 


Thursday, October 19, 2017

Harry Potter Baby Set - Hat, Bib & Diaper Cover
My cousin, Brandi, is having "A Muggle Baby Shower" this weekend so I thought something Harry Potter was certainly fitting to make for their baby.

Being a huge Harry Potter fan, this was fun to make in the House of Griffindor colors.  Of course, I had to appliqué Harry's glasses and scar onto the Bib.

This was fun and fairly quick to make.  I used worsted weight yarn and a 6.0mm hook.  I used less than half a skein of each color.

Harry Potter Set - Hat, Bib & Diaper Cover

I made 2 Hats:  1 newborn size and the other 3-6 month size:

The Diaper Cover is 0-6 months size:

And, the cute Bib with appliqués:

Super cute set for any little Muggle to wear; for boys just omit the bow from the Hat: 
 
Happy Crocheting...

Difficulty Level:  Easy

Size:  Newborn - 6 months

Materials:
--6.0mm hook for Hat and Bib
--5.0mm hook for Diaper Cover
--#4 worsted weight yarn (I used gold and cardinal; and a very small amount of black yarn for appliqué )
--1/2" button for bib
--1" button for diaper cover
--tapestry needle for weaving

U.S. Stitch Abbreviations:
Ch:  chain
Sl st:  slip stitch
St:  stitch(es)
SC:  single crochet
HDC: half double crochet
DC:  double crochet
TC:  triple crochet
MR:  magic ring
FO:  fasten off
Rep:  repeat

Directions:
A.  Hat:
Newborn (11" head circumference):
1.  With Gold yarn and 6.0mm hook, 8 HDC into MR.  Sl st join and Ch1.  (8)
2.  2 HDC in each st around.  Sl st join and Ch1.  (16)
3.  2 HDC in first st, 1 HDC in next st.  Rep around.  Sl st join.  FO and switch to Cardinal yarn.  Ch1.  (24)
4.  With Cardinal yarn, 2 HDC in first st, 1 HDC in next 2 st.  Rep around.  Sl st join and Ch1.  (32)
5.  1 HDC in each st around.  Sl st join.  FO and switch back to Gold yarn.  Ch1.  (32)
6-7.  With Gold yarn, 1 HDC in each st around.  Sl st join and Ch1.  At the end of Round 7, FO and switch back to Cardinal yarn.  (32)
8-10.  With Cardinal yarn, 1 HDC in each st around.  Sl st join and Ch1.  At the end of Round 10, FO and switch back to Gold yarn.  (32)
11.  With Gold yarn, 1 SC in each st around.  Sl st join and FO.  Weave ends.

Pompom:
1.  With Gold and Cardinal yarn, wrap around your 4 fingers approximately 20 times.  Leave a long tail for attaching.  Tie in the center in a double knot.  Cut ends with scissors and trim to make even.
2.  Attach to top center.

Bow:
1.  With Gold yarn, 6 DC into MR.  Sl st into MR.  6 DC into MR.  Sl st into MR.  Pull tail to tighten center.  Wrap Yarn around the center 8-10 times.  FO.  Leave tail for attaching to hat.

To make the hat bigger:
Newborn - 3 months:
1.  After Round 4, you will complete 1 more increase Round.  2 HDC in first st, 1 HDC in next 3 st.  Sl st join and Ch1.  This will make the hat 4.5" diameter which will fit 14" head circumference.  Then just complete pattern same as above, alternating colors as you desire.  You will work 2 extra Rounds of HDC stitches plus the final Round of SC stitches for a total of 13 Rounds.

3 months - 6 months:
1.  After Round 4, you will complete 2 more increase Rounds.  2 HDC in first st, 1 HDC in next 3 st.  Sl st join and Ch1.  And, then 2 HDC in first st, 1 HDC in next 4 st.  Sl st join and Ch1. This will make the hat 5.5" diameter which will fit 16-18" head circumference.  Then just complete pattern same as above, alternating colors as you desire.  You will work 2 extra Rounds of HDC stitches plus the final Round of SC stitches for a total of 13 Rounds.

For the bow on the bigger hat, I completed as above, except I used TC stitches instead of D.C. Stitches.

B.  Bib:
For the Bib, I used my Paisley Bib pattern.  It can be found here.  The only changes I made were:
1.  I used a 6.0mm hook;
2.  I did not include the final border of picot stitches.

For the appliqué:
Glasses:
1.  Using black yarn, Ch15.  Sl st to first ch.  Ch4.  Place stitch marker in 4th ch.  Ch14.  Sl st into the 4th ch that has the stitch marker.  FO.  Leave long enough tail for attaching.

Scar:
1.  Using black yarn, Ch10.  FO.  Leave tail for attaching.  Shape as you attach it.

C.  Diaper Cover:
0 - 6 months:
This Adjustable Diaper Cover is not my pattern.  You can find the pattern for this simple cover here.

Happy Crocheting...

Legal:
--don't claim my pattern/design as your own
--don't use my pics as your own
--okay to make and sale your finished work
--don't share my pattern electronically or in print format (without my consent) but provide a link to my blog