Friday, February 21, 2020

Rainbow Scrappy Blanket

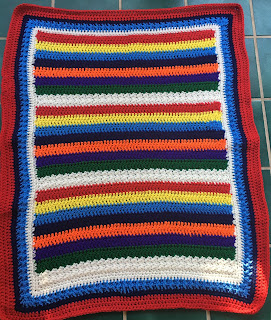
For an upcoming baby shower gift, I decided to use up some of my scrap yarn in an assortment of rainbow colors.

I used a 6.0mm hook and a mix of “I Love This Yarn” from Hobby Lobby and Red Heart Super Saver yarn.  I used HDC for the bright-colored rows with color changes after every second row.  For the white rows, I used a SC and DC in the same stitch, skip 1 stitch and repeat. I completed 4 white rows at the end of each of the color sequence rows.

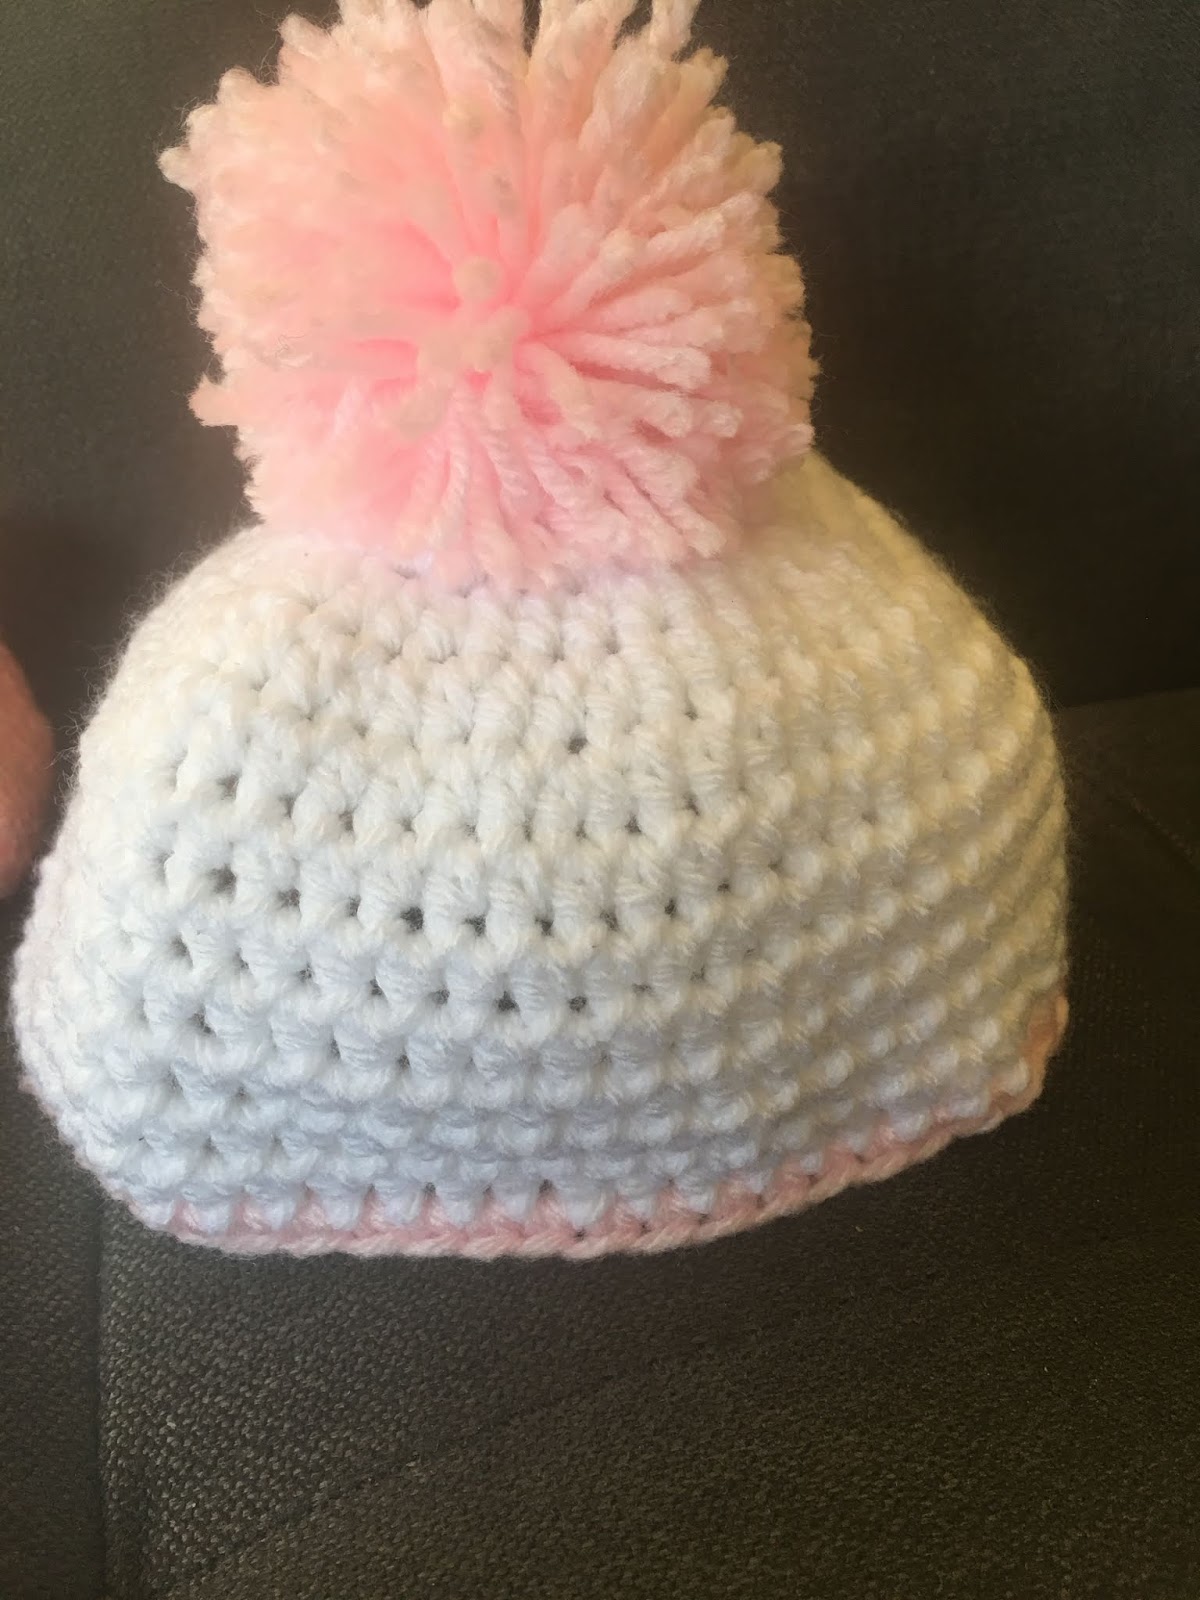
And, of course, I had to add a pair of cute booties and hat to complete the ensemble.  The hat was made using DC stitches.  I started with 10 DC in a MR and increased until the diameter I wanted.  I then completed 4 more rounds.  I then switched yarn and completed 2 SC rounds.

Overall, I’m very pleased with the completion of this project.

Again, this was a baby project I completed freestyle.  I did not write a pattern down but, as you can read from the details above, it was not a hard project to complete.

Rainbow Scrappy Blanket


Happy Crocheting...
Legal:
--don't use/claim my design as your own
--don't use/claim my pics as your own
--okay to make and sale your finished work
--don't share my pattern electronically or in print format (without prior consent) but provide a link to my blog

Social Media:
If you are on the following sites, let's connect and hook up...
  • Instagram:  Rilla2u
  • Pinterest:  Rilla2u
  • Twitter:  Rilla2u
  • Facebook:  /rilla.edwards 

Thursday, February 20, 2020

UNC Theme-Colored Blanket

Here is my UNC-themed color blanket with matching booties and hat for a baby shower gift.  This project was quick and easy to make.  I used worsted weight yarn for the hat, booties and blanket.  I used a bulky yarn for the border of the blanket.

This project was completed using basic stitches of SC, HDC and DC.  I made the poms by wrapping the yarn around my hand 35-50 times, tying a double knot at the center to secure and then cutting/trimming to form the pom.

I do not have a pattern for this project since I completely made this freestyle for a quick gift.  I can say for the blanket portion, I used *SC, HDC and DC in the same stitch, skipped two stitches* and repeated.  This creates a beautiful textured blanket.

UNC-Themed Colored Blanket


Happy Crocheting...
Legal:
--don't use/claim my design as your own
--don't use/claim my pics as your own
--okay to make and sale your finished work
--don't share my pattern electronically or in print format (without prior consent) but provide a link to my blog

Social Media:
If you are on the following sites, let's connect and hook up...
  • Instagram:  Rilla2u
  • Pinterest:  Rilla2u
  • Twitter:  Rilla2u
  • Facebook:  /rilla.edwards 


Cow Blanket...

Cow Blanket 
I made this super cute girlie Cow Blanket with the matching booties and hat for a baby shower gift.  I used worsted weight yarn for the blanket itself, booties and hat.  I used a bulky yarn for the cow applique.  

I found the cutest little cow buttons to add to the booties.  I'm not sure if the buttons came from Hobby Lobby or Wal-Mart.  

Everything was made using basic SC, HDC and DC stitches.  The pom for the hat was made by wrapping the pink yarn around four of my fingers 50 times, securing the center with a double knot and then cutting/trimming to form the pom.  

I do not have a pattern for this project.  I competed it freestyle. 


Happy Crocheting...
Legal:
--don't use/claim my design as your own
--don't use/claim my pics as your own
--okay to make and sale your finished work
--don't share my pattern electronically or in print format (without prior consent) but provide a link to my blog

Social Media:
If you are on the following sites, let's connect and hook up...
  • Instagram:  Rilla2u
  • Pinterest:  Rilla2u
  • Twitter:  Rilla2u
  • Facebook:  /rilla.edwards 


Sunday, February 9, 2020

Loofah...

Here’s a quick and easy project to make. Plus, so functional. You will use it all the time. It’s a 5” Loofah - the perfect item to pamper yourself or to gift to someone.

Loofah
Materials:
--5.0mm hook
--Peaches & Creme (or the like) yarn in your color of choice
--tapestry needle for weaving

U.S. Stitch Abbreviations:
Ch:  chain 
Sl St:  slip stitch
ESC:  extended single crochet
HDC:  half double crochet
FO:  fasten off

Special Stitch:
1.  Extended Single Crochet:  insert hook into chain or stitch, yarn over, come back thru the chain or stitch (now you will have 2 loops on the hook).  Yarn over and pull through one loop on the hook, yarn over and pull both loops through the hook.   

Directions:  
1.  Leave a long tail (1-2 yards) at the beginning for making the hanging loop at the end.  Ch 25.  Sl st into the first chain to form a circle.  Complete 24 ESC into the circle.  Sl st join to the first ESC and Ch 1.
2.  3 HDC into each st around.  Sl st join to first st and Ch1.
3.  3 HDC into each st around.  Sl st join to first st and Ch1.
4.  3 HDC into each st around.  Sl st join to first st and FO.  Weave ends.  

Assembly:
1.  Using your tapestry needle and a length of yarn, you will want to weave in and out of the first round of stitches made.  You will then pull the two ends of the yarn tight.  This will form the Loofah's shape.  Now, secure by tying the ends together several times in knots and then trim ends.  

Loop:
Now, you will join yarn in the yarn you left at the beginning.  Make 25-30 chains.  Then either SC or sl st across.  Attach the end to the base of the tail to form the loop.  Weave ends.  

That's it.  Quick, simple and easy. 
Happy Crocheting...
Legal:
--don't use/claim my design as your own
--don't use/claim my pics as your own
--okay to make and sale your finished work
--don't share my pattern electronically or in print format (without prior consent) but provide a link to my blog

Social Media:
If you are on the following sites, let's connect and hook up...
  • Instagram:  Rilla2u
  • Pinterest:  Rilla2u
  • Twitter:  Rilla2u
  • Facebook:  /rilla.edwards 


Sunday, February 2, 2020

Twin-Sized Baseball Blanket

My grandson, Gabriel, asked me to make him a “Baseball Blanket.”  He was getting a new bed and said he needed a new handmade blanket from his mamaw.

So, in the Fall of 2019, I started on his blanket with the colors Red, White and Blue for the base of the blanket itself.  I used Green and Tan for the field and on the border.  The yarn is Hobby Lobby’s, “I Love This Yarn.”  You can use your favorite yarn brand; just note the overall size may vary slightly.

Initially, I designed this pattern on a graph to complete as a graphgan but later decided to make the blanket first and then make the baseball and field as appliqués.  I will include my graph for those who want to complete this project as one piece.

I’m including general directions below in how I made this blanket.  I will follow-up with detailed instructions as soon as I have a chance to type it up.

Gabriel’s Baseball Blanket

Below is an upclose picture of the border.  I absolutely loved how it turned out.  I think it really adds to the beauty of this blanket.

Here is an upclose picture of the baseball and field.  I was extremely pleased with the end result of this.

And, a picture of the completed blanket.  It measures Twin-sized.  I debated back and forth on whether or not to add my baseball bat appliqué pattern to this blanket (you can find this freebie by typing “Play Ball” in my search engine).  Gabriel, however, was happy with it, as is.


Here is my original graph design.  Please note, 1 white and 1 blue section is not showing on the graph.  The pattern is as follows:
15 Rows Red
10 Rows White
15 Rows Blue 

You will repeat pattern a total of 4 times.  Or, to your desired size.  As you can see in the above picture, I appliquéd the field in the center of section 2 and section 3 of the red, white and blue.  

Here is how I made the appliqué sections:
1.  First, I crocheted the green portion of my field;
2.  Next,  I crocheted the brown portion; I made the bases and appliqued to create first, second, third and home base;
3.  Then, I crocheted the baseball;
4.  Now, I attached the brown section to the field then the baseball above;
5.  Last I attached to the center of the blanket.  

Border:
I used brown, white and green to create my border.  

Happy Crocheting...

Legal:
--don't use/claim my design as your own
--don't use/claim my pics as your own
--okay to make and sale your finished work
--don't share my pattern electronically or in print format (without prior consent) but provide a link to my blog

Social Media:
If you are on the following sites, let's connect and hook up...
  • Instagram:  Rilla2u
  • Pinterest:  Rilla2u
  • Twitter:  Rilla2u
  • Facebook:  /rilla.edwards