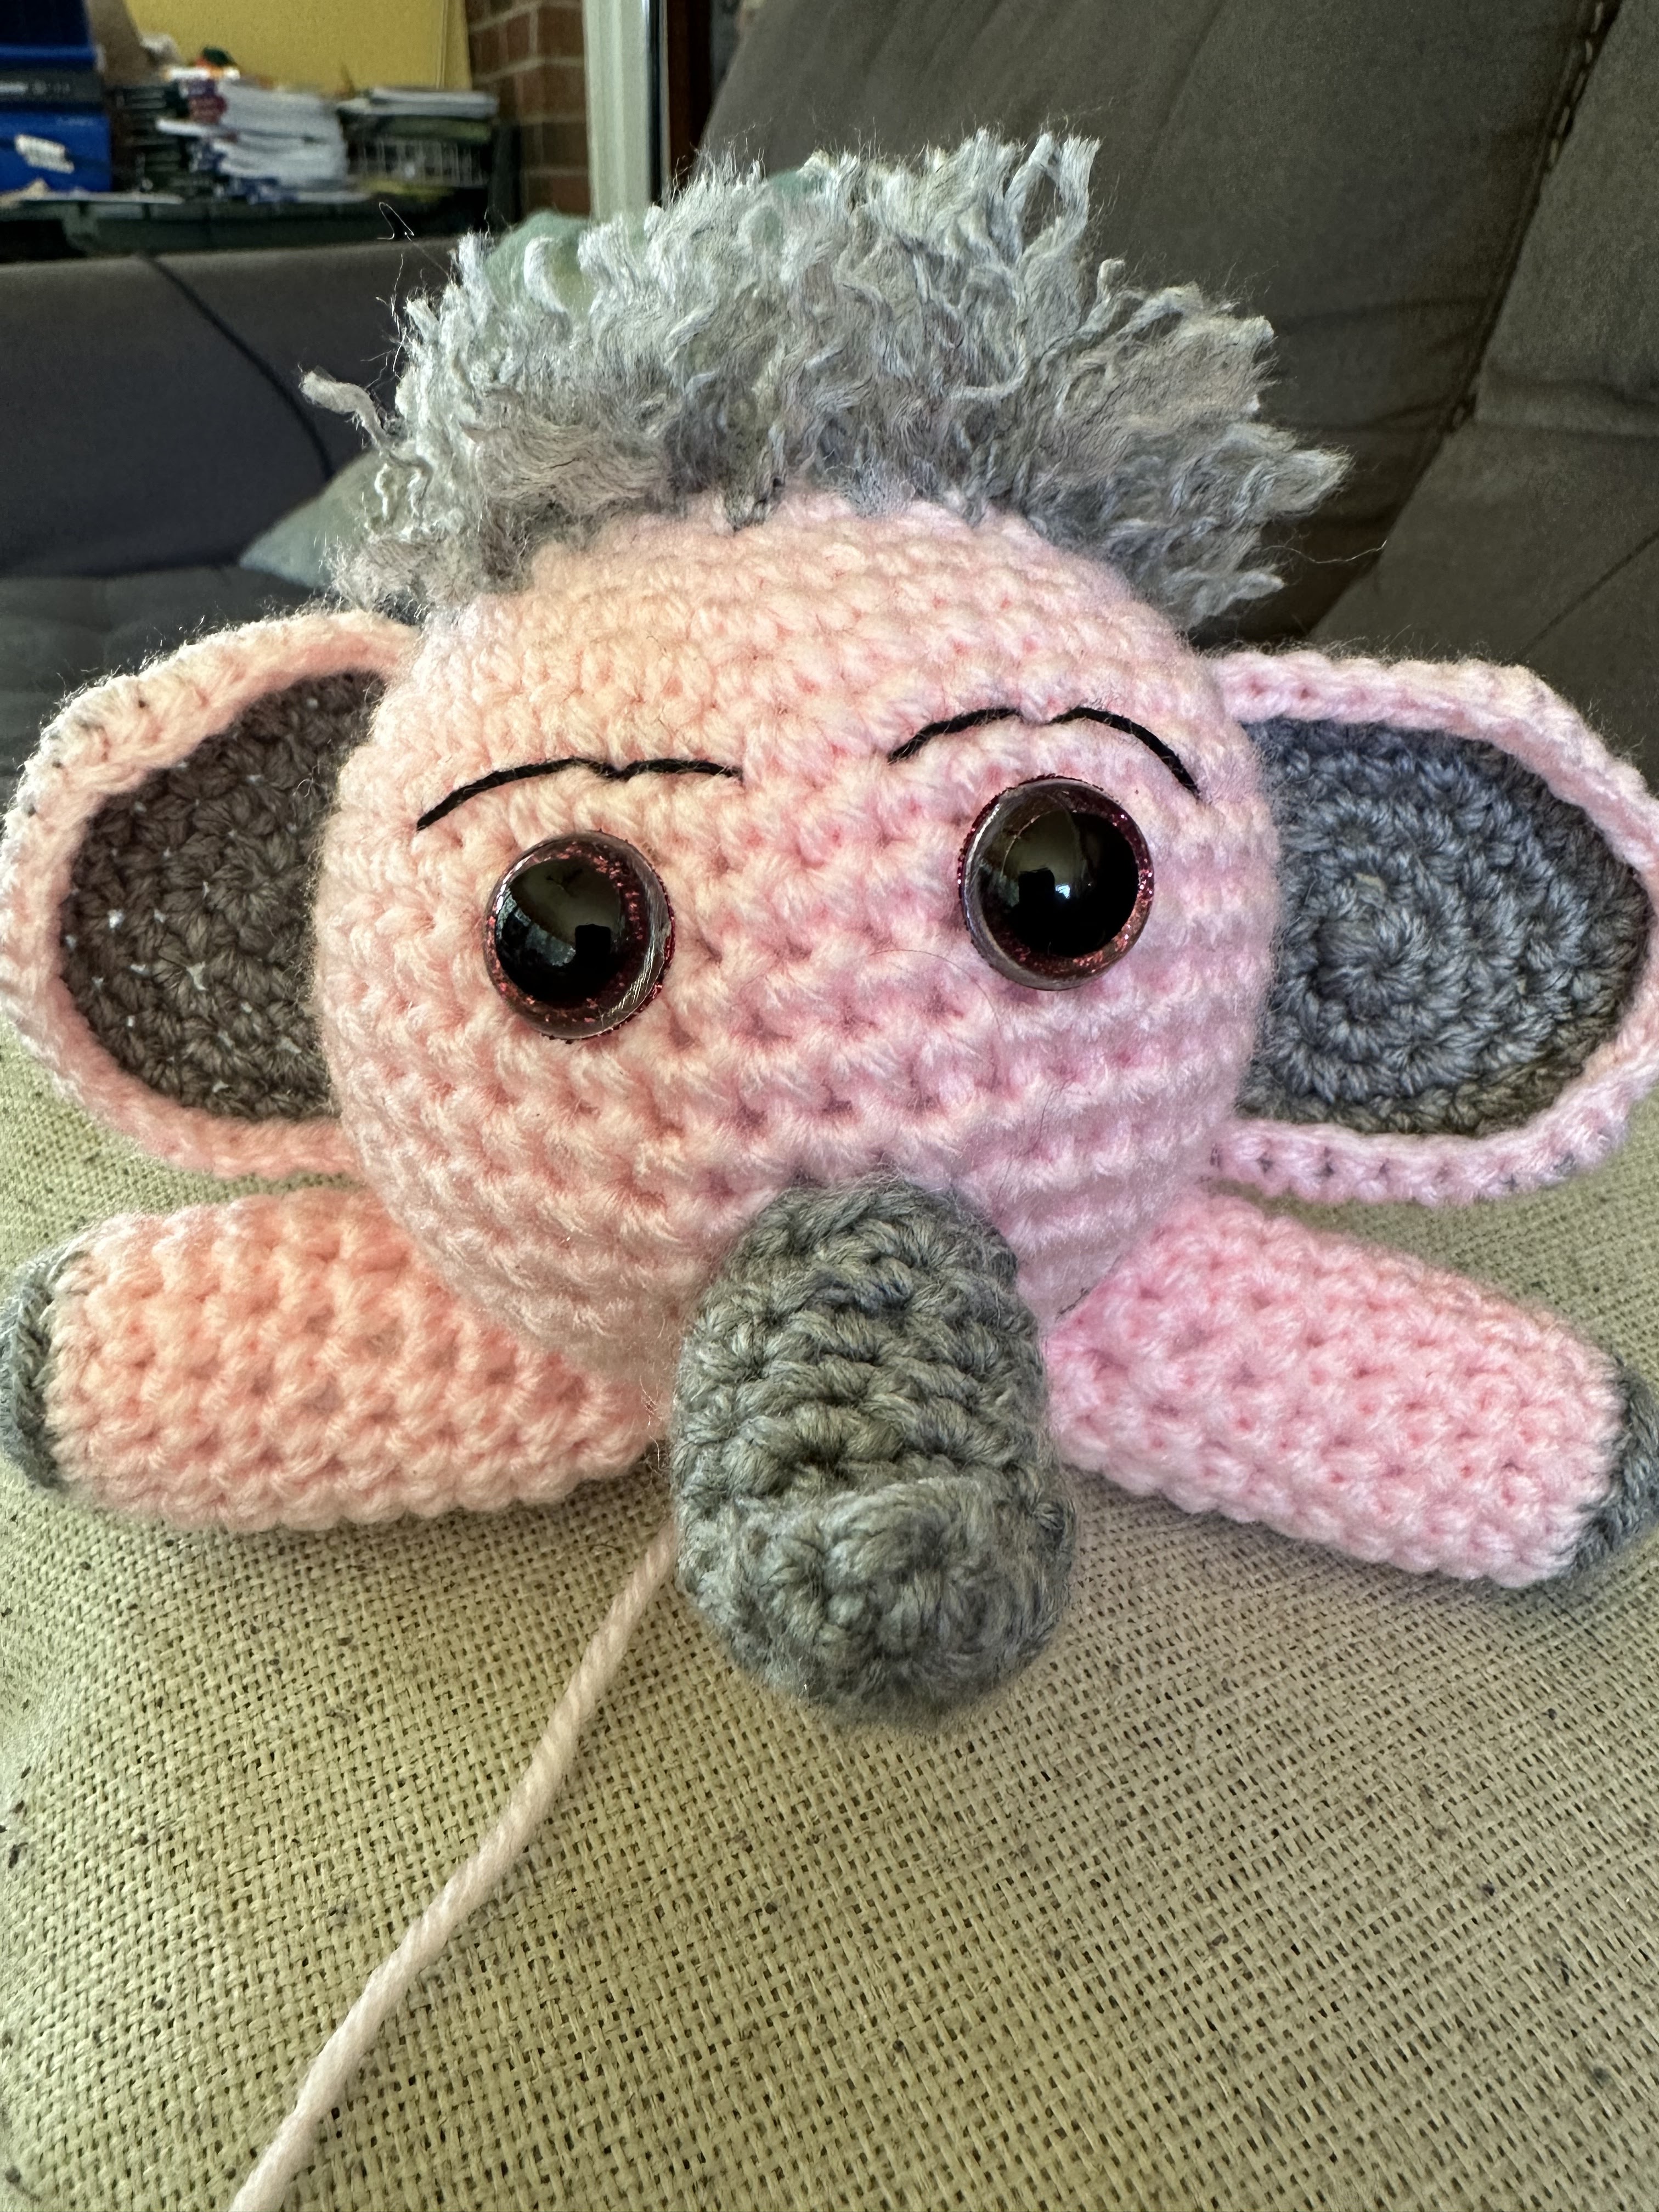
Monday, October 31, 2022

Basic Beanie Hats

 Basic Beanie Hats

Over the last 2 months or so, I’ve made quite a few Beanie Hats, especially during sickness and I couldn’t do anything but lie on the couch. 


I used different yarn brands with only slight variations in size.  I did the hats solid, stripes, multi-colored; just whatever I liked and I loved the end result of each and every hat.


I wanted a simple “go-to pattern” for Beanies.  A project I could complete anywhere, anytime, without having to give much thought to a pattern scheme; yet still pleasing to the eye.

The brown with yellow yarn made me think of a sunflower.  

Size:  

Average Adult-Sized Head


Materials:

-5.0mm hook

-#4 worsted weight yarn

-Stitch Marker

-Tapestry needle


U.S. Stitch Abbreviations:

Ch:  chain

St:  stitch(es)

Sl St:  slip stitch

DC:  double crochet

FPDC:  front post double crochet 

BPDC:  back post double crochet 

BLO:  back loops only

Rep:  repeat

MR:  magic ring

FO:  fasten off


Notes:  

1.  The pattern is worked in the round.  Move the stitch marker up accordingly at the start of each new round.  

2.  This pattern can easily be adjusted to a smaller or larger size by adjusting the “increase rounds.”


Directions:  

1.  10 DC into MR.  (10)

2.  2 DC in each st around.  (20)

3.  1 DC in first st.  2 DC in next st.  Rep around.  (30)

4.  1 DC in first 2 st.  2 DC in next st.  Rep around.  (40)

5.  1 DC in first 3 st.  2 DC in next st.  Rep around.  (50)

6.  1 DC in first 4 st.  2 DC in next st.  Rep around.  (60)

7.  1 DC in each st around.  (60)

8-12.  Rep #7.  (60)

13.  In BLO, DC in each st around.  Sl st join to first st. (60)

14.  Ch3 (counts as first FPDC).  *BPDC around the next post st.  FPDC around the next post st.*  Rep from * to * around.  Sl st join to first st.  (60)

15.  Rep #14.  FO and weave ends.  (60)


Optional:

You can add a faux fur or crochet pom, if so desired.  


And, that’s it for this go-to Beanie.  I love the simplicity of it, plus the little texture added with using BLO and post stitches for the border.  

Enjoy!!!!

This last set (picture below) I made while at the beach in October.  The two shades of pink yarn I purchased from the Dollar Tree (Just Active) and I really enjoyed working with the yarn  it was super soft, easy to use and only a $1.25 per skein.  

 Happy Crocheting...


Legal:
--don't use/claim my design as your own
--don't use/claim my pics as your own
--okay to make and sale your finished work
--don't share my pattern electronically or in print format (without prior consent) but provide a link to my blog

Social Media:
If you are on the following sites, let's connect and hook up...
  • Instagram:  Rilla2u
  • Pinterest:  Rilla2u
  • Twitter:  Rilla2u
  • Facebook:  /rilla.edwards 
  • Etsy:  rilla2u 
  • TikTok:  rillae2u 
  • YouTube:  Rilla2u 
  • Shopify:  Rilla2u

Saturday, October 29, 2022

Snowman

Snowman

I’d been thinking about this idea for a few weeks now. I wanted to make a three-balled Snowman in one piece, using Chenille (Blanket) yarn and a 10mm hook. 

This was a fairly quick and easy project from start to finish. With the hat, he stands approximately 20” tall.

The Snowman is made in one piece which makes it quick. Stuff as you go, with some pellets in the bottom portion with the Polyfil to add weight.  

He’s great to add to your Christmas seasonal decor or to use as a door stop.  Whatever you choose and wherever you choose to place him, he is sure to bring a smile to many faces.  

Here is the PDF digital file link to purchase the pattern:

Jolly Snowman Pattern…


 Happy Crocheting...


Legal:
--don't use/claim my design as your own
--don't use/claim my pics as your own
--okay to make and sale your finished work
--don't share my pattern electronically or in print format (without prior consent) but provide a link to my blog

Social Media:
If you are on the following sites, let's connect and hook up...
  • Instagram:  Rilla2u
  • Pinterest:  Rilla2u
  • Twitter:  Rilla2u
  • Facebook:  /rilla.edwards 
  • Etsy:  rilla2u 
  • TikTok:  rillae2u 
  • YouTube:  Rilla2u 
  • Shopify:  Rilla2u


Thursday, October 27, 2022

Kid’s Hat!!!!

 Kid’s Hat

I wanted to make a Hat pattern, specifically for elementary school aged children. I will be doing a Holiday Market at an elementary school and thought this will be a perfect item to make and sale. 

This looks cute with or without a pom. 

Pom Hat:


Without Pom:


 Happy Crocheting...

Legal:
--don't use/claim my design as your own
--don't use/claim my pics as your own
--okay to make and sale your finished work
--don't share my pattern electronically or in print format (without prior consent) but provide a link to my blog

Social Media:
If you are on the following sites, let's connect and hook up...
  • Instagram:  Rilla2u
  • Pinterest:  Rilla2u
  • Twitter:  Rilla2u
  • Facebook:  /rilla.edwards 
  • Etsy:  rilla2u 
  • TikTok:  rillae2u 
  • YouTube:  Rilla2u 
  • Shopify:  Rilla2u


Monday, October 24, 2022

Elephant Lovey

 Elephant Lovey

I’m loving this new design of mine!!!  I think it turned out so adorable, using pink and grey yarn.

The lovey itself measures 12” x 12”.  

Materials:

--5.0mm hook for the lovey

--3.0mm & 4.0 mm hook for the elephant portion

--#4 worsted weight yarn (I used RHSS yarn in Soft Pink, Grey Heather, Dusty Grey)

--(2) Plastic safety eyes (I used 10mm but size and plastic eyes are optional; crocheted eyes are fine to make)

--small amount of Black floss for eyebrows and mouth

--Polyfil

--Tapestry needle

U.S. Stitch Abbreviations:

Ch:  chain

St:  stitch(es)

Sl st:  slip stitch

SC:  single crochet

SC2tog:  single crochet 2 stitches together (creates a decrease)

HDC:  half double crochet

FHDC:  foundation half double crochet

DTR:  double treble

BLO:  back loops only

Rep:  repeat

MR:  magic ring

FO:  Fasten Off


Special Stitch:

1.  DTR:  Yarn over 3 times.  Insert hook into next st and yarn over.  Pull through st.  Yarn over and pull through 2 loops on the hook, yarn over and pull through 2 loops on the hook, yarn over and pull through 2 loops on the hook, yarn over and pull through remaining 2 loops on hook.


Directions:

Lovey:

1.  With 5.0mm hook and Grey Heather yarn, FHDC 33.  Or, you can Ch34 and work a HDC in the 2nd chain from the hook and across.  Ch1.  Turn.  (33)

2-23.  Working in the BLO, HDC in each st across.  Ch1 and Turn.  (33)

24.  Working in the BLO, HDC in each st across.  Ch1 and Turn.  (33)

25.  Working in both loops, SC in each st across, placing 2 SC in the last st (corner).  Turn and work down the side.  Place 1 SC in each side st.  When you get to the bottom, 2 SC in the corner st.  Work 1 SC in each of the base chains across the bottom.  2 SC in the last base chain (corner).  Turn and work 1 SC in each st up the last side, making sure the last corner st has 2 st in it.  FO and weave ends.

This will  make your Lovey a 10" x 10" size for now.  

Lovey Border:
1.  With 5.0mm hook and Soft Pink Yarn, join yarn in any corner stitch with a sl st and Ch4.  The Ch4 will count as your first DTR.  DTR 2 more times into the same st.  Ch1.  DTR 3 more times into the same st.  SC in each of the next 3 st.  *DTR 3 times, Ch1, DTR 3 times in the same st.  SC in each of the next 3 st.* Rep pattern from * to * around the lovey.  

With my stitch calculations, you will come up 1 short at the end - this means you will make your last DTR and then you should only have 2 remaining stitches to SC into (instead of 3).  


Now, your Lovey will measure 12" x 12".  Set to the side.

Note:  I only used the Grey Heather yarn on the Lovey.  For the elephant, I used Dusty Grey.  But, of course, this is completely optional in how you choose to use your colors.

Elephant Head:
(I worked the head in the round.  I used a stitch marker to keep track of the beginning of each new round and moved the stitch marker up for the start of each new round)

1.  With 4.0mm hook and Soft Pink yarn, 6 SC into MR.  (6)
2.  2 SC in each st around.  (12)
3.  1 SC in first st, 2 SC in next st.  Rep around.  (18)
4.  1 SC in first 2 st, 2 SC in next st.  Rep around.  (24)
5.  1 SC in first 3 st, 2 SC in next st.  Rep around.  (30)
6.  1 SC in first 4 st, 2 SC in next st.  Rep around.  (36)
7.  1 SC in first 5 st, 2 SC in next st.  Rep around.  (42)
8-14.  1 SC in each st around.  (42)
15.  1 SC in first 5 st, SC2tog.  Rep around.  (36)
16.  1 SC in first 4 st, SC2tog.  Rep around.  (30)
17.  1 SC in first 3 st, SC2tog.  Rep around.  (24)
18.  1 SC in first 2 st, SC2tog.  Rep around.  (18)
Stop.  Leave hook in place.

Now, you want to place your eyes.  
Add eyes at:  Round 10, 5 space between gap between the eyes.  (you can opt to make crochet eyes, since this is for a baby and you would never leave a baby unattended with plastic eyes).  I used every safety precaution, but plastic eyes can be a potential hazard to a baby/toddler. 

If you would prefer to make crocheted eyes:
1.  With a 4.0 mm hook and yarn color of choice, 6 SC into MR.  Sl st join to first st and FO. Leave a long enough tail for attaching. (6)

Firmly stuff head with Polyfil.

19.  1 SC in first st, SC2tog.  Rep around.  Add more Polyfil, if needed.  (12)
20.  SC2tog 6 times.  Add more Polyfil, if needed.  FO and leave a long tail for closing up opening and for attaching to the center of your Lovey.   

Ears (make 2):
1.  With 4.0mm hook and Grey yarn, 6 SC into MR.  (6)
2.  2 SC in each st around.  (12)
3.  1 SC in first st, 2 SC in next st.  Rep around.  (18)
4.  1 SC in first 2 st, 2 SC in next st.  Rep around.  (24)
5.  1 SC in first 3 st, 2 SC in next st.  Rep around.  Sl st join to the first st and FO Grey yarn.  Weave ends.  (30)
6.  Add Soft Pink yarn in any stitch with a sl st and Ch1.  1 SC in first 4 st, 2 SC in next st.  Rep around.  Sl st join to first st and FO.  Leave a long tail for attaching ear.  (36)

Rep for second ear.

Attach ears on the sides between Rounds 8-13.  

Arms (make 2):
1.  With 4.0mm hook and Grey yarn, 6 SC into MR.  (6)
2.  2 SC in each st around.  Sl st join to first st and FO.  Weave ends.  (6)
3.  This Round is worked in the BLO.  Join Soft Pink yarn in any st.  1 SC in each st around.  Sl st join to first st.  (6)
4.  Working in both loops, 1 SC in each st around.  (6)
5-12.  Rep #4.  (6)
13.  1 SC in each st around.  FO and leave a long tail for attaching to the bottom of the Elephant's Head.

Rep for second arm.

Attach arms on the bottom of the head.  I put Round 13 of the arm at the center bottom to attach.  

Tusk:
1.  With 3.0mm hook and Grey yarn, 3 SC into MR.  (3)
2.  2 SC in each st around.  (6)
3.  1 SC in each st around.  (6)
4.  1 SC in first st, 2 SC in next st.  Rep around.  (9)
5.  1 SC in each st around.  (9)
6-9.  Rep #5.  (9)

Stuff with Polyfil.

10.  1 SC in each st around.  FO and leave a long tail for attaching.  Add more Polyfil, if needed.  (see my pic for placement)

For the eyebrows and mouth, I used black floss and my tapestry needle to embroider.  

For the hair, I just used my hook and looped yarn through a stitch, tied in a knot.  I then took my tapestry needle and frayed the yarn.  

Place the completed Elephant head at the center of your Lovey and securely attach.  Since my tail was pink yarn, I did not go completely through my Lovey while securing the head.  I just secured mine with working with the top stitches.  

And, that's it for this simple and adorable "Elephant Lovey..."

Be sure to check out my Etsy Shop.  Here’s the link:


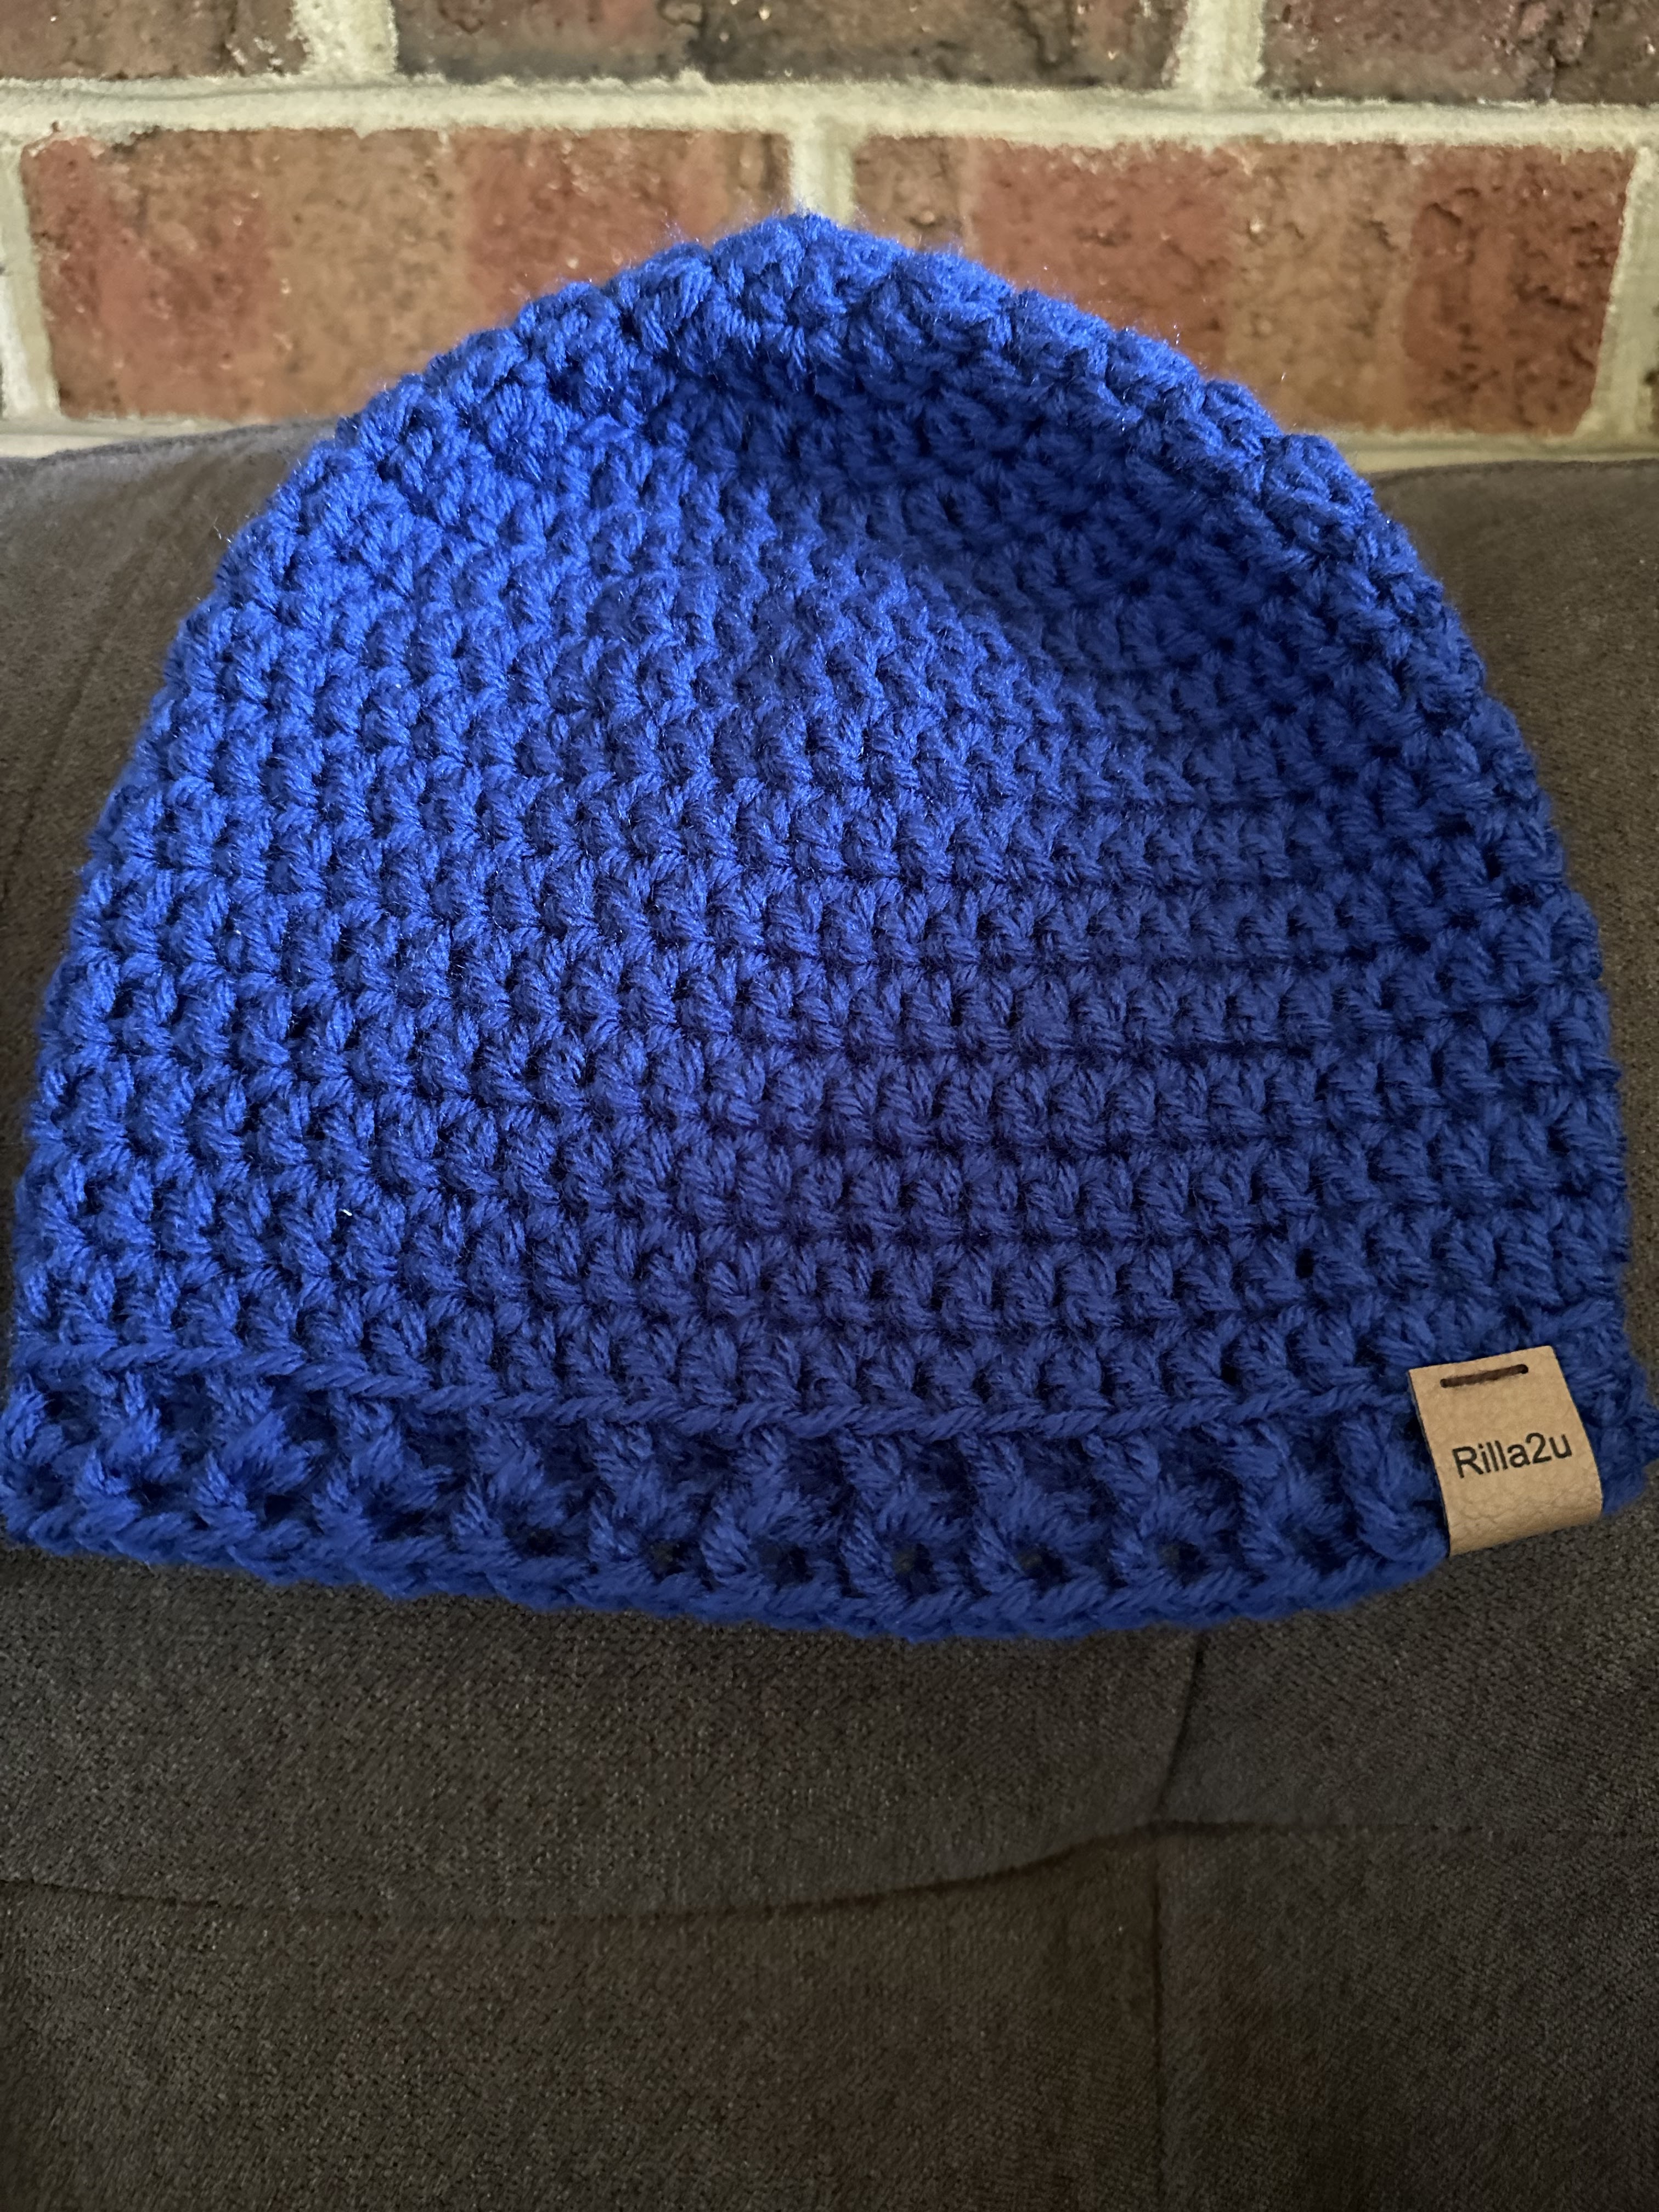
To complete my gift set, I added a few additional items to my Lovey.  0-3 months Hat, 0-3 months booties and a pacifier clip.  This made the set look so complete and pretty.  I'm loving this baby gift set so much.  I hope you all will too.

 Happy Crocheting...


Legal:
--don't use/claim my design as your own
--don't use/claim my pics as your own
--okay to make and sale your finished work
--don't share my pattern electronically or in print format (without prior consent) but provide a link to my blog

Social Media:
If you are on the following sites, let's connect and hook up...
  • Instagram:  Rilla2u
  • Pinterest:  Rilla2u
  • Twitter:  Rilla2u
  • Facebook:  /rilla.edwards 
  • Etsy:  rilla2u 
  • TikTok:  rillae2u 
  • YouTube:  Rilla2u 
  • Shopify:  Rilla2u

Thursday, October 20, 2022

Homemade Laundry Soap

 Homemade Laundry Soap

Making your own laundry detergent has a lot of benefits:

1.  Inexpensive.

2.  No harsh chemicals.

3.  Eco-friendly.

4.  Easy to make. 

I’m sure there’s many other reasons but that’s just a few off the top of my head.  

If you don’t have time to make it, then visit my Etsy Shop and buy you a container.  You will definitely love using it.  

Here’s the link to my shop:

https://www.etsy.com/listing/1335149980/

So, to make your own here’s what I did:

I started in a bowl with dry ingredients:

-1 cup Borax

-1 cup Washing Soda(Arm & Hammer)

In a pot on stovetop:

-4 cups filtered water

-5.5 oz Zote’s Flakes

1.  Boil until melted. 

2.  Add dry ingredients, while continuing to stir over heat.  Approximately a minute. 

3.  Remove from heat.  Stir until smooth. 

4.  You will evenly pour into 2 clean, sterilized quart jars, regular-rimmed (not wide brimmed). 

5.  Fill remainder of quart jars, leaving about an inch headspace for expansion, with filtered water.  Place lids on jars. 

6.  Turn jars upside down and let set for about 4 - 4 1/2 hours. 

7.  Once time is up, use a butter knife or something similar to loosen any of the detergent from around the sides. 

8.  Use your blender bottom and screw onto the jar top and place on blender.  Blend for about 30 - 45 seconds. 

You now have Homemade Laundry Soap.  Add a Tbsp to each laundry load.  Each quart jar will yield approximately 60 - 70 loads of laundry.

Happy Crafting…

Sunday, October 16, 2022

Cinch Ear Warmer


Cinch Ear Warmer 


I made this cute and quick Cinch Ear Warmer for a friend of mine who lives in Ohio and I was going to visit this weekend. 

I used RHSS yarn and a 5.0mm hook. 

To make:
1.  I started with a Ch13.  HDC in 2nd ch and across.  Ch1 and turn. (12) 
2-39.  In the BLO, HDC in each st.  Ch1 and turn. (12)
40.  In the BLO, HDC in each st.  Join short ends together and Sl st across. Ch1.  (12) 
41.  SC in each st across. Ch1 and turn. (40)
42.  SC in first st.  DC in next st.  Rep across. Ch1 and turn. (40) 
43-45.  Rep #42.  At the end of Round 45, FO and weave ends. 


Now, lay your Ear Warmer flat, at the center you will join a piece of yarn with a tapestry needle at R41.  Wrap the yarn around R45.  Pull tight to cinch together. Do this 5-10 times, to create a center, cinched look. Secure and weave the ends.

Be sure to check out my Etsy Shop;


Happy Crocheting…

Legal:
--don't use/claim my design as your own
--don't use/claim my pics as your own
--okay to make and sale your finished work
--don't share my pattern electronically or in print format (without prior consent) but provide a link to my blog

Social Media:
If you are on the following sites, let's connect and hook up...
  • Instagram:  Rilla2u
  • Pinterest:  Rilla2u
  • Twitter:  Rilla2u
  • Facebook:  /rilla.edwards 
  • Etsy:  rilla2u 
  • TikTok:  rillae2u 
  • YouTube:  Rilla2u 
  • Shopify:  Rilla2u

Dollar Tree DIY: Pumpkin Topiary

Dollar Tree DIY:  

Pumpkin Topiary

Here’s my newest Dollar Tree project using their pumpkins. I absolutely love how this topiary turned out.

I used straw, greenery and florals I had leftover from other projects. The scarecrow came as a set of 2 with a wood stick.  I just snipped the stick off and hot glued it the base.

To make:

1.  I removed the stems from #2 and #3 pumpkins. I hot glued them at the center. I removed #1 stem, made the hole a little bigger and inserted #2 stem in its place with hot glue. Then hot glued #1 to the center of #2.  

2.  Normally, you would hot glue the bottom of #3 pumpkin to a candlestick. However, when I sent my hubby to the Dollar Tree to get me a candlestick, he came back with a margarita glass.  So, to improvise, I wrapped it in burlap with hot glue and then attached the topiary to the bottom of the glass. 


3.  To set out with decorating, I basically used items from previous projects that I had purchased from Dollar Tree and just started hot gluing it.  This part is more of a free-spirited adventure for me. I just used what I had and made it work. I had bits and pieces of stuff, so I made sure to make it uniform throughout. If it was attached on the top pumpkin, then I made sure to counter with it on the bottom pumpkin - to give it a uniform look. I  didn’t have enough leftover floral to wrap around all the pumpkins so I deciding to attach what I had in a cascading effect. 

So, sometimes, you have to get creative when working with minimal supplies but that’s okay. It just takes a little maneuvering and balancing what you have to create a beautiful, subtle effect. 


Happy Crafting…


Legal:
--don't use/claim my design as your own
--don't use/claim my pics as your own
--okay to make and sale your finished work
--don't share my pattern electronically or in print format (without prior consent) but provide a link to my blog

Social Media:
If you are on the following sites, let's connect and hook up...

  • Instagram:  Rilla2u
  • Pinterest:  Rilla2u
  • Twitter:  Rilla2u
  • Facebook:  /rilla.edwards 
  • Etsy:  rilla2u 
  • TikTok:  rillae2u 
  • YouTube:  Rilla2u 
  • Shopify:  Rilla2u

Friday, October 14, 2022

Ohio State Hat

 Ohio State Hat 

This weekend we are heading to Columbus, Ohio for my hubby’s uncle’s 80th surprise birthday party. He is a huge Ohio State fan.  So, I thought I’d make him a Hat.

For this project, I used RHSS yarn in Red, Black, White and Grey Heather and a 5.0 mm hook. 

Size: 

Medium - Large Adult-Sized Head

22” - 23” head circumference 

Materials:

-5.0mm hook

-RHSS yarn in Red, Black, White and Grey Heather

-White pom (optional) 

-Tapestry needle 

-Stitch marker


U.S. Stitch Abbreviations:
Ch:  chain
St:  stitch(es)
Sl st:  slip stitch
SC:  single crochet
DC:  double crochet
FPDC:  front post double crochet 
BPDC:  back post double crochet 
BLO:  back loops only
MR:  magic ring
Rep:  repeat
FO:  fasten off


Note:  The hat is worked in the round, except where noted (when color changes take place).  

Directions:
1.  Grey yarn.  MR.  Ch3 (first DC).  8 DC.  (9)
2.  2 DC in top of Ch3 sp.  2 DC in each st around.  (18)
3.  1 DC in first st.  2 DC in next st.  Rep around.  Sl st join to first st.  FO Grey yarn.  Weave ends.  (27)
4.  Join Red yarn in any st.  1 DC in each of the first 2 st.  2 DC in next st.  Rep around.  (36)
5.  1 DC in each of the first 3 st.  2 DC in next st.  Rep around.  Sl st join to first st.  FO Red yarn.  Weave ends.  (45)
6.  Join Grey yarn in any st.  1 DC in each of the first 4 st.  2 DC in next st.  Rep around.  (54)
7.  1 DC in each of the first 5 st.  2 DC in next st.  Rep around.  Sl st join to first st.  FO Grey yarn.  Weave ends.  (63)
8.  Join Black yarn in any st.  1 DC in each st around.  Sl st join to first st.  FO Black yarn.  Weave ends.  (63)
9.  Join White yarn in any st.  1 DC in each st around.  Sl st join to first st.  FO White yarn.  Weave ends.  (63)
10.  Join Red yarn in any st.  1 DC in each st around.  (63)
11.  Rep #10.  (63)
12.  1 DC in each st around.  Sl st join to first st.  FO Red yarn.  Weave ends.  (63)
13.  Join White yarn.  1 DC in each st around.  Sl st join to first st.  FO White yarn.  Weave ends.  (63)
14.  Join Black yarn.  1 DC in each st around.  Sl st join to first st.  FO Black yarn.  Weave ends.  (63)
15.  Join Grey yarn.  1 DC in each st around.  (63)
16.  1 DC in each st around.  Sl st join to first st.  FO Grey yarn.  Weave ends.  (63)
17.  Join Red yarn.  BLO 1 DC in each st around.  Sl st join to first st.  (63)
18.  Ch3 (this counts as your first FPDC).  *BPDC around the next post st.  Then, FPDC around the next post st.*  Rep from * to * around.  Sl st join to top of Ch3.  (63)
19.  BLO 1 SC in each st around.  Sl st join to first st and FO.  Weave ends.  (63)


Teen - Average Adult-Sized Head:
Follow pattern as above, except on Round 7 you would do the following:
7.  1 DC in each of the first 8 st.  2 DC in next st.  Rep around.  Sl st join to first st.  FO Grey yarn.  Weave ends.  (60)
8-19 Work as above Rounds, except your total stitches will only be 60, and not 63.  

Attach Pom to center top.  A pom is optional.  I wanted to add a Red pom, but I only had white on hand to use.  If you don't have a faux fur pom, you can make a crochet pom in one color or all 4 colors used in this hat.  

To make a yarn pom, wrap yarn(s) around your hand 40-50 times.  Cut off.  Tie securely in the center and then attach to the top of the hat.   


 Happy Crocheting...


Legal:
--don't use/claim my design as your own
--don't use/claim my pics as your own
--okay to make and sale your finished work
--don't share my pattern electronically or in print format (without prior consent) but provide a link to my blog

Social Media:
If you are on the following sites, let's connect and hook up...
  • Instagram:  Rilla2u
  • Pinterest:  Rilla2u
  • Twitter:  Rilla2u
  • Facebook:  /rilla.edwards 
  • Etsy:  rilla2u 
  • TikTok:  rillae2u 
  • YouTube:  Rilla2u 
  • Shopify:  Rilla2u

Tuesday, October 11, 2022

Pumpkin, Oh Pumpkin!!!!

 Pumpkin, Oh Pumpkin!!!!

Super cute and easy fall project for the home - a pumpkin!!!  I used, “I Love This Yarn,” in the color, Terra Cotta, from Hobby Lobby and a 4.0mm hook. For the stem, I just grabbed some leftover brown worsted weight yarn I had on hand. I filled with Polyfil; added 2 cute button leaves (from Hobby Lobby) and ta-dah - it’s done!!!!

Size:  5” x 4”

Materials:

—ILTY in Terra Cotta (or worsted weight yarn color of choice)

—Small amount of Brown worsted weight yarn for stem

—Polyfil

—2 buttons (optional)

—Stitch marker 

—Tapestry needle


U.S. Stitch Abbreviations:
Ch:  chain
St:  stitch(es)
Sl st:  slip stitch
SC:  single crochet 
BLO:  back loops only
Rep:  repeat
SC2tog:  single crochet 2 stitches together (decrease)
MR:  magic ring 
FO:  fasten off

Directions:
Pumpkin:
The pumpkin is worked in rows and then the short ends Sl st together to work the top and bottom in rounds. 
1.  Ch 13.  SC in second ch from hook and across. (12)
2.  BLO.  SC across. (12)
3-29.  Rep #29.  (12)
30.  BLO.  SC across.  Ch1. Turn.  (12)
31.  Working across the end, SC evenly across. (30)
32.  Join short ends and Sl st together.  (12)
33.  Now, working across the opposite end, SC evenly across.  (30)

Now we will work in the round. 
34.  SC2tog.  Rep around 15 times. (15)
35.  SC first st. SC2tog.  Rep around. (10)
36.  SC2tog.  Rep 5 times. FO and leave a tail for closing up.  (5)

Use the tail to weave in and out of the last 5 stitches to close up the opening. Weave ends. 

Firmly stuff with Polyfil. 

Repeat 34-36 on opposite end. 


Stem:
The stem is worked in the round. Use your stitch marker to keep track of the first stitch of each new round and move marker accordingly for each new round. 
1.  MR.  5 SC.  (5)
2.  1 SC in each st around.  (5)
3.  2 SC in each st around. (10)
4-5.  1 SC in each st around. (10)
6.  1 SC in first st.  2 SC in next st.  Rep around.  (15)
7.  1 SC in each st around.  (15)
8.  1 SC in each st around. Sl st to first st.  FO. Leave a tail to attach to top, center of pumpkin. Stuff with Polyfil.  

Assembly:
1.  With pumpkin closed on both ends, attach stem to the center top with tapestry needle. 
2.  Optional.  The buttons I used had sticky backs on them, so I just attached to the top. You can glue to make it permanently attached.  Or, add a crochet leaf. 

 Happy Crocheting...


Legal:
--don't use/claim my design as your own
--don't use/claim my pics as your own
--okay to make and sale your finished work
--don't share my pattern electronically or in print format (without prior consent) but provide a link to my blog

Social Media:
If you are on the following sites, let's connect and hook up...
  • Instagram:  Rilla2u
  • Pinterest:  Rilla2u
  • Twitter:  Rilla2u
  • Facebook:  /rilla.edwards 
  • Etsy:  rilla2u 
  • TikTok:  rillae2u 
  • YouTube:  Rilla2u