Showing posts with label Ponytail Ear Warmers/Hats. Show all posts

Sunday, December 2, 2018

Buffalo Plaid Ponytail Ear Warmer/Headband

In plaid-mode at the moment, I decided to make a “Buffalo Plaid Ponytail Ear Warmer/Headband.” Cute for my head, secures my ponytail and will definitely keep my ears toasty warm.  Plus, the plaid-look is so stylish and fashionable- I see it everywhere.

I hope you all will enjoy making this as much as I did in designing it.  I'd love to see your finished projects and share your pictures.

HERE is the LINK... to my Etsy Shop if you would like to purchase the PDF, Ad-Free Version of my Buffalo Plaid Ponytail Ear Warmer/Headband Pattern...


Buffalo Plaid Ponytail Ear Warmer/Headband Pattern
Size:  This will fit the average Teen - Adult.  It measures 4" wide.  To make smaller, adjust the number of rows you complete.  A good rule of thumb, is to test length as you go to make sure you get the right fit for your head. 

Gauge:  8 HDC st x 5 rows = 2"

Materials:
--5.0mm hook
--ponytail holder
--stitch markers
--RHSS yarn in red, black and claret (or any brand of #4 worsted weight yarn) - it takes a total of 100-130 yards
--small amount of #5 bulky yarn in white (I used Yarn Bee's Fleece Lite in Quartz) for the trim
--tapestry needle for weaving ends

U.S. Stitch Abbreviations:
Ch:  chain
Sl st:  slip stitch
St:  stitch(es)
SC:  single crochet
HDC:  half double crochet 
Rep:  repeat
Sk:  skip
FO:  fasten off

Special Note:
This is a variation to my Basic Ponytail Ear Warmer/Headband pattern.  If you are not familiar with it, you can check out the pattern HERE...  From there, you can also find the link to my video tutorial on Youtube.

Plaid Stitch:
1.  First row you will work HDC st with black and claret.
2.  Second row you will with HDC st with claret and red.  
3.  You will be carrying over your yarn so just keep the color not in use to the back as you carry it over and then just pick up when you are ready to use it. 
 
Directions: 
1.  Sl st join black yarn to the ponytail holder and Ch1.  Make 24 SC around holder.  (If you don't have a ponytail holder, you can Ch20, sl st join to first ch to form a ring and then make 24 SC st).  Sl st join to first st and Ch1.  (24)
2.  1 HDC in each st around.  Sl st join to first st and Ch1.  (24)
3.  Rep #2.  Sl st join to first st and stop for a moment. 
Stitch Marker Placement:
You will place a stitch marker at the following stitches:  #1, #9, #13 and #21.  You are going to be working between st markers #1 and #9 to make the band.  Once you make the numbered rows, you will join the last row at and between stitch markers #13 and #21.


Now, you are ready to continue crocheting.  From here forward, you will be working between stitch #1 and #9.

4. With black yarn, Ch2 (this counts as the first HDC st).  Make 2 more HDC st in the next 2 st.  Before completing the 2nd HDC st, you will want to switch to claret yarn and complete the stitch.  HDC in the next 3 st with the claret yarn.  Before completing the 3rd st, you will want to switch back to the black yarn to complete the 3rd st.  HDC in the next 3 st with black yarn. 
5.  With claret yarn, Ch2 (this counts as the first HDC st).  Make 2 more HDC in the next 2 st.  Before completing the 2nd HDC st, you will want to switch to red yarn and complete the stitch.  HDC in the next 3 st with red yarn.  Before completing the 3rd st, you will want to switch back to the claret yarn to complete the 3rd st.  HDC in the next 3 st with claret yarn.  

6-45.  You will continue repeating steps #4 and #5 until you have completed 45 rows (or the number of rows you need to fit your head)
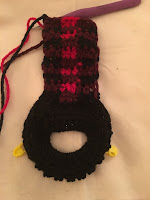
46.  Now, you are ready to sl st join Row 45 to the stitches between stitch markers #13 and #21 of Round 3.  FO all yarn and weave ends.
47.  Join claret in the side stitch of Row 4 and Ch1.  Evenly SC from Row 4 to Row 45.  FO and weave ends.
48.  Rep #47 on opposite side.  
49.  With your bulky yarn, join in any stitch and Ch1.  HDC in same st and around.  Sl st join to first st and FO.  Weave ends.
50.  Rep #49 on opposite side.  


And, that completes your Buffalo Plaid Ponytail Ear Warmer/Headband.  I'm very pleased with the outcome of this project and hope you all will enjoy making this stylish and warm Ear Warmer for yourselves or to gift to others.

Please feel free to PIN and SHARE this pattern to your PINTEREST boards!!!!  I would love to hear your feedback and see your pictures...
 
Happy Crocheting...
Legal:
--don't use/claim my design as your own
--don't use/claim my pics as your own
--okay to make and sale your finished work
--don't share my pattern electronically or in print format (without prior consent) but provide a link to my blog

Social Media:
If you are on the following sites, let's connect and hook up...
  • Instagram:  Rilla2u
  • Pinterest:  Rilla2u
  • Twitter:  Rilla2u
  • Facebook:  /rilla.edwards 


Wednesday, June 6, 2018

Ponytail Sunvisor Hat

I decided to make a view alterations to my Basic Ponytail Ear Warmer/Headband pattern and came up with something for the warmer months - a "Ponytail Sunvisor Hat..."

This pattern is quick and easy to make - and doesn't require a lot of yarn.

I hope you all will enjoy this pattern as much as I do...

Ponytail Sunvisor Hat
Ponytail Sunvisor Hat Pattern
 
Size:  Average Adult-Sized Woman's Head

Gauge:  I did not gauge pattern

Materials:
--5.0mm hook
--elastic ponytail holder
--#4 worsted weight yarn; I used Lion Brand's Vanna's Choice yarn
--2 stitch markers
--tapestry needle for weaving

U.S. Stitch Abbreviations:
Ch:  chain
Sl st:  slip stitch
SC:  single crochet
HDC:  half double crochet
SC2tog:  single crochet 2 stitches together
FO:  fasten off

Directions:
1.  Join yarn with sl st to ponytail holder.  24 SC st around holder.  Sl st join to first st and Ch1.  (24)
2-3.  1 HDC in each st around.  Sl st join to first st and Ch1.  (24)
4.  1 HDC in each of the first 6 st.  Ch1 and turn.  (6)

Before continuing with pattern, you will want to place your stitch markers at stitch #13 and stitch #18 of Round 3. 

5-43.  1 HDC in each st across.  Ch1 and turn.  (6)
44.  1 HDC in each st across.  Ch1 and turn.  Once you complete this row, you will want to sl st join Row 44 to Row 3 (from stitch marker to stitch marker).

This completes the headband portion.

Visor:
A.  It is worked double-stranded Yarn.
B.  To add the front visor to the headband, you will want to count over 9 Rows on each side from Round 3 that was made and place your stitch markers.  You will be working your stitches from stitch marker to stitch marker - 26 stitches - in the front.  


1.  Join yarn with a sl st and Ch1 into the first stitch marker.  SC in same st and across until you place the last SC st into the second stitch marker.  Ch1 and turn.  (26)
2.  SC2tog, 1 SC into the next 22 st, SC2tog.  Ch1 and turn.  (24)
3-4.  1 SC in each st across.  Ch1 and turn.  (24)
5.  SC2tog, 1 SC into the next 20 st, SC2tog.  Ch1 and turn.  (22)
6-7.  1 SC in each st across.  Ch1 and turn.  (22)
8.  SC2tog, 1 SC into the next 18 st, SC2tog.  Ch1 and turn.  (20)
9-10.  1 SC in each st across.  Ch1 and turn.  (20)
11.   SC2tog, 1 SC into the next 16 st, SC2tog.  Ch1 and turn.  (18)
12.   SC2tog, 1 SC into the next 14 st, SC2tog.  FO and weave ends.  (16)

Please feel free to message and/or comment me with any questions.


 Happy Crocheting...

Legal:
--don't use/claim my design as your own
--don't use/claim my pics as your own
--okay to make and sale your finished work
--don't share my pattern electronically or in print format (without prior consent) but provide a link to my blog


Sunday, February 4, 2018

Zumba Ponytail Hats - 2 Versions

I was asked to design 2 black ponytail hats for 2 Zumba warrior dancers.  And, of course, I said, yes.

With the non-stop freezing rain here in North Carolina today, I stayed inside and crocheted...

Zumba Warrior Ponytail Hats


Version 1:
 Version 1 Pattern

Size:  Average Teen/Adult Sized Head

Materials:
--5.5mm Hook
--#4 worsted weight yarn in black
--black ponytail holder (or color to match your yarn color)
--tapestry needle for weaving

U.S. Stitch Abbreviations:
Ch:  chain
Sl st:  slip stitch
St:  stitch(es)
SC:  single crochet
HDC:  half double crochet
BLO:  back loops only
FLO:  front loops only
Rep:  repeat
Sk:  skip
FO:  fasten off

Directions:
1.  24 SC st around ponytail holder.  Sl st join to first st and Ch1.  (24)
2.  1 HDC st in each st around.  Sl st join to first st and Ch1.  (24)
3.  2 HDC in first st, 1 HDC in next st.  Rep around.  Sl st join to first st and Ch1.  (36)
4.  2 HDC in first st, 1 HDC in next 2 st.  Rep around.  Sl st join to first st and Ch1.  (48)
5.  2 HDC in first st, 1 HDC in next 3 st.  Rep around.  Sl st join to first st and Ch1.  (60)
6.  2 HDC in first st, 1 HDC in next 4 st.  Rep around.  Sl st join to first st and Ch1.  (72)
7.  1 HDC in each st around.  Sl st join to first st and Ch1.  (72)
8-16.  1 HDC in the BLO of the first st, 1 HDC in the FLO of the next st.  Continue to rep this pattern around.  Sl st join to first st and Ch1.  (72)
17-20.  1 HDC in the BLO of each st around.  Sl st join to first st and Ch1.  (72)
21.  Sl st in each st around.  FO and Weave ends.  Turn right side out.  (72)

 Version 2:

Version 2 Pattern

Size:  Average Teen/Adult Sized Head

Materials:
--5.0mm Hook
--#4 worsted weight yarn in black (I used Deborah Norville)
--black ponytail holder (or color to match your yarn color)
--tapestry needle for weaving

U.S. Stitch Abbreviations:
Ch:  chain
Sl st:  slip stitch
St:  stitch(es)
SC:  single crochet
HDC:  half double crochet
BLO:  back loops only
FPHDC:  front post half double crochet
BPHDC:  back post half double crochet
Rep:  repeat
Sk:  skip
FO:  fasten off

Special Stitch Note:
1.  HDC Crossover:  Sk first st, place HDC in next st.  Go back to the sk st and place a HDC st.  Continue to rep this pattern around.

 Directions:
1.  20 SC st around ponytail holder.  Sl st join to first st and Ch1.  (20)
2.  1 HDC st in each st around.  Sl st join to first st and Ch1.  (20)
3.  2 HDC in first st, 1 HDC in next st.  Rep around.  Sl st join to first st and Ch1.  (30)
4.  2 HDC in first st, 1 HDC in next 2 st.  Rep around.  Sl st join to first st and Ch1.  (40)
5.  2 HDC in first st, 1 HDC in next 3 st.  Rep around.  Sl st join to first st and Ch1.  (50)
6.  2 HDC in first st, 1 HDC in next 4 st.  Rep around.  Sl st join to first st and Ch1.  (60)
7.  2 HDC in first st, 1 HDC in next 5 st.  Rep around.  Sl st join to first st and Ch1.  (70)
8-11.  1 HDC in each st around.  Sl st join to first st and Ch1.  (70)
12-13.  HDC crossover around.  (see special note for instructions)  (70)
14-15.  HDC in BLO of each st around.  Sl st join to first st and Ch1.  (70)
16-17.  Rep #12.  (70)
18-20.  FPHDC around first post st, BPHDC around next post st.  Rep around.  Sl st join to first st and Ch1.  At the end of round 20, FO and weave ends.  Turn right side out.  (70)

 Hope you enjoy both patterns...

 Version 1 (on left); Version 2 (on right)
 Happy Crocheting
Legal:
--don't use/claim my design as your own
--don't use/claim my pics as your own
--okay to make and sale your finished work
--don't share my pattern electronically or in print format (without prior consent) but provide a link to my blog


Saturday, January 27, 2018

Sweetie Ponytail/Messy Bun Hat

Here's my "Sweetie" Ponytail/Messy Bun Hat made from Premier Yarns, Sweet Roll, in the color, Birthday Cake and a 5.0mm (H) hook.

I will try to get the pattern added in the next day or so....

Sweetie Ponytail/Messy Bun Hat 
Size: Fits average-sized adult head

Materials:
--5.0mm hook
--1 Premier Yarns Sweet Roll in Birthday Cake (245 yds/roll)
--ponytail holder
--tapestry needle for weaving

U.S. Stitch Abbreviations:
Ch:  chain
Sl st:  slip stitch
St:  stitch(es)
SC:  single Crochet
HDC:  half double crochet
FLO:  front loops only
BLO:  back loops only
MR:  magic ring
Rep:  repeat
FO:  fasten off

Directions:
1. Work 24 HDC around ponytail holder.  Sl st join to first st and Ch1.  (24)
2.  2 HDC in first st, 1 HDC in next st.  Rep around.  Sl st join to first st and Ch1.  (36)
3.  2 HDC in first st, 1 HDC in next 2 st.  Rep around.  Sl st join to first st and Ch1.  (48)
4.  2 HDC in first st, 1 HDC in next 3 st.  Rep around.  Sl st join to first st and Ch1.  (60)
5.  2 HDC in first st, 1 HDC in next 4 st.  Rep around.  Sl st join to first st and Ch1.  (72)
6.  1 HDC in the FLO of the first st, 1 HDC in the BLO of the next st.  Rep around.  Sl st join to first st and Ch1.  (72)
7.  1 HDC in the first st, sl st into the next st.  Rep around.  Sl st join to first st and Ch1.  (72)
8-21 Rep rounds #6 and 7.  At the end of Round 21, sl st join to first st.  Do not fasten off.

Border:
(the border is going to be made by starting with a row of 4 SC horizontal stitches and sl st to the last round of the hat; you are going to create 72 rows of 4 SC stitches)
1.  Ch5.  SC in 2nd ch from hook and across.  Ch1 and turn.  (4)
2.  SC in the BLO of each st across.  Sl st to the next st of Round 21.  Sl st into the next of Round 21 and Ch1.
3.  SC in the BLO across.  Ch1 and turn.  
4.  SC in the BLO across.  Sl st to the next st of Round 21.  Sl st into the next st of Round 21 and Ch1.
Rep #3 and #4 until you have created 72 rows of 4 SC st.  Sl st join the sides of the last row to the first row and FO.  Weave ends.


Happy Crocheting...
Legal:
--don't use/claim my design as your own
--don't use/claim my pics as your own
--okay to make and sale your finished work
--don't share my pattern electronically or in print format (without prior consent) but provide a link to my blog

Thursday, December 28, 2017

Nae Messy Bun/Ponytail Hat...

I designed my "Nae Messy Bun/Ponytail Hat" for a very special tween, Naomi, for part of her Christmas gift.   She's the daughter of a young couple that I spent years teaching in Sunday School and Youth Group at church.  And, the younger sister of MaKenna.

I used worsted weight yarn and a 5.5mm hook.

Nae Messy Bun/Ponytail Hat Pattern

Size:  Easily will fit 18" - 21" head circumference 

Gauge:  I did not gauge this pattern.

Materials:
--5.5mm hook
--ponytail holder
--#4 worsted weight yarn (I used Lion Brand in a shade of purple)

U.S. Stitch Abbreviations:
Ch:  chain
Sl st:  slip stitch
St:  stitch(es)
Sk:  skip
Rep:  repeat
SC:  single crochet
DC:  double crochet 
FPDC:  front post double crochet  
FO:  fasten off

Special Note:  
1.  Reverse Single Crochet (Crab Stitch):  work 1 single crochet stitch into each stitch from left to right around.  It's the same stitch as a single crochet - just worked in reverse.  This will give a nice twisted edge.

2.  Surface Single Crochet:  Join yarn with a slip stitch and Ch1 in any stitch of Round 9.  Single crochet in same stitch and in each stitch around.  Slip stitch join to first stitch and fasten off.  Weave ends.  

Directions:
1.  With ponytail holder, 24 DC st around.  Sl st join to first st and Ch1.  (24)
2.  2 DC in first st, 1 DC in next st.  Rep around.  Sl st join to first st and Ch1.  (36)
3.  2 DC in first st, 1 DC in next 2 st.  Rep around.  Sl st join to first st and Ch1.  (48)
4.  2 DC in first st, 1 DC in next 3 st.  Rep around.  Sl st join to first st and Ch1.  (60)
5.  1 DC in each st around.  Sl st join to first st and Ch1.  (60)
6.  1 DC in first 9 st, 1 FPDC in next.  Rep around.  Sl st join to first st and Ch1.  (60)
7-13.  Rep #6.  (60)
14.  1 Reverse Single Crochet in each st around.  Sl st join to first st and FO.  Weave ends.  (60)

Join yarn in any stitch of Round 9 and complete Surface Single Crochet as noted above.  

Here's a pic of my Nae Messy Bun/Ponytail Hat with my Kenna Messy Bun/Ponytail Hat:
Happy Crocheting...
Legal:
--okay to make and/or sale
--don't use my pattern or pics as your own
--don't share my pattern/pics electronically but provide a link to my blog 


Kenna Messy Bun/Ponytail Hat...

I designed my "Kenna Messy Bun/Ponytail Hat for a very special tween for part of her Christmas gift.  Before I was a "Mamaw," I was a "RiRi" to MaKenna.  She's the daughter of a young couple that I spent years teaching in Sunday School and Youth Group at church.  So, when they wed and gave birth to MaKenna, it was just a natural bond with her.  I would work all week 8am-5:30pm, pick her up on Friday evenings and keep her all weekend.  And, so, I became RiRi to her.

I used worsted weight yarn and a 5.5mm hook.

Kenna Messy Bun/Ponytail Hat Pattern

Size:  Easily will fit 18" - 21" head circumference 

Gauge:  I did not gauge this pattern.

Materials:
--5.5mm hook
--ponytail holder
--#4 worsted weight yarn (I used Red Heart Supersaver in Light Raspberry)

U.S. Stitch Abbreviations:
Ch:  chain
Sl st:  slip stitch
St:  stitch(es)
Sk:  skip
Rep:  repeat
SC:  single crochet
HDC:  half double crochet 
FPDC:  front post double crochet  
BPDC:  back post double crochet 
TC:  triple crochet
FO:  fasten off

Special Note:  
1.  TC Crossover:  Skip stitch and work a TC into next stitch.  Then work a TC into the skipped stitch.  Repeat this pattern around.  

Directions:
1.  With ponytail holder, 20 HDC st around.  Sl st join to first st and Ch1.  (20)
2.  2 HDC in first st, 1 HDC in next st.  Rep around.  Sl st join to first st and Ch1.  (30)
3.  2 HDC in first st, 1 HDC in next 2 st.  Rep around.  Sl st join to first st and Ch1.  (40)
4.  2 HDC in first st, 1 HDC in next 3 st.  Rep around.  Sl st join to first st and Ch1.  (50)
5.  2 HDC in first st, 1 HDC in next 9 st.  Rep around.  Sl st join to first st and Ch1.  (55)
6.  1 FPDC around each post.  Sl st join to first st and Ch1.  (55)
7.  1 TC in the first st.  Then TC Crossover around.  Sl st join to first st and Ch1.  (55)
8-13.  Rep steps #6 and 7.  (55)
14-16.  FPDC around first post, then BPDC around next post.  Rep around.  Sl st join to first st and Ch1.  (55)
17.  1 SC in each st around.  Sl st join to first st and FO.  Weave ends.  (55). 

Here's a pic of my Kenna Messy Bun/Ponytail Hat with my Nae Messy Bun/Ponytail Hat:
Happy Crocheting...
Legal:
--okay to make and/or sale
--don't use my pattern or pics as your own
--don't share my pattern/pics electronically but provide a link to my blog 


Saturday, November 18, 2017

Ashes Messy Bun/Ponytail Hat...

I made this Messy Bun/Ponytail hat last night.  It worked up quickly.  I really like the texture of this hat and the chunkiness is sure to keep my ears toasty warm this winter.

Ashes Messy Bun/Ponytail Hat


Ashes Messy Bun/Ponytail Hat Pattern

Size:  Teen - Adult (up to a 21" head circumference)

Gauge:  6 stitches (HDC/SC) x 5 rows = 2"

Materials:
--6.0mm hook
--1 skein of Charisma in Ashes Yarn from Michael's (#5 bulky yarn)
--small amount of #5 bulky yarn in black for the trim
--ponytail holder
--tapestry needle for weaving ends

U.S. Stitch Abbreviations:
Ch:  chain
Sl st:  slip stitch
St:  stitch(es)
SC:  single crochet
HDC:  half double crochet
FPDC:  front post double crochet
BPDC:  back post double crochet
Rep:  repeat
Sk:  skip
MR:  magic ring
FO:  fasten off

SPECIAL NOTE: 
November 7, 2018 
I tend to crochet loose, so if you are making this hat with the same yarn and same hook, then you will need to double-check as you go to make sure you’re not getting a hat that may be too tight.  I received a message from a fellow crocheter who is having this problem. So, to remedy:
1.  You may need to go up in hook size (for my beanie Style I used a 10mm hook to make it loose);
2.  You may need to add 1-2 additional increase rounds before you start the repeat rounds. 

Directions:
1.  20 SC st around ponytail holder.  Sl st to first st to join and Ch1.  (20)
2.  1 HDC in each st around.  Sl st join and Ch1.  (20)
3.  2 HDC in first st, 1 HDC in next st.  Rep around.  Sl st join and Ch1.  (30)
4.  2 HDC in first st, 1 HDC in next 2 st.  Rep around.  Sl st join and Ch1.  (40)
5.  2 HDC in first st, 1 HDC in next 3 st.  Rep around.  Sl st join and Ch1.  (50)
6.  HDC and SC in the first st, sk the next st.  Rep around.  Sl st join and Ch1.  (25 HDC & 25 SC)
7.  SC and HDC in the first st, sk the next st.  Rep around.  Sl st join and Ch1.  (25 SC & 25 HDC)
8-13.  Rep steps #6 and #7.
14-15.  FPDC, BPDC around.  Sl st join and Ch1.  (25 FPDC & 25 BPDC)
At the end of Round 15, FO Ashes yarn and join black yarn.
16-17.  With black yarn, FPDC, BPDC around.  Sl st join and Ch1.  (25 FPDC & 25 BPDC).  At the end of Round 17, FO and weave ends. 

Variations:
For my variations, I used Hobby Lobby's, "I Love This Chunky Yarn" in Black Marble and I used #4 worsted weight yarn in solid, double stranded Yarn (since I didn't have any solid colored Chunky Yarn).  I also used 6.5mm hook instead of a 6.0mm hook.

I made 3 of the hats as Messy Bun/Ponytail Hats.  I made 1 with no opening (the one that has purple in it).  For that one, I started with 10 HDC into MR, increased next Row to 20 HDC stitches and then next row to 30 HDC stitches.  Then completed like the rest.
Happy Crocheting...

Legal:
--don't claim my pattern/design as your own
--don't use my pics as your own
--don't share my pattern/design electronically or in print format but provide a link to my blog
--okay to make and sale your finished work

Wednesday, October 25, 2017

Ginger Spice Ponytail Ear Warmer & Fingerless Gloves...

Here's another newbie set from my Ginger Spice Tea Cake yarn - a Ponytail Ear Warmer/Headband and a set of Fingerless Gloves.

I really got a lot of "bang for my buck" with the purchase of 2 Ginger Spice Tea Cakes by Caron from Michael's (plus, I bought them while they were on sale)!!!  I made all of the following from the 2 Cakes of yarn:
  • A Hooded Neck Cowl; the pattern can be found here.    
  • A Neck Warmer and a Hat; the pattern can be found here. 
  • And, now a Ponytail Ear Warmer and Fingerless Gloves...

Ginger Spice Ponytail Ear Warmer & Fingerless Gloves


Ginger Spice Ponytail Ear Warmer & Fingerless Gloves Pattern

Difficulty Level:  Easy

Size:  This will fit an average woman's head and hands; but as always, please test as you go to make sure you get your fit...

Materials:
--8mm and 10mm hooks
--Caron Tea Cakes in Ginger Spice or #6 Super Bulky yarn (approximately 1/2 Cake)
--ponytail holder
--2 stitch markers
--tapestry needle for weaving

U.S. Stitch Abbreviations:
Ch:  chain
Sl st:  slip stitch
St:  stitch(es)
SC:  single crochet
SC2tog:  single crochet 2 stitches together (decrease)
SCFP:  single crochet front post
SCBP:  single crochet back post
BLO:  back loops only
FO:  fasten off
Rep:  repeat
Sk:  skip

Special Note:  this Ponytail Ear Warmer is approx. 7" wide; if you do not desire yours to be this wide, then do not do the increase in #5 and #6.  But, work Rows 5-35 with 8 SC stitches.  Also, this fits my head comfortably (I have a 21" head circumference), but you may want to test this around your head before you finish off to make sure it is the right fit for your head!!!

Directions:
Ponytail Ear Warmer:
1.  With a 10.0mm hook, work 12 SC around the ponytail holder.  Sl st join and Ch1.  (12)
2.  2 SC in each st around.  Sl st join and Ch1.  (24)
3.  1 SC in each st around.  Sl st join and Ch1.  (24)
4.  1 SC in each of the first 8 st.  Ch1 and turn.  (8)

Stitch Marker Placement:
From the 8th stitch you just made in #4, count over and place stitch marker in the 5th unworked stitch (from #3).  Then count over 7 stitches and place the 2nd stitch marker.   (The 8 stitches from stitch marker to stitch marker will be joined with the last row)

5.  2 SC in the first st, 1 SC in the next 6 st and 2 SC in the last st.  Ch1 and turn.  (10)
6.  2 SC in the first st, 1 SC in the next 8 st and 2 SC in the last st.  Ch1 and turn.  (12)
7.  1 SC in each st across.  Ch1 and turn.  (12)
8-33.  Repeat #7.  (12)
34.  SC2tog, 1 SC in the next 8 st and SC2tog.  Ch1 and turn.  (10)
35.  SC2tog, 1 SC in the next 6 st and SC2tog.  FO and leave a long tail.  (8)

Joining:
1.  With the long tail, you will whipstitch the 8 stitches from Row 35 to the 8 stitches of Round 3 from stitch marker to stitch marker.

And, that's it!!!  A super easy and bulky Ponytail Ear Warmer for this Fall and Winter to keep your ears toasty warm and your ponytail in place.

Fingerless Gloves:
(make 2)

You will make a rectangular-shaped piece.

1.  With a 10.0mm hook, Ch19.  SC in 2nd ch from hook and across.  Ch1 and turn.  (18)
2.  1 SC in each st across.  Ch1 and turn.  (18)
3-8.  1 SC in BLO of each st across.  Ch1 and turn.  (18)
9.  Switch to an 8.0mm hook.  Working in both loops now and in the remaining rows, 1 SC in each st across.  Ch1 and turn.  (18)
10-15.  1 SC in each st across.  Ch1 and turn.  (18)
16.  For this last row, I worked SCFP and then SCBP in each st across.  FO.  Leave a long tail.

 Assembling: 
You have completed a rectangular-shaped piece.  Now, you will fold your piece over from left to right (or right to left).  Whipstitch to close seam.  But, remember to leave an opening for your thumb.  I whipstitched 1" down the seam, then I skipped over 1 and 1/2" for my thumb opening and then continued to whipstitch the remaining seam.  Weaved ends.

Here's a collage picture of all 5 projects that I completed with the 2 Caron Teak Cakes:


Happy Crocheting


Legal:
--don't claim my pattern/design as your own
--don't use my pics as your own
--okay to make and sale your finished work
--don't share my pattern electronically or in print format (without my consent) but provide a link to my blog