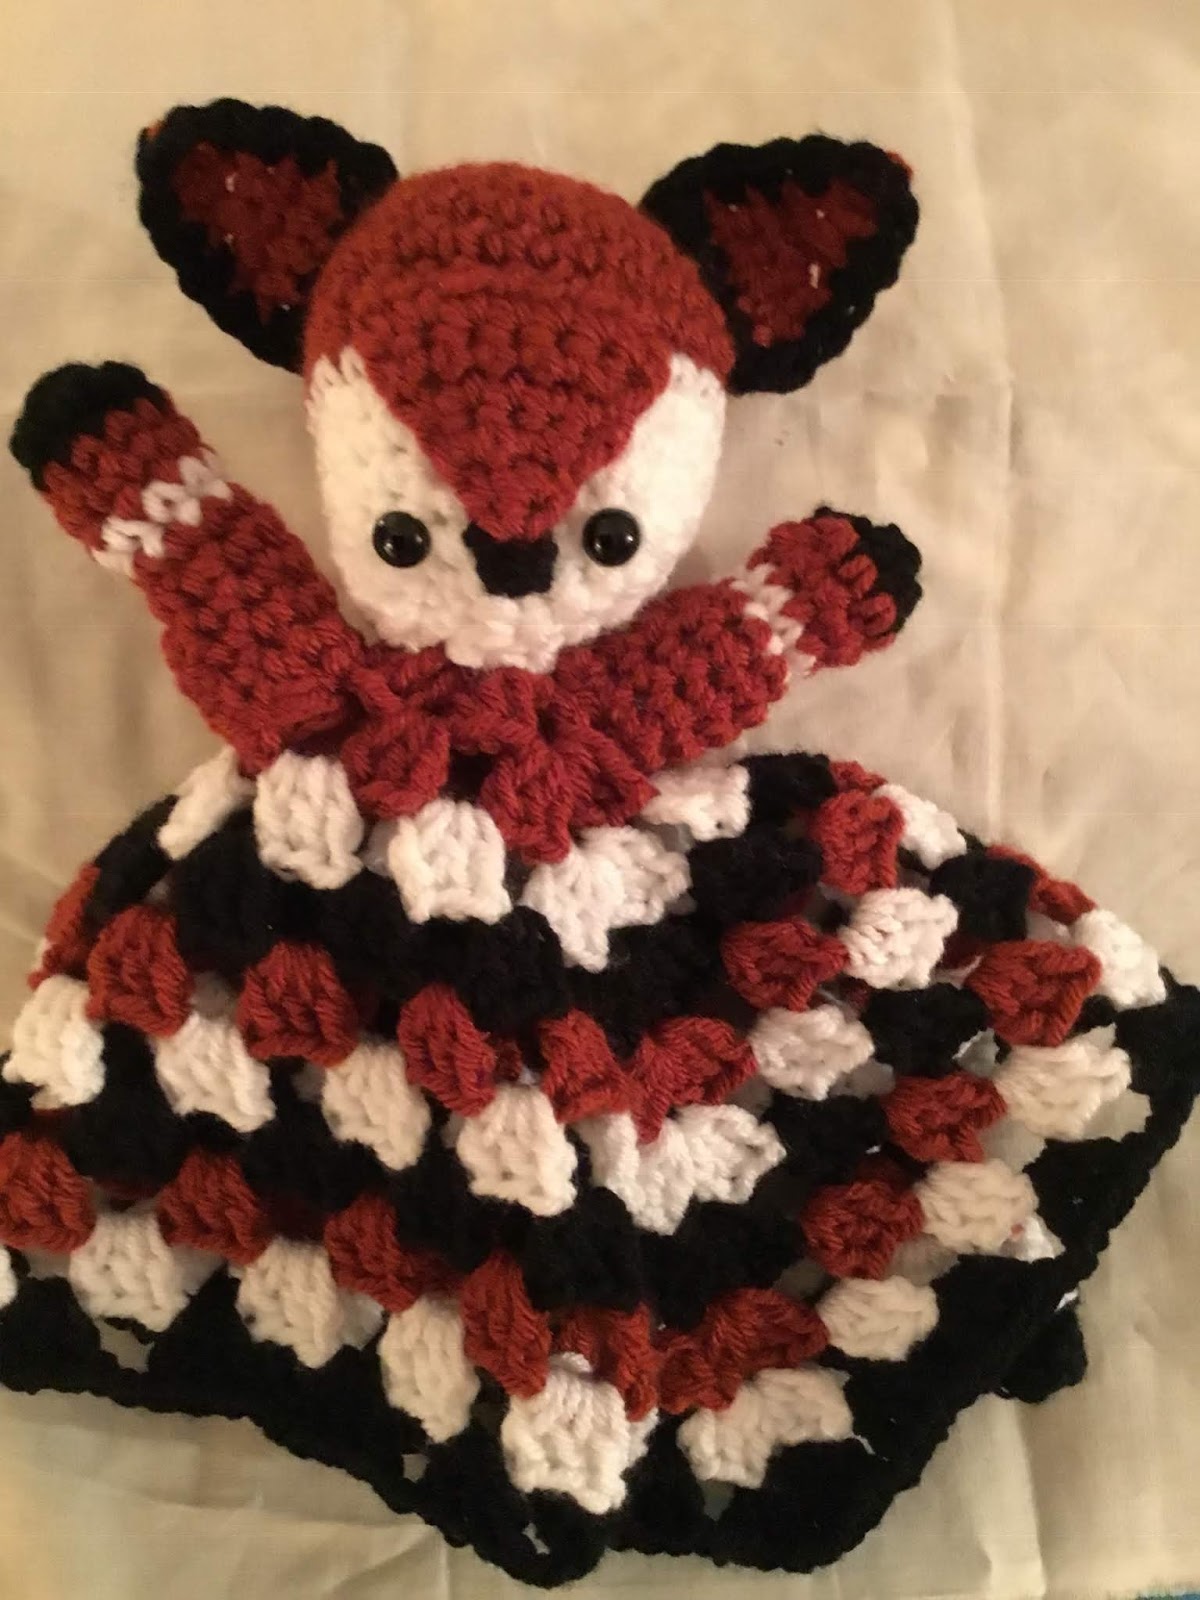
Here's my newest design, a "Fox Lovey." It is absolutely adorable. The colors, the cuteness - just the perfect gift for a boy or girl.
I made this in one evening. So, it's quick, easy and doesn't require a lot of yarn. I don't know the exact amount of yarn for this project but I used yarn from partial skeins I had on hand.
I hope you all will enjoy this pattern...
Fox Lovey Pattern
Size: Approximately 14" x 14" (blanket portion)
Materials:
--4.5mm & 5.5mm hooks
--I Love This Yarn in Terra Cotta, White and Black
--(2) 9mm safety eyes (or you can make crocheted eyes)
--small amount of Poly-fil stuffing for head and arms
--tapestry needle for weaving & attaching
U.S. Stitch Abbreviations:
Ch: chain
St: stitch(es)
Sl st: slip stitch
SC: single crochet
DC: double crochet
SC2tog: single crochet 2 together (creates a decrease)
MR: magic ring
Sk: skip
Rep: repeat
FO: fasten off
Warning: If you are making this for a baby, please be mindful with using "safety eyes." You may want to make crocheted eyes to prevent any potential choking. For crocheted eyes, you can use a 4.5mm hook and black yarn. 6 SC into MR. FO and attach.
Directions:
First we will make our Granny Square. I made mine to measure approximately 14" x 14." You can do a Traditional Granny Square, a variation of a Granny Square or use my pattern below.
Note: most Granny Squares start with a magic ring with 12 DC stitches; I made 24 DC stitches into my initial round.
1. With Terra Cotta yarn and 5.5mm hook, start with a MR. If you are not familiar with starting with a MR, you can Ch4 and sl st into the first ch to form a circle. Ch3 (counts as first DC), DC two times, Ch1, DC three times; this forms your first corner. Ch1. For the second corner, *DC three times, Ch1, DC three times. Ch1.* For the third corner, repeat from * to *. For the fourth corner, DC three times, Ch1, DC three times. Ch1. Sl st join to the third Ch. Pull tail to close/tighten the center hole.
2. For Round Two, you will continue with the Terra Cotta yarn. Sl st over three times. You will be working the first corner of this round into the Ch1 space. Ch3 (counts as first DC), DC two times, Ch1, DC three times. Ch1. *Sk 2 st. 3 DC into the previous round's Ch1 space. Ch1. Sk 2 st. Now, you are making the next corner. 3 DC into the Ch1 space. Ch1. 3 DC into same space. Ch1.* Rep from * to * around. After the last Ch1 is made, sl st join into the 3rd ch of the Ch3. FO and weave ends.
3. Join White yarn with a sl st into any corner. Ch3 (counts as first DC), DC two times, Ch1 DC three times. Ch1. *Sk 2 st. 3 DC into the previous round's Ch1 space. Ch1. Sk 2 st. 3 DC into the next Ch1 space of the previous round. Ch1. Sk 2 st. Now, you are making the next corner. 3 DC into next Ch1 space. Ch1. 3 DC into same space. Ch1.* Rep from * to * around. Sl st join to the 3rd ch of the Ch3. FO and weave ends.
4. Join Black yarn with a sl st into any corner. Repeat the same pattern scheme as in Round Three. (see below pic)
5. With Terra Cotta yarn, continue pattern scheme.
6. With White yarn, continue pattern scheme.
7. With Black yarn, continue pattern scheme.
8-10. Rep 5-7. FO and weave ends.
Now, we will make the Fox...
Head:
1. With 4.5mm hook and Terra Cotta yarn, 6 SC into MR. Sl st join to first st and Ch1. (6)
2. 2 SC in each st around. Sl st join to first st and Ch1. (12)
3. 2 SC in first st, 1 SC in next st. Rep around. Sl st join to first st and Ch1. (18)
4. 2 SC in first st, 1 SC in next 2 st. Rep around. Sl st join to first st and Ch1. (24)
5. 2 SC in first st, 1 SC in next 3 st. Rep around. Sl st join to first st and Ch1. (30)
6-8. 1 SC in each st around. Sl st join to first st and FO. Weave ends. (30)
9. With White yarn, join with a sl st into any st and Ch1. 1 SC in each st around. Sl st join to first st and Ch1. (30)
10-12. 1 SC in each st around. Sl st join to first st and Ch1. (30)
13. SC2tog, 1 SC in next 3 st. Rep around. Sl st join to first st and Ch1. (24)
14. SC2tog, 1 SC in next 2 st. Rep around. Sl st join to first st and Ch1. (18)
15. SC2tog, 1 SC in next st. Rep around. Sl st join to first st and Ch1. (12)
Before proceeding you will want to add your safety eyes. I placed mine at Round 13, with a 4 st space between the eyes. This is a good time to go ahead and stuff your head with the Polyfil.
16. SC2tog. Rep 5 more times around. Sl st join to first st and FO. Leave a long enough tail to weave in and out of this last round to close up the opening. Leave a long tail for attaching the head to the center of your Granny Square. (6)
Nose Stripe:
1. With 4.5mm hook and Black yarn, Ch2, 1 SC in the 2nd ch from the hook. FO yarn and join Terra Cotta yarn. Ch1. (1)
2. 2 SC into st. Ch1 and turn. (2)
3. 2 SC into first st, 1 SC in next st. Ch1 and turn. (3)
4. 2 SC into first st, 1 SC in next st, 2 SC into last st. Ch1 and turn. (5)
5. 1 SC into each st across. Ch1 and turn. (5)
6. 2 SC into first st, 1 SC into next 3 st, 2 SC into last st. Ch1 and turn. (7)
7. 1 SC into each st across. FO and leave a long tail for attaching. (7)
Ears (make 2):
1. With 4.5mm hook and Terra Cotta yarn, Ch2, 1 SC into the 2nd ch from the hook. Ch1 and turn. (1)
2. 2 SC into st. Ch1 and turn. (2)
3. 2 SC into first st, 1 SC in next st. Ch1 and turn. (3)
4. 2 SC into first st, 1 SC in next st, 2 SC into last st. Ch1 and turn. (5)
5. 1 SC into each st across. FO and weave ends. (5)
6. Join Black yarn into any st and Ch1. 1 SC into each st around. Sl st join and FO. Leave a long enough tail for attaching ears.
Arms (make 2):
1. With 5.5mm hook and Black yarn, 6 SC into MR. Sl st join to first st and Ch1. (6)
2. 2 SC into first st, 1 SC in next st. Rep around. Sl st join to first st and FO. Weave ends. (9)
3. Join Terra Cotta yarn, 1 SC into each st around. Sl st join to first st and Ch1. (9)
4. 1 SC in each st around. Sl st join to first st. Join White yarn. Do not fasten off Terra Cotta yarn. You can carry it over while working with the White yarn, or just leave it in the background while working the next round. (9)
5. With White yarn, 1 SC in each st around. Sl st join to first st and FO. Weave ends. Pick Terra Cotta yarn back up and Ch1. (9)
6-10. With Terra Cotta yarn, 1 SC in each st around. Sl st join to first st and Ch1. At the end of Round 10, FO and leave a long enough tail for attaching the arm.
Assembly:
1. Attach Nose Stripe at Round 8, with the Black nose time in the center of the eyes. (see my pics for help)
2. Attach Ears to each side of the head. I attached mine between Round 4 - 8.
3. Attach Head to center of Granny Square.
4. Attach Arm to each side of the Head.
And, that's it for this cute Fox Lovey that is sure to be a cherished heirloom for your little one. Below you will see my "Deer Lovey." I will hopefully get this pattern added to my blog this weekend...
I would love to hear your thoughts on this pattern. If you make this, please share with me on Instagram - #rilla2u...
Enjoy!!!
Happy Crocheting...
Legal:
--don't use/claim my design as your own
--don't use/claim my pics as your own
--okay to make and sale your finished work
--don't share my pattern electronically or in print format (without prior consent) but provide a link to my blog
Social Media:
If you are on the following sites, let's connect and hook up...
- Instagram: Rilla2u
- Pinterest: Rilla2u
- Twitter: Rilla2u
- Facebook: /rilla.edwards