Sunday, October 30, 2016

Crochet Boba Fett hat - Star Wars -- Free pattern


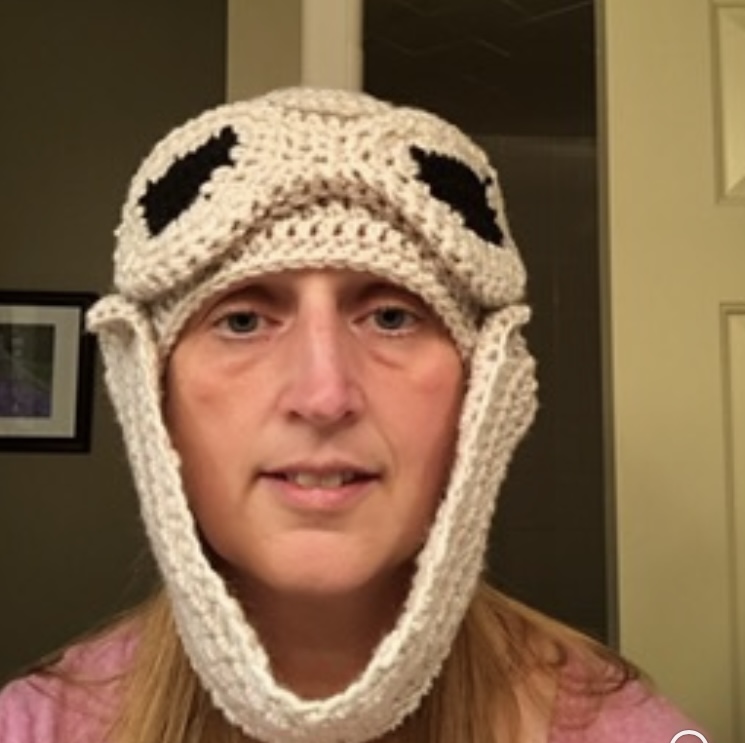
Crochet Boba Fett hat with my fav yarn, "I Love This Yarn," from Hobby Lobby for my daughter-in-law's party at my doc's office tomorrow.  Laurel works for "the best" doctor hands down...

I designed this pattern using the Herringbone Half Double Crochet (HHDC).  I love the look and texture of this stitch.  But, if you prefer you can just do the Half Double Crochet stitch.

The base of the hat was made to fit up to a 21" head circumference.  To make bigger just add more increase rows.

Materials:
--  5mm crochet hook
--#4 worsted weight yarn (I used I Love This Yarn from Hobby Lobby in mid green, terra cotta and yellow)
--felt in black, gray, yellow
--tapestry needle with a pointed point(to use when weaving thru felt layer)
--tapestry needle with a blunt point for remaining weaving
--Elmer's Craft Bond glue
(All materials needed came from Hobby Lobby...)

Base:
1.  Magic ring with 8 HHDC.  Join with sl st to 1st st.  Ch. 1.  (8)
2.  2 HHDC into each st.  Join with sl st to 1st st.  Ch. 1.  (16)
3.  2 HHDC, 1 HHDC around.  Join with sl st to 1st st.  Ch. 1.  (24)
4.  2 HHDC, 1 HHDC into next 2 stitches around.  Join with sl st to 1st st.  Ch. 1.  (32)
5.   2 HHDC, 1 HHDC into next 3 stitches around.  Join with sl st to 1st st.  Ch. 1.  (40)
6.   2 HHDC, 1 HHDC into next 4 stitches around.  Join with sl st to 1st st.  Ch. 1.  (48)
7.   2 HHDC, 1 HHDC into next 5 stitches around.  Join with sl st to 1st st.  Ch. 1.  (56)
8. - 20.  1 HHDC into each st around.  Join with sl st to 1st st.  Ch. 1.  (56)
21. - 30.  1 HHDC into the next 38 st.  Ch 1.  Turn.  (38)

At the end of row 30, fasten off and weave ends.

Now, I've never watched a single episode of Star Wars and I have no idea what the appliqué pieces are actually called so please forgive my elementary descriptions...

Front Center of hat:
This covers the forehead area.  I did this in terra cotta and in 2 parts, then joined together before attaching to the hat.

Part I.
1.  First, I chained 36.  Then 1 HHDC in 2 chain from hook and across.  Turn to work on foundation row.  (35)
2.  1 HHDC into the first 2 stitches.  Fasten off and join yarn on the last stitch of the foundation row, ch 1.  1 HHDC in same st as ch 1 and into the next st.  Fasten off.  Leave long tail.

Part II.
(Make 2)
1.  Ch 15.  1 HHDC into 2 ch from hook and across.  Ch 1.  Turn. (14)
2.  1 HHDC into each st across.  Ch 1.  Turn. (14)
3.  1 HHDC into the first 6 st and then HHDC2tog.  Ch 1.  Turn. (7)
4.  HHDC2tog, HHDC into next 3 st, HHDC2tog.  Ch 1.  Turn. (5)
5.  HHDC into next 3 st, HHDC2tog.  Ch 1.  Turn. (4)
6.  HHDC2tog, HHDC into next 2 st.  Ch 1.  Turn.  (3)
7.  HHDC across.  (3)
Fasten off.   Leave long tail for sewing.  Weave ends.

See pic and attach each Part II to the ends of Part I.

Right Side:
1.  With yellow yarn, I ch 6.  I double crocheted in 3rd ch from hook and across.  Ch 1 and turn.  (4)
2. - 14.  DC in each st across.  Ch 1 and turn.  At the end of row 14, fasten off.  Leave a long tail for sewing.

Left Side:
I did the left side the same as the right, but used the mid green yarn.

Back Center:
1.  With, terra cotta, ch 11.  HHDC in 2nd ch from hook and across.  Ch 1 and turn.  (10)
2. - 20.  HHDC into each st across.  Ch 1 and turn.  (10)

At the end of row 20, I ch 7.  HHDC in 2nd ch from hook and remaining 5 ch.  Sl st into each st of row 20.  Ch 7.  HHDC in 2nd ch from hook and remaining 5 ch.  Fasten off.  Leave a long tail for sewing.

Felt pieces:
Black felt:
--  I free form cut an expanded "T" for the front center.  Make it wide enough to fit under the front center.
--  I free form cut a strip approx. 5 1/2" long and 1/4" wide.
--  I free form cut (6) 2" long, 1/4" wide strips for the back center.
--  I free form cut a 2" x 1 1/2" strip for the antenna.
--  I free form cut a u-shaped strip.
--  I free form cut a 1 1/2" long strip and slightly snipped evenly across it.

Yellow felt:
--  I free form cut 7 very small rectangles.  See pic.

Gray felt:
--  I free form cut a u-shaped strip for the left side.
--  I free form cut a rectangle 2 1/2" x 1 1/2" long.
--  I free form cut a rectangle 1 1/2" x 1/2" long.

Assembly:
See pics to see where I either sewed the appliqué pieces or glued the felt pieces.


Please comment or email me with any questions.  If you make this hat, I would love to see pics.  This is my original design, please do not copy pics or claim as your own, but reference back to my blog.  You may make and sale at your own discretion.  Thanks and be blessed.


Friday, October 28, 2016

Crochet Batman & Robin...diy costumes...

Brothers, Jacob & Gabriel, two of my grandsons, are going to be Batman & Robin for Halloween this year.  I think they look just way too cute...and making their costumes just added more of a special touch to the occasion!!!


Tuesday, October 25, 2016

Crochet Elmo Hat -- (19" - 21" head circumference)

My daughter-in-law asked me to crochet an Elmo Hat for my grandson, Luke, for Halloween.  I think he's going to look super cute wearing it.  Working with eyelash yarn isn't the most enjoyable, but as long as you use a stitch marker and make sure your stitch count is correct in each round, then you should be fine.


Materials:
-- 5.5 mm hook
-- #4 worsted weight yarn in red ( I used Red Heart Super Saver)
-- #5 bulky yarn in red ( I used Gilt Eyelash in Star Ruby)
-- small amount of #4 worsted weight yarn in orange, black and white (I used Red Heart Super Saver)
-- tapestry needle

Abbrev.
MR = magic ring
HDC= half double crochet
SC = single crochet
Inc = increase
Dec = decrease
FO = fasten off
Sl St = slip stitch

Instructions:
Hat 
1.  Holding the red yarn and gilt eyelash yarn together make a MR and ch 1.  8 HDC into MR.  Sl st to 1st HDC.  Ch 1.  (8)
2.  2 HDC into each st around.  Sl st to join.  Ch 1.  (16)
3.  2 HDC into first st, 1 HDC in next st.  Repeat around.  Sl st to join.  Ch 1.  (24)
4.  2 HDC into first st, HDC into the next 2 st.  Repeat around.  Sl st to join.  Ch 1.  (32)
5.  2 HDC into first st, HDC into the next 3 st.  Repeat around.  Sl st to join.  Ch 1.  (40)
6.  SC into the first 9 st, then 2 SC in the next st.  Repeat around.  Sl st to join.  Ch 1.  (44)
7-14.  1 HDC into each st around.  Sl st to join and ch 1.  At the end of row 14, sl st to join and ch 1.  Don't FO.  

First Earflap:
1.  HDC in the same st as the ch 1 and into the next 9 st.  Turn.  (10)
2.  HDC dec in first 2 st, 1 HDC into the next 6 st, then HDC dec in last 2 st.  Ch 1.  Turn. (8)
3.  1 HDC into each st across. Turn.  (8)
4.  HDC dec in first 2 st, 1 HDC into the next 4 st, then HDC dec in last 2 st.  Ch 1.  Turn. (6)
5.  1 HDC into each st across.  Turn.  (6)
6.  HDC dec in first 2 st, 1 HDC into the next 2 st, then HDC dec in last 2 st.  Ch 1.  Turn. (4)
7.  1 HDC into each st across.  Turn. (4)
8.  HDC dec 2 times. Turn. (2)
9.  HDC dec.  FO.

Second Earflap:
I laid my hat down and joined yarn directly across from the first earflap and then repeat as for the first earflap.  

Eyes (make 2):
1.  With black yarn, make a MR and ch 1.  8 HDC into MR.  Sl st to first HDC to join.  Ch 1.  (On last st, join with white yarn)
2.  2 HDC into each st around.  Sl st to join.  Ch 1.  (16)
3.  1 HDC into each st around.  Sl st to join.  Ch 1.  (16)
4.  1 SC into each st around.  Sl st to join.  Leave a long tail for attaching to Hat.  FO.  (16)
5.  Lightly stuff. 

Nose:
For the nose, I wound the orange yarn around my 4 fingers 60 times, slipped off my hand gently and tied in the center.  Be sure to leave a long tail for attaching to the hat.  I then cut all the loops, trimmed to even out and rubbed together to make the ball more uniform.  

Assembly:
Use tapestry needle to weave any stray strands and to attach eyes and nose.   


Monday, October 24, 2016

Star Wars Crochet Rey Hat -- free pattern


A nurse at my doc's office asked if I could make the hat the character Rey wears.  Of course, I said sure, with the full knowledge of knowing that I absolutely know nothing about Star Wars...lol.


Materials:
--  #4 worsted weight yarn in main color and a small amount in a contrast color and black
--  5mm hook
--  tapestry needle
--  4 buttons

Note:  I worked in the round so I didn't join or start each row with a chain.  

Hat:
1.  I used the magic ring and started with 11 Dc.  (11) 
2.  2 Dc into each st.  (22)
3.  2 Dc in first st, 1 Dc in the next st.  Repeat around.  (33)
4.  2 Dc in first st. 1 Dc in the next 2 st.  Repeat around.  (44)
5.  2 Dc in first st. 1 Dc in the next 3 st.  Repeat around.  (55)
6.  2 Dc in first st. 1 Dc in the next 4 st.  Repeat around.  (66)
7.-12.  1 Dc into each st around.  Fasten off and weave ends.

Scarf:
I made 10 rows of 45 HDC in each row with a ch 1 at the start of each new row.  Depending on the size of your neck and/or head you can add or take away rows.  

After the scarf was made, I decided where to place the buttons on the sides of the hat.  I used clear buttons.  


Goggles:
I made each eye section first and then joined together.  
With black yarn, Ch 10.  Sc in 2nd ch and remaining ch.  Ch 1.  Turn.  (9)
1.  9 sc across.  Ch 1. Turn.
2.  7 sc and then dec in the last 2 stitches.  Turn.  (8)
3.  Dec in first 2 stitches, 6 sc across.  Ch 1.  Turn. (7)
4.  5 sc and then dec in the last 2 stitches.  Turn.  (6)
5.  Dec in first 2 stitches, 4 sc across.  In the last st, join with main color yarn. Ch 1. Turn.  2 HDC in first stitch, HDC into next 3 stitches and 2 HDC in the last st.  Now turn, working on the side and evenly HDC, then across the foundation row and up the other side.  Join with sl st to first HDC.  
6.  HDC around piece one more time.  Fasten off and set aside.

For the second eye section:
1.  Ch 10, sc 2nd ch from hook and remaining chains across.  Ch 1. Turn. (9)
2.  9 sc across.  (9)
3.  Dec in first 2 st, then 7 sc across.  Ch 1.  Turn.  (8)
4.  6 sc across, dec in the last 2 stitches.  (7)
5.  Dec in first 2 st, then 5 sc across.  Ch 1.  Turn.  (6)
6.  4 sc, then dec in the last 2.  Ch 1.  Turn.  Join with main color.  2 HDC in first st, HDC in next 3 stitches and 2 HDC in the last st.  Now turn, working on the side and evenly HDC, then across the foundation row and up the other side.  Join with sl st to first HDC.  
7.  HDC around piece one more time.  Fasten off.  

To assemble eyes to make the goggles, I joined main color on one of the eye sections inner section.  I ch 1 and then sc in same stitch and in 2 more st.  Ch 1.  Turn.  3 sc across.  Ch 1. Turn.  A third row of 3 sc across.  Fasten off.  Leave a tail long enough to whipstitch to the other eye section.  

I then joined main color in a corner and sc around.  On last st, I joined contrasting color and sc around.  Fasten off.  Weave ends.  

The nurse I'm making this for did not want the goggles appliqued on.  She wanted them to be removable.  I ch 61 and then sl st from 2nd ch all the way across.  Fastened off.  Leaving a long tail for sewing.  I made a second one.  I then attached each strap to the sides of the goggles.  

So, this hat can be worn with the scarf and goggles, one or the other or just as a plain beanie. .  

(I think these googles would make a great mask for sleeping and/or relaxing in the tub.  A great gift item to add to a lady's pampering gift.)

 I hope y'all enjoy this.  Comment or email me any questions.  If you use this pattern, I'd love to see your work.  Feel free to sell anything you make.  I just ask that you link back to my blog.

Blessings.


Saturday, October 22, 2016

Crochet Mouse Hat & diy Hickory Dickory Dock Clock...

Nursery Rhyme Day is coming up for a Kindergarten class and a friend asked me if I could make her son something from the nursery rhyme, "Hickory Dickory Dock..."

Check out my pics.  I crocheted the hat using the herringbone half double crochet and just love this stitch...


Materials for Hat:
--#4 worsted weight yarn in gray (I used "I Love This Yarn" from Hobby Lobby) and small amount of black and white yarn
--5mm crochet hook
--tapestry needle

Special stitch:  Herringbone Half Double Crochet (HHDC) - yarn over, insert hook into ring or next stitch, yarn over, coming back thru the ring or stitch and the first stitch on the hook, and then yarn over and bring 2 loops on hook thru.

Note:  this can be worked in the round or joined with a sl st to the first stitch.

Pattern:
This hat will fit 20-21" circumference with some give to stretch.

Hat base:
1.  Magic ring.  Ch 1.  11 Herringbone Half Double Crochet (HHDC).  Join to first stitch and ch 1.
2.  2 HHDC into each stitch.  Ch 1.  (22)
3.  1 HHDC, 2 HHDC into each stitch around.  Ch 1.  (33)
4.  1 HHDC into next 2 stitches, then 2 HHDC into next stitch around.  Ch 1.   (44)
5.  1 HHDC into next 3 stitches, then 2 HHDC into next stitch around.  Ch 1.  (55)
6.  1 HHDC into next 4 stitches, then 2 HHDC into next stitch around.  Ch 1.  (66)
7-16.  1 HHDC into each stitch around with ch 1 at start of each round.  Do not fasten off.


First Earflap:
1.  Ch 1.  1 HHDC in same stitch as ch 1 and into next 9 stitches.  Ch 1.  (10)
2.  HHDC decin first 2 stitches, 1 HHDC into next 6 stitches and HHDC dec in last 2 stitches.  Ch 1. (8)
3.  1 HHDC into each stitch around.  Ch 1.  (8)
4.  HHDC dec in first 2 stitches, 1 HHDC into next 4 stitches and HHDC dec in last 2 stitches. Ch 1.  (6)
5.  1 HHDC into each stitch around.  Ch 1.  (6)
6.  1 HHDC decrease in first 2 stitches, 1 HHDC into next 2 stitches and HHDC dec in last 2 stitches.  Ch 1. (4)
7.  1 HHDC into each stitch around.  Ch 1.  (4)
8.  2 HHDC dec. Ch 1.  (2)
9.  1 HHDC dec.  Fasten off.


Second Earflap:
As you can see in above pic, I laid my hat flat and joined yarn in first stitch directly across from first earflap.  Ch 1.  HHDC in same stitch and in next 9 stitches.  Just make sure it matches up with the first flap.  Then repeat steps 2-9 of first earflap.  I then joined black yarn to the last row of the hat base and single crochet into each stitch around.  Weave ends.


Nose:
I used white yarn.
1.  Magic ring.  Ch 1.
2.  5 HHDC into ring.  Join to first stitch.  Ch 1.  (5)
3.  2 HHDC into each stitch around.  Join and Ch 1.  (10)
4.  1 HHDC into each stitch around.  (10)
5.  Fasten off and lightly stuff.


Ears (make 2):
1.  With white yarn, magic ring and Ch 1.
2.  8 HHDC into magic ring.  Pull yarn to tighten but do not join.  Turn.  Ch 1. (8)
3.  1 HHDC into each stitch around.  On last stitch, join with main color yarn.  Turn.  Ch 1.  (8)
4.  2 HHDC into first stitch, 1 HHDC into next 6 stitches and 2 HHDC into the last stitch.  Turn.  Ch 1.  (10)
5.  Repeat #4.  Fasten off.  Leave a long tail for attaching.  


Eyes (make 2):
1.  With black yarn, magic ring.  Ch 1.
2.  6 HHDC into magic ring.  Join with sl st to first stitch and fasten off.  Leave a long tail for attaching.  


Assembly:
I sewed the ears, nose and then eyes on.  Weave ends.  
  
Tip:  I left a long enough tail on each eye to attach eye and to embroider 3 eyelashes above each eye.    I then embroidered 3 whiskers to each side of the nose.


Tuesday, October 18, 2016

Carolina Renaissance Festival...

My two oldest grand babies, Jacob (5) and Arielle (2 1/2), are really looking forward to Student Days today at the Carolina Renaissance Festival.  I home school them and we have been planning their first field trip for the past month.  So, we are super-excited to lapse back into a world before technology and just have fun, play games, eat and definitely watch a jousting tournament.  

So, I will unlikely do any crocheting today but I will be putting smiles on my grand babies' faces...which is priceless.  Fall (Autumn) is such a wonderful time of year to enjoy the outdoors, festivals galore, pumpkin patches and maybe, even a Halloween trail.  

I'm blessed to have my 4 grand babies to live so close to us to experience lots of fun times and to sit with them in church every Sunday.  I'm overwhelmed with gratitude and blessed so much more than I truly deserve.  

Today is all about having fun, eating and maybe learning something from generations ago!!!  I hope y'all have a blessed day and are planning some type of fall activity that will take you outdoors to enjoy God's beautiful myriad of colors this time of year...


Monday, October 17, 2016

Crochet Elsa Hat...

My granddaughter, Arielle, is a huge...and I mean huge...Elsa fan.  She is Elsa everyday...lol.  Last week, I made her an Elsa hat.  So, this week, I had to make me one, too.  She has such a vivid imagination for a 2 1/2 year old and is such a joy to listen to when she is in character.

I made this hat with Red Heart Soft yarn in turquoise.  I used HDC stitch, starting with 10 in magic ring.  I did increase rows until I reached my head circumference and then I completed rounds of 1 HDC to each stitch until I reached the length just above my ears.  I then completed 6 rows of SC in the back loops only.  Fastened off and weaved ends.

I made the snowflake appliqué with SC stitches in the magic ring and then just HDC stitches, chains and picots.  There's tons of free snowflake patterns on the internet so just find one that you like or create your own.

The braid was made using desired length of white yarn into 10 stitches across the last row and then into ten stitches of second and third last rows.  Braid and tie off.  I put my braid on the same side as the snowflake.

I don't like taking selfies but had to try the hat on...lol.


Happy Crocheting…

Sunday, October 9, 2016

Snowman Cozy!!!

Snowman Cozy

I'm really liking how this Snowman cozy pattern turned out to use on the Bath & Body 8 oz mist spray.  You can use the cozy on an empty bottle to repurpose and make part of your holiday decor OR use on a new bottle as part of a gift.

This is my own, original design and took time to put together.  The pattern can be changed a little to make so many seasonal items.  Very versatile.  I will hopefully add the pattern tomorrow and update this post.  Please respect that this is my original design and abide with copyright.  It's fine to make and sale whatever you make.  Please, however, reference my blog as the designer....

Blessings this Sunday evening.


Tuesday, October 4, 2016

Crochet Apron -- Snow White (inspired)...Toddlers/Kids FREE Pattern


Snow White Apron Pattern
Size:  2T - 5
(my granddaughter is tall for a 2-year-old; this apron reaches her calves which gives plenty of years for her to wear it and to play dress up); adjust rows accordingly by increasing or decreasing rows to fit your little princess...

Materials:
--5 mm crochet hook for the apron
--4 mm crochet hook for the bow and apple applique
--Worsted Weight #4 yarn in yellow, blue, red and white and a very minimal amount of green (for apple leaf) and brown (for apple stem)
--Tapestry needle

Directions:
Apron:
(worked from bottom up)

Row 1:  With yellow yarn, 45 FHDC.  Ch 1. Turn.  (45 HDC st)
Row 2 - 25:  HDC into each st across.  Ch 1. Turn.  (45 HDC st)
Row 26:  Working on the wrong side with this row, HDC into each st across in FLO.  Join red yarn in last st.  Ch. 1. Turn.  (45 HDC st)

(With red yarn)
Row 27-28:  HDC into each st across.  Ch 1. Turn.  (45 HDC st)
Row 29-30:  HDC into first st, *FPHDC next st, BPHDC next st,* repeat across.  HDC into last st.  Join blue yarn in last st.  Ch 1.  Turn.  (43 fphdc & bphdc; 2 HDC st)

(With blue yarn)
Row 31-39:  (decrease rows) HDC2tog at the beginning and ending of each row.  HDC remaining st.  Ch 1. Turn.
Row 31:  43 st
Row 32:  41 st
Row 33:  39 st
Row 34:  37 st
Row 35:  35 st
Row 36:  33 st
Row 37:  31 st
Row 38:  29 st
Row 39:  27 st

Row 40-41:  HDC into each st across.  Ch 1.  Turn.  (27 HDC st)

Row 42-44:  (decrease rows) HDC2tog at the beginning and ending of each row.  HDC remaining st.  Ch 1.  Turn.
Row 42:  25 st
Row 43:  23 st
Row 44:  21 st

Row 45-47:  HDC into each st across.  Ch 1.  Turn.  (21 HDC st)
Row 48:  HDC into first 10 st.  HDC drop st (into row 47 st), HDC into last 10 st.  Ch 1. Turn.  (20 HDC st and 1 HDC drop st)

Row 49-52:  Repeat Row 48 with the 11th HDC st being dropped into previous row.  Ch 1.  Turn. (20 HDC st and 1 HDC drop st)


(Neck strap)
Row 53-76:  HDC into the first 3 st only.  Ch 1.  Turn.  (3 HDC st).  At end of row 76, leave a tail long enough to join to the other side.

(With white yarn)
Row 1:   Join yarn at Row 26 in FLO of the blue yarn.  HDC into each FLO st across.  Ch 1.  Turn.  (45 HDC st)
Row 2-10:  HDC into each st across.  Ch 1.  Turn.  (45 HDC st)
Row 11:  HDC3tog, HDC into next 39 st, and HDC3tog.  Fasten off.  (41 HDC st)

(With red yarn)

Join with a sl st at row 30.  Ch 82.  HDC into 3rd ch from hook and remaining chs.  Fasten off and weave ends.  (80 HDC st).  Repeat on other side.

Bow:
(With red yarn)
Ch 7
Row 1.  SC into 2nd st and across.  Ch 1.  Turn.  (6 SC st)
Row 2-14:  SC into each st across.  Ch 1.  Turn.  (6 SC st)

At the end of Row 14, fasten off.  Weave ends.  Using red yarn, wrap yarn around the center 10-12 times.  Leave a tail long enough to knot and attach to the apron.  (see pic)

Apple:
(With red yarn)
1.  10 HDC into Magic Loop.  Sl st to first HDC.  Ch 1.  (10 HDC st)
2.  2 HDC into each st.  Sl st to first HDC and ch 1.  (20 HDC st)
3.  *2 HDC into first st, 1 HDC into next st* repeat around.  Sl st to first HDC.  (30 HDC st)


For the leaf, in green yarn, ch 7.  SC in 2nd ch from hook, 1 HDC, 1 DC, 1, Triple, 1 DC & 1 HDC.  Then turn and work on the opposite side of the foundation row.  1 HDC, 1 DC, 1 Triple, 1 DC & 1 HDC.  Sl st.  Fasten off.  Leave a tail long enough to attach to the apple.  Make a second leaf. 

For the stem, in brown yarn, ch 5.  SC st in 2nd ch from hook and remaining st.  Fasten off.  Leave a tail long enough to attach to the apple.

The hat is not my pattern.  But here is the info:
2
Here’s the link on Pinterest: https://pin.it/cz3yr5eprenrfg
Here’s the link to the website: http://www.achickwsticks.com/2013/04/bon-appetit.html


With this pattern, you can make a few adjustments and create all the different princesses' looks you want.  Here is a pic of the Ariel apron for my granddaughter, Arielle.

Legal:
You may use my pattern to make and sale your finished product(s).  However, I just ask that you:

  • do not claim the pattern as your own
  • do not use my pics as your own
  • add a link to reference back to my blog 
 This is my original design and I spent a lot of time writing/creating this design to share with the crocheting community!!!!