I hope everyone is having a wonderful Memorial Day Weekend. I just got back home from a few days at the beach with my son and two of my grandchildren. It was so much fun and relaxing. And, I didn't take any yarn/hooks with me. I was determined to focus on my grand babies and rest....We literally had so much fun that, for a moment, the idea of giving up everything at home and just moving to the beach would be the ultimate life. And, then Reality slaps you in the face when your cell phone dings with a text message from a bill provider reminding you of your upcoming payment due date. Ah, but, for a brief time, we get to imagine the beach life for a few days and it's gloriously appreciated.
But, back to reality for me. My blog posts have been a little slow the past 4-6 weeks. I have been working on multiple new ideas and designs. It's taking a little longer than expected. I do want to go ahead and share how my "medical" project is progressing.
This is a long project that's going to include a lot of cool items. To date, I have completed a few pieces, which include:
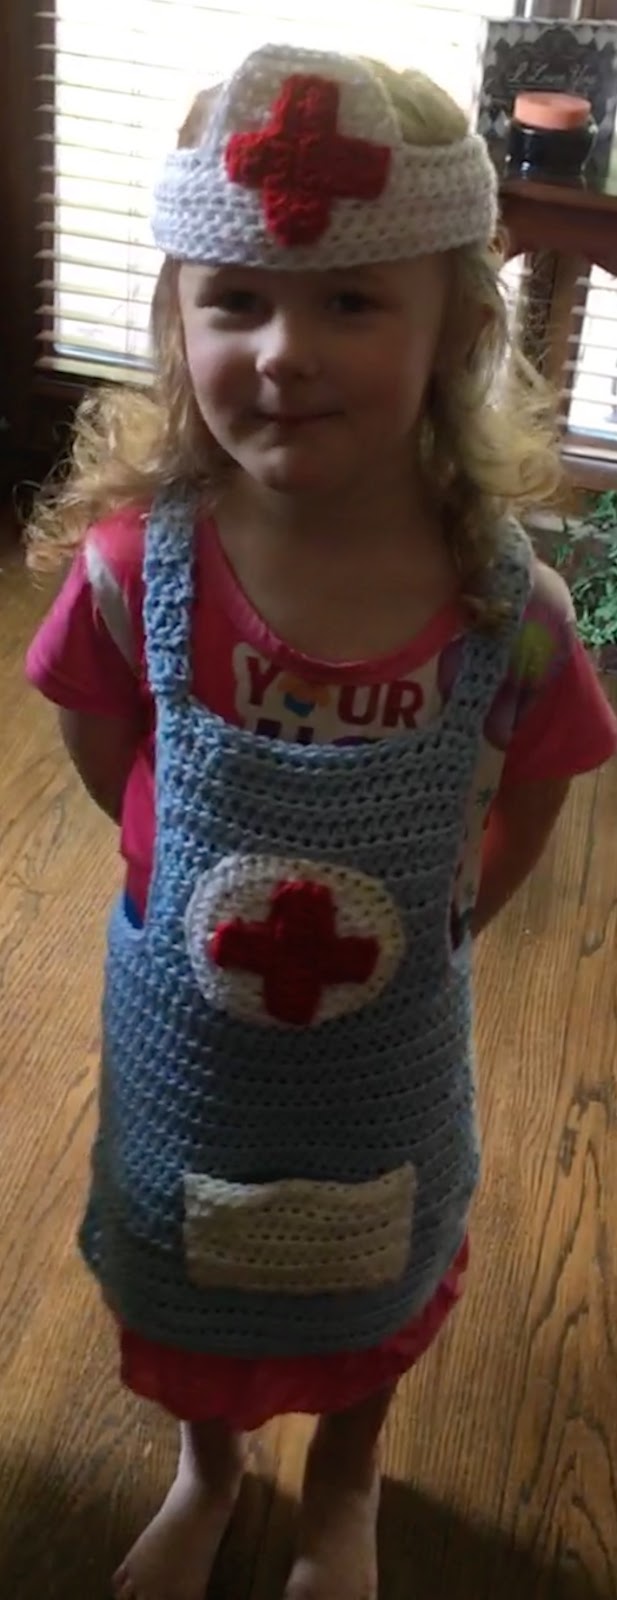
A. Nurse Apron
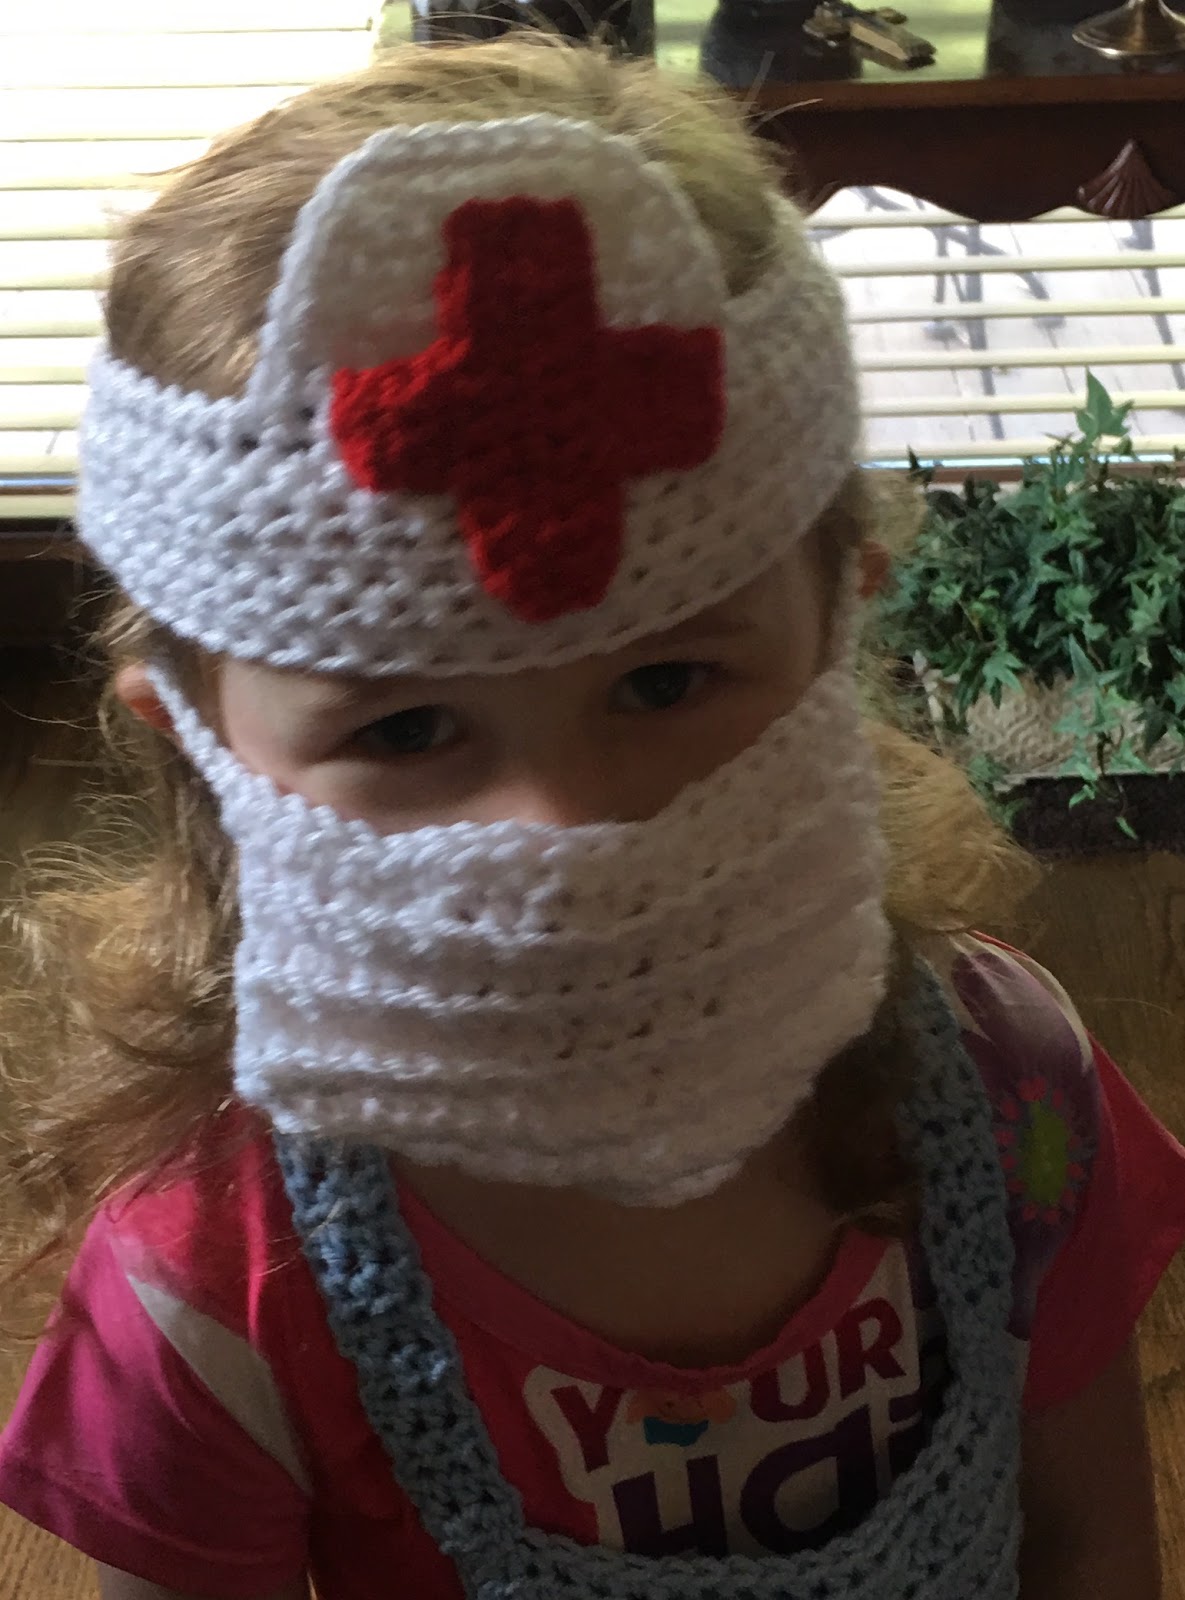
B. Nurse Hat
C. Blood pressure cuff
D. Faux arm cast
E. Surgeon's Hat
F. Surgeon's Top Scrubs
G. Surgery Mask
H. Doctor Bag
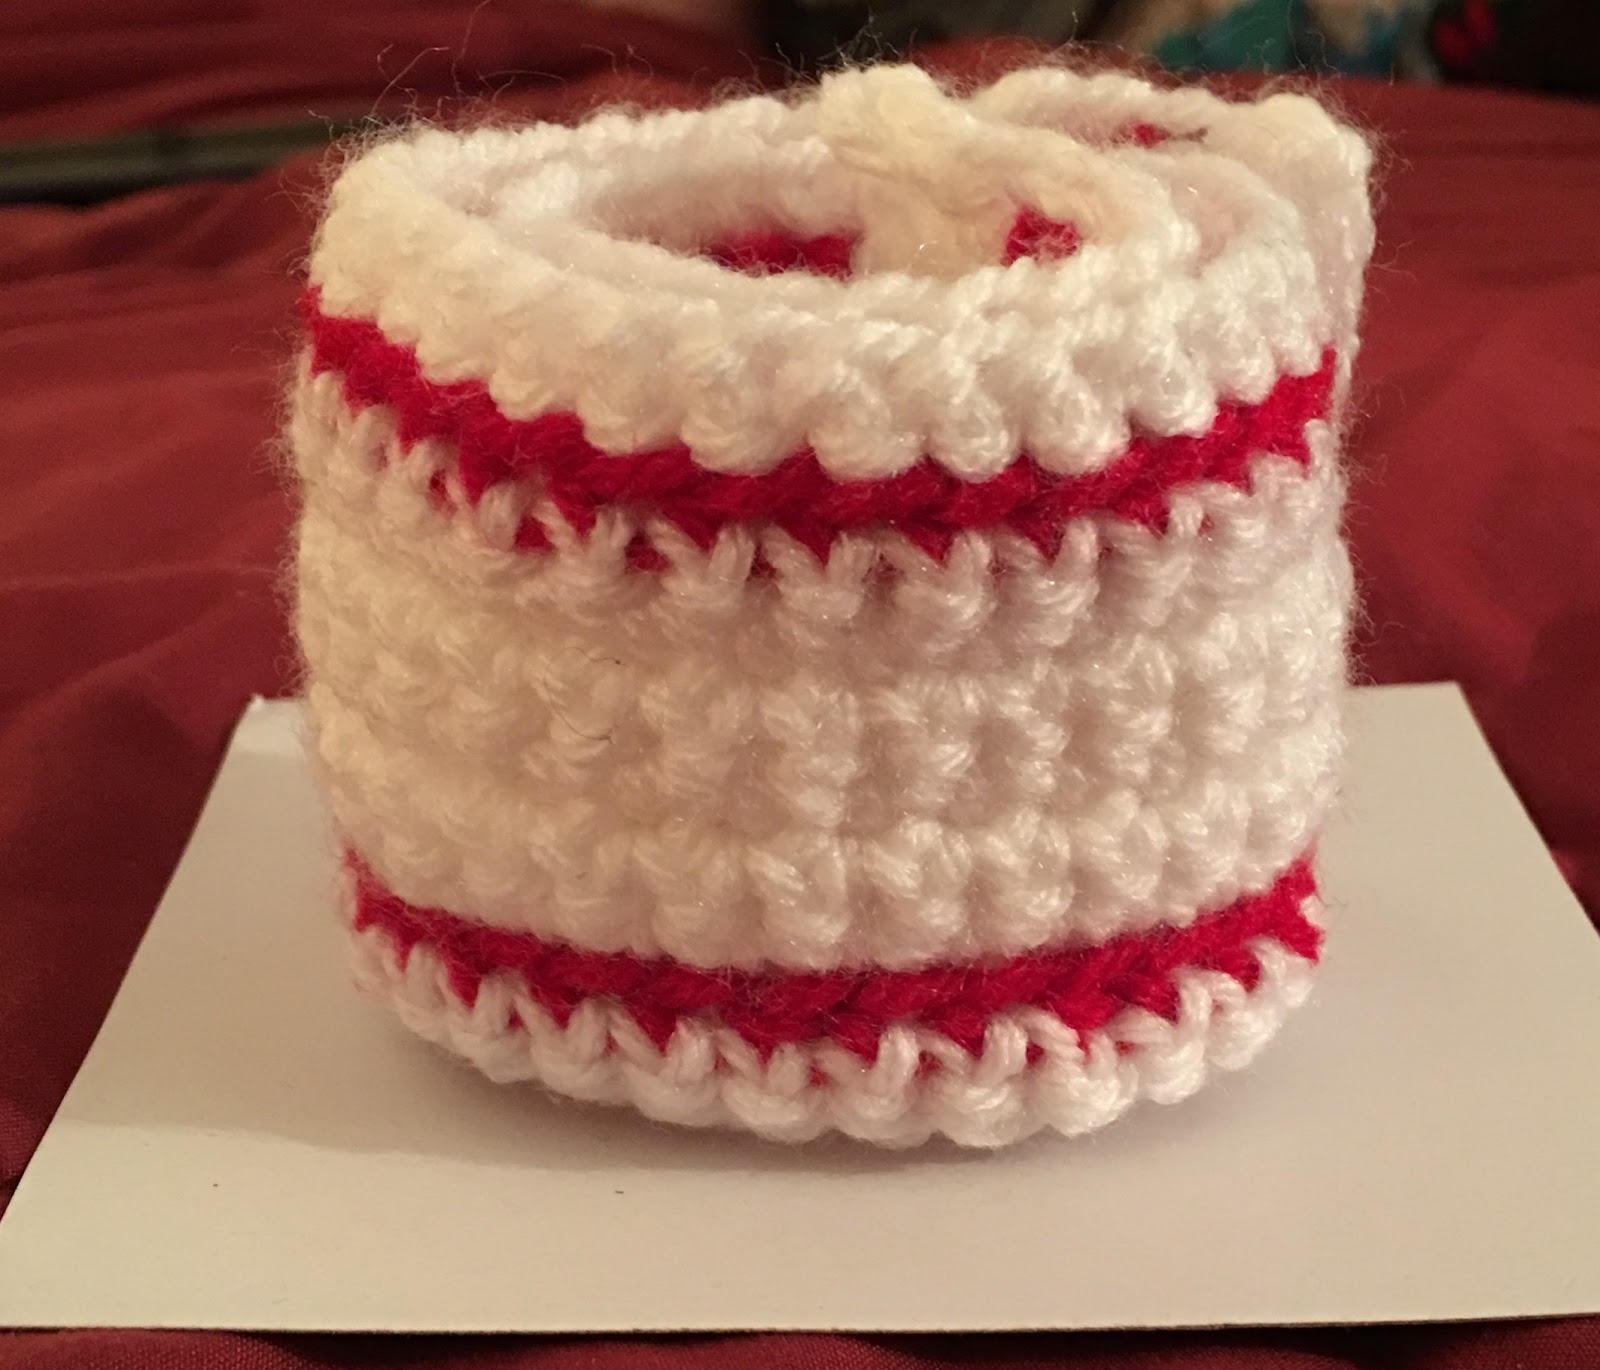
I. Ace Bandage
Here is the Medical Project Collection Link to my Etsy Shop to purchase the Ad-Free PDF version of this entire pattern for $5.00, if you prefer. My sincere appreciation to anyone and everyone who decides to purchase the PDF pattern.
A. NURSE APRON
Size: Measures approx. 17" long (you can easily adjust this pattern for someone smaller or bigger; I know both of my 2-year-old grandsons have put it on - slightly big on them; and my 4-year old granddaughter - as you can see in the pics, and my 7-year old grandson - a little snug)
Gauge: 12 HDC stitches x 10 rows = 4"
Materials:
--6.0mm hook
--#4 worsted weight yarn (I used Red Heart Super Saver yarn in light blue, white and red)
--tapestry needle for weaving
U.S. Stitch Abbreviations:
Ch: chain
St: stitch(es)
Sl st: slip stitch
SC: single crochet
HDC: half double crochet
FHDC: foundation half double crochet
DC: double crochet
Sk: skip
Rep: repeat
MR: magic ring
FO: fasten off
Directions:
(The apron is made from the bottom up.)
Apron:
1. FHDC 40. Or, ch41, HDC in 2nd ch from hook and across. Ch1 and turn. (40)
2. 1 HDC in each st across. Ch1 and turn. (40)
3-25. Rep #2.
26-27. 1 DC in each st across. Ch1 and turn. (40)
28. 1 DC in each st across. FO and weave ends. (40)
29. Sk 10 st and join yarn with a sl st and Ch1 into st #11. HDC in same st. 1 HDC in each of the next 19 st. Ch1 and turn. (20)
30-42. 1 HDC in each st across. Ch1 and turn. (20)
43. 1 HDC in each st across. Ch1 and turn. (20)
Border:
44. 1 SC in each st evenly around apron. Join with sl st to first st and FO. Weave ends.
Waist Strap (make 2):
1. FHDC 60. Or, Ch61, HDC in 2nd ch from hook and across. Ch1 and turn. (60)
2. 1 HDC in each st across. FO and leave a long enough tail for attaching.
Repeat for 2nd strap.
Neck Strap:
1. Join yarn with a sl st and Ch1 in the last st of Row 43 of the Apron. HDC in same st. 1 HDC in each of the next 2 st. Ch1 and turn. (3)
2. 1 HDC in each st across. Ch1 and turn. (3)
3-29. 1 HDC in each st across. Ch1 and turn. (3)
30. 1 HDC in each st across. FO and leave a long enough tail for attaching to the opposite side.
Pocket:
1. FHDC 15. Or, ch 16, HDC in 2nd ch from hook and across. Ch1 and turn. (15)
2-9. 1 HDC in each st across. Ch1 and turn. (15)
10. 1 HDC in each st across. FO and leave a long tail for attaching. (15)
Cross Applique:
Base Circle:
1. With white yarn, 8 HDC into MR. Sl st join and Ch1. (8)
2. 2 HDC in each st around. Sl st join and Ch1. (16)
3. 2 HDC in first st, 1 HDC in next st. Rep around. Sl st join and Ch1. (24)
4. 2 HDC in first st, 1 HDC in next 2 st. Rep around. Sl st join and Ch1. (32)
5. 2 HDC in first st, 1 HDC in next 3 st. Rep around. Sl st join and FO. Leave a long enough tail for attaching. (40)
Cross:
1. With red yarn, Ch12. SC in 2nd ch from hook and across. Ch1 and turn. (11)
2. 1 SC in each st across. Ch1 and turn. (11)
3. 1 SC in each st across. Don't Ch1 and turn. (11)
4. Sl st in 4 st. Ch1. SC in next 3 st. Ch1 and turn. (3)
5-6. 1 SC in each st across. Ch1 and turn. (3)
7. 1 SC in each st across. FO and leave a long enough tail for attaching. (3)
8. Join red yarn on opposite side at base ch #5 with a sl st and Ch1. SC in same. 1 SC in next 2 st. Ch1 and turn. (3)
9-10. 1 SC in each st across. Ch1 and turn. (3)
11. 1 SC in each st across. FO and leave a long enough tail for attaching. (3)
Assembly:
1. Attach each waist strap on the side between Rows 26-28.
2. Attach the neck strap to the last 3 stitches on the opposite side.
3. Attach pocket to center bottom portion of apron. I placed mine in the center at Row 7-16.
4. Attach Cross to the center of the base circle. Then attach to the Apron top center, beginning at Row 38.
***********************************
B. NURSE HAT:
Size: Fits a 20" head circumference
Gauge: I did not gauge hat
Materials:
--6.0 & 4.0mm hooks
--#4 worsted weight yarn (I used Red Heart Super Saver yarn in white and red)
--tapestry needle for weaving
U.S. Stitch Abbreviations:
Ch: chain
St: stitch(es)
Sl st: slip stitch
SC: single crochet
SC2tog: single crochet 2 stitches together (creates a decrease)
HDC: half double crochet
FHDC: foundation half double crochet
FO: fasten off
Directions:
(If you need your hat smaller or bigger, then adjust your starting ch/st.)
1. With 6.0mm hook and white yarn, FHDC 45. Or, Ch46. HDC in 2nd ch from hook and across. Ch1 and turn. (45)
2-4. 1 HDC in each st across. Ch1 and turn. (45)
5. 1 HDC in each st across. FO and leave a long enough tail to join the ends together with a whipstitch. Join ends together and make sure you have the right length for your head circumference.
6. Count over 6 stitches on the right side and join yarn with a sl st and Ch1 in the next st. SC in same st. 1 SC in each of the next 9 st. Ch1 and turn. (10)
7-8. 1 SC in each st across. Ch1 and turn. (10)
9. SC2tog, 1 SC in next 6 st. SC2tog. Ch1 and turn. (8)
10. 1 SC in each st across. Ch1 and turn. (8)
11. SC2tog, 1 SC in next 4 st, SC2tog. Ch1 and turn. (6)
12. 1 SC in each st across. Ch1 and turn. (6)
13. SC evenly around the hat. FO and weave ends.
Cross:
1. With red yarn and 4.0mm hook, Ch12. SC in 2nd ch from hook and across. Ch1 and turn. (11)
2. 1 SC in each st across. Ch1 and turn. (11)
3. 1 SC in each st across. Don't Ch1 and turn. (11)
4. Sl st in 4 st. Ch1. SC in next 3 st. Ch1 and turn. (3)
5-6. 1 SC in each st across. Ch1 and turn. (3)
7. 1 SC in each st across. FO and leave a long enough tail for attaching. (3)
8. Join red yarn on opposite side at base ch #5 with a sl st and Ch1. SC in same. 1 SC in next 2 st. Ch1 and turn. (3)
9-10. 1 SC in each st across. Ch1 and turn. (3)
11. 1 SC in each st across. FO and leave a long enough tail for attaching. (3)
Assembly:
1. Attach Cross to center of hat.
***********************************
C. BLOOD PRESSURE CUFF
Size: Cuff measures approximately 11" in length
Gauge: I did not gauge pattern
Materials:
--6mm hook
--#4 worsted weight yarn (I used RHSS yarn in gray, black and white)
--3 Velcro dots
--very small amount of polyfil for the pressure reader
--small balloon
--tapestry needle for weaving
U.S. Stitch Abbreviations:
Ch: chain
St: stitch(es)
Sl st: slip stitch
SC: single crochet
SC2tog: single crochet 2 stitches together (creates a decrease)
Rep: repeat
MR: magic ring
FO: fasten off
Directions:
Cuff:
1. With gray yarn, Ch16. SC in 2nd ch from hook and across. Ch1 and turn. (15)
2. 1 SC in each st across. Ch1 and turn. (15)
3-44. 1 SC in each st across. Ch1 and turn. (15)
45. 1 SC in each st across. FO and weave ends.
46. Attach the Velcro dots, evenly spaced, vertically, along Row 8-9. I think, however, a Velcro strip may be a better choice, but, I had dots on hand and used them.
Cuff Center (I used this to attach my cords to):
1. With black yarn, Ch13. SC in 2nd ch from hook and across. Ch1 and turn. (12)
2-4. 1 SC in each st across. Ch1 and turn. (12)
5. 1 SC in each st across. FO and leave a long enough tail to attach to inside, center of cuff.
Pressure Reader Cord:
1. With black yarn, Ch4. Sl st to first ch. 5 SC into ring. Sl st join to first st and Ch1. (5)
2. 1 SC in each st around. Sl st join to first st and Ch1. (5)
3-24. Rep #2.
25. 1 SC in each st around. FO and weave ends.
Pressure Reader:
(make 2)
1. With black yarn, 6 SC into MR. Sl st join to first st and Ch1. (6)
2. 2 SC in each st around. Sl st join to first st and Ch1. (12)
3. 2 SC in first st, 1 SC in next st. Rep around. Sl st join to first st and Ch1. (18)
Face of Pressure Reader:
1. With white yarn, 6 SC into MR. Sl st join to first st and Ch1. (6)
2. 2 SC in each st around. Sl st join to first st and FO. Leave a long enough tail to attach. (12)
Assembly of Pressure Reader Cord:
1. Whipstitch the 2 black Pressure Readers together. Stuff with a small amount of polyfil before closing up.
2. Whipstitch Face to Pressure Reader.
3. Use black yarn and tapestry needle and embroider tick marks around the Face.
4. Attach top of cord to the black Cuff Center.
Pump Cord:
1. With black yarn, Ch4. Sl st to first ch. 5 SC into ring. Sl st join to first st and Ch1. (5)
2. 1 SC in each st around. Sl st join to first st and Ch1. (5)
3-24. Rep #2.
25. 1 SC in each st around. FO and switch to gray yarn. Sl st join and Ch1. (5)
26. With gray yarn, 1 SC in each st around. Sl st join to first st and Ch1. (5)
27. 1 SC in each st around. FO and weave ends.
Pump Screw:
1. With gray yarn, Ch4. Sl st to 1st ch. FO and leave a long enough tail to attach to Round 26 & 27.
Pump:
1. With black yarn, 6 SC into MR. Sl st join to first st and Ch1. (6)
2. 1 SC in each st around. Sl st join to first st and Ch1. (6)
3. 2 SC in first st, 1 SC in next st. Rep around. Sl st join to first st and Ch1. (9)
4. 2 SC in first st, 1 SC in next 2 st. Rep around. Sl st join to first st and Ch1. (12)
5. 1 SC in each st around. Sl st join to first st and Ch1. (12)
6. 2 SC in first st, 1 SC in next 3 st. Rep around. Sl st join to first st and Ch1. (15)
7-10. 1 SC in each st around. Sl st join to first st and Ch1. (15)
11. SC2tog, 1 SC in next 3 st. Rep around. Sl st join to first st and Ch1. (12)
12. 1 SC in each st around. Sl st join to first st and Ch1. (12)
13. SC2tog, 1 SC in next 2 st. Rep around. Sl st join to first st and Ch1. (9)
14. SC2tog, 1 SC in next st. Rep around. Sl st join to first st and Ch1. (6)
15. 1 SC in each st around. FO and weave ends. Leave the last round open for balloon insertion.
16. Once you place the small balloon into the pump, then inflate the balloon - not too big but big enough to make it feel like an actual pump.
Assembly of Pump Cord:
1. Whipstitch first Round of Pump to the Cord end of Round 27.
2. Attach top of Cord to black Cuff Center.
***********************************
D. FAUX ARM CAST
Size: Approximately 10" in diameter and 8" in length
Gauge: I did not gauge pattern.
Materials:
--6.0mm hook
--#4 worsted weight yarn (I used RHSS yarn in white)
--tapestry needle for weaving
U.S. Stitch Abbreviations:
Ch: chain
St: stitch(es)
Sl st: slip stitch
HDC: half double crochet
Sk: skip
Rep: rep
FO: fasten off
Directions:
(To adjust size decrease or increase your starting chain and increase or decrease your number of rounds)
1. Ch 28. Sl st to first ch and Ch1. HDC in each st around. Sl st join to first st and Ch1. (28)
2. 1 HDC in each st around. Sl st join to first st and Ch1. (28)
3-17. Rep #2.
18. Ch5. Sk 5 st. 1 HDC in each of the remaining st. Sl st join to first ch and Ch1. (23)
19. 5 HDC into the Ch5 space. 1 HDC in each of the remaining st. Sl st join to first st and Ch1. (28)
20. 1 HDC in each st around. FO and weave ends.
***********************************
E. SURGEON'S HAT
Size: Fits 19-21" head circumference
Gauge: I did not gauge pattern.
Materials:
--6.0mm hook
--#4 worsted weight yarn (RHSS yarn in Navy)
--tapestry needle for weaving
U.S. Stitch Abbreviations:
Ch: chain
St: stitch(es)
Sl st: slip stitch
HDC: half double crochet
BLO: back loops only
Rep: repeat
MR: magic ring
FO: fasten off
Directions:
1. 10 HDC into MR. Sl st join to first st and Ch1. (10)
2. 2 HDC in each st around. Sl st join to first st and Ch1. (20)
3. 2 HDC in first st, 1 HDC in next st. Rep around. Sl st join to first st and Ch1. (30)
4. 2 HDC in first st, 1 HDC in next 2 st. Rep around. Sl st join to first st and Ch1. (40)
5. 2 HDC in first st, 1 HDC in next 3 st. Rep around. Sl st join to first st and Ch1. (50)
6. 2 HDC in first st, 1 HDC in next 4 st. Rep around. Sl st join to first st and Ch1. (60)
7. 1 HDC in the BLO of each st around. Sl st join to first st and Ch1. (60)
8. 1 HDC in each st around. Sl st join to first st and Ch1. (60)
9-11. Rep #8.
12. 1 HDC in the first 50 st around. Ch1 and turn. (50)
13. 1 HDC in each st around. Ch1 and turn. (50)
14. 1 HDC in each st around. Ch1 and turn. (50)
15. 1 HDC in each st around. (50)
16. Ch41. Sl st in 2nd ch from hook and across. FO and weave ends. (40)
17. Join yarn on opposite side in last stitch of round 15. Ch41. Sl st in 2nd ch from hook and across. FO and weave ends. (40)
Simple Surgeon's Hat that kids will enjoy wearing...
***********************************
F. SURGEON'S TOP SCRUBS
Size: My grandson, Jacob, is 7 and wears a size 12/14; this is like a youth small/medium. I used one of his t-shirts as a guide.
Gauge: 12 HDC stitches x 10 rows = 4"
Materials:
--6.0mm hook
--#4 worsted weight yarn (RHSS yarn in Navy)
--tapestry needle for weaving
U.S. Stitch Abbreviations:
Ch: chain
St: stitch(es)
Sl st: slip stitch
HDC: half double crochet
FHDC: foundation half double crochet
HDC2tog: half double crochet 2 stitches together (creates a decrease)
FPHDC: front post half double crochet
BPHDC: back post half double crochet
Rep: rep
FO: fasten off
Directions:
(The Scrub Top is made in 2 panels, whipstitched together, then sleeves and neck edging are added. To make for a smaller child, use the same principle as my pattern, just decrease the number of your starting chain and number of repeat rows. Then, continue to decrease by 1 stitch per row to form your V-shape until you get your desired length)
Front Panel:
1. FHDC 45. Or, Ch46, HDC in 2nd ch from hook and across. Ch1 and turn. (45)
2. 1 HDC in each st across. Ch1 and turn. (45)
3-40. Rep #2.
Forming the V-neck:
41. 1 HDC in the next 22 st. Ch1 and turn. (22)
42. HDC2tog, 1 HDC in next 20 st. Ch1 and turn. (21)
43. 1 HDC in next 19 st, HDC2tog. Ch1 and turn. (20)
44. HDC2tog, 1 HDC in next 18 st. Ch1 and turn. (19)
45. 1 HDC in next 17 st, HDC2tog. Ch1 and turn. (18)
46. HDC2tog, 1 HDC in next 16 st. Ch1 and turn. (17)
47. 1 HDC in next 15 st, HDC2 tog. Ch1 and turn. (16)
48. HDC2tog, 1 HDC in next 14 st. Ch1 and turn. (15)
49. 1 HDC in next 13 st, HDC2tog. Ch1 and turn. (14)
50. HDC2tog, 1 HDC in next 12 st. Ch1 and turn. (13)
51. 1 HDC in next 11 st, HDC2tog. Ch1 and turn. (12)
52. HDC2tog, 1 HDC in next 10 st. Ch1 and turn. (11)
53. 1 HDC in next 9 st, HDC2tog. Ch1 and turn. (10)
54-56. 1 HDC in each st across. Ch1 and turn. (10)
57. 1 HDC in each st across. FO and weave ends.
Rep #41-57 on opposite side.
Back Panel:
1. FHDC 45. Or, Ch46, HDC in 2nd ch from hook and across. Ch1 and turn. (45)
2. 1 HDC in each st across. Ch1 and turn. (45)
3-52. Rep #2.
Forming the Shoulder:
53. 1 HDC in the next 10 st. Ch1 and turn. (10)
54-56. Rep #53.
57. 1 HDC in each st across. FO and leave a long tail for attaching. (10)
Rep #53-57 on opposite side.
Assembly:
1. Place right sides together and whipstitch across the shoulders on each side.
2. For the sides, I counted from bottom, up to Row 36. I then whipstitched sides from Row 36 down.
Neck Edging:
1. Join yarn in any stitch of Row 57 in the back. Sl st join and Ch1. SC in same. Then, 1 SC in each st around. Sl st join to first st and Ch1.
2-4. 1 SC in each st around. Sl st join to first st and Ch1.
5. 1 HDC in each st around. Sl st join to first st and Ch2.
6. The ch2 counts as your first st (FPHDC), BPHDC in next st. Alternate between FPHDC, then BPHDC around. Sl st join to the top of the ch2 and FO. Weave ends.
***Note: if you are not familiar with post stitches, then you can opt to complete Round 6 with HDC stitches***
Sleeves:
1. Sl st join and Ch1 at the bottom of the opening. HDC in same. Evenly HDC in each st around.
2. 1 HDC in each st around. Sl st join to first st and Ch1.
3-5. Rep #2.
6. 1 HDC in each st around. Sl st join to first st and FO. Weave ends.
Repeat on opposite side for second sleeve.
***********************************
G. SURGERY MASK
Size: Fits most kids; you may have to adjust the end straps for smaller children
Gauge: I did not gauge pattern.
Materials:
--6.0mm hook
--#4 worsted weight yarn (I used RHSS yarn in white)
--tapestry needle for weaving
U.S. Stitch Abbreviations:
Ch: chain
SC: single crochet
HDC: half double crochet
BLO: back loops only
Rep: repeat
FO: fasten off
Directions:
1. Ch 21, HDC in 2nd ch from hook and across. Ch1 and turn. (20)
2. Working in the BLO, HDC in the first st, SC in the next st. Rep across. Ch1 and turn. (20)
3. Working in the BLO, SC in the first st, HDC in the next st. Rep across. Ch1 and turn. (20)
4. Rep #2
5. Rep #3
6. Rep #2
7. Rep #3
8. Rep #2
9. Rep #3
10. Rep #2
11. Rep #3
12. 1 HDC in both loops of each st across. (20)
13. Ch24 and sl st join to the last st on the same side of the first Row. This makes the first ear strap. FO and weave ends. Rep on opposite side.
If you are making this for a smaller child:
1. You may need to start with a smaller number of chains (and decrease the number of rows) so that the mask isn't as long/wide
2. You may need to make a smaller number of chains for the ear straps.
***********************************
H. DOCTOR BAG:
Size: Approximately 8 1/2" in length and 9 1/2" in width
Gauge: I did not gauge pattern.
Materials:
--6.0mm hook
--#4 worsted weight yarn (RHSS yarn in black and red)
--tapestry needle for weaving
U.S. Stitch Abbreviations:
Ch: chain
St: stitch(es)
Sl st: slip stitch
SC: single crochet
HDC: half double crochet
BLO: back loops only
FO: fasten off
Directions:
Bag:
1. Ch25. HDC in 2nd ch from hook and next 22 st. 3 HDC in last st. Rotate to work on opposite side of base ch. HDC in next 22 ch. 2 HDC in last ch. Sl st join to first st and Ch1. (50)
2. 1 HDC in the first 24 st. 3 HDC in next st. 1 HDC in the next 24 st. 2 HDC in last st. Sl st join to first st and Ch1. (53)
3. 1 HDC in the first 25 st. 3 HDC in next st. 1 HDC in the next 26 st. 2 HDC in last st. Sl st join to first st and Ch1. (56)
4. 1 HDC in the first 26 st. 3 HDC in next st. 1 HDC in the next 28 st. 2 HDC in last st. Sl st join to first st and Ch1. (59)
5. This round only is worked in BLO. 1 HDC in BLO of each st around. Sl st join to first st and Ch1. (59)
6. 1 HDC in each st around. Sl st join to first st and Ch1. (59)
7-20. Rep #6.
21. 1 sl st in each st around. Sl st join to first st and FO. Weave ends.
Handles (make 2):
1. Ch29. HDC in 2nd ch from hook and across. Ch1 and turn. (28)
2-3. 1 HDC in each st across. Ch1 and turn. (28)
4. 1 HDC in each st across. FO and leave a long tail.
5. Fold handle in half, horizontally and whipstitch Row 1 to Row 4.
Cross:
1. With red yarn, Ch12. SC in 2nd ch from hook and across. Ch1 and turn. (11)
2. 1 SC in each st across. Ch1 and turn. (11)
3. 1 SC in each st across. Don't Ch1 and turn. (11)
4. Sl st in 4 st. Ch1. SC in next 3 st. Ch1 and turn. (3)
5-6. 1 SC in each st across. Ch1 and turn. (3)
7. 1 SC in each st across. FO and leave a long enough tail for attaching. (3)
8. Join red yarn on opposite side at base ch #5 with a sl st and Ch1. SC in same. 1 SC in next 2 st. Ch1 and turn. (3)
9-10. 1 SC in each st across. Ch1 and turn. (3)
11. 1 SC in each st across. FO and leave a long enough tail for attaching. (3)
Assembly:
1. Attach each handle to the front center and back center.
2. Attach Cross to front center.
***********************************
I. ACE BANDAGE:
Size: Approx 13 1/2" long
Gauge: I did not gauge pattern.
Materials:
--4.0mm hook
--#4 worsted weight yarn (I used RHSS yarn in white and red)
--2 Velcro dots
--tapestry needle for weaving
U.S. Stitch Abbreviations:
Ch: chain
St: stitch(es)
Sl st: slip stitch
SC: single crochet
FO: fasten off
Directions:
(If you want a longer or wider Ace Bandage, then just increase your starting chain number and complete additional rows)
1. With white yarn, Ch51. SC in 2nd ch from hook and across. FO and switch to red yarn. Ch1 and turn. (50)
2. With red yarn, sl st in each st across. FO and switch back to white yarn. Ch1 and turn. (50)
3. With white yarn, 1 SC in each st across. Ch1 and turn. (50)
4-7. Rep #3.
8. With white yarn, 1 SC in each st across. FO and switch to red yarn. Ch1 and turn.
9. With red yarn, sl st in each st across. FO and switch back to white yarn. Ch1 and turn. (50)
10. With white yarn, 1 SC in each st across. FO and weave ends.
I placed 2 Velcro dots on one end at Row 2 and Row 8. The Velcro seems to stick to the yarn itself fairly well.
***********************************
Be sure to be on the look out for more patterns to come with my "Medical Project" collection. I still have to complete:
1. Stethoscope
2. Needle
3. Thermometer
4. Band-Aid(s)5. Hammer (for reflex checks)
6. Ear/Nose scope
7. Rx bottle
And, anything else that might strike me along the way, while I continue to watch Grey's Anatomy on Netflix...
Happy Crocheting...
Legal:
--don't use/claim my design as your own
--don't use/claim my pics as your own
--okay to make and sale your finished work
--don't share my pattern electronically or in print format (without prior consent) but provide a link to my blog


 Size: 26" long
 1. Join Terra Cotta in the first st of Row 1 with a sl st and Ch1. HDC in same st and into the next 9 st. Sl st into the next 5 st. HDC in each of the last 10 st. Ch1 and turn. (20 HDC and 5 sl st)


 Waist Straps (make one on each side):
 Assembly: