Showing posts with label Amigurumi. Show all posts

Thursday, April 1, 2021

Kawaiis...

For the past 4-6 weeks, I’ve been on a Kawaii kick. These have all been fun and enjoyable projects for me.  I think creating the faces are my favorite part.  It seems to give each of them their own character; their own identity.  

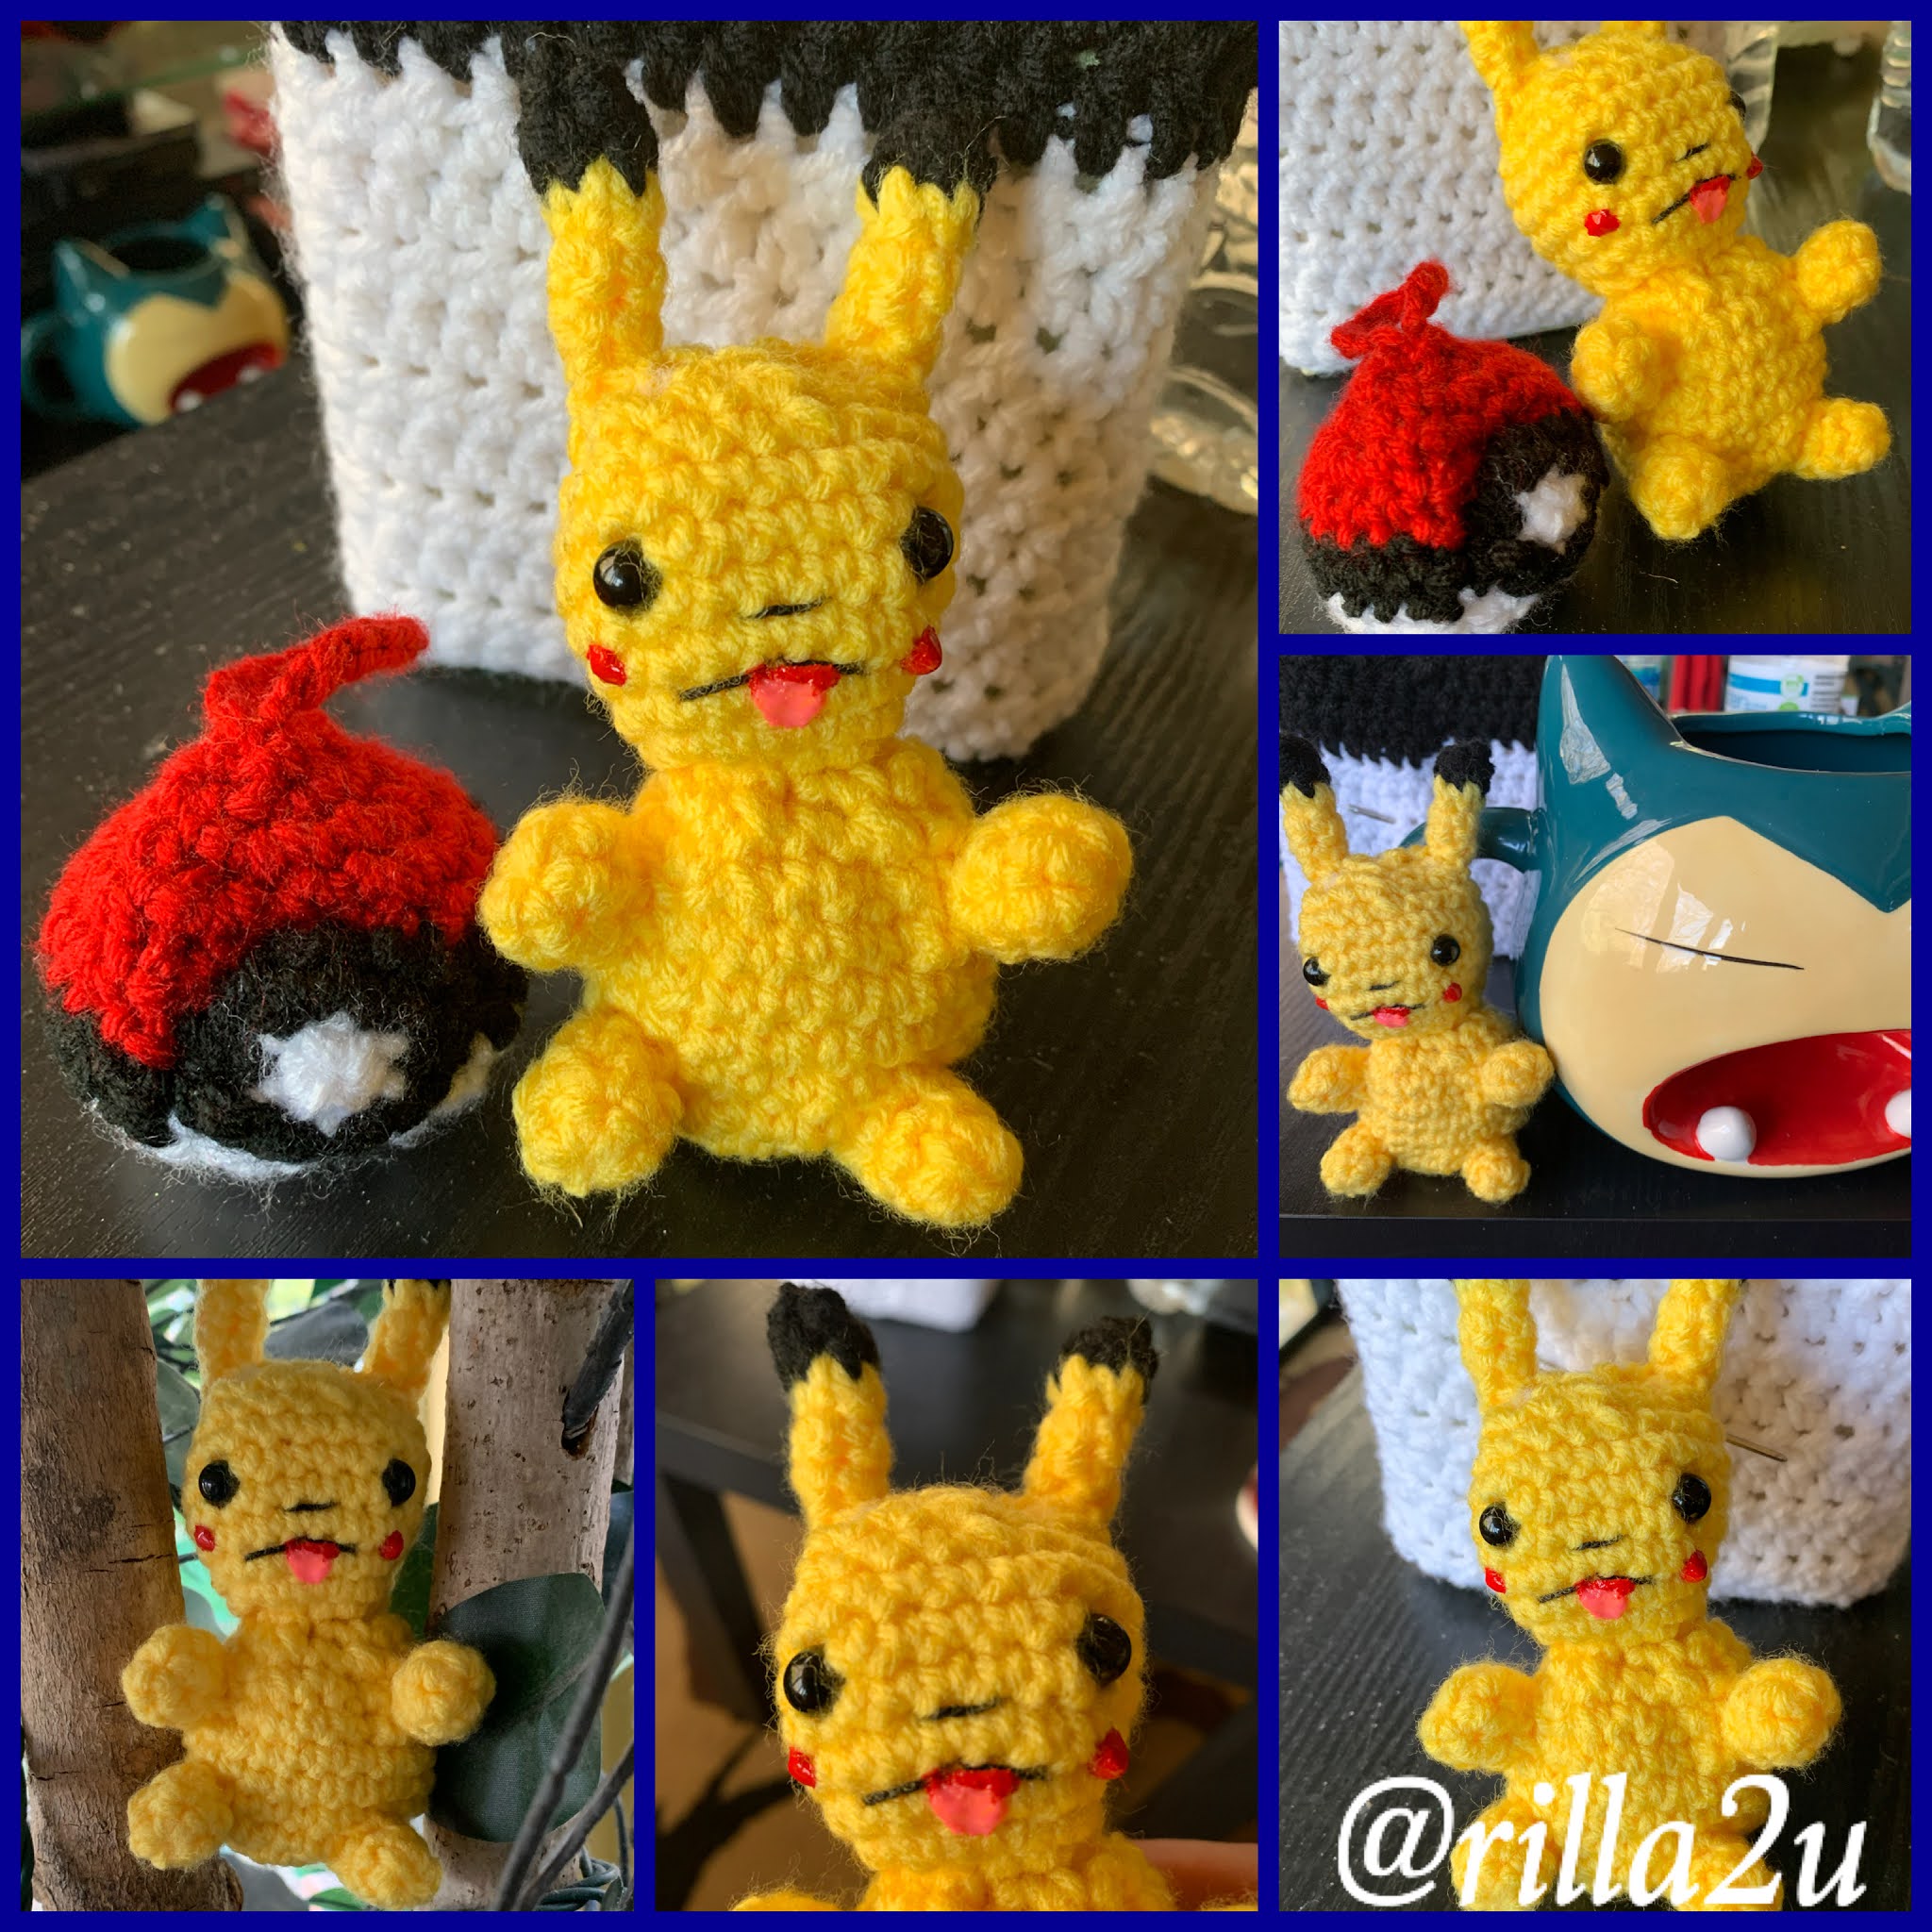
I know I’m really behind on updating my blog with the patterns for each of them.  My apologies. In-between the Kawaiis, I have completed a baby shower gift project consisting of a blanket, hat and an elephant lovey (all new designs); 10 washcloths; 8 mini-character eggs; an Easter Bunny Cover; a 3-piece Pokemon set consisting of a mini-basket, a Pokemon ball and Pikachu; a “Very Hungry Caterpillar” headband; painting and bow making; and last I’ve added new video tutorials to YouTube.  So, I have been a little busy the past few months and I’m finding that I can’t do everything at one time.  I absolutely LOVE the creative side of crafting.  I’m lax when it comes to typing up the pattern and sharing.  

My focus this week has been on crosses with it being Easter week.  I have made about 40 so far.  Each takes me about 10 minutes...

For now, I’m creating and jotting down the patterns on paper (and one pattern on a cardboard box).  I will get them added.  


Happy Crocheting...

Legal:
--don't use/claim my design as your own
--don't use/claim my pics as your own
--okay to make and sale your finished work
--don't share my pattern electronically or in print format (without prior consent) but provide a link to my blog

Social Media:
If you are on the following sites, let's connect and hook up...
  • Pinterest:  Rilla2u
  • Twitter:  Rilla2u
  • Facebook:  /rilla.edwards 
  • Instagram:  Rilla2u 


Thursday, March 25, 2021

Swimming Pool Kawaii

Swimming Pool Kawaii

Here’s my newest design, a “Swimming Pool” Kawaii. This is a fun and cute project!!!

I used Mainstays yarn from Wal-Mart in yellow, blue, teal, white and pink, a 5.0mm hook, Polyfil, black embroidery thread, (2) 15mm safety eyes and a tapestry needle to complete this project...

The completed project measures 13” x 9”. This doesn’t include the top wave. 

I made two of the same pieces - the front and back:


I made one bottom wave with blue yarn. I left a long tail for attaching it. 

I added the eyes at Row 12 with 8 spaces between them:

For the mouth, I used black thread and embroidered it. I added tiny pink cheeks under the eyes by chaining 4 and then making 3 single crochet stitches. 

I started at the halfway point at top with my white yarn and worked a single crochet stitch to join the front and back pieces together. I worked across, down, across, up and then stop.  Place a stitch marker to hold the stitch open for later...

I added the bottom wave being careful to only stitch through the front piece only.

I then made the top wave two times and whip stitched them together.  (Sorry I didn’t snap a picture of it)

Now, you are ready to stuff with Polyfil.  I then placed the top wave into the opening. I whip stitch attached the wave.  

And, last, join the needle back to the corner top of white yarn and continue to single crochet around the wave and slip stitch join to the first stitch and fasten off. Weave ends. 


Happy Crocheting...

Legal:
--don't use/claim my design as your own
--don't use/claim my pics as your own
--okay to make and sale your finished work
--don't share my pattern electronically or in print format (without prior consent) but provide a link to my blog

Social Media:
If you are on the following sites, let's connect and hook up...
  • Pinterest:  Rilla2u
  • Twitter:  Rilla2u
  • Facebook:  /rilla.edwards 
  • Instagram:  Rilla2u

Saturday, March 20, 2021

Flower Pot Kawaii

Flower Pot Kawaii

With spring’s arrival, I wanted to make a flower pot.  Originally, I was going to make Sunflowers for the pot but ultimately ended up with making a cactus!!!  I’m happy with the overall outcome of this project  

I used Mainstays Yarn from Wal-Mart and a 5.0mm hook to complete this project.  You will need a few extra items:  Polyfil, black embroidery thread for the mouth, (2) safety eyes and a small amount of pink and white yarn for the cheeks, bow and outline around the eyes.


My focal point was the flower pot itself, and so, I decided to add the facial features to the pot and not the cactus. 


And, here he is with his pal, my. “Baby Chick” Kawaii!!!

Happy Crocheting...

Legal:
--don't use/claim my design as your own
--don't use/claim my pics as your own
--okay to make and sale your finished work
--don't share my pattern electronically or in print format (without prior consent) but provide a link to my blog

Social Media:
If you are on the following sites, let's connect and hook up...
  • Pinterest:  Rilla2u
  • Twitter:  Rilla2u
  • Facebook:  /rilla.edwards 
  • Instagram:  Rilla2u 

Sunday, March 14, 2021

Baby Chick Kawaii

“Baby Chick” Kawaii


Blessings this Sunday evening.  I spent most of today making this super cute “Baby Chick” Kawaii for Easter and/or Spring seasonal decor. Once again, I used Main Stays yarn. I have really gotten the bang for my buck on this yarn. I bought each available color my local Wal-Mart had at $2.44 per skein and I have thus far completed multiple projects. 

I know I need to set aside time to update my blog with the patterns from recent weeks, as well as, go back through my posts from 2016 backward and re-add the pictures. I’m not sure what has happened but somehow my older blog posts have lost their photos.  I do want to get all of my patterns moved to my own domain website. My problem is:  I love crafting; I just hate the electronics side that goes with it to be able to share with you all. 

Please be patient and I will get everything added and updated. If you want a pattern before then, just message me.  

Happy Crocheting...


Thursday, March 11, 2021

Basketball Kawaii

 Basketball Kawaii 

With March Madness upon us, I couldn’t resist designing a “Basketball Kawaii.”  I think he is so adorable!!!!

I will get the FREE pattern added on the blog tomorrow for anyone who would like to make themselves one...

I used Mainstays yarn brand in orange and black from Wal-Mart. For the ball portion, I used a 4.5mm hook and for the stripes, I used a 4.0mm hook. You will also need 2 black 15 or 20mm black eyes, Polyfil and black embroidery floss. I may go back and add pink cheeks.  I meant to do that before taking the pics and recording the video on Instagram. 


Happy Crocheting...


Wednesday, March 3, 2021

Pikachu

I’m a huge Pogo player. I’ve been playing for several years now. I’m currently a Level 48. Anyway, this year marks Pokémon’s 25th Anniversary and I wanted to make a Pokémon and decided on a cute Pikachu!!!

Pikachu


Size:  approximately 4” - 5”
(depending on yarn brand)

Materials:
-3.0mm hook
-#4 worsted weight yarn in yellow and black
-Polyfil
-(2) black safety eyes
-black and red floss yarn or puff paint for the facial features
-tapestry needle 

U.S. Stitch Abbreviations:
Ch:  chain
MR:  magic ring
St:  stitch(es)
Sl st:  slip stitch
SC:  single crochet
SC2tog:  single crochet 2 stitches together (decreases)
Rep:  repeat
FO:  fasten off

Note:  the pattern is worked in the round; use a stitch marker to keep track of the first stitch of each new round and move stitch marker up accordingly 

Directions:  
Head
1.  With yellow, 6 SC into MR.  (6)
2.  2 SC in each st around. (12)
3.  1 SC in first st, 2 SC in next st.  Rep around.  (18)
4.  1 SC in first 2 st, 2 SC in next st.  Rep around.  (24)
5.  1 SC in first 3 st, 2 SC in next st.  Rep around.  (30)
6-9.  1 SC in each st around.  (30)
10.  1 SC in first 3 st, SC2tog.  Rep around.  (24)
11.  1 SC in first 2 st, SC2tog.  Rep around.  (18)
12.  1 SC in first st, SC2tog.  Rep around.  (12)

Add eyes at Round 6.  Leave 5 st between the eyes.  Use the tapestry needle and add the nose, mouth, tongue and cheeks.  Optional:  use puff paint for the cheeks and tongue.

Body:
13.  1 SC in each st around.  (12)
14.  1 SC in first 3 st, 2 SC in next st.  Rep around.  (15)
15.  1 SC in first 4 st, 2 SC in next st.  Rep around. (18)
16-17.  1 SC in each st around.  (18)
18.  1 SC in first 2 st, 2 SC in next st.  Rep around.  (24)
19-21.  1 SC in each st around.  (24)
22.  1 SC in first 2 st, SC2tog.  Rep around.  (18)
23.  1 SC in first st, SC2tog.  Rep around.  (12)

Firmly stuff.

24.  SC2tog 6 times.  FO and leave a tail for closing up.  Weave ends.  (6)

Ears (make 2):
1.  With black yarn, 6 SC into MR.  (6)
2.  1 SC in each st around.  FO black yarn.  (6)
3.  Join yellow yarn, 1 SC in each st around.  (6)
4-5.  1 SC in each st around.  (6)
6.  1 SC in each st around.  FO and leave a tail for attaching at Rounds 4-5.  

Arms/Legs (make 4):
1.  With yellow, 6 SC into MR.  (6)
2.  1 SC in each st around.  (6)
3.  1 SC in each st around.  Sl st join to the first st and FO.  Leave tail for attaching.  (see pics for placement help)


Happy Crocheting...


Legal:
--don't use/claim my design as your own
--don't use/claim my pics as your own
--okay to make and sale your finished work
--don't share my pattern electronically or in print format (without prior consent) but provide a link to my blog

Social Media:
If you are on the following sites, let's connect and hook up...

  • Instagram:  Rilla2u
  • Pinterest:  Rilla2u
  • Twitter:  Rilla2u
  • Facebook:  /rilla.edwards 
  • Etsy:  rilla2u 
  • TikTok:  rillae2u 

Saturday, February 27, 2021

Eggplant Kawaii

My second “Veggie Pal” Kawaii is an Eggplant. Quick, easy and super cute project to complete in no time at all!!!

Eggplant Veggie Pal 


Pattern coming SOON....


Happy Crocheting....


Saturday, February 20, 2021

Carrot Kawaii

Carrot Kawaii Pattern

Binge watching Grimm, I wanted to work with Orange yarn for some reason (lol) and I decided to design my own version of a “Carrot Kawaii.”  Mine measures approximately 4” wide and 8” tall (but just over 10” tall if you include the leaves/stem). 

This project was SO easy to make and SUPER quick. I mean literally less than an hour from start to finish on the entire project!!!!  How awesome is that? 

I had bought all the available colors of Wal-Mart’s Mainstays brand to test out and so far I’ve been happy with the yarn and the finished outcome of my projects. Plus, the cost is very affordable. 

So, let's get started on this cutie!!!!

Carrot Kawaii Free Pattern  

Materials:

--5.0mm hook

--#4 Worsted weight yarn in Orange and Green; I used Mainstays yarn brand

--Polyfil

--(2) 15mm black eyes 

--a small amount of black thread for the mouth

--needle for weaving ends and making mouth 


U.S. Stitch Abbreviations:

Ch:  chain

St:  stitch

Sl st:  slip stitch

SC:  single crochet

HDC:  half double crochet

FO:  fasten off


Directions:  

I made two identical pieces and a stem for the top.

Body of Carrot:
1.   With orange yarn, Ch 3. HDC in second ch from hook and the next. Ch 1 and turn.  (2)
2.  2 SC in first st; 1 SC in last st. Ch 1 and turn. (3)
3.  2 HDC first st, 1 HDC next st, 2 HDC last st. Ch1 and turn. (5)
4.  1 SC in each st across. Ch 1 and turn. (5)
5.  2 HDC first st, 1 HDC next 3 st, 2 HDC last st. Ch1 and turn. (7)
6.  1 SC in each st across. Ch 1 and turn. (7)
7.  2 HDC first st, 1 HDC next 5 st, 2 HDC last st. Ch1 and turn. (9)
8.  1 SC in each st across. Ch 1 and turn. (9)
9.  2 HDC first st, 1 HDC next 7 st, 2 HDC last st. Ch1 and turn. (11)
10.  1 SC in each st across. Ch 1 and turn. (11)
11-24.  Rep #9 and 10. At the end of Row 24, FO and weave ends. 

Repeat to make a second one.  
Stem/Leaves:
1.  With Green yarn, Ch6.  SC in 2nd ch from hook and across.  Turn.  (5)
2.  Sl st into first st and ch 10. SC in 2nd ch from hook and across.  Sl st into the 2nd st of Row 1. (9)
3.  Ch 8.  SC in 2nd ch from hook and across.  Sl st into 3rd st of Row 1.  (7) 
4.  Ch6.  SC in 2nd ch from hook and across.  Sl st into 4th st of Row 1.  (5)
5.  Ch 8.  SC in 2nd ch from hook and across.  Sl st into 5th st of Row 1.  (7)
6.  Ch 10.  SC in 2nd ch from hook and across.  Sl st into 5th st of Row 1.  FO and weave ends.  (9)

 
Assembly:
1.  Attach eyes at Row 17.  Count 4 stitches over from the left place the first eye; skip three stitches and then place the second eye in the next stitch.
2.  With needle and thread, add mouth.
3.  Lay the two orange body pieces evenly on top of each other.  You will SC around to join the two pieces together.  Join orange yarn in the 3rd stitch from the left on the top row and Ch1.  SC in same st. Now you will work across the two remaining stitches, then down the side, back up the side and across the first 3 stitches on top. FO and leave a long tail.
4.  Stuff with Polyfil. 
5.  Last, you will align the stem between the center top opening and use the long tail to whip stitch close the top. Weave ends.  

This was such a fun and easy project. I’m now inspired to make a whole collection of veggie and fruits. 

Check out my Carrot Kawaii hanging out with his pals...

Happy Crocheting...

Legal:
--don't use/claim my design as your own
--don't use/claim my pics as your own
--okay to make and sale your finished work
--don't share my pattern electronically or in print format (without prior consent) but provide a link to my blog

Social Media:
If you are on the following sites, let's connect and hook up...
  • Instagram:  Rilla2u
  • Pinterest:  Rilla2u
  • Ravelry:  Rilla2u
  • Facebook:  Crocheting & Crafting 


Tuesday, February 16, 2021

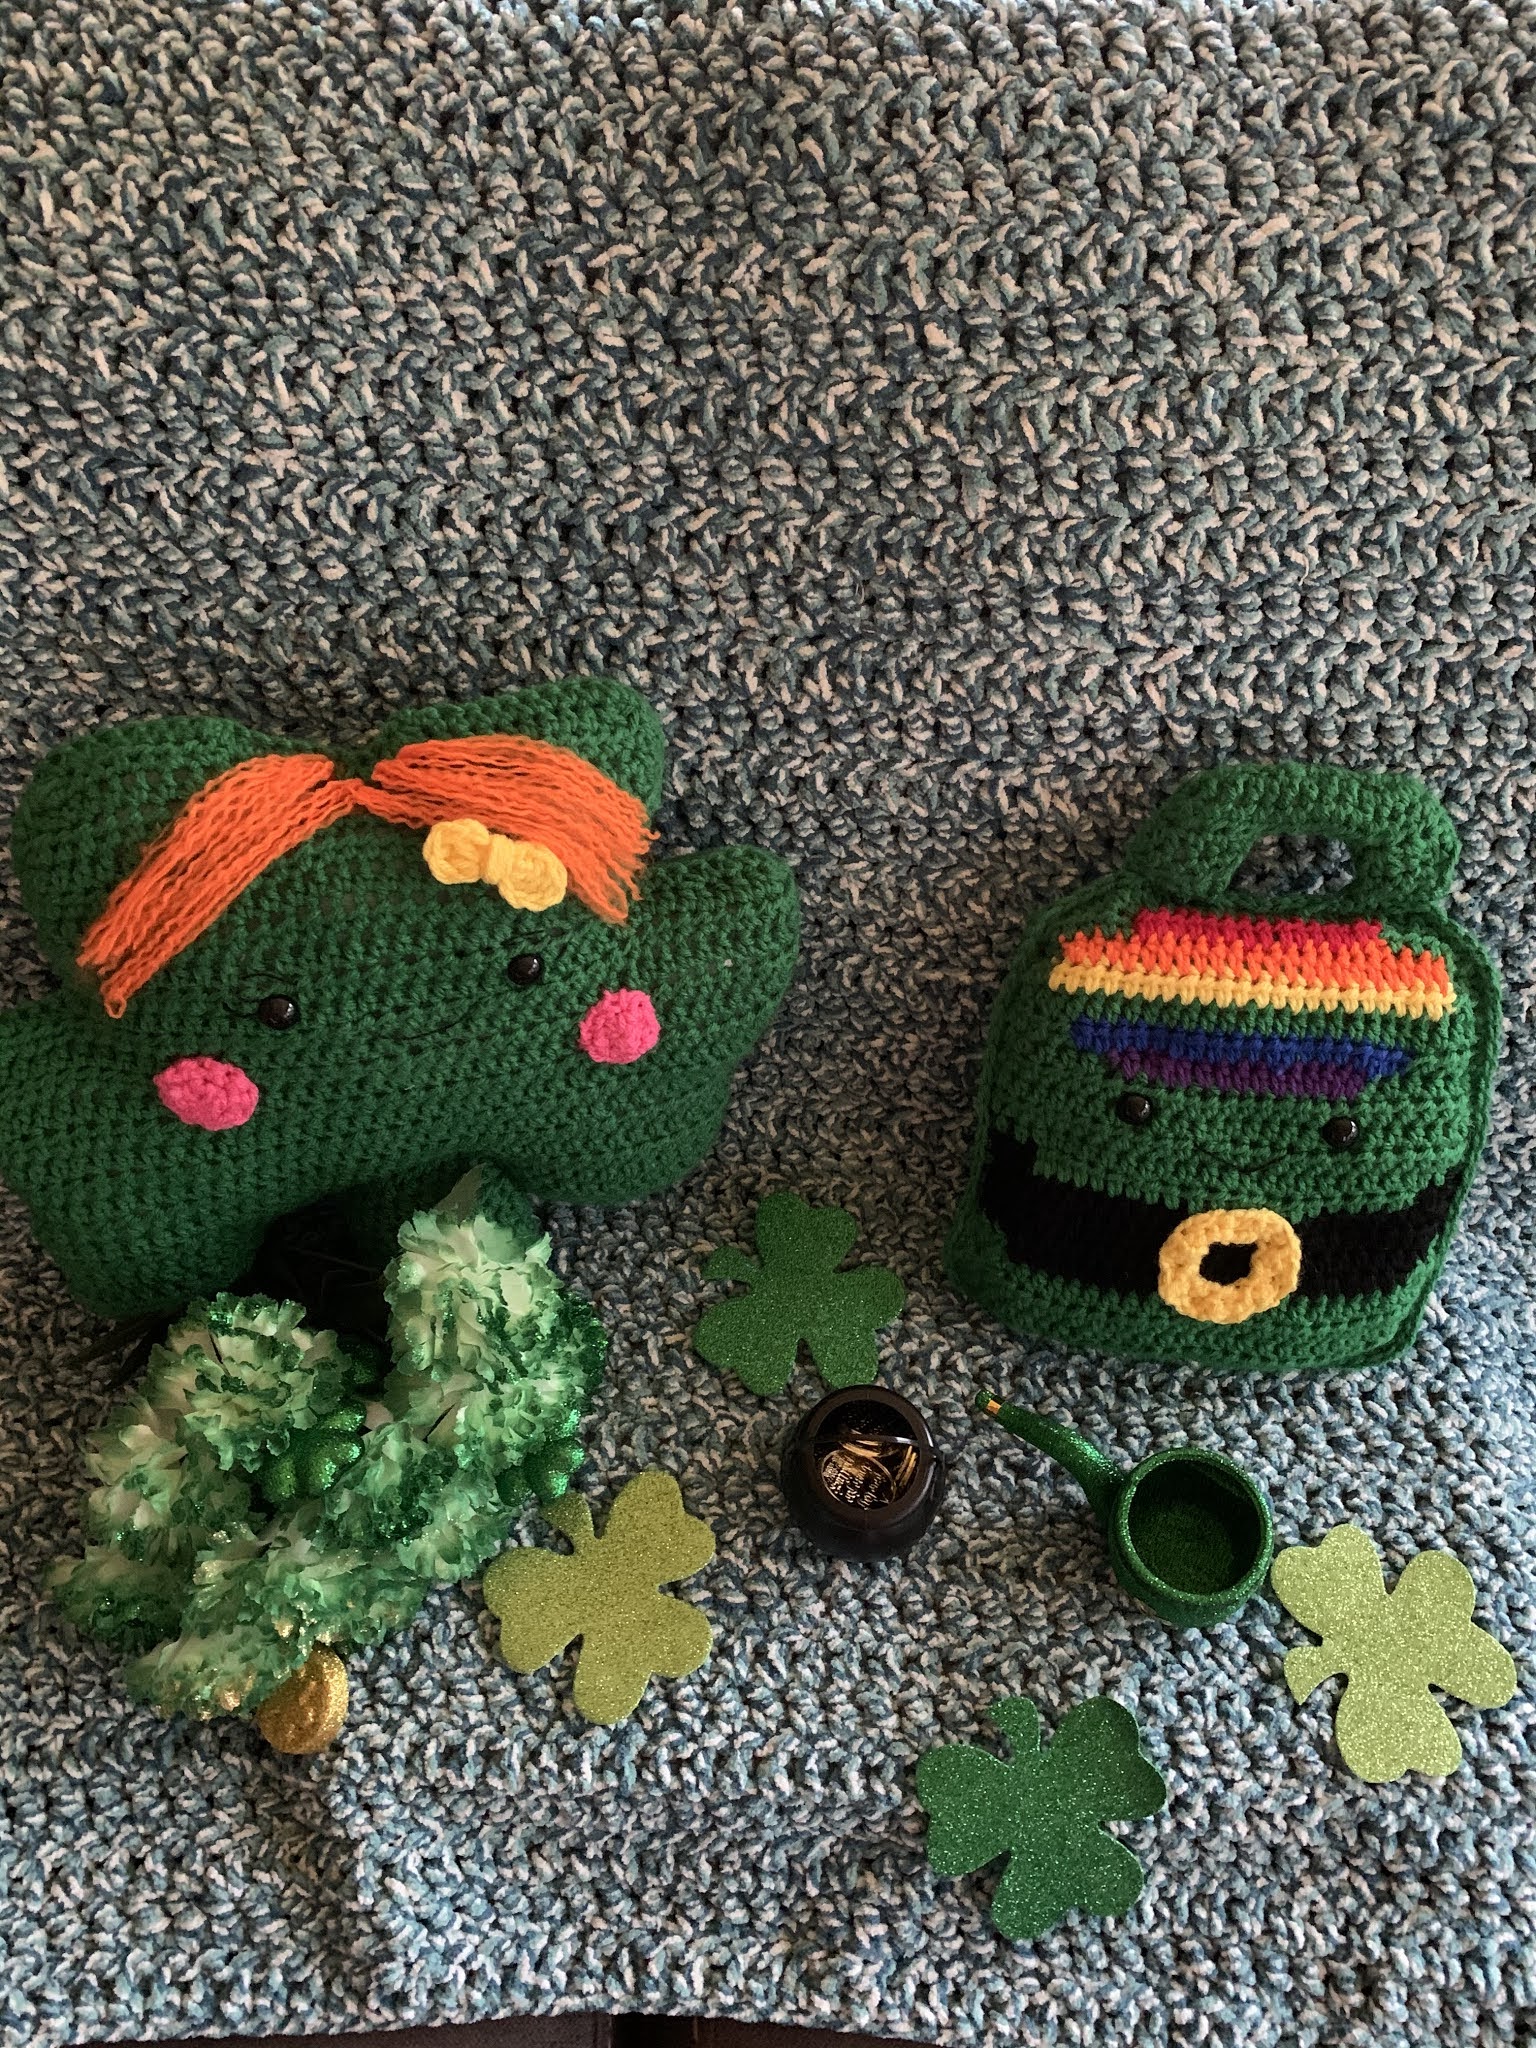
Leprechaun Handbag Kawaii

Leprechaun Handbag Kawaii 


Pattern details coming SOON!!!

So, check back frequently....


Happy Crocheting...


Saturday, February 13, 2021

Shamrock Kawaii Pillow

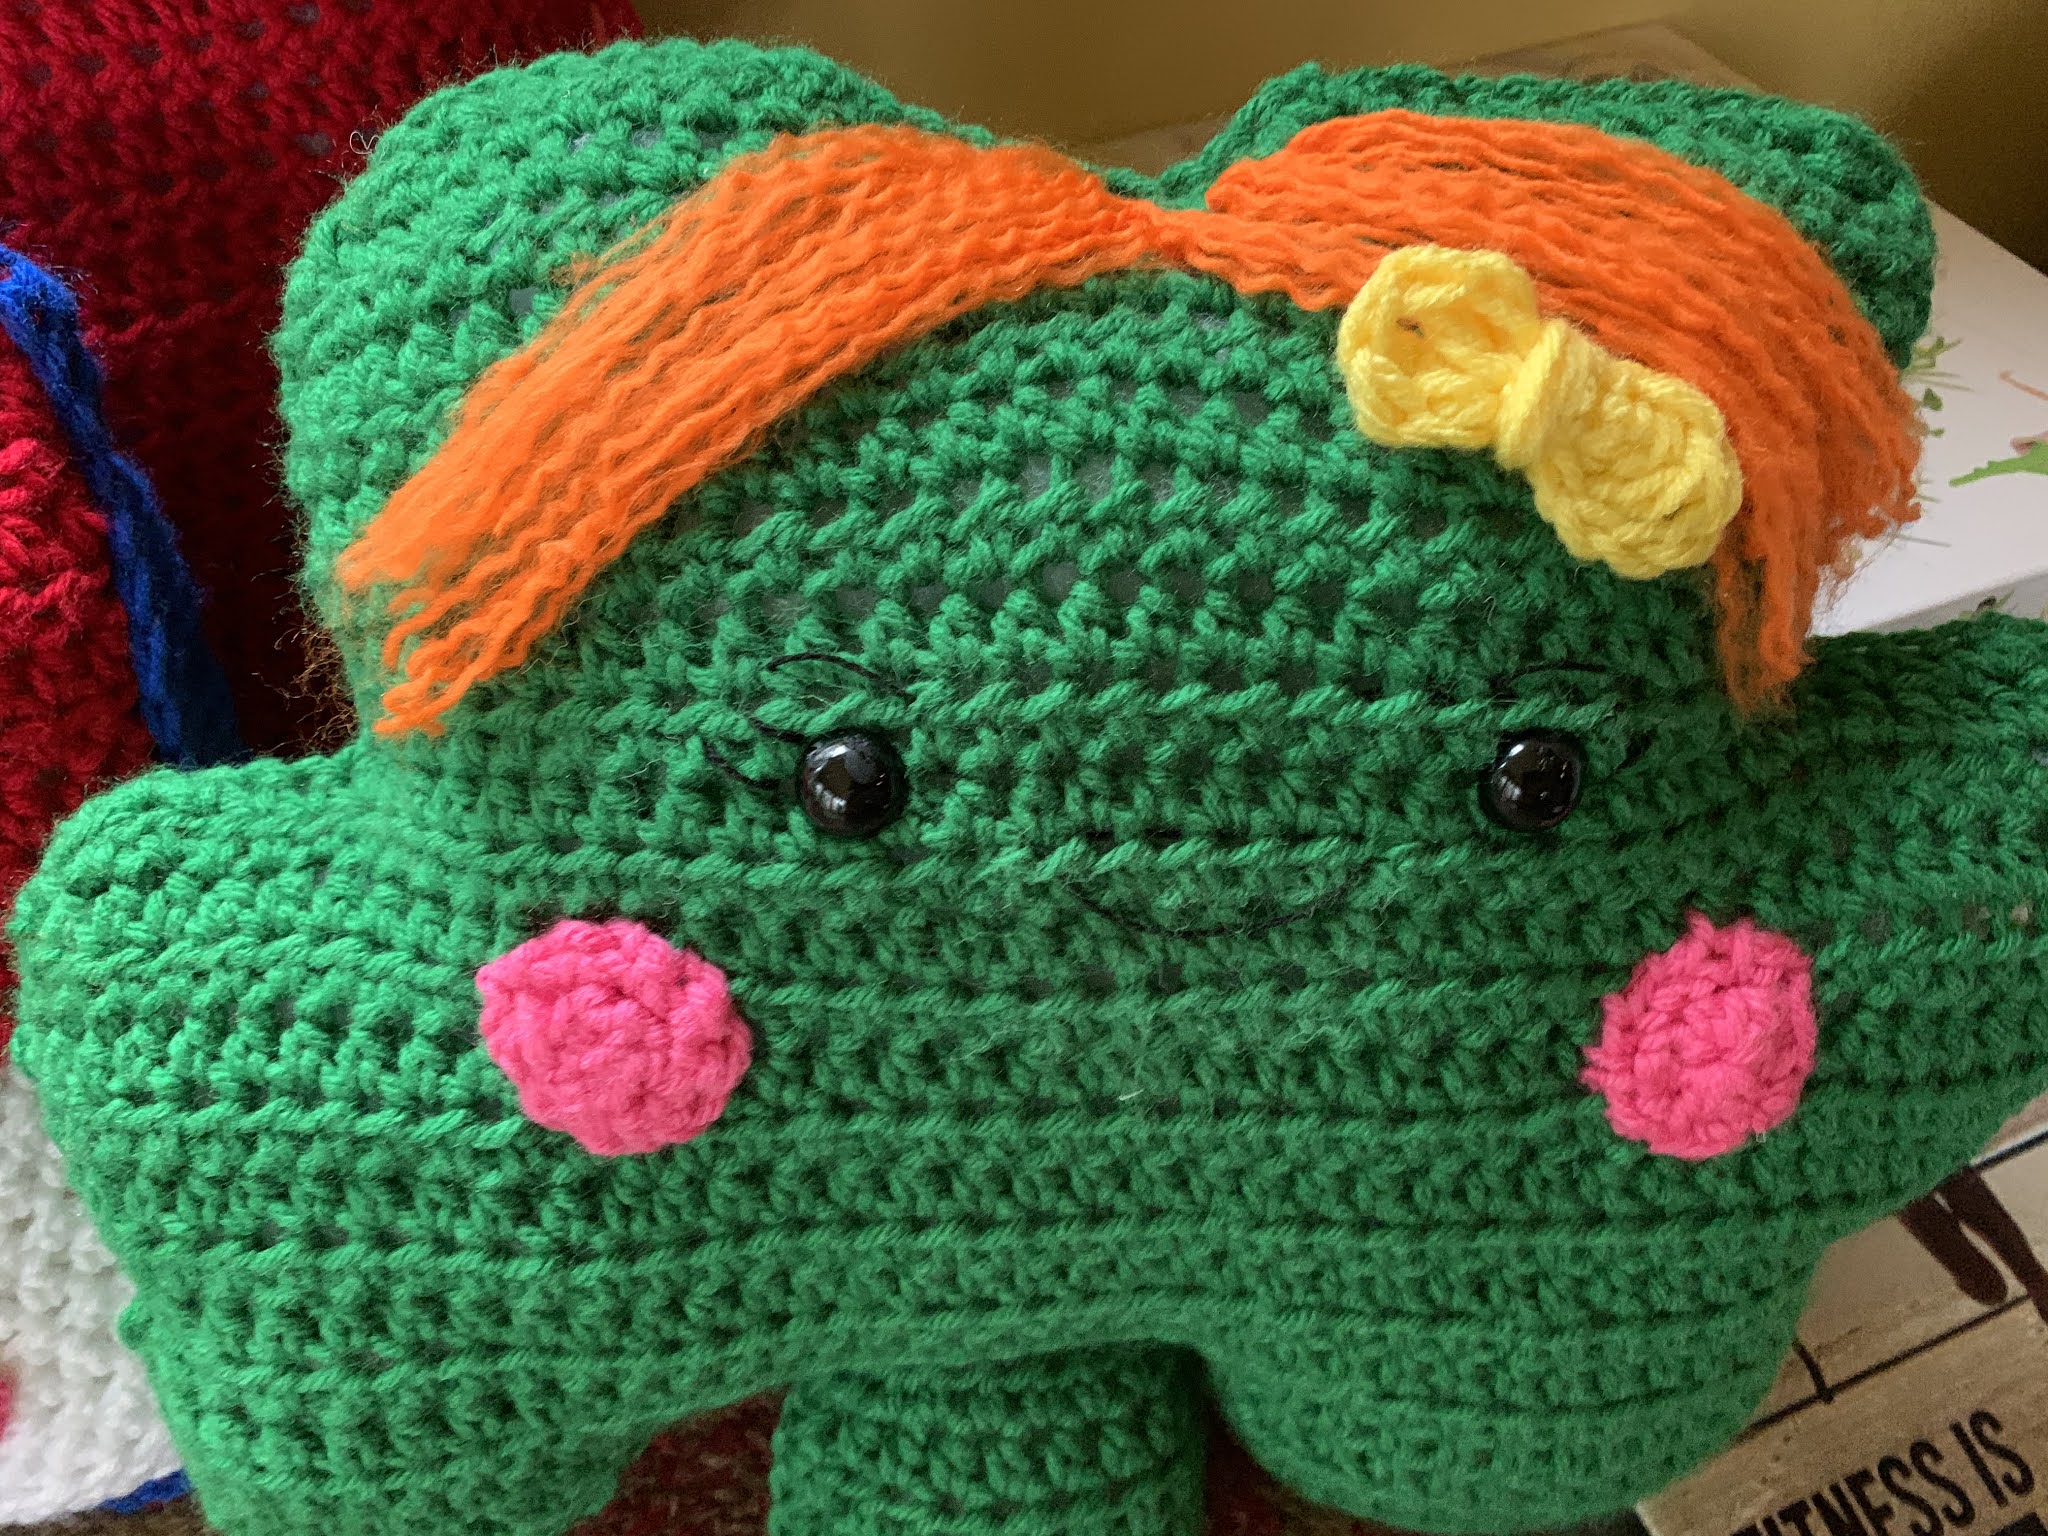
 Here’s another one of my newest designs, a “Shamrock Kawaii Pillow.”  I think it’s super cute, especially with the hair (optional).  

I used Main Stays Acrylic yarn from Wal-Mart for this project. 

Shamrock Kawaii Pillow

With a little hat on...

If you would like to purchase the Ad-free, PDF version, here is the link to my Etsy Shop:

Shamrock Kawaii

Size:  14 1/2" x 13"

Materials:
--5.0mm hook

--#4 worsted weight yarn in green (1 skein), pink (2-3 yds) and orange (2-3 yds); I used Mainstays Yarn (Wal-Mart)

--2 (15mm) black eyes

--small amount of black embroidery thread 

--Polyfil

 --tapestry needle for weaving

U.S. Stitch Abbreviations:

Ch:  chain

St:  stitch(es)

Sl st:  slip stitch

SC:  single crochet

HDC:  half double crochet

HDC2tog:  half double crochet 2 stitches together (decrease stitch)

TC:  triple crochet

Rep:  repeat

FO:  fasten off

MR:  magic ring

Directions:

     Special Note:  if making for a child, you may want to crochet the eyes for safety reasons.

For this project, you will be making a front and back identical piece and then single crocheting the two pieces together.  You can slip stitch or whipstitch the two pieces together, if so desired.  The hair is optional.  I used black safety eyes, but you can opt to make crocheted eyes instead.  As you can see, at the bottom of this post, I decided after I completed this project to add a small yellow bow.  This is optional, as well.  

To start we will be making the stem first:

1.  Ch10.  HDC in the second ch from the hook and across.  Ch1 and turn.  (9)

2-7.  HDC in each st across.  Ch1 and turn.  (9)

8.  HDC in each st across.  FO and set aside.  (9)

Now, we are going to start on the lower right lobe:

1.  Ch9.  HDC in second ch from hook and across.  Ch1 and turn.  (8)

2.  2 HDC in the first st, 1 HDC in the next 6 st, 2 HDC in the last st.  Ch1 and turn.  (10)

3.  2 HDC in the first st, 1 HDC in the next 8 st, 2 HDC in the last st.  Ch1 and turn.  (12)

4.  2 HDC in the first st, 1 HDC in the next 10 st, 2 HDC in the last st.  Ch1 and turn.  (14)

5.  1 HDC in each st across.  Ch1 and turn.  (14)

6.  1 HDC in the first 13 st.  2 HDC in the last st.  Now, pick up stem and sl st join to stem.  1 HDC in the same st as the sl st.  Then 1 HDC in each st across.  (24)

Now, we are going to be adding the lower left lobe to the piece:

7.  Ch16.  HDC in second ch from hook and across.  Turn.  (15)

You are going to turn your piece and work the next row in the base chains.  This way your 15 HDC stitches will stay even with Row 8 of your stem.

8.  Sl st into each of the first four ch.  Ch1.  HDC in each of the remaining 11 ch.  Ch1 and turn.  (11)

9.  HDC in the first 9 st, HDC2tog.  Ch1.  Turn.  (10)

10.  HDC2tog, HDC in the next 8 st.  FO and weave ends.  (9)

Now, you have your right lower lobe of 15 stitches, your stem of 9 stitches and your left lower lobe of 15 stitches for a total of 39 stitches.  Join yarn in the last stitch on the right side with a sl st and ch1.

The Body:

1.  HDC in each st across.  Ch1 and turn.  (39)

2.  HDC in each st across.  Ch 1 and turn.  (39)

3.  HDC2tog, HDC in the next 35 st, HDC2tog.  Ch1 and turn.  (37)

4.  HDC2tog, HDC in the next 35 st.  Ch1 and turn.  (36)

5.  Ch3.  HDC in the second ch from the hook and the next ch.  HDC in the next 35 st.  2 HDC in the last st.  Ch1 and turn.  (39)

6.  2 HDC in the first st, HDC in the next 37 st, 2 HDC in the last st.  Ch1 and turn.  (41)

7.  2 HDC in first st, HDC in the next 40 st.  Ch1 and turn.  (42)

8-10.  1 HDC in each st across.  Ch1 and turn.  (42)

11.  HDC in the first 40 st, HDC2tog.  Ch1 and turn.  (41)

12.  HDC2tog, HDC in the next 39 st.  Ch1 and turn.  (40)

13.  HDC2tog, HDC in the next 33 st.  Leave remaining unworked.  Ch1 and turn.  (34)

14.  2 HDC in first st, HDC in the next 25.  Ch1 and turn.  (27)

15.  2 HDC in first st, HDC in the next 26 st.  Ch1 and turn.  (28)

16.  HDC in the first 27 st, 2 HDC in the last st.  Ch1 and turn.  (29)

17.  2 HDC in first st, HDC in the remaining st.  Ch1 and turn.  (30)

18-19.  1 HDC in each st across.  Ch1 and turn.  (30)

20.  HDC2tog, HDC in the next 13 st.  Ch1 and turn.  (14)

21.  HDC2tog, HDC in the next 10 st, HDC2tog.  Ch1 and turn.  (12)

22.  HDC2tog, HDC in the next 7 st.  FO and weave ends.  (8)

Now, join yarn on opposite side of last stitch of Row 19 with a sl st and ch1.  

23.  1 HDC in same st as sl st and next 13 st.  Ch1 and turn.  (14)

24.  HDC2tog, HDC in the next 10 st, HDC2tog.  Ch1 and turn.  (12)

25.  HDC2tog, HDC in the next 8 st, HDC2tog.  FO and weave ends.  (10)

Repeat to make the second piece.  

Now, once you have two identical pieces made, you will want to go ahead and add the facial features to one of your completed pieces before we join them together.


For the eyes,  I placed them at approximately the 13th or 14th row of the body portion, with a space of 9 stitches between them.  I then added lashes, brows and a mouth with black embroidery thread.

For the cheeks, I used pink yarn:

1.  6 SC in to MR.  Sl st join and Ch1.  

2.  *2 SC in first st, 1 SC in next st.* Complete from * to * around.  FO and leave a long tail for attaching.  (see pic for placement)

For the hair, I used orange yarn:

1.  At the top center, I joined 6 pieces of orange yarn and secured with a double knot.  This made 12 pieces.  I then used my tapestry needle to fray the yarn.  

For the bow, I used yellow yarn:

1.  I started with a MR.  Ch4.  7 TC into MR.  Sl st join to top of Ch4.  Then I sl st to center.  FO and leave a long tail.  Pull tail to tighten the center.  Then wrap yarn several times around the center and then join to the top right or left, just under the hair.  

Now, align your two pieces together.  Join yarn with a sl st and Ch1.  SC around.  Before closing piece, stuff firmly with Polyfil.  Then, complete SC.  Sl st join to first st.  FO and weave ends.  

That's it.  You're ALL DONE...


And with a little hair bow added...
Happy Crocheting...

Legal:
--don't use/claim my design as your own
--don't use/claim my pics as your own
--okay to make and sale your finished work
--don't share my pattern electronically or in print format (without prior consent) but provide a link to my blog

Social Media:
If you are on the following sites, let's connect and hook up...
  • Instagram:  Rilla2u
  • Pinterest:  Rilla2u
  • Twitter:  Rilla2u
  • Facebook:  /rilla.edwards