With Christmas not too far off, I've been working the past week on a Christmas Town. I love Christmastime - the colors, the smells and just the jovial, overall kindness that people seem to express just a little more during this time of the year.
I wanted to go ahead and share what I have completed so far for my Christmas Town for those of you who may want to make this for yourselves!!!
So far, I have completed:
--Santa's House with a small Christmas tree and a bed of snow (doily);
--a Gingerbread House that is round;
--a town Christmas tree;
--Santa's sleigh
--a Thanksgiving "Turkey" House with an orange walkway
--Santa with bag
--Snowman
--Nativity Stable with Baby Jesus wrapped in a swaddling wrap lying in a basket
This pattern is rather long. I have created a PDF pattern that can be purchased HERE for $5.99.
Please consider purchasing my PDF pattern to help me out. I try to keep most (except for a couple) of my patterns FREE but it does cost me money to maintain my blog and to buy the supplies to make patterns.
Christmas Town Patterns...
Materials:
--3.0mm, 4.0mm, 5.0mm hooks
--#4 worsted weight yarn in red, black, white, brown, yellow, purple, orange, peach (or skin color of choice) and green (I have been using scrap yarns I have - Red Heart Super Saver, I Love This Yarn, Crafter's Secret); approximately 650-750 yards
--#5 bulky Bernat Pipsqueak yarn (I used this for Santa's house and doily borders); 1/2 skein
--polyfil
--tissue box (4.5" x5")
--large Duncan Hines cake frosting container
--40 oz empty peanut butter container
--2 Candy canes (for the sleigh skids)
--small animal eyes for Santa, Snowman and Turkey House
--red button for Snowman hat (optional)
--tapestry needle for weaving
U.S. Stitch Abbreviations:
Ch: chain
Sl st: slip stitch
St: stitch(es)
Rep: repeat
Sk: skip
MR: magic ring
SC: single crochet
SC2tog: single crochet 2 stitches together (creates a decrease)
SC3tog: single crochet 3 stitches together (creates a decrease)
HDC: half double crochet
HDC2tog: half double crochet 2 stitches together (creates a decrease)
HHDC: Herringbone half double crochet
DC: double crochet
TC: triple crochet
FLO: front loops only
BLO: back loops only
FO: fasten off
HHDC Video Tutorial: Click here and watch my short video tutorial on the Herringbone Half Double Crochet Stitch!!!
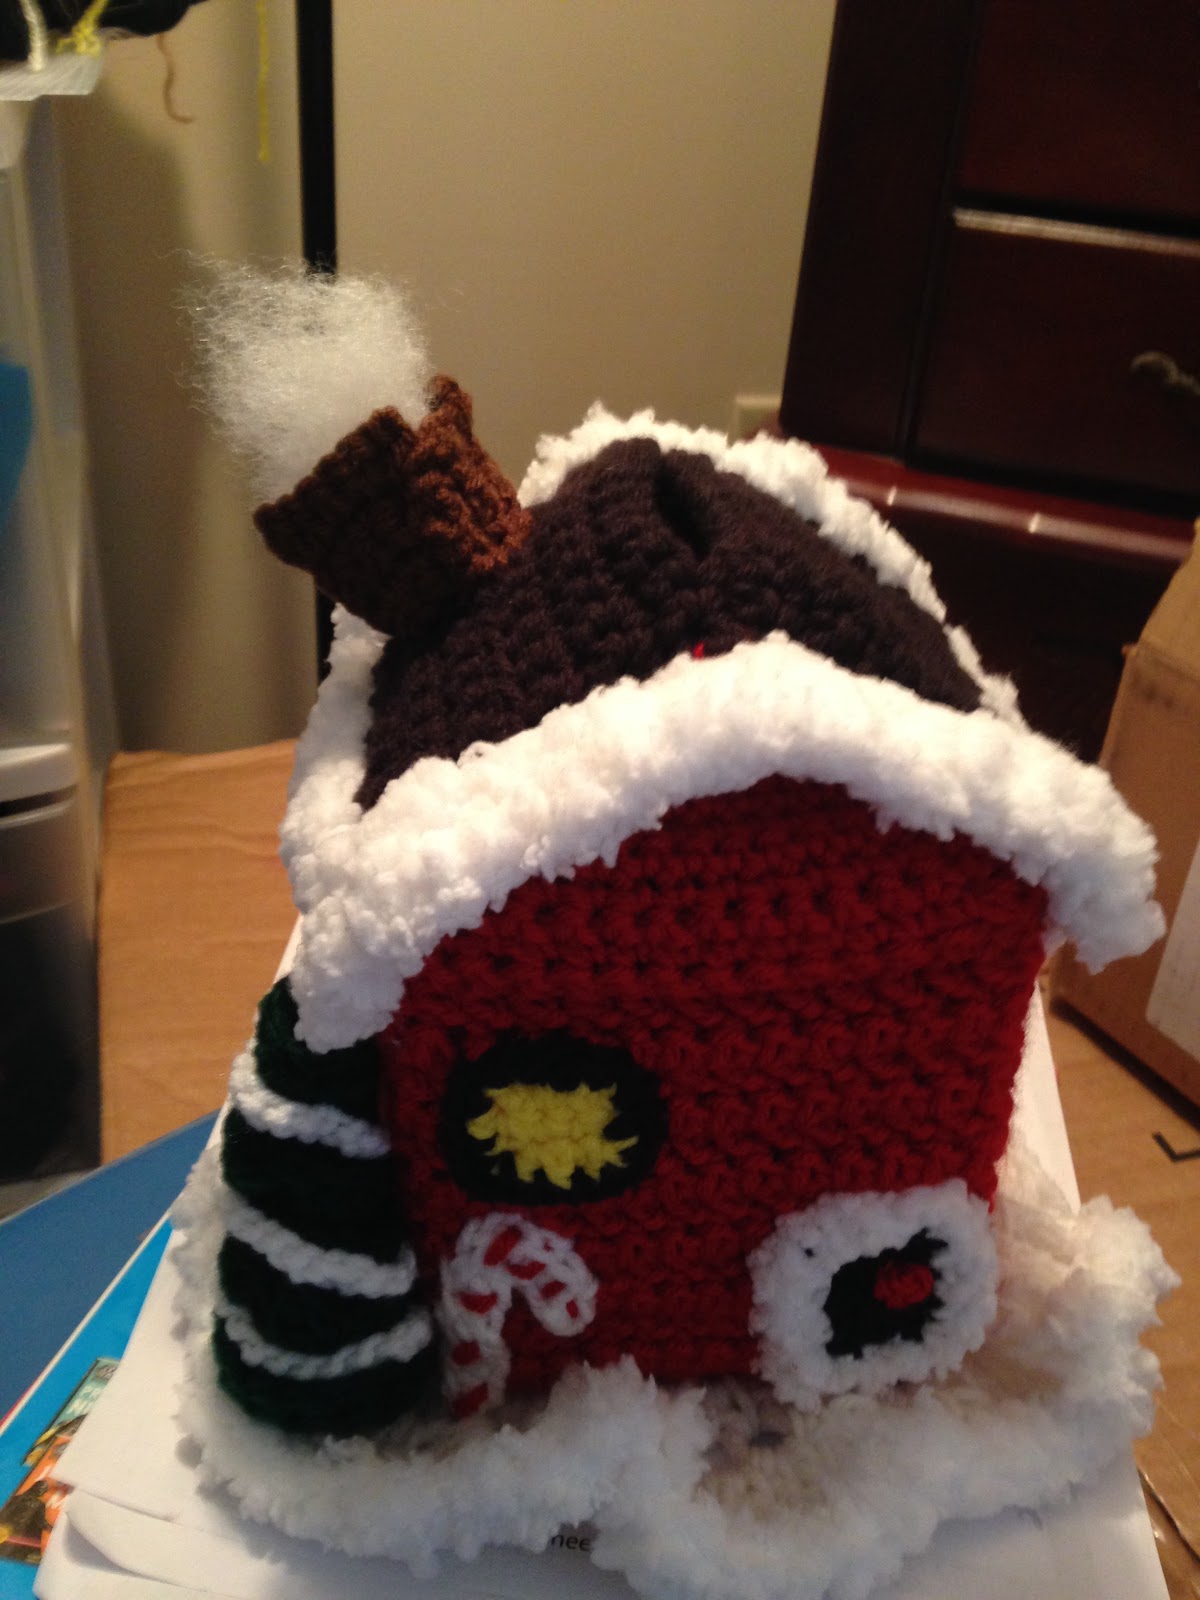
Santa's House - Tissue Box Cover


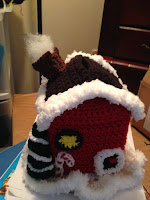


Size: 7" tall x 5" wide
Directions:
The four sides are made in 1 piece.
1. With red yarn and a 5.0mm hook, Ch56. HHDC in 2nd ch from hook and across. Ch1 and turn. (55) --if you do not want to use the HHDC stitch, you can use just the HDC stitch--
2-13. HHDC in each st across. Ch1 and turn. (55)
At the end of Row 13, FO. Leave a long enough tail to whipstitch the 2 short ends together.
Door:
1. With black yarn and 4.0mm hook, Ch7. SC in 2nd ch from hook and across. Ch1 and turn. (6)
2-4. 1 SC in each st across. Ch1 and turn. At the end of Row 4, FO black yarn and join Pipsqueak yarn.
5. With Pipsqueak yarn, SC around the perimeter of the door. Sl st join to first st and FO. Leave tail for attaching. Attach to front side, right corner.
Doorknob:
1. With red yarn and 4.0mm hook, Ch3. Sl st to 1st ch and FO. Leave tail for attaching.
Candy Cane:
1. With white yarn and 4.0mm hook, Ch13. SC in 2nd ch from hook and next ch. 3 SC in next ch. 1 SC in each of the remaining ch. FO. Leave tail for attaching.
2. With red yarn and tapestry needle, weave stripes. Shape and attach to front side, left corner.
Windows:
Front (make 1):
1. With yelllow yarn and 4.0mm hook, Ch5. SC in 2nd ch from hook and across. Ch1 and turn. (4)
2-3. SC across. Ch1 and turn. At the end of Row 3, FO yellow yarn and join black yarn. (4)
4. With black yarn, SC around perimeter of window. FO and leave tail for attaching. Attach to front side, upper left corner.
Side (make 1):
(I only made 1 side window but you can make for both sides and the back, if so desired)
1. With yellow yarn and 4.0mm hook, Ch 9. SC in 2nd ch from hook and across. Ch1 and turn. (8)
2-5. SC across. Ch1 and turn. (8)
6. HDC2tog, HDC in next 4 st, HDC2tog. Ch1 and turn. (6)
7. HDC2tog, HDC in next 2 st, HDC2tog. FO yellow yarn and join black yarn. (4)
8. With black yarn, SC around perimeter of window. Sl st join to first st and FO. Leave tail for attaching.
For the cross made for the window (make 2):
1. With black yarn, Ch10. FO and leave tail for attaching to window. (see pics)
Front and Back Triangles (make 2):
To finish the house we are now going to have to make the front and back triangles.
1. With red yarn and 5.0mm hook, Ch16. SC in 2nd ch from hook and across. Ch1 and turn. (15)
2-5. SC across. Ch1 and turn. (15)
6. SC2tog, SC in next 11 st and SC2tog. Ch1 and turn. (13)
7. SC2tog, SC in next 9 st and SC2tog. Ch1 and turn. (11)
8. SC2tog, SC in next 7 st and SC2tog. Ch1 and turn. (9)
9. SC2tog, SC in next 5 st and SC2tog. Ch1 and turn. (7)
10. SC2tog, SC in next 3 st and SC2tog. Ch1 and turn. (5)
11. SC2tog, SC in next st and SC2tog. Ch1 and turn. (3)
12. SC2tog, SC in next st. Ch1 and turn. (2)
13. SC2tog. FO. Leave a long tail for attaching. (1)
Assembly: attach Row 1 of the triangle to the front side panel of Row 13 by using red yarn and tapestry needle to whipstitch; repeat on the back side with second triangle piece.
Roof:
1. With black yarn and 5.0mm hook, Ch14. SC in 2nd ch from hook and across. Ch1 and turn. (13)
2-10. SC across. Ch1 and turn. (13)
11. Working in the FLO, SC across. Ch1 and turn. (13)
12-15. SC across. Ch1 and turn. (13)
16. SC in the first 2 st. Ch9, skip 9 (this makes the opening). SC in the last 2 st. Ch1 and turn. (4 st; 9 ch)
17. SC in the first 2 st. 9 SC into the Ch9 space and SC in the last 2 st. Ch1 and turn. (13)
18-21. SC across. Ch1 and turn. (13)
22. Working in the FLO, SC across. Ch1 and turn. (13)
23-32. SC across. Ch1 and turn. At the end of Row 32, FO and leave a long tail for attaching. (13)
Assembly: Center the roof so that the opening is in the, well, center. You will whipstitch all 4 sides of the roof to the house.
Trim:
Front:
1. With Pipsqueak yarn and 5.0mm hook, Ch28. HDC in 2nd ch from hook and across. Ch1 and turn. (27)
2. HDC in each of the first 13 st, 3 HDC in the next st, HDC in each of the last 13 st. FO and leave a long tail for attaching. (29)
Repeat again for back trim.
Side (make 2):
1. With Pipsqueak yarn and 5.0mm hook, Ch13, HDC in 2nd ch from hook and across. Ch1 and turn. (12)
2. HDC across. FO and leave a long tail for attaching.
Assembly:
1. With tapestry needle, whipstitch each side first.
2. Whipstitch front trim and then back trim. For the front and back trim, the stitch with 3 HDC stitches should be centered.
Chimney:
Front:
1. With brown yarn and 4.0mm hook, Ch5. SC in 2nd ch from hook and across. Ch1 and turn. (4)
2-3. SC across. Ch1 and turn. (4)
4. SC across. Ch2 and turn. (4)
5. SC in the 2nd ch from hook, SC in next 3 st. 2 SC in last st. FO leave a long tail for attaching. (6)
Repeat again for the Back of the chimney.
Side (make 2):
1. With brown yarn and 4.0mm hook, Ch4. SC in 2nd ch from hook and across. Ch1 and turn. (3)
2-4. SC across. Ch1 and turn. At the end of Row 4, FO, leaving a long enough tail for attaching. (3)
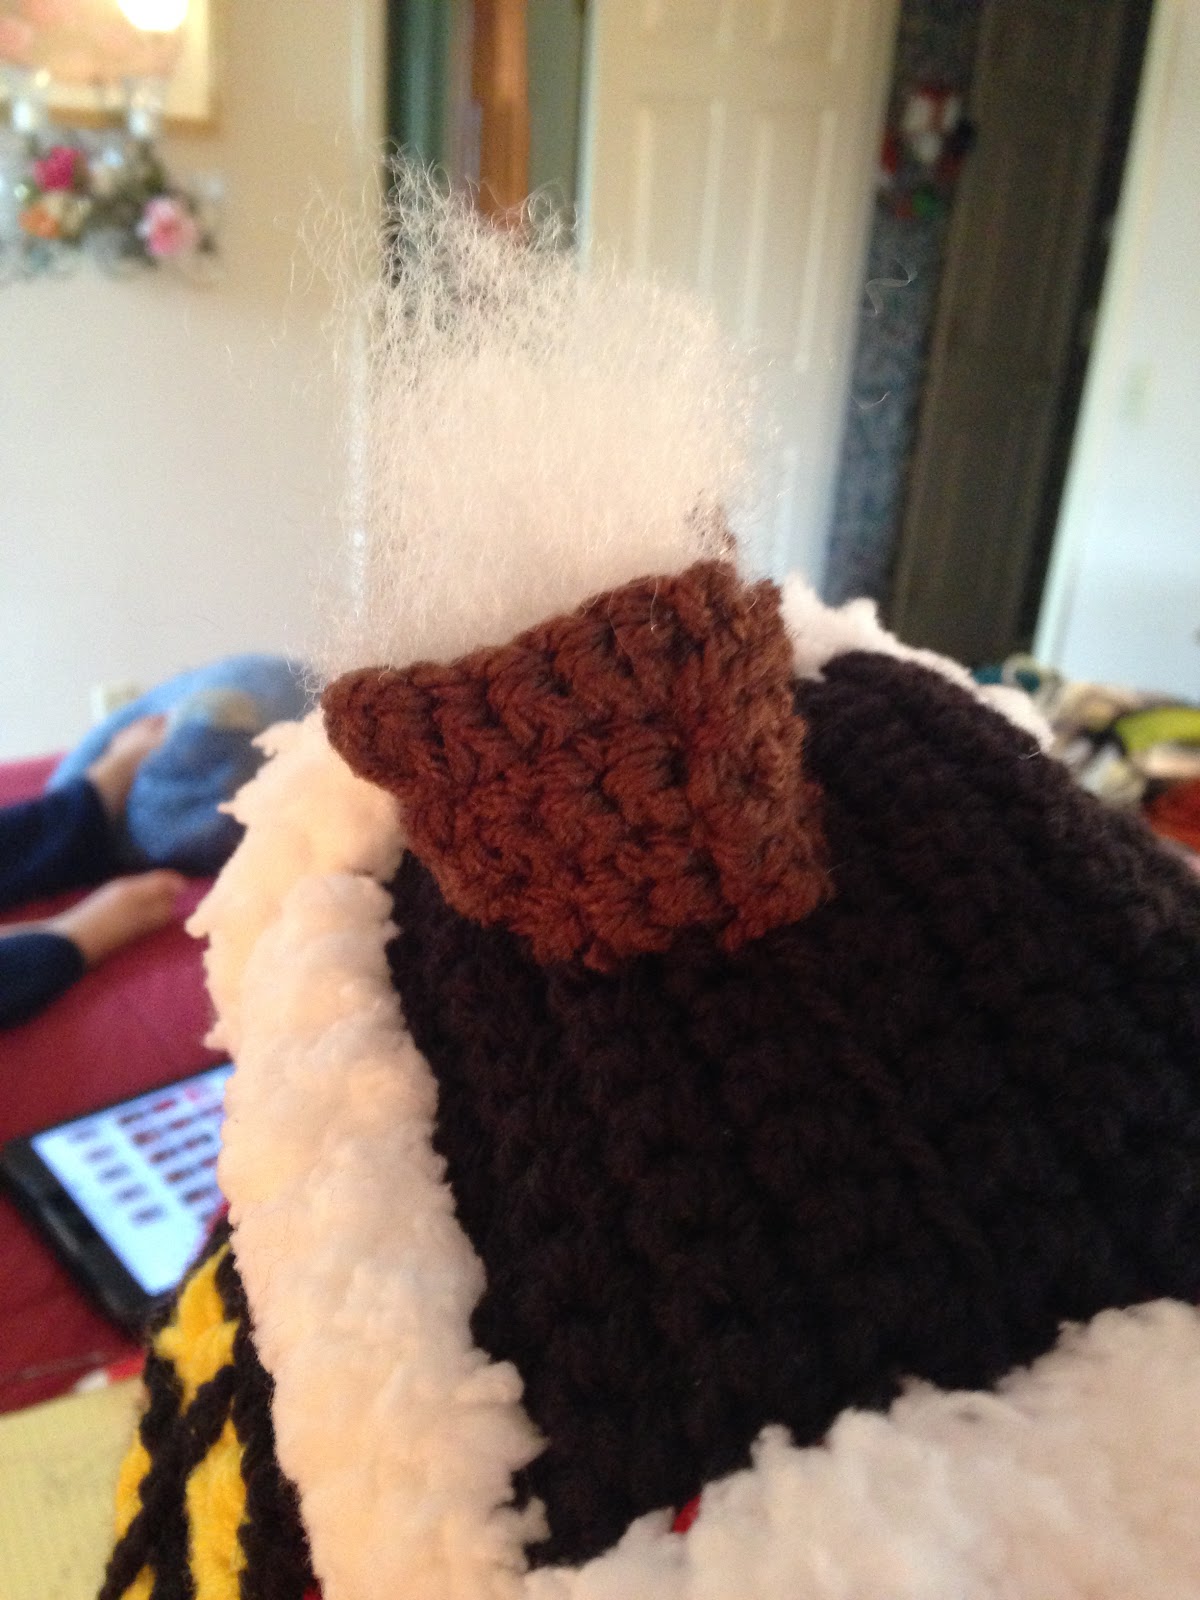
Assembly: Whipstitch the front, back and sides together like a square. The sides will be joined to rows 1-4 of the chimney with Row 5 being the top of the chimney. Stuff a small amount of polyfil into the chimney for "smoke".
And, that's it for Santa's house...you could add more to the house, if so desired. It's cute and functional...
Small Christmas Tree:
1. With green yarn and 5.0mm hook, Ch25. 3 HDC st in the 2nd ch from the hook and into each of the next 7 ch. 3 DC st in the next ch and into each of the next 7 ch. 3 TC st in the next ch and into each of the last 7 ch. This creates a chunky curlicue to shape into a tree. FO and weave tail in and out of tree to keep its shape.
For the tree garland:
1. With white yarn and 4.0mm hook, Ch60. FO and leave a long tail for attaching to tree. Loosely wrap and attach around tree.
For the doily:
1. With white yarn and 5.0mm hook, 10 HDC into MR. Sl st join and Ch1. (10)
2. 2 HDC in each st around. Sl st join and Ch1. (20)
3. 2 HDC in first st. 1 HDC in next st. Rep around. Sl st join and Ch1. (30)
4. 2 HDC in first st. 1 HDC in next 2 st. Rep around. Sl st join and Ch1. (40)
5. 2 HDC in first st. 1 HDC in next 3 st. Rep around. Sl st join and FO. Weave ends. (50)
6. Join Pipsqueak yarn with sl st and Ch1. HDC in same st as Ch1 and each st around. Sl st join and FO. Weave ends. (50)
Gingerbread House
Size: 8" tall
Directions:
For the Gingerbread House, I first make a rectangluar-shaped piece:
1. With warm brown yarn and 5.0mm hook, Ch37. HHDC in 2nd ch from hook and across. Ch1 and turn. (36) --if you do not want to use the HHDC stitch, you can use just the HDC stitch--
2-13. HHDC across. Ch1 and turn. At the end of Row 13, FO and leave a long tail for whipstitching the short ends together. (36)
Now, you will make 4 triangluar-shaped pieces (this will form the roof):
1. With warm brown yarn and 5.0mm hook, Ch10. SC in 2nd ch from hook and across. Ch1 and turn. (9)
2-5 SC across. Ch1 and turn. (9)
6. SC2tog, SC in next 5 st, SC2tog. Ch1 and turn. (7)
7. SC2tog, SC in next 3 st, SC2tog. Ch1 and turn. (5)
8. SC across. Ch1 and turn. (5)
9. SC2tog, SC in next st, SC2tog. Ch1 and turn. (3)
10. SC2tog, SC in next st. Ch1 and turn. (2)
11. SC2tog. Ch1 and turn. (1)
12. SC in st. FO. Leave long tail for attaching. (1)
Assembly: As you can see in the pics below, I made 4 triangular-shaped pieces. I weaved the long tails of each triangle down to Row 1. Row 1 of each triangle is 9 stitches. There are 36 stitches across Row 13 of the rectangular-shaped piece.
Next, you will whipstitch the 2 short ends of the rectangular-shaped piece together.
And, now you will whipstitch the triangle sides together to form the roof peak. I stuffed polyfil into the roof portion of the house. I then placed the bottom portion over a large, Duncan Hines, cake frosting container, with the open end on the bottom, thus forming my circular-shaped Gingerbread House!!!
Trim that goes around the bottom of the house:
1. With white yarn and 4.0mm hook, Ch50. *SC in the 2nd ch from hook, DC into each of the next 3 ch, SC in next ch, TC into each of the next 3 ch,* rep to the end. FO and leave a long tail to attach to bottom of the house.
Candy Balls:
(I made mine in orange, purple, red and yellow; I made enough to go from one side of the door to the other side of the door)
1. With 4.0mm hook, Ch4. 4 HDC into the 1st ch. After completing the 4th HDC, remove hook from loop. Place hook into the first HDC st and then back into the loop. Pull stitch through and ch1. FO and leave a long enough tail for attaching.
Door:
1. With green yarn and 4.0mm hook, Ch6. SC in 2nd ch from hook and across. Ch1 and turn. (5)
2-7. SC across. Ch1 and turn. At the end of Row 7, FO green yarn. (5)
8. Join white yarn and SC around perimeter of the door. Sl st join to first st and FO. Leave a long tail for attaching.
Doorknob:
1. With yellow yarn and 4.0mm hook, Ch3. Sl st to first ch and FO. Leave tail for attaching knob to door.
Window:
1. With white yarn and 3.0mm hook, Ch24. FO and leave tail for attaching. Shape into square and attach. I attached mine to the left of the front door.
For the cross made for the windows:
(make 2)
1. Ch6. FO and leave tail for attaching to window.
Candy Cane (make 4):
1. With white yarn and 3.0mm hook, Ch10. SC in 2nd ch from hook and next Ch. 3 SC in next ch. SC in each of the remaining ch. FO and leave a long enough tail for attaching.
2. With red yarn and tapestry needle, weave stripes.
I placed each candy cane in the center of the triangles of the roof.
Candy Top:
1. With red yarn and 4.0mm hook, Ch19, SC in 2nd ch from hook and across. FO and leave a long enough tail for attaching. I just made this into a swirl-shape and whipstitched it with a few stitches. I then attached to rooftop.
I added a few red balls around my house with a 4.0mm hook by just making a ch3 and sl st into first ch.
I made 2 wavy white lines. I did this by using white yarn and 4.0mm hook; make a ch24. I then placed it in a wavy line and whipstitched to the house.
And, that's it for the Gingerbread House...
Santa's Sleigh
Size: 3" tall x 7" long
Directions:
--The sleigh is made using double-stranded red yarn--
Side (make 2):
1. With red yarn and 5.0mm hook, Ch18. SC in 2nd ch and across. Ch1 and turn. (17)
2-6. SC across. Ch1 and turn. (17)
7. SC in the first 8 st. Ch1 and turn. (8)
8. SC2tog, SC in next 6 st. Ch1 and turn. (7)
9. SC in the first 5 st, SC2tog. Ch1 and turn. (6)
10. SC2tog, SC in next 4 st. Ch1 and turn. (5)
11. SC across. Ch1 and turn. (5)
12. SC across. FO. Weave ends.
13. Re-join yarn in Row 5. Skip 4 st and join with sl st and Ch1. SC in same st as Ch1 and into next 4 st. Ch1 and turn. (5)
14. SC across. Ch1 and turn. (5)
15. SC2tog, SC in next 3 st. Ch1 and turn. (4)
16. SC2tog, SC in next 2 st. FO and weave ends. (3)
The front, bottom and back are all made in 1 piece, double-stranded:
1. Ch8. 3 HDC in 2nd ch from hook, 2 HDC in each of the next 5 ch and 3 HDC in the last ch. Ch1 and turn. (16)
2. SC3tog, SC2tog (5x) and SC3tog. Ch1 and turn. (7)
3-12. SC across. Ch1 and turn. (7)
13. Working in FLO, SC across. Ch1 and turn. (7)
14-22. In both loops, SC across. Ch1 and turn. (7)
23. Working in FLO, SC across. Ch1 and turn. (7)
24-33. In both loops, SC across. Ch1 and turn. (7)
34. 3 HDC in first st, 2 HDC in each of the next 5 st and 3 HDC in the last st. FO. Weave ends. (16)
(The first and last rows creates a curve for the front and the back of the sleigh)
Pockets (make 4):
--This will be for the candy canes to slide through--
1. With white yarn and 4.0mm hook, Ch3. SC in 2nd ch from hook and next ch. Ch1 and turn. (2)
2-4. SC across. Ch1 and turn. At the end of Row 4, FO and leave a long enough tail for attaching. (2)
Assembly:
The pockets are attached to the sides. 2 pockets per side. When you attach the pockets, you whipstitch Row 4 to the side, weave yarn through the pocket and whipstitch Row1. Make sure you leave the gap/opening on each side of Rows 2 and 3 for the candy cane to slide through. I placed each of my pockets a few stitches in on each side at the bottom of the side pieces.
To assemble the sleigh:
1. First, I attached the sides to the front, bottom and back piece. Whipstitch Row 1 of the side, to the front, bottom and back piece between the 2 FLO rows I made.
2. Whipstitch the back corners. You will fold down 3 rows (to the outside) of the back side pieces. This is so the curve of Row 34 back piece shows better.
3. Whipstitch the front corners. You will fold down 3 rows (to the inside) of the front side pieces. This is so the curve of Row 1 front piece shows better.
Place 1 candy cane through the pockets on each side.
Santa and his Bag
Size: 8" tall from top of hat to feet
Directions:
Head:
1. With peach yarn and a 4.0mm hook, 6 SC into MR. Sl st join and Ch1. (Note: you can work this in the round if you so choose). (6)
2. 2 SC in each st around. Sl st join and Ch1. (12)
3. 2 SC in first st, 1 SC in next. Rep around. Sl st join and Ch1. (18)
4-7. 1 SC in each st around. Sl st join and Ch1. (18)
8. SC2tog, 1 SC in next st. Rep around. Sl st join and Ch1. (12)
--attach eyes to Round 4
9. SC2tog. Rep 5 more times. Sl st join and FO peach yarn. Join red yarn and Ch1. (6)
--stuff with polyfil
Body:
10. With red yarn, 2 SC in each st around. Sl st join and Ch1. (12)
11. 2 SC in first st, 1 SC in next st. Rep around. Sl st join and Ch1. (18)
12. 2 SC in first st, 1 SC in next 2 st. Rep around. Sl st join and Ch1. (24)
13-20. 1 SC in each st around. Sl st join and Ch1. (24)
21. SC2tog, 1 SC in next 2 st. Rep around. Sl st join and Ch1. (18)
22. SC2tog, 1 SC in next st. Rep around. Sl st join and Ch1. (12)
--stuff with polyfil
First Leg:
23. 1 SC in each of the first 6 st. Sl st join to the first st and Ch1. (6)
24. 1 SC in first st, 2 SC in next st. Repeat around. Sl st join and FO red yarn. Join white yarn and Ch1. (9)
25. With white yarn, 1 SC in each st around. Sl st join and FO white yarn. Join black yarn and Ch1. (9)
26-27. 1 SC in each st around. Sl st join and Ch1. (9)
28. SC2tog, 1 SC in next st. Rep around. Sl st join and FO. Lightly stuff and close opening with tail. Weave ends. (6)
Second Leg:
29. Join red yarn at Round 23 and work 1 SC st in each of the 6 unworked stitches. Sl st join and Ch1. (6)
30. 1 SC in first st, 2 SC in next st. Repeat around. Sl st join and FO red yarn. Join white yarn and Ch1. (9)
31. With white yarn, 1 SC in each st around. Sl st join and FO white yarn. Join black yarn and Ch1. (9)
32-33. 1 SC in each st around. Sl st join and Ch1. (9)
34. SC2tog, 1 SC in next st. Rep around. Sl st join and FO. Lightly stuff and close opening with tail. Weave ends. (6)
Arms (make 2):
--use stitch marker and work arms in the round--
1. With peach yarn and 4.0mm hook, 6 SC into MR. (6)
2-3. 1 SC in each st around. At the end of Round 3, FO peach yarn and join white yarn. (6)
4. With white yarn, 1 SC in each st around. FO white yarn and join red yarn. (6)
5. With red yarn, 1 SC in each st around. (6)
6-8. 1 SC in each st around. At the end of Round 8, lightly stuff. FO and leave a long enough tail for attaching arm to each side of the body.
Assembly:
1. Attach arms to each side of the body. Weave ends.
Jacket Skirt:
1. With black yarn and 4.0mm hook, Ch26. SC in 2nd ch from hook and across. FO black yarn and join red yarn. (25)
2. With red yarn, 1 SC in each st across. Ch1 and turn. (25)
3. 2 SC in first st, 1 SC in next 23 st, 2 SC in last st. Ch1 and turn. (27)
4. 2 SC in first st, 1 SC in next 25 st, 2 SC in last st. FO red yarn and join white yarn. Ch1. (29)
5. With white yarn, 1 SC in each st across. FO and leave a tail.
Belt Buckle:
1. With yellow yarn and 4.0mm hook, Ch12 and FO. Leave a tail.
Assembly:
1. Attach belt buckle at the center of the black portion of the Jacket Skirt and shape into a rectangle and whipstitch.
2. Now, wrap Jacket Skirt around the center of the body portion. Whipstitch the short ends together in the back. Whipstitch around the black row of the skirt.
Beard/Mustache:
1. With white yarn and 4.0mm hook, Ch10. HDC in the 2nd ch from the hook and into the next 2 ch. Ch3 and Sk 3 ch. HDC in each of the last 3 ch. Ch1 and turn.
2. HDC in the first 3 st. 3 TC into the Ch3 space, HDC in the last 3 st. FO and leave a tail for attaching.
Assembly:
1. First I used red yarn and embroidered a mouth.
2. Whipstitch the Beard/Mustache, with Row 1 above the mouth; this way the mouth is visible through the Ch3 space.
Hat:
1. Leave a long starting tail for attaching hat to the head. With white yarn and 4.0mm hook, Ch20. Sl st to first ch to form a ring. 1 SC in each ch around. Sl st join and FO white yarn. Join red yarn and Ch1. (20)
2. With red yarn, 1 SC in each st around. Sl st join and Ch1. (20)
3. 1 SC in each st around. Sl st join and Ch1. (20)
4-8. Decrease 1 SC st in each round. Sl st join and Ch1. (19, 18, 17, 16, 15)
9. SC2tog, 1 SC in next 2 st. Rep around. Sl st join and Ch1. (12)
10. SC2tog. Rep 5 more times. Sl st join and FO. Weave ends. (6)
Pompom:
1. With white yarn, I wrapped around 2 of my fingers 12 times. Tied in center. Trimmed ends and attached to the end of the hat.
Assembly:
1. With starting white tail, whipstitch hat around top of head.
2. I also bent the top of the hat down and used a piece of red yarn to whistitch it in place.
Santa Bag:
--use stitch marker and work arms in the round--
1. With green yarn and 4.0mm hook, 6 SC into MR. (6)
2. 2 SC in each st around. (12)
3. 2 SC in first st, 1 SC in next st. Rep around. (18)
4. 2 SC in first st, 1 SC in next 2 st. Rep around. (24)
5-7. 1 SC in each st around. (24)
8. SC2tog, 1 SC in next 2 st. Rep around. (18)
9-14. 1 SC in each st around. (18)
15. 1 HDC in each st around. (18)
16. 2 HDC in first st, 1 HDC in next st. Rep around. FO and weave ends. (24)
Drawstring:
1. With green yarn, Ch75. FO.
Assembly:
1. Lightly stuff bag with polyfil.
2. Weave drawstring in and out of the stitches of Round 15. Tie.
Snowman
Size: Approximately 5 1/2" tall from top of hat to bottom
Directions:
Snowman:
1. With white yarn and 4.0mm hook, 6 SC into MR. Sl st join and Ch1. (Note: you can work your Snowman in the round, if you so choose) (6)
2. 2 SC in each st around. Sl st join and Ch1. (12)
3. 2 SC in first st, 1 SC in next st. Rep around. Sl st join and Ch1. (18)
4-7. 1 SC in each st around. Sl st join and Ch1. (18)
8. SC2tog, 1 SC in next st. Rep around. Sl st join and Ch1. (12)
9. SC2tog. Rep 5 more times. Sl st join and Ch1. (6)
--attach eyes at Round 4; stuff--
10. 2 SC in each st around. Sl st join and Ch1. (12)
11. 2 SC in first st, 1 SC in next st. Rep around. Sl st join and Ch1. (18)
12. 2 SC in first st, 1 SC in next 2 st. Rep around. Sl st join and Ch1. (24)
13-16. 1 SC in each st around. Sl st join and Ch1. (24)
17. SC2tog, 1 SC in next 2 st. Rep around. Sl st join and Ch1. (18)
18. SC2tog, 1 SC in next st. Rep around. Sl st join and Ch1. (12)
--attach button eyes at Round 14 and 16; stuff--
19. SC2tog. Rep 5 more times. FO and leave a tail. Weave tail in and out of last 6 st to close up. Weave ends. (6)
Nose:
1. With orange yarn and 3.0mm hook, Ch5. SC in 2nd ch from hook and across. Ch1 and turn. (4)
2. SC2tog. SC2tog. FO and leave a tail for attaching. (2)
Assembly:
1. Fold in half; whipstitch and attach to face.
Arms (make 2)
1. With brown yarn and 3.0mm hook, Ch5. SC in 2nd ch from hook and across. (4)
2. Ch3. SC in 2nd ch and next ch. Sl st to the last st of the base.
3. Ch3. SC in 2nd ch and next ch. Sl st to the last st of the base and FO. Leave a tail for attaching to each side of the body.
Hat:
1. With black yarn and 3.0mm hook, 6 SC into MR. Sl st join and Ch1. (Note: you can work this in the round, if you so choose)
2. 2 SC in each st around. Sl st join and Ch1. (12)
3-5. 1 SC in each st around. Sl st join and Ch1. (12)
6. Working in the BLO, 1 SC in each st around. Sl st join and Ch1. (12)
7. Working in both loops, 2 SC in first st, 1 SC in next st. Rep around. Sl st join and Ch1. (18)
8. 1 SC in each st around. Sl st join and FO. Leave a tail for attaching hat to top of head.
Optional:
1. Attach a button to the hat.
Scarf:
1. With green yarn and 3.0mm hook, Ch49. Sl st in 2nd ch from hook and across. FO and weave ends. (48)
Assembly:
1. Loosely tie scarf around neck of Snowman.
Turkey House
Size: Approximately 7" tall, not including the hat
Directions:
1. With warm brown yarn and 5.0mm hook, Ch41. Sl st join to first ch. HDC in 2nd ch from hook and across. Ch1 and turn. (40)
2-11. 1 HDC in each st across. Ch1 and turn. At the end of Row 11, FO warm brown yarn and join white yarn. (40)
12. With white yarn, HDC in each st across. Ch1 and turn. (40)
13. 1 HDC in each st across. FO and leave tail for attaching.
Assembly:
1. With right sides facing, whipstitch the short ends together.
2. Turn right side out.
Turkey Face Door:
1. With dark brown yarn and 4.0mm hook, 8 HDC into MR. Sl st join and Ch1. (8)
2. 2 HDC in each st around. Sl st join and Ch1. (16)
3. 1 HDC in each of the first 6 st. Ch1 and turn. (6)
4. 1 HDC in each st across. Ch1 and turn. (6)
5. 2 HDC in first st, 1 HDC in next 4 st, 2 HDC in last st. Ch1 and turn. (8)
6. 1 HDC in each st across. Ch1 and turn. (8)
7. 2 HDC in first st, 1 HDC in next 6 st, 2 HDC in last st. Ch1 and turn. (10)
8. HDC2tog, HDC in next 6 st, HDC2tog. Ch1 and turn. (8)
9. SC evenly around the perimeter. FO and leave a tail for attaching.
Nose:
1. With yellow yarn and 3.0mm hook, 3 SC into MR. Sl st join and Ch1. (3)
2. 2 SC in each st around. Sl st join and Ch1. (6)
3. 1 SC in each st around. FO and leave tail for attaching. (6)
Wattle:
1. With red yarn and 4.0mm hook, Ch5. SC in 2nd ch from hook, DC into each of the next 3 ch. FO and leave tail for attaching. (4)
Assembly:
1. See pics on where to attach eyes, nose and wattle.
Feathers:
(I made 2 purple, 2 red, 1 orange and 1 yellow)
1. With 5.0mm hook, 6 SC into MR. Sl st join and Ch1. (Note: you can work this in the round, if you so choose) (6)
2. 1 SC in each st around. Sl st join and Ch1. (6)
3. 2 SC in first st, 1 SC in next st. Rep around. Sl st join and Ch1. (9)
4-12. 1 SC in each st around. Sl st join and Ch1. (9)
13. 1 SC in each st around. Sl st join and FO. Leave a tail for attaching.
Assembly:
1. To the back side, I attached my feathers in the following order: purple, yellow, red, orange, red, purple).
Hat:
1. With red yarn and 5.0mm hook, Ch40. Sl st to first ch to form ring. HDC in each ch around. Sl st join and Ch1. (40)
2-5. 1 HDC in each st around. Sl st join and Ch1. (40)
6. HDC2tog, 1 HDC in next 2 st. Rep around. Sl st join and Ch1. (30)
7. HDC2tog, 1 HDC in next st. Rep around. Sl st join and Ch1. (20)
8-15. HDC in each st around. However, decrease 1 HDC st in each round. Sl st join and Ch1. (19, 18, 17, 16, 15, 14, 13, 12)
16. HDC2tog. Rep 5 more times. Sl st join and Ch1. (6)
17. 1 HDC in each st around. Sl st join and FO. Weave tail in and out of last round to close up. (6)
Pompom:
1. With white yarn, I wrapped it around 3 of my fingers 20-25 times. Tied in center. Trimmed ends and attached to the hat end.
Walkway:
1. With orange yarn and 5.0mm hook, Ch12. SC in 2nd ch from hook and across. Ch1 and turn. (11)
2-24. 1 SC in each st across. Ch1 and turn. (11)
25. 2 HDC in each st around perimeter.
26. 2 HDC in each st around. FO and weave ends.
Nativity Stable, Baby Jesus and Basket
Size:
Stable: Approximately 6" long x 5" tall
Basket: Approximately 4" x 2"
Baby Jesus: 2 1/2" long
Directions:
Stable:
(Back and Bottom)
1. With dark brown yarn and 4.0mm hook, Ch25, SC in 2nd ch from hook and across. Ch1 and turn. (24)
2-15. SC in each st across. Ch1 and turn. (24)
16. SC in each st across. FO dark brown yarn and join warm brown yarn. Ch1 and turn. (24)
17. Working in the BLO, SC in each st across. Ch1 and turn. (24)
18-27. Rep #17. At the end of Row 17, FO and weave ends. (24)
Sides (make 2):
1. With dark brown yarn and 4.0mm hook, Ch12. SC in 2nd ch from hook and across. Ch1 and turn. (11)
2-16. SC in each st across. Ch1 and turn. At the end of Row 16, FO and leave a long tail for attaching. (11)
Assembly:
1. Attach short end to each side of the bottom pieces.
Top:
1. With dark brown yarn and 4.0mm hook, Ch31, SC in 2nd ch from hook and across. Ch1 and turn. (30)
2-12. SC in each st across. Ch1 and turn. (30)
13. SC in the first 14 st. 3 SC in each of the next 2 st, SC in the last 14 st. Ch1 and turn. (34)
14. SC in the first 16. 3 SC in each of the next 2 st, SC in the last 16 st. FO. Leave a long tail for attaching the top to the sides. (38)
Basket:
1. With warm brown yarn and 5.0mm hook, Ch10. SC in 2nd ch from hook and next 7 ch. 3 SC in next ch. Rotate to work on opposite side of base chain. SC in the next 7 ch. 2 SC in the last ch. Sl st join to first st and Ch1. (20)
2. SC in the first 9 st. 3 SC in the next st. SC in the next 9 st. 2 SC in the last st. Sl st join and Ch1. (23)
3. SC in the first 10 st. 3 SC in the next st. SC in the next 11 st. 2 SC in the last st. Sl st join and Ch1. (26)
4. SC in the first 11 st. 3 SC in the next st. SC in the next 13 st. 2 SC in the last st. Sl st join and Ch1. (29)
5-6. 1 SC in each st around. Sl st join and Ch1. (29)
7. HDC in each st around. Sl st join and FO. Weave ends. (29)
Baby Jesus:
Head:
1. With peach yarn and 3.0mm hook, 6 SC into MR. Sl st join and Ch1. (Note: you can work this in the round, if you so choose) (6)
2. 2 SC in first st, 1 SC in next st. Rep around. Sl st join and Ch1. (9)
3. 1 SC in each st around. Sl st join and Ch1. (9)
4. SC2tog, 1 SC in next st. Rep around. Sl st join and Ch1. (6)
5. Stuff; embroider eyes, if so desired (I used blue yarn) and FO. Leave tail for attaching.
Body:
1. With peach yarn and 3.0mm hook, 6 SC into MR. Sl st join and Ch1. (Note: you can work this in the round, if you so choose) (6)
2. 2 SC in each st around. Sl st join and Ch1. (12)
3-4. 1 SC in each st around. Sl st join and Ch1. At the end of Round 4, FO, stuff and close end.
Assembly:
1. Attach head to body. Whipstitch and weave ends.
Arms (make 2):
1. 3 SC into MR. Sl st join and Ch1. (3)
2. 2 SC in each st around. FO and leave tail for attaching. (6)
Assembly:
1. Attach arms to each side of the body. Whipstitch and weave ends.
Legs (make 2):
1. 6 SC into MR. Sl st join and Ch1. (6)
2. 1 SC in each st around. Sl st join and FO. Leave tail for attaching.
Assembly:
1. Attach legs to each side of the bottom of the body. Whipstitch and weave ends.
Blanket:
1. With purple yarn and 4.0mm hook, Ch12. SC in 2nd ch from hook and across. Ch1 and turn. (11)
2-15. SC in each st across. Ch1 and turn. (11)
16. HDC in each st around perimeter of blanket. Sl st join and FO. Weave ends.
Assembly:
1. I wrapped the blanket around Baby Jesus and added a couple of stitches to keep the blanket closed.
Christmas Tree
Size: 12" tall
Directions:
You can find my post for the Christmas tree pattern by clicking here...
I hope you all will enjoy these patterns. Please feel free to message
me or comment below with any questions. These have not been tested and
my own creations. I hope I have made the directions easy enough to
understand.
Happy Crocheting...
Legal:
--don't claim my pattern/design as your own
--don't use my pics as your own
--don't share my patterns electronically or in print format but provide a link to my blog
--okay to make and sale your finished work; just credit me as the designer