

Pumpkin, Oh Pumpkin!!!!

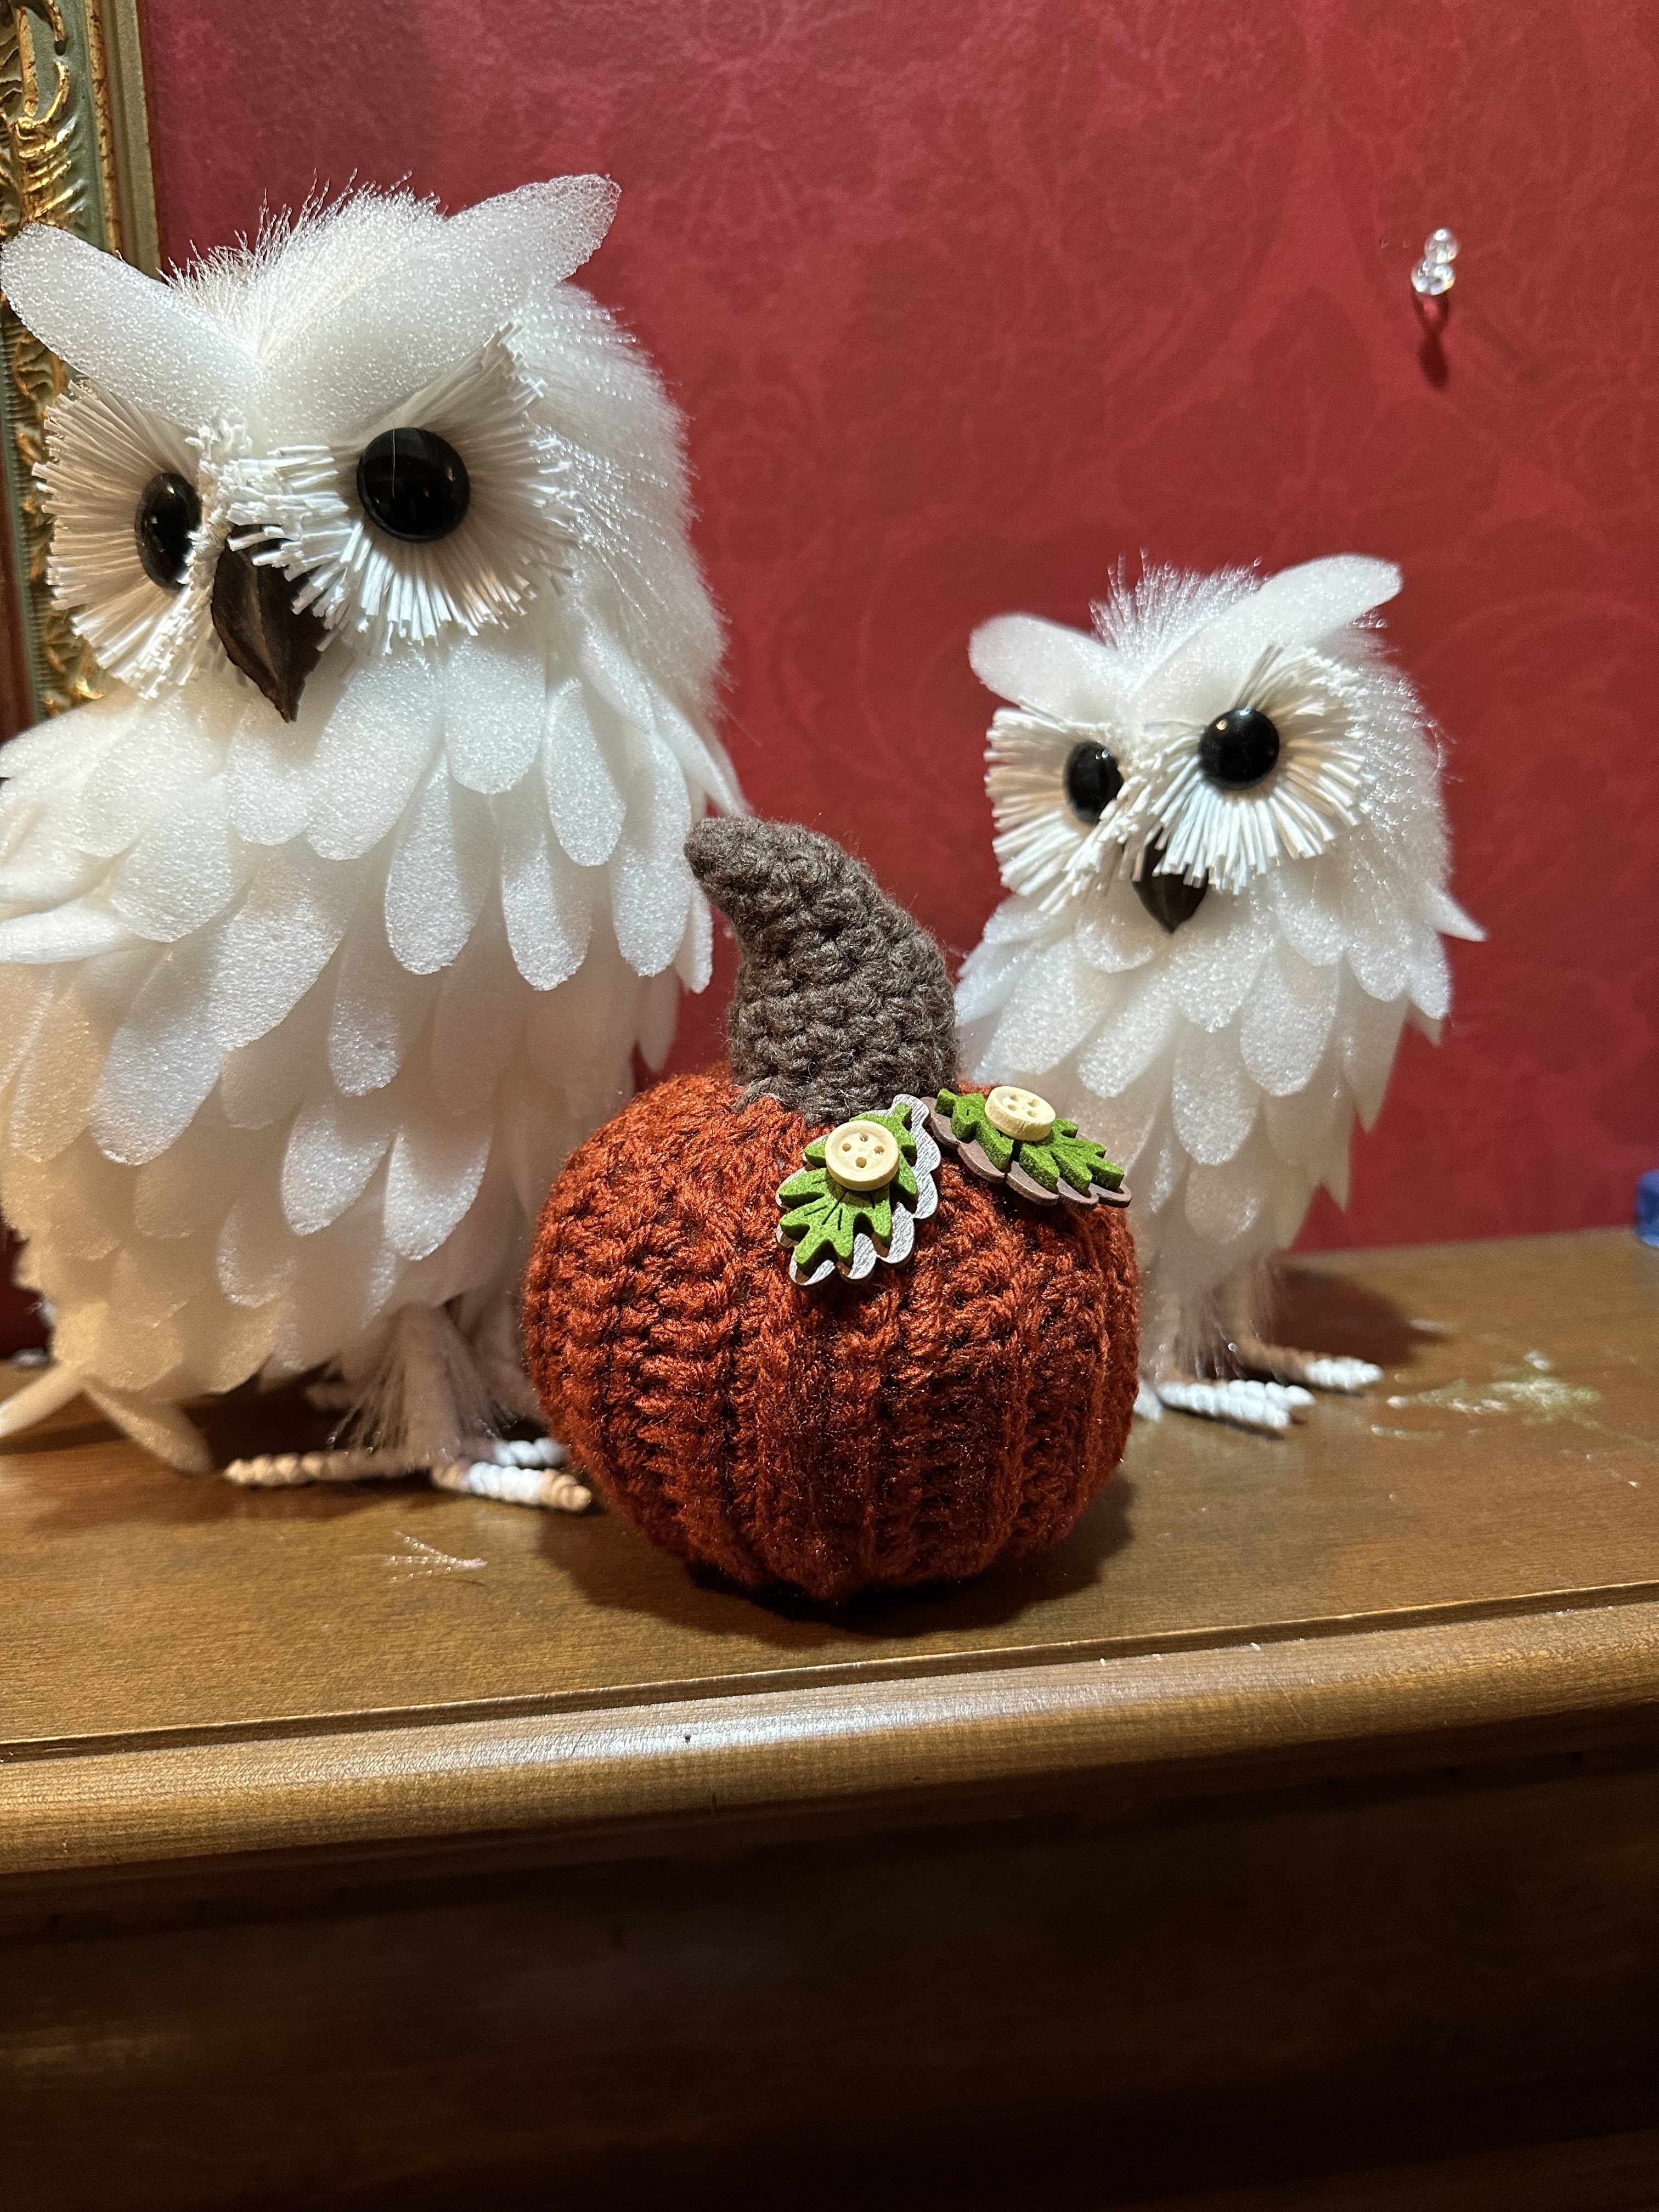
Super cute and easy fall project for the home - a pumpkin!!! I used, “I Love This Yarn,” in the color, Terra Cotta, from Hobby Lobby and a 4.0mm hook. For the stem, I just grabbed some leftover brown worsted weight yarn I had on hand. I filled with Polyfil; added 2 cute button leaves (from Hobby Lobby) and ta-dah - it’s done!!!!

Size: 5” x 4”
Materials:
—ILTY in Terra Cotta (or worsted weight yarn color of choice)
—Small amount of Brown worsted weight yarn for stem
—Polyfil
—2 buttons (optional)
—Stitch marker
—Tapestry needle

Ch: chain
St: stitch(es)
Sl st: slip stitch
SC: single crochet
BLO: back loops only
Rep: repeat
SC2tog: single crochet 2 stitches together (decrease)
MR: magic ring
FO: fasten off
Directions:
Pumpkin:
The pumpkin is worked in rows and then the short ends Sl st together to work the top and bottom in rounds.
1. Ch 13. SC in second ch from hook and across. (12)
2. BLO. SC across. (12)
3-29. Rep #29. (12)
30. BLO. SC across. Ch1. Turn. (12)
31. Working across the end, SC evenly across. (30)
32. Join short ends and Sl st together. (12)
33. Now, working across the opposite end, SC evenly across. (30)
Now we will work in the round.
34. SC2tog. Rep around 15 times. (15)
35. SC first st. SC2tog. Rep around. (10)
36. SC2tog. Rep 5 times. FO and leave a tail for closing up. (5)
Use the tail to weave in and out of the last 5 stitches to close up the opening. Weave ends.
Firmly stuff with Polyfil.
Repeat 34-36 on opposite end.
Stem:
The stem is worked in the round. Use your stitch marker to keep track of the first stitch of each new round and move marker accordingly for each new round.
1. MR. 5 SC. (5)
2. 1 SC in each st around. (5)
3. 2 SC in each st around. (10)
4-5. 1 SC in each st around. (10)
6. 1 SC in first st. 2 SC in next st. Rep around. (15)
7. 1 SC in each st around. (15)
8. 1 SC in each st around. Sl st to first st. FO. Leave a tail to attach to top, center of pumpkin. Stuff with Polyfil.
Assembly:
1. With pumpkin closed on both ends, attach stem to the center top with tapestry needle.
2. Optional. The buttons I used had sticky backs on them, so I just attached to the top. You can glue to make it permanently attached. Or, add a crochet leaf.
Happy Crocheting...
Legal:
--don't use/claim my design as your own
--don't use/claim my pics as your own
--okay to make and sale your finished work
--don't share my pattern electronically or in print format (without prior consent) but provide a link to my blog
Social Media:
If you are on the following sites, let's connect and hook up...
- Instagram: Rilla2u
- Pinterest: Rilla2u
- Twitter: Rilla2u
- Facebook: /rilla.edwards
- Etsy: rilla2u
- TikTok: rillae2u
- YouTube: Rilla2u
No comments:
Post a Comment