

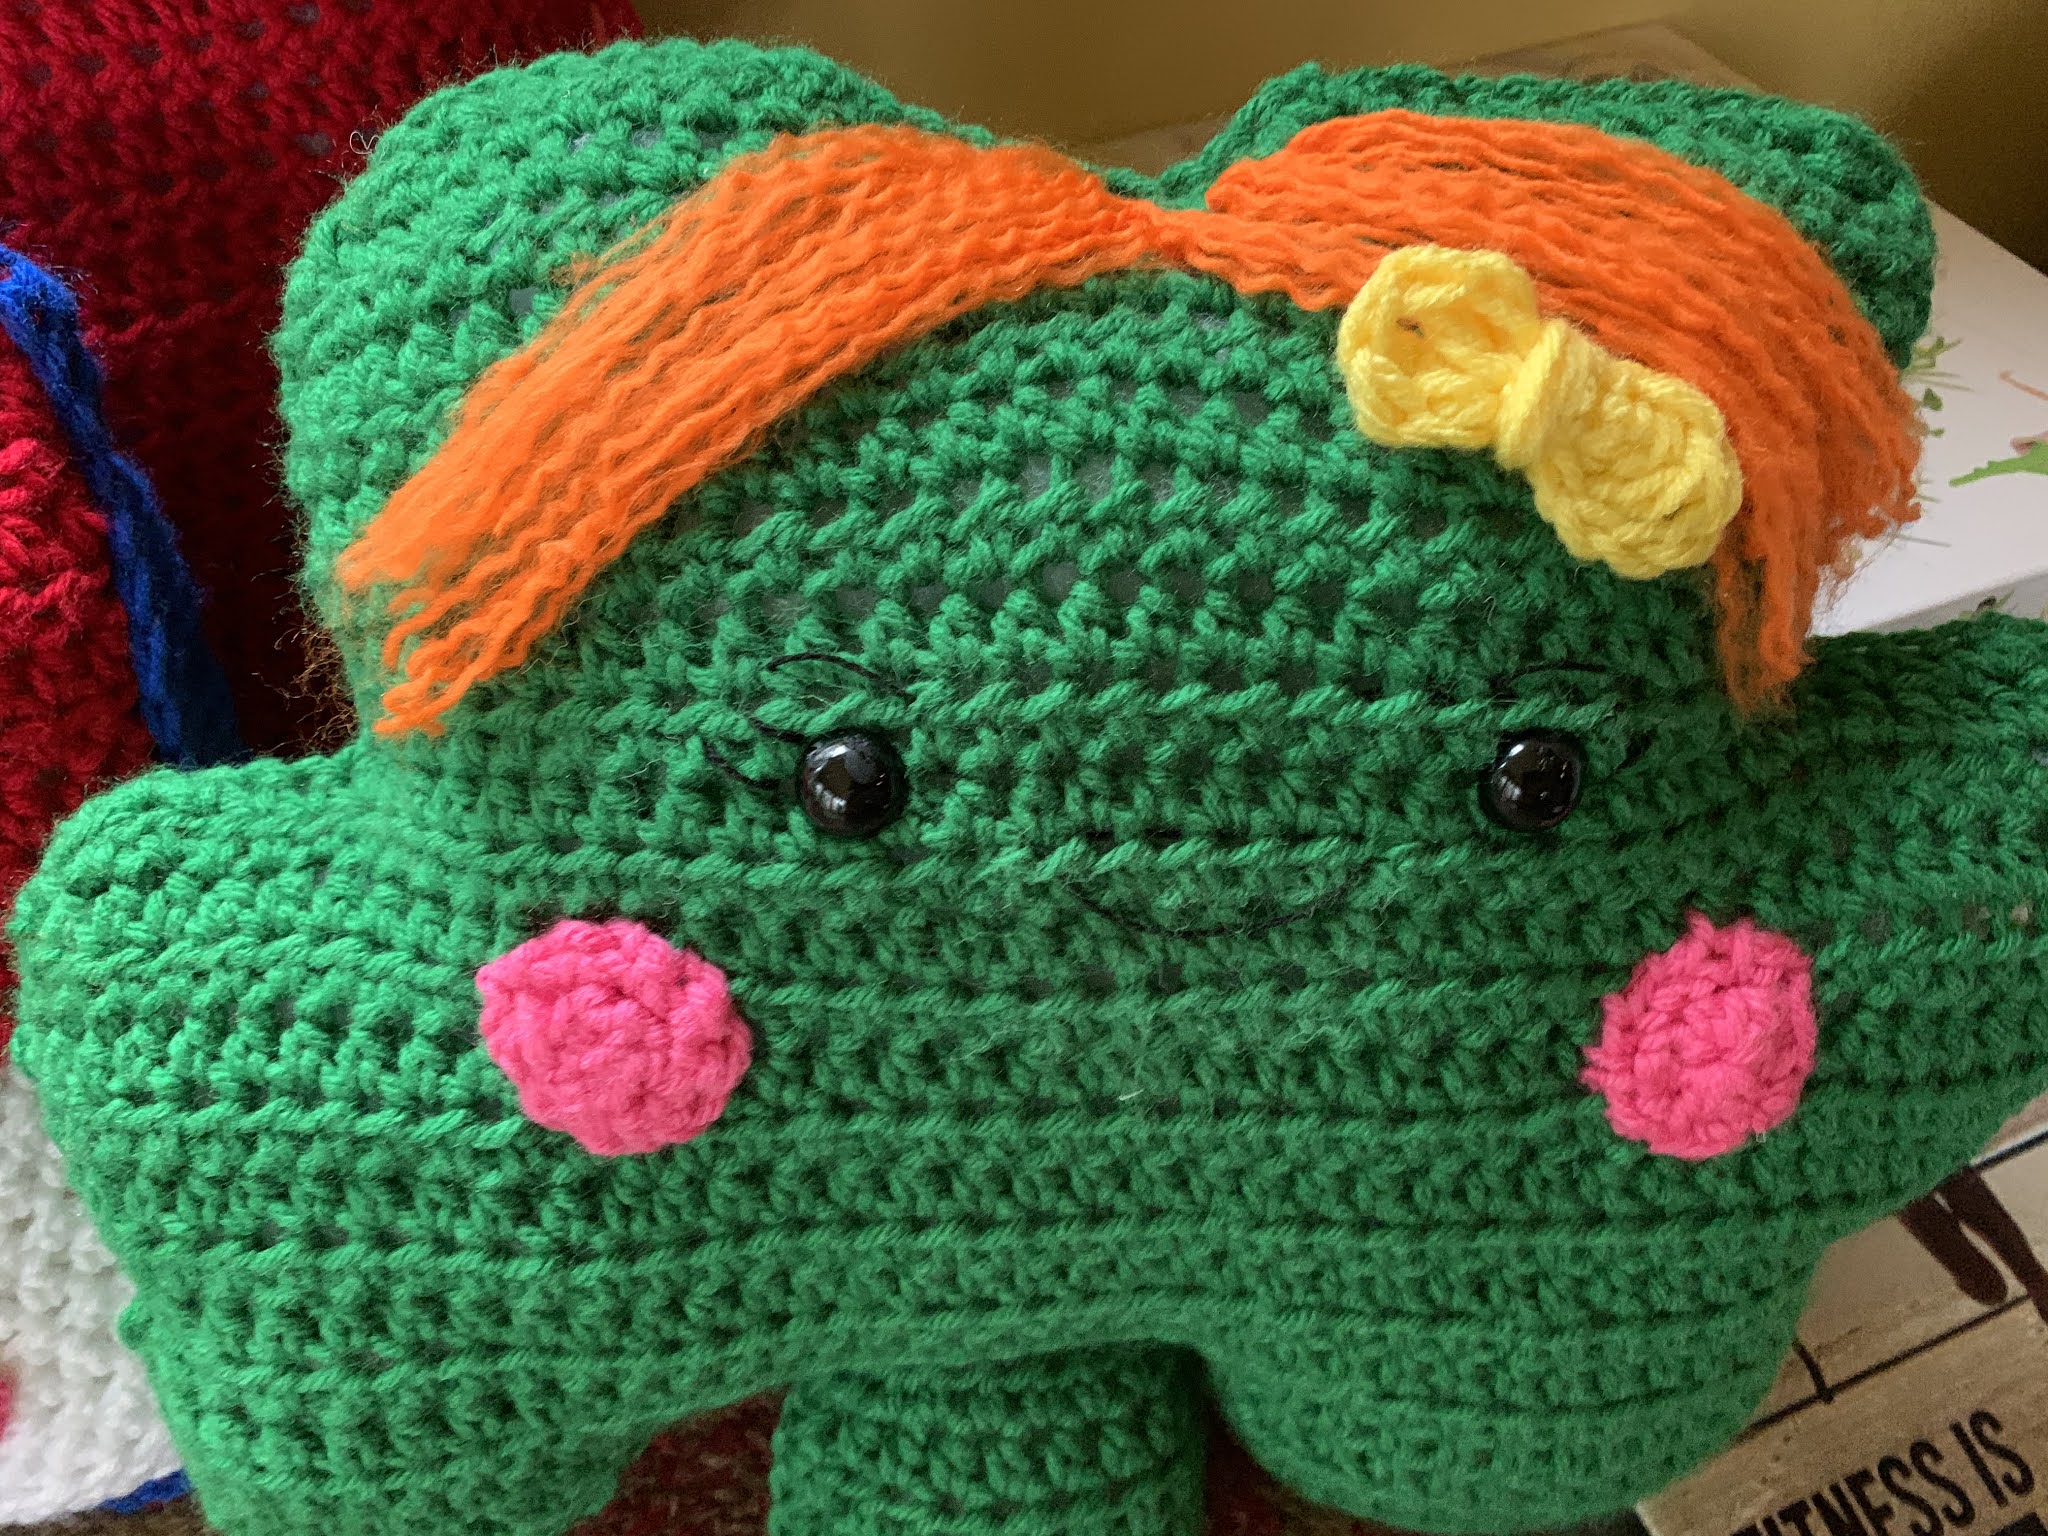
Here’s another one of my newest designs, a “Shamrock Kawaii Pillow.” I think it’s super cute, especially with the hair (optional).
I used Main Stays Acrylic yarn from Wal-Mart for this project.
Shamrock Kawaii Pillow

With a little hat on...

If you would like to purchase the Ad-free, PDF version, here is the link to my Etsy Shop:
Size: 14 1/2" x 13"
Materials:
--5.0mm hook
--#4 worsted weight yarn in green (1 skein), pink (2-3 yds) and orange (2-3 yds); I used Mainstays Yarn (Wal-Mart)
--2 (15mm) black eyes
--small amount of black embroidery thread
--Polyfil
--tapestry needle for weaving
U.S. Stitch Abbreviations:
Ch: chain
St: stitch(es)
Sl st: slip stitch
SC: single crochet
HDC: half double crochet
HDC2tog: half double crochet 2 stitches together (decrease stitch)
TC: triple crochet
Rep: repeat
FO: fasten off
MR: magic ring
Directions:
Special Note: if making for a child, you may want to crochet the eyes for safety reasons.
For this project, you will be making a front and back identical piece and then single crocheting the two pieces together. You can slip stitch or whipstitch the two pieces together, if so desired. The hair is optional. I used black safety eyes, but you can opt to make crocheted eyes instead. As you can see, at the bottom of this post, I decided after I completed this project to add a small yellow bow. This is optional, as well.
To start we will be making the stem first:
1. Ch10. HDC in the second ch from the hook and across. Ch1 and turn. (9)
2-7. HDC in each st across. Ch1 and turn. (9)
8. HDC in each st across. FO and set aside. (9)
Now, we are going to start on the lower right lobe:
1. Ch9. HDC in second ch from hook and across. Ch1 and turn. (8)
2. 2 HDC in the first st, 1 HDC in the next 6 st, 2 HDC in the last st. Ch1 and turn. (10)
3. 2 HDC in the first st, 1 HDC in the next 8 st, 2 HDC in the last st. Ch1 and turn. (12)
4. 2 HDC in the first st, 1 HDC in the next 10 st, 2 HDC in the last st. Ch1 and turn. (14)
5. 1 HDC in each st across. Ch1 and turn. (14)
6. 1 HDC in the first 13 st. 2 HDC in the last st. Now, pick up stem and sl st join to stem. 1 HDC in the same st as the sl st. Then 1 HDC in each st across. (24)
Now, we are going to be adding the lower left lobe to the piece:
7. Ch16. HDC in second ch from hook and across. Turn. (15)
You are going to turn your piece and work the next row in the base chains. This way your 15 HDC stitches will stay even with Row 8 of your stem.
8. Sl st into each of the first four ch. Ch1. HDC in each of the remaining 11 ch. Ch1 and turn. (11)
9. HDC in the first 9 st, HDC2tog. Ch1. Turn. (10)
10. HDC2tog, HDC in the next 8 st. FO and weave ends. (9)

Now, you have your right lower lobe of 15 stitches, your stem of 9 stitches and your left lower lobe of 15 stitches for a total of 39 stitches. Join yarn in the last stitch on the right side with a sl st and ch1.
The Body:
1. HDC in each st across. Ch1 and turn. (39)
2. HDC in each st across. Ch 1 and turn. (39)
3. HDC2tog, HDC in the next 35 st, HDC2tog. Ch1 and turn. (37)
4. HDC2tog, HDC in the next 35 st. Ch1 and turn. (36)
5. Ch3. HDC in the second ch from the hook and the next ch. HDC in the next 35 st. 2 HDC in the last st. Ch1 and turn. (39)
6. 2 HDC in the first st, HDC in the next 37 st, 2 HDC in the last st. Ch1 and turn. (41)
7. 2 HDC in first st, HDC in the next 40 st. Ch1 and turn. (42)
8-10. 1 HDC in each st across. Ch1 and turn. (42)
11. HDC in the first 40 st, HDC2tog. Ch1 and turn. (41)
12. HDC2tog, HDC in the next 39 st. Ch1 and turn. (40)
13. HDC2tog, HDC in the next 33 st. Leave remaining unworked. Ch1 and turn. (34)
14. 2 HDC in first st, HDC in the next 25. Ch1 and turn. (27)
15. 2 HDC in first st, HDC in the next 26 st. Ch1 and turn. (28)
16. HDC in the first 27 st, 2 HDC in the last st. Ch1 and turn. (29)
17. 2 HDC in first st, HDC in the remaining st. Ch1 and turn. (30)
18-19. 1 HDC in each st across. Ch1 and turn. (30)
20. HDC2tog, HDC in the next 13 st. Ch1 and turn. (14)
21. HDC2tog, HDC in the next 10 st, HDC2tog. Ch1 and turn. (12)
22. HDC2tog, HDC in the next 7 st. FO and weave ends. (8)
Now, join yarn on opposite side of last stitch of Row 19 with a sl st and ch1.
23. 1 HDC in same st as sl st and next 13 st. Ch1 and turn. (14)
24. HDC2tog, HDC in the next 10 st, HDC2tog. Ch1 and turn. (12)
25. HDC2tog, HDC in the next 8 st, HDC2tog. FO and weave ends. (10)

Repeat to make the second piece.
Now, once you have two identical pieces made, you will want to go ahead and add the facial features to one of your completed pieces before we join them together.


For the eyes, I placed them at approximately the 13th or 14th row of the body portion, with a space of 9 stitches between them. I then added lashes, brows and a mouth with black embroidery thread.
For the cheeks, I used pink yarn:
1. 6 SC in to MR. Sl st join and Ch1.
2. *2 SC in first st, 1 SC in next st.* Complete from * to * around. FO and leave a long tail for attaching. (see pic for placement)


For the hair, I used orange yarn:
1. At the top center, I joined 6 pieces of orange yarn and secured with a double knot. This made 12 pieces. I then used my tapestry needle to fray the yarn.
For the bow, I used yellow yarn:
1. I started with a MR. Ch4. 7 TC into MR. Sl st join to top of Ch4. Then I sl st to center. FO and leave a long tail. Pull tail to tighten the center. Then wrap yarn several times around the center and then join to the top right or left, just under the hair.
Now, align your two pieces together. Join yarn with a sl st and Ch1. SC around. Before closing piece, stuff firmly with Polyfil. Then, complete SC. Sl st join to first st. FO and weave ends.
That's it. You're ALL DONE...


- Instagram: Rilla2u
- Pinterest: Rilla2u
- Twitter: Rilla2u
- Facebook: /rilla.edwards
No comments:
Post a Comment