Monday, December 20, 2021

Dallas Cowboys Hat

Dallas Cowboys Hat


Here’s my Dallas Cowboys inspired crochet hat.  I think it turned out gorgeous and hope my customer will love it as much as I do.  

And, with “Cowboys” on it…


Happy Crocheting…

Legal:

--don't use/claim my design as your own
--don't use/claim my pics as your own
--okay to make and sale your finished work
--don't share my pattern electronically or in print format (without prior consent) but provide a link to my blog

Social Media:

If you are on the following sites, let's connect and hook up...

  • Pinterest:  Rilla2u
  • Twitter:  Rilla2u
  • Facebook:  /rilla.edwards 
  • Instagram:  Rilla2u

Monday, December 6, 2021

The Dreamer Hat

“The Dreamer” Hat       

Here's one of my newest hat designs that I absolutely love.  The finished hat is just fabulous.  I've made this with different brands of worsted weight yarn and I have loved all of them.  The pom is optional.  You can add a faux or crocheted pom.

Here’s the link to my Etsy Shop for some great crochet and craft items at very reasonable prices so check it out!!!
 
The Ad-free, PDF version of this pattern can be purchased in my Etsy Shop for a small fee.  Here is the link:


Size:  Teen - Average Adult-Sized Head
(you can easily adjust to smaller or bigger size)
 
Materials:
--5.0mm hook
--#4 worsted weight yarn in desired color and brand
--optional pom
--tapestry needle

U.S. Stitch Abbreviations:
Ch:  chain
St:  stitch
Sl st:  slip stitch
MR:  magic ring
DC:  double crochet
BLO:  back loops only
FPDC:  front post double crochet
BPDC:  back post double crochet
Rep:  repeat
Sk:  skip
FO:  fasten off 

Note:  Pattern is worked in the round; unless otherwise noted.
 
Directions:
1.  10 DC into MR.  (10)
2.  2 DC in each st around.  (20)
3.  2 DC in first st, 1 DC in next st.  Rep around.  (30)
4.  2 DC in first st, 1 DC in next 2 st.  Rep around.  (40)
5.  2 DC in first st, 1 DC in next 3 st.  Rep around.  (50)
6.  2 DC in first st, 1 DC in next 4 st.  Rep around.  Sl st join to first st.  (60)
7.  Ch3 (counts as first DC).  2 DC in same st as Ch3.  *Sk 2 st.  3 DC in next st.*  Rep from * to * around. Sl st join to top of Ch3.  (60)

8.  Rep #7.  (60)
9.  BLO.  DC around.  (60)
10-11.  Rep #7.
12.  BLO.  DC around.  (60)
13-14.  Rep #7.  (60)
15.  BLO.  DC around.  (60)
16.  Ch3 (counts as FPDC).  *BPDC, FPDC* rep from * to * around the post st around.  Sl st join.  (60)
 
                                      FPDC                                      BPDC
17.  Rep #16.  FO and weave ends.
 
If you want the hat to be longer, so that you can fold up the front, then continue to make more rounds of 13-15 before you start the last 2 rounds and then add 4-6 additional rounds of 16-17.  
 
I hope you enjoy this pattern.  If you make this, please share your pics with me on social media.  My info is listed below.  

Happy Crocheting…

Legal:

--don't use/claim my design as your own
--don't use/claim my pics as your own
--okay to make and sale your finished work
--don't share my pattern electronically or in print format (without prior consent) but provide a link to my blog

Social Media:

If you are on the following sites, let's connect and hook up...

  • Pinterest:  Rilla2u
  • Twitter:  Rilla2u
  • Facebook:  /rilla.edwards 
  • Instagram:  Rilla2u
  • TikTok:  Rillae2u
  • Ravelry:  Rilla2u


Friday, December 3, 2021

Candy Cane Ornament

With Christmas right around the corner, here is a quick and easy pattern for a candy cane. I shared the free pattern on my Instagram account. 

Candy Cane Ornament

So, here’s the link for my Candy Candy Ornament Reel with free pattern


Happy Crocheting…

Legal:

--don't use/claim my design as your own
--don't use/claim my pics as your own
--okay to make and sale your finished work
--don't share my pattern electronically or in print format (without prior consent) but provide a link to my blog

Social Media:

If you are on the following sites, let's connect and hook up...

  • Pinterest:  Rilla2u
  • Twitter:  Rilla2u
  • Facebook:  /rilla.edwards 
  • Instagram:  Rilla2u

Monday, November 29, 2021

Winter Season - Hats & Headbands

With winter weather upon us, I’ve been busy designing quite a few new hats and headbands.  The patterns each work up easy with a beautiful texture created. 

I hope to get the patterns added soon. But, to be honest, I’ve had a lot going on in recent months with the death of my sister-in-law and some serious medical issues. 

Please feel free to message me with any questions…


Happy Crocheting…

Legal:

--don't use/claim my design as your own
--don't use/claim my pics as your own
--okay to make and sale your finished work
--don't share my pattern electronically or in print format (without prior consent) but provide a link to my blog

Social Media:

If you are on the following sites, let's connect and hook up...

  • Pinterest:  Rilla2u
  • Twitter:  Rilla2u
  • Facebook:  /rilla.edwards 
  • Instagram:  Rilla2u

Sunday, October 31, 2021

Hocus Pocus Washcloth

 Hocus Pocus Washcloth 

Here’s my simple “Hocus Pocus Washcloth” in Peaches & Creme yarn in Orange, Purple and Black and a 5.0mm hook.  

I started with a chain 32.  I used single crochet (SC) stitches.  31 SC stitches across. I completed 31 rows.  


Here’s the graph pattern I made for this washcloth if you would like to make one for yourself.
Happy Crocheting…

Legal:

--don't use/claim my design as your own
--don't use/claim my pics as your own
--okay to make and sale your finished work
--don't share my pattern electronically or in print format (without prior consent) but provide a link to my blog

Social Media:

If you are on the following sites, let's connect and hook up...

  • Pinterest:  Rilla2u
  • Twitter:  Rilla2u
  • Facebook:  /rilla.edwards 
  • Instagram:  Rilla2u

Sunday, October 10, 2021

Frankenstein Tissue Box Cover

Frankenstein Tissue Box Cover 

I whipped up this tissue box cover within 2 hours last night to add to my fall decor collection. 

I used Red Heart Super Saver yarn in Spring Green and Black and a 5.0mm hook. I used 2 plastic eyes but you can crochet your eyes, if so desired. 

The cover is made using the HDC (Half Double Crochet) stitch, except for one row, in which I rotated between HDC and DC (Double Crochet) for the hair. 

1.  The sides are all made in one piece. With Spring Green, I chain 55.  From 2nd chain and across, HDC. Ch1 and turn. (54)

2.-11. HDC across. Ch1 and turn. At the end of Row 11, fasten off Spring Green yarn. (54)

12.  Hair Row!!!  “HDC, HDC, 3DC dropped down into previous row stitch, skip 2 stitches, and repeat across.”  At the end of this Row, fasten off.  With right side together, you will slip stitch close the short ends together.  Weave ends. 

Top:

1.  With Black yarn, chain 14.  HDC in 2nd chain from hook and across.  Ch1 and turn. (13)

2-6.  HDC across.  Ch1 and turn.  (13)

7.  HDC in the first 4 stitches, chain 5 and skip 5 stitches (for opening), HDC in last 4 stitches.  Ch1 and turn.  (8 st and 5 ch = 13)

8.  HDC in first 4 stitches, HDC 5x in the chain space, HDC in the last 4 stitches.  Ch1 and turn.  (13)

9-13.  HDC across.  Ch1 and turn.  At the end of row 13, leave a long tail for attaching the top.

Assembly:

1.  Use tapestry needle to attach the top to the sides with a whip stitch around. 

2.  I added my eyes at Row 7 from the bottom  going up with 4 stitches between them.

3.  With Black yarn, I added a little stitch on the side and a smile.  For this part, you can do whatever you like.  

And, that’s it for my “Frankenstein Tissue Box Cover!!!”

Happy Crocheting…

Legal:

--don't use/claim my design as your own
--don't use/claim my pics as your own
--okay to make and sale your finished work
--don't share my pattern electronically or in print format (without prior consent) but provide a link to my blog

Social Media:

If you are on the following sites, let's connect and hook up...

  • Pinterest:  Rilla2u
  • Twitter:  Rilla2u
  • Facebook:  /rilla.edwards 
  • Instagram:  Rilla2u


Saturday, October 9, 2021

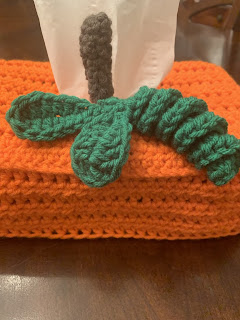
Rectangle Tissue Box Cover

Rectangle Tissue Box Cover 


Happy Crocheting…

Legal:

--don't use/claim my design as your own
--don't use/claim my pics as your own
--okay to make and sale your finished work
--don't share my pattern electronically or in print format (without prior consent) but provide a link to my blog

Social Media:

If you are on the following sites, let's connect and hook up...

  • Pinterest:  Rilla2u
  • Twitter:  Rilla2u
  • Facebook:  /rilla.edwards 
  • Instagram:  Rilla2u