

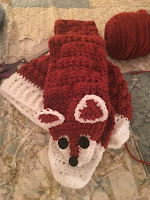
I know I’ve said this so many times in the past - and it still remains the same - there’s just something about foxes that just fascinates me. I love the majestic creature from its look to its colors and everything in-between.
This project was easy to complete and the perfect colors for the fall season. I used “I Love This Yarn” from Hobby Lobby in Terra Cotta and White.
I hope you all will enjoy this project as much as I enjoyed designing it.
 Size:
Size:
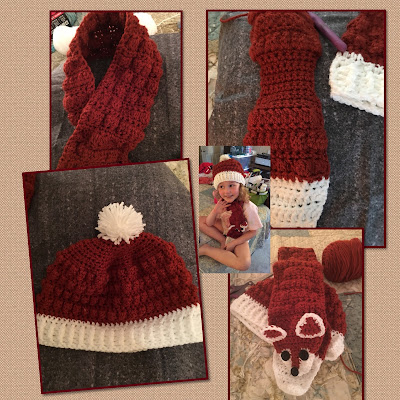
Hat: 19” - 21” Head Circumference
Scarf: 39” in length x 4” wide
Materials:
—5.0mm hook
—(1) skein each of “I Love This Yarn” in Terra Cotta and White (or any #4 worsted weight yarn in your colors of choice); just note different yarn brand can cause slight variation in overall size
—(2) 3/4” black buttons for eyes
—(1) 1/2” black button for the nose
—(1) 1/2” black button for the back side of the scarf for securing the tail end (optional)
—stitch marker
—tapestry needle for weaving
U.S. Stitch Abbreviations:
Ch: chain
Sl St: slip stitch
St: stitch(es)
SC: single crochet
HDC: half double crochet
DC: double crochet
FPDC: front post double crochet
BPDC: back post double crochet
SC2tog: single crochet 2 stitches together (creates a decrease)
Rep: repeat
Sk: skip
FO: fasten off
Special Stitch:
1. Cluster Stitch: yarn over and insert hook into stitch; yarn over and come back thru the stitch; yarn over and pull thru 2 loops on stitch; yarn over and insert hook into same stitch; yarn over and pull back thru stitch; yarn over and pull thru 2 loops on stitch; yarn over and insert hook into same stitch; yarn over and pull back thru stitch; yarn over and pull thru 2 loops on hook; yarn over and pull thru remaining 4 loops on hook.
Directions:
The hat is worked in the round, unless otherwise stated; so use your stitch marker to keep track of the first and last stitch of each round. If desired, you can slip stitch join to first stitch and chain 1.
Hat:


1. With Terra Cotta yarn, 10 HDC in MR. Pull to tighten center. (10)
2. 2 HDC in each st around. (20)
3. 2 HDC in first st, 1 HDC in next st. Rep around. (30)
4. 2 HDC in first st, 1 HDC in next 2 st. Rep around. (40)
5. 2 HDC in first st, 1 HDC in next 3 st. Rep around. (50)
6. 2 HDC in first st, 1 HDC in next 4 st. Rep around. (60)
7. 2 HDC in first st, 1 HDC in next 5 st. Rep around. (70)
8. Cluster stitch in first st, SC in next st. Rep around. (70)
9-10. SC in each st around. (70)
11. Rep #8. (70)
12-13. SC in each st around. (70)
14. Rep #8. (70)
15-16. SC in each st around. (70)
17. Rep #8. (70)
18-19. SC in each st around. (70)
20. SC in each st around. Sl st join to first st and FO Terra Cotta yarn. Weave ends. Join White yarn in any st with a sl st and Ch1. (70)
21. SC in each st around. Sl st join to first st. (70)
22. Ch3 (counts as first DC). DC in each st around. Sl st join and Ch1. (70)
23. Work a FPDC around the first DC post st of the previous round, BPDC around the next DC post st of the previous round. Rep around. Sl st join to first st and Ch1. (70)
24-25. Rep #23. (70)
26. Loosely sl st in each st around. Sl st join to first st and FO. Weave ends.
Pompom:
I used the White yarn and wrapped around 4 of my fingers approximately 50 times. I then tied a double-knot in the center and trimmed the ends. Shape pompom and attach to top of hat.
You can wear the hat on either side. One side the cluster stitches puff out; on the inside the stitches do not puff out. The hat looks great both ways. If so desired, make a 2nd pompom to attach to the opposite side so you will have a pom on both sides.

 Either side of the hat can be worn and both sides look great to me!!!
Scarf:


 1. With White yarn, Ch3. HDC in 2nd ch from hook and next ch. Ch1 and turn. (2)
2. 2 HDC in first st, 1 HDC in next st. Ch1 and turn. (3)
3. 2 HDC in first st, 1 HDC in next st, 2 HDC in last st. Ch1 and turn. (5)
4. 1 HDC in each st across. Ch1 and turn. (5)
5. 2 HDC in first st, 1 HDC in next 3 st, 2 HDC in last st. Ch1 and turn. (7)
6. 1 HDC in each st across. Ch1 and turn. (7).
7. 2 HDC in first st, 1 HDC in next 5 st, 2 HDC in last st. Ch1 and turn. (9)
8. 1 HDC in each st across. Ch1 and turn. (9)
9. 2 HDC in first st, 1 HDC in next 7 st, 2 HDC in last st. Ch1 and turn. (11)
10. 1 HDC in each st across. Ch1 and turn. (11)
11. 1 HDC in each st across. FO White yarn and join Terra Cotta yarn. Ch1 and turn. (11)
12. 1 HDC in each st across. Ch1 and turn. (11)
13. Cluster st in first st, SC in next st. Rep across, ending with a cluster st in the last st. Ch1 and turn. (11)
14-15. SC in each st across. Ch1 and turn. (11)
16. Rep #13. (11)
17-18. SC in each st across. Ch1 and turn. (11)
19. Rep #13. (11)
20-21. SC in each st across. Ch1 and turn. (11)
22. SC2tog, 1 SC in next 7 st, SC2tog. Ch1 and turn. (9)
23-30. SC in each st across. Ch1 and turn. (9)
31. 2 SC in first st, 1 SC in next 7 st, 2 SC in last st. Ch1 and turn. (11)
32. Rep #13. (11)
33-34. SC in each st across. Ch1 and turn. (11)
35. Rep #13. (11)
36-37. SC in each st across. Ch1 and turn. (11)
38. Rep #13. (11)
39-40. SC in each st across. Ch1 and turn. (11)
41. Rep #13. (11)
42-43. SC in each st across. Ch1 and turn. (11)
44. Rep #13. (11)
45-46. SC in each st across. Ch1 and turn. (11)
47. Rep #13. (11)
48-49. SC in each st across. Ch1 and turn. (11)
50. Rep #13. (11)
51-52. SC in each st across. Ch1 and turn. (11)
53. Rep #13. (11)
54-55. SC in each st across. Ch1 and turn. (11)
56. Rep #13. (11)
57-58. SC in each st across. Ch1 and turn. (11)
59. Rep #13. (11)
60-61. SC in each st across. Ch1 and turn. (11)
62. Rep #13. (11)
63-64. SC in each st across. Ch1 and turn. (11)
65. Rep #13. (11)
66-67. SC in each st across. Ch1 and turn. (11)
68. Rep #13. (11)
69-70. SC in each st across. Ch1 and turn. (11)
71. Rep #13. (11)
72-73. SC in each st across. Ch1 and turn. (11)
74. Rep #13. (11)
75-76. SC in each st across. Ch1 and turn. (11)
77. Rep #13. (11)
78-79. SC in each st across. Ch1 and turn. (11)
80. Rep #13. (11)
81-82. SC in each st across. Ch1 and turn. (11)
83. Rep #13. (11)
84-85. SC in each st across. Ch1 and turn. (11)
86. Rep #13. (11)
87-88. SC in each st across. Ch1 and turn. (11)
89. Rep #13. (11)
90-91. SC in each st across. Ch1 and turn. (11)
92. Rep #13. (11)
93-94. SC in each st across. Ch1 and turn. (11)
95. Rep #13. (11)
96-97. SC in each st across. Ch1 and turn. (11)
98. Rep #13. (11)
99-100. SC in each st across. Ch1 and turn. (11)
Here's a pic of the "tail" end of the scarf:
 Forming the Face:
101-103. SC in each st across. At the end of Row 103, join White yarn and Ch1. Do not FO Terra Cotta yarn, but you will want to carry over the yarn to use to form the nose stripe. (11)
104. With White yarn, SC2tog, 1 SC in next 2 st. Before completing the last st, switch to Terra Cotta yarn, SC in next 3 st. Before completing the last st, switch back to White yarn, SC in next 2 st and then SC2tog. Ch1 and turn. (9)
105. SC in each st across - 3 SC in White, 3 SC in Terra Cotta and 3 SC in White. Ch1 and turn. (9)
106. In White, SC2tog, SC in next st. 3 SC in Terra Cotta. In White, SC in next st, SCtog. Ch1 and turn. (7)
107. SC in each st across - 2 SC in White, 3 SC in Terra Cotta and 2 SC in White. Ch1 and turn. (7)
108. In White, SC2tog, 3 SC in Terra Cotta. In White, SC2tog. Ch1 and turn. (5)
109. SC in each st across - 1 SC in White, 3 SC in Terra Cotta and 1 SC in White. Ch1 and turn. (5)
110. In White, 1 SC. With Terra Cotta, SC3tog. In White, 1 SC. Ch1 and turn. (3)
111. With White yarn, SC3tog. FO and weave ends. (1)
112. Join Terra Cotta with sl st and Ch1 in any st. SC in each st around scarf. Sl st join to first st and FO. Weave ends.
 Ears:
Ears:
1. With Terra Cotta, Ch6. SC in 2nd ch from hook and across. Ch1 and turn. (5)
2. SC across. Ch1 and turn. (5)
3. SC2tog, SC in next 2 st, SC2tog. Ch1 and turn. (3)
4. SC3tog. FO Terra Cotta yarn and join White yarn. Ch1. (1)
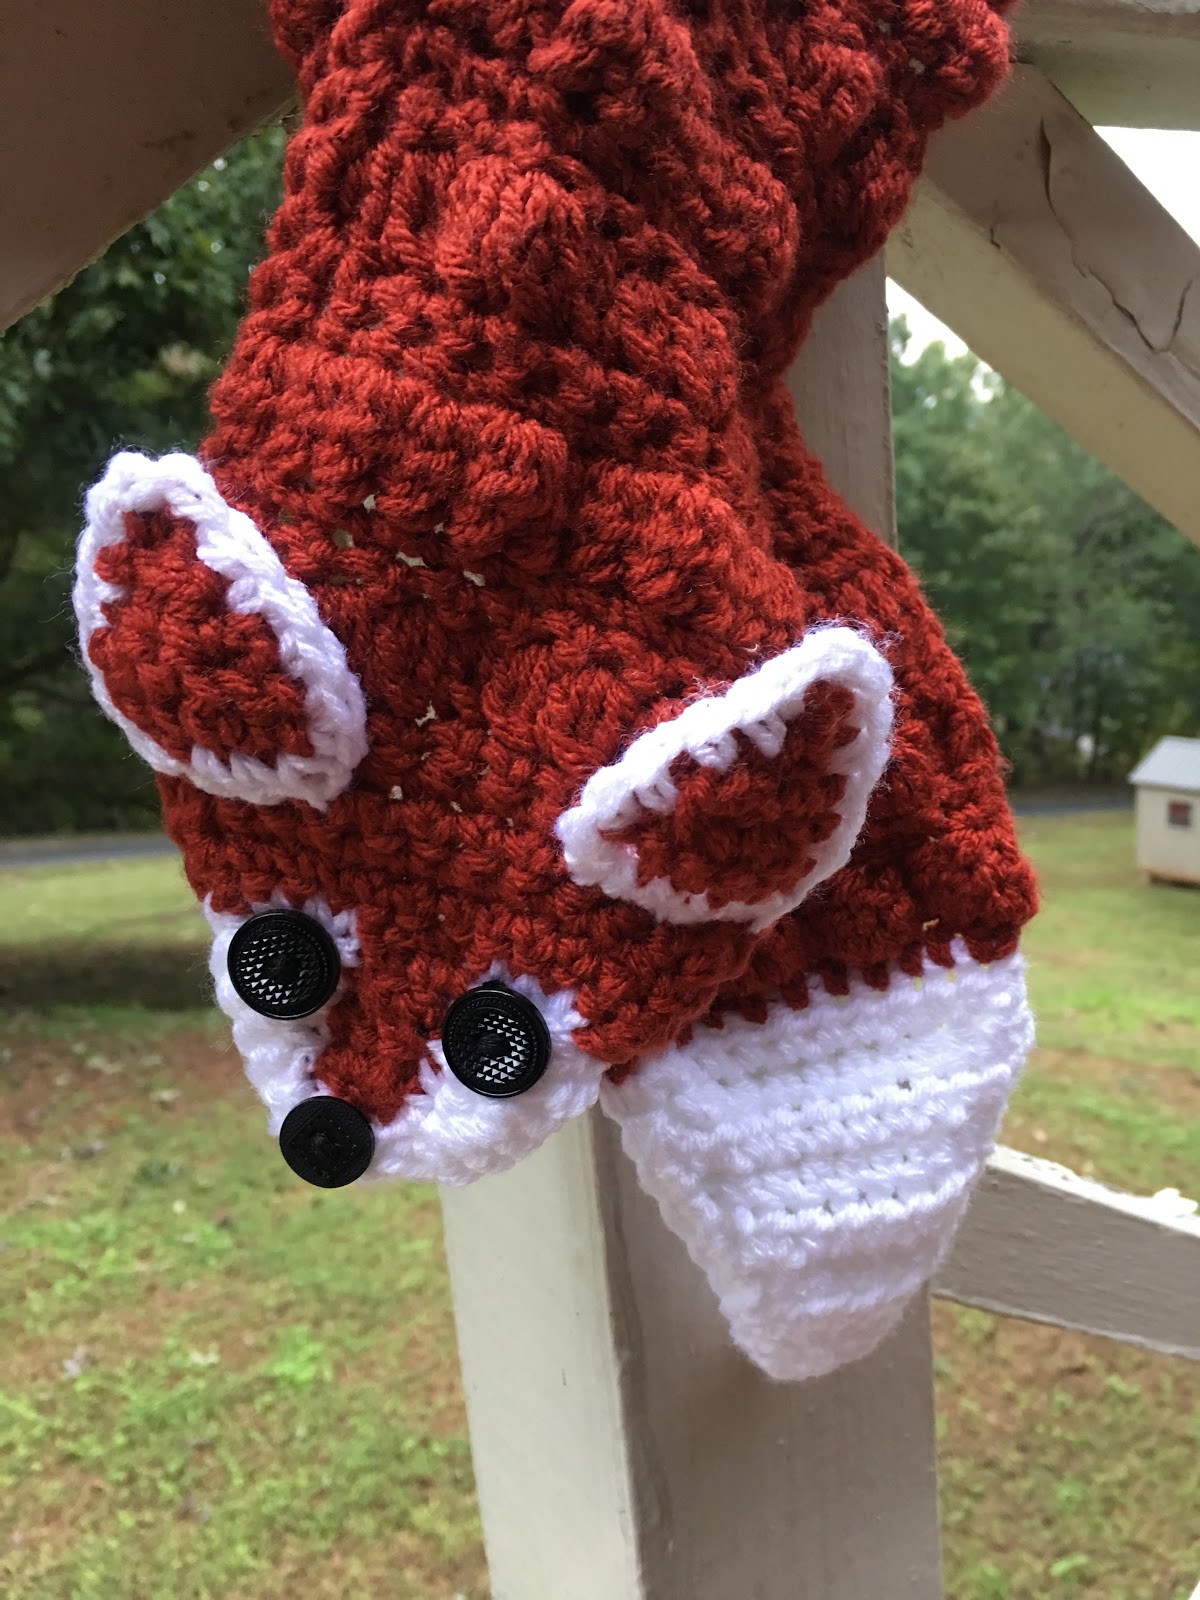
5. White White yarn, SC in each st around. Sl st join to first st and FO. Leave a tail for attaching each ear to your scarf. I attached my ears at Row 102. (see pics)
Attach buttons for the eyes and nose. (see pics)
Loop:

1. Ch9. SC in 2nd ch from hook and across. Ch1 and turn. (8)
2-4. SC in each st across. At the end of Row 4, FO and leave a tail for attaching.
Attach the Loop to the back side of your scarf at Row #92.
Optional:
Prior to attaching my Loop to Row 92, I added a 1" black button in the center of the Loop. This way, I can either slip the "Tail End" of my scarf into the Loop OR I can use the button and button it up through one of the cluster stitches.

Here's my granddaughter, Miss Arielle, donning the "Fox Hat and Scarf" set:

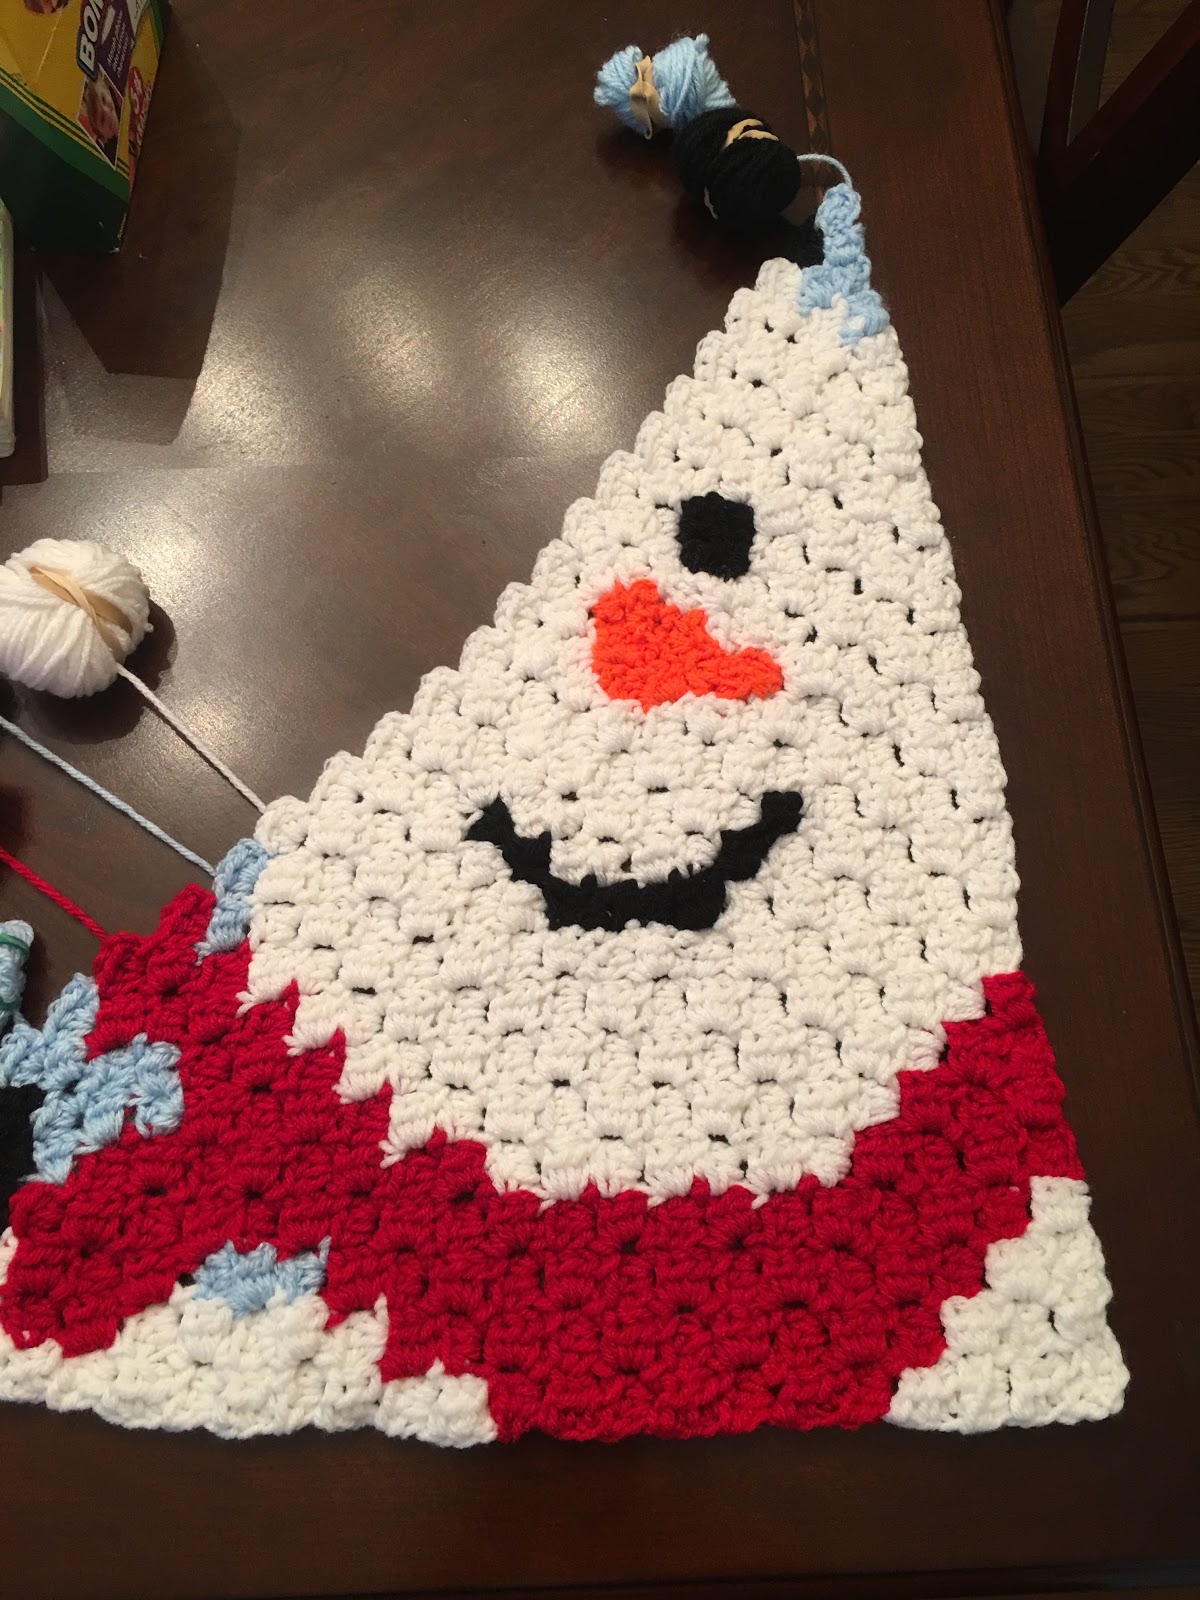
And, here is a SNEAK PEEK at two projects I'm currently working on:

 Legal:
This project was easy to complete and the perfect colors for the fall season. I used “I Love This Yarn” from Hobby Lobby in Terra Cotta and White.
I hope you all will enjoy this project as much as I enjoyed designing it.
Fox Hat and Scarf Pattern


Hat: 19” - 21” Head Circumference
Scarf: 39” in length x 4” wide
Materials:
—5.0mm hook
—(1) skein each of “I Love This Yarn” in Terra Cotta and White (or any #4 worsted weight yarn in your colors of choice); just note different yarn brand can cause slight variation in overall size
—(2) 3/4” black buttons for eyes
—(1) 1/2” black button for the nose
—(1) 1/2” black button for the back side of the scarf for securing the tail end (optional)
—stitch marker
—tapestry needle for weaving
U.S. Stitch Abbreviations:
Ch: chain
Sl St: slip stitch
St: stitch(es)
SC: single crochet
HDC: half double crochet
DC: double crochet
FPDC: front post double crochet
BPDC: back post double crochet
SC2tog: single crochet 2 stitches together (creates a decrease)
Rep: repeat
Sk: skip
FO: fasten off
Special Stitch:
1. Cluster Stitch: yarn over and insert hook into stitch; yarn over and come back thru the stitch; yarn over and pull thru 2 loops on stitch; yarn over and insert hook into same stitch; yarn over and pull back thru stitch; yarn over and pull thru 2 loops on stitch; yarn over and insert hook into same stitch; yarn over and pull back thru stitch; yarn over and pull thru 2 loops on hook; yarn over and pull thru remaining 4 loops on hook.
Directions:
The hat is worked in the round, unless otherwise stated; so use your stitch marker to keep track of the first and last stitch of each round. If desired, you can slip stitch join to first stitch and chain 1.
Hat:
Cluster Side

Reverse Side

1. With Terra Cotta yarn, 10 HDC in MR. Pull to tighten center. (10)
2. 2 HDC in each st around. (20)
3. 2 HDC in first st, 1 HDC in next st. Rep around. (30)
4. 2 HDC in first st, 1 HDC in next 2 st. Rep around. (40)
5. 2 HDC in first st, 1 HDC in next 3 st. Rep around. (50)
6. 2 HDC in first st, 1 HDC in next 4 st. Rep around. (60)
7. 2 HDC in first st, 1 HDC in next 5 st. Rep around. (70)
8. Cluster stitch in first st, SC in next st. Rep around. (70)
9-10. SC in each st around. (70)
11. Rep #8. (70)
12-13. SC in each st around. (70)
14. Rep #8. (70)
15-16. SC in each st around. (70)
17. Rep #8. (70)
18-19. SC in each st around. (70)
20. SC in each st around. Sl st join to first st and FO Terra Cotta yarn. Weave ends. Join White yarn in any st with a sl st and Ch1. (70)
21. SC in each st around. Sl st join to first st. (70)
22. Ch3 (counts as first DC). DC in each st around. Sl st join and Ch1. (70)
23. Work a FPDC around the first DC post st of the previous round, BPDC around the next DC post st of the previous round. Rep around. Sl st join to first st and Ch1. (70)
24-25. Rep #23. (70)
26. Loosely sl st in each st around. Sl st join to first st and FO. Weave ends.
Pompom:
I used the White yarn and wrapped around 4 of my fingers approximately 50 times. I then tied a double-knot in the center and trimmed the ends. Shape pompom and attach to top of hat.
You can wear the hat on either side. One side the cluster stitches puff out; on the inside the stitches do not puff out. The hat looks great both ways. If so desired, make a 2nd pompom to attach to the opposite side so you will have a pom on both sides.


Scarf:


2. 2 HDC in first st, 1 HDC in next st. Ch1 and turn. (3)
3. 2 HDC in first st, 1 HDC in next st, 2 HDC in last st. Ch1 and turn. (5)
4. 1 HDC in each st across. Ch1 and turn. (5)
5. 2 HDC in first st, 1 HDC in next 3 st, 2 HDC in last st. Ch1 and turn. (7)
6. 1 HDC in each st across. Ch1 and turn. (7).
7. 2 HDC in first st, 1 HDC in next 5 st, 2 HDC in last st. Ch1 and turn. (9)
8. 1 HDC in each st across. Ch1 and turn. (9)
9. 2 HDC in first st, 1 HDC in next 7 st, 2 HDC in last st. Ch1 and turn. (11)
10. 1 HDC in each st across. Ch1 and turn. (11)
11. 1 HDC in each st across. FO White yarn and join Terra Cotta yarn. Ch1 and turn. (11)
12. 1 HDC in each st across. Ch1 and turn. (11)
13. Cluster st in first st, SC in next st. Rep across, ending with a cluster st in the last st. Ch1 and turn. (11)
14-15. SC in each st across. Ch1 and turn. (11)
16. Rep #13. (11)
17-18. SC in each st across. Ch1 and turn. (11)
19. Rep #13. (11)
20-21. SC in each st across. Ch1 and turn. (11)
22. SC2tog, 1 SC in next 7 st, SC2tog. Ch1 and turn. (9)
23-30. SC in each st across. Ch1 and turn. (9)
31. 2 SC in first st, 1 SC in next 7 st, 2 SC in last st. Ch1 and turn. (11)
32. Rep #13. (11)
33-34. SC in each st across. Ch1 and turn. (11)
35. Rep #13. (11)
36-37. SC in each st across. Ch1 and turn. (11)
38. Rep #13. (11)
39-40. SC in each st across. Ch1 and turn. (11)
41. Rep #13. (11)
42-43. SC in each st across. Ch1 and turn. (11)
44. Rep #13. (11)
45-46. SC in each st across. Ch1 and turn. (11)
47. Rep #13. (11)
48-49. SC in each st across. Ch1 and turn. (11)
50. Rep #13. (11)
51-52. SC in each st across. Ch1 and turn. (11)
53. Rep #13. (11)
54-55. SC in each st across. Ch1 and turn. (11)
56. Rep #13. (11)
57-58. SC in each st across. Ch1 and turn. (11)
59. Rep #13. (11)
60-61. SC in each st across. Ch1 and turn. (11)
62. Rep #13. (11)
63-64. SC in each st across. Ch1 and turn. (11)
65. Rep #13. (11)
66-67. SC in each st across. Ch1 and turn. (11)
68. Rep #13. (11)
69-70. SC in each st across. Ch1 and turn. (11)
71. Rep #13. (11)
72-73. SC in each st across. Ch1 and turn. (11)
74. Rep #13. (11)
75-76. SC in each st across. Ch1 and turn. (11)
77. Rep #13. (11)
78-79. SC in each st across. Ch1 and turn. (11)
80. Rep #13. (11)
81-82. SC in each st across. Ch1 and turn. (11)
83. Rep #13. (11)
84-85. SC in each st across. Ch1 and turn. (11)
86. Rep #13. (11)
87-88. SC in each st across. Ch1 and turn. (11)
89. Rep #13. (11)
90-91. SC in each st across. Ch1 and turn. (11)
92. Rep #13. (11)
93-94. SC in each st across. Ch1 and turn. (11)
95. Rep #13. (11)
96-97. SC in each st across. Ch1 and turn. (11)
98. Rep #13. (11)
99-100. SC in each st across. Ch1 and turn. (11)
Here's a pic of the "tail" end of the scarf:

101-103. SC in each st across. At the end of Row 103, join White yarn and Ch1. Do not FO Terra Cotta yarn, but you will want to carry over the yarn to use to form the nose stripe. (11)
104. With White yarn, SC2tog, 1 SC in next 2 st. Before completing the last st, switch to Terra Cotta yarn, SC in next 3 st. Before completing the last st, switch back to White yarn, SC in next 2 st and then SC2tog. Ch1 and turn. (9)
105. SC in each st across - 3 SC in White, 3 SC in Terra Cotta and 3 SC in White. Ch1 and turn. (9)
106. In White, SC2tog, SC in next st. 3 SC in Terra Cotta. In White, SC in next st, SCtog. Ch1 and turn. (7)
107. SC in each st across - 2 SC in White, 3 SC in Terra Cotta and 2 SC in White. Ch1 and turn. (7)
108. In White, SC2tog, 3 SC in Terra Cotta. In White, SC2tog. Ch1 and turn. (5)
109. SC in each st across - 1 SC in White, 3 SC in Terra Cotta and 1 SC in White. Ch1 and turn. (5)
110. In White, 1 SC. With Terra Cotta, SC3tog. In White, 1 SC. Ch1 and turn. (3)
111. With White yarn, SC3tog. FO and weave ends. (1)
112. Join Terra Cotta with sl st and Ch1 in any st. SC in each st around scarf. Sl st join to first st and FO. Weave ends.
NOTE: if you want your scarf longer than 49", then complete more repeat rows of 13-15 before you start forming the face!!!

1. With Terra Cotta, Ch6. SC in 2nd ch from hook and across. Ch1 and turn. (5)
2. SC across. Ch1 and turn. (5)
3. SC2tog, SC in next 2 st, SC2tog. Ch1 and turn. (3)
4. SC3tog. FO Terra Cotta yarn and join White yarn. Ch1. (1)
5. White White yarn, SC in each st around. Sl st join to first st and FO. Leave a tail for attaching each ear to your scarf. I attached my ears at Row 102. (see pics)
Attach buttons for the eyes and nose. (see pics)
Loop:

1. Ch9. SC in 2nd ch from hook and across. Ch1 and turn. (8)
2-4. SC in each st across. At the end of Row 4, FO and leave a tail for attaching.
Attach the Loop to the back side of your scarf at Row #92.
Optional:
Prior to attaching my Loop to Row 92, I added a 1" black button in the center of the Loop. This way, I can either slip the "Tail End" of my scarf into the Loop OR I can use the button and button it up through one of the cluster stitches.

Here's my granddaughter, Miss Arielle, donning the "Fox Hat and Scarf" set:

And, here is a SNEAK PEEK at two projects I'm currently working on:
Noah's Ark Quiet Book:

"Let It Snow" C-2-C Blanket:
Happy Crocheting...
--don't use/claim my design as your own
--don't use/claim my pics as your own
--okay to make and sale your finished work
--don't share my pattern electronically or in print format (without prior consent) but provide a link to my blog
--don't share my pattern electronically or in print format (without prior consent) but provide a link to my blog
No comments:
Post a Comment