

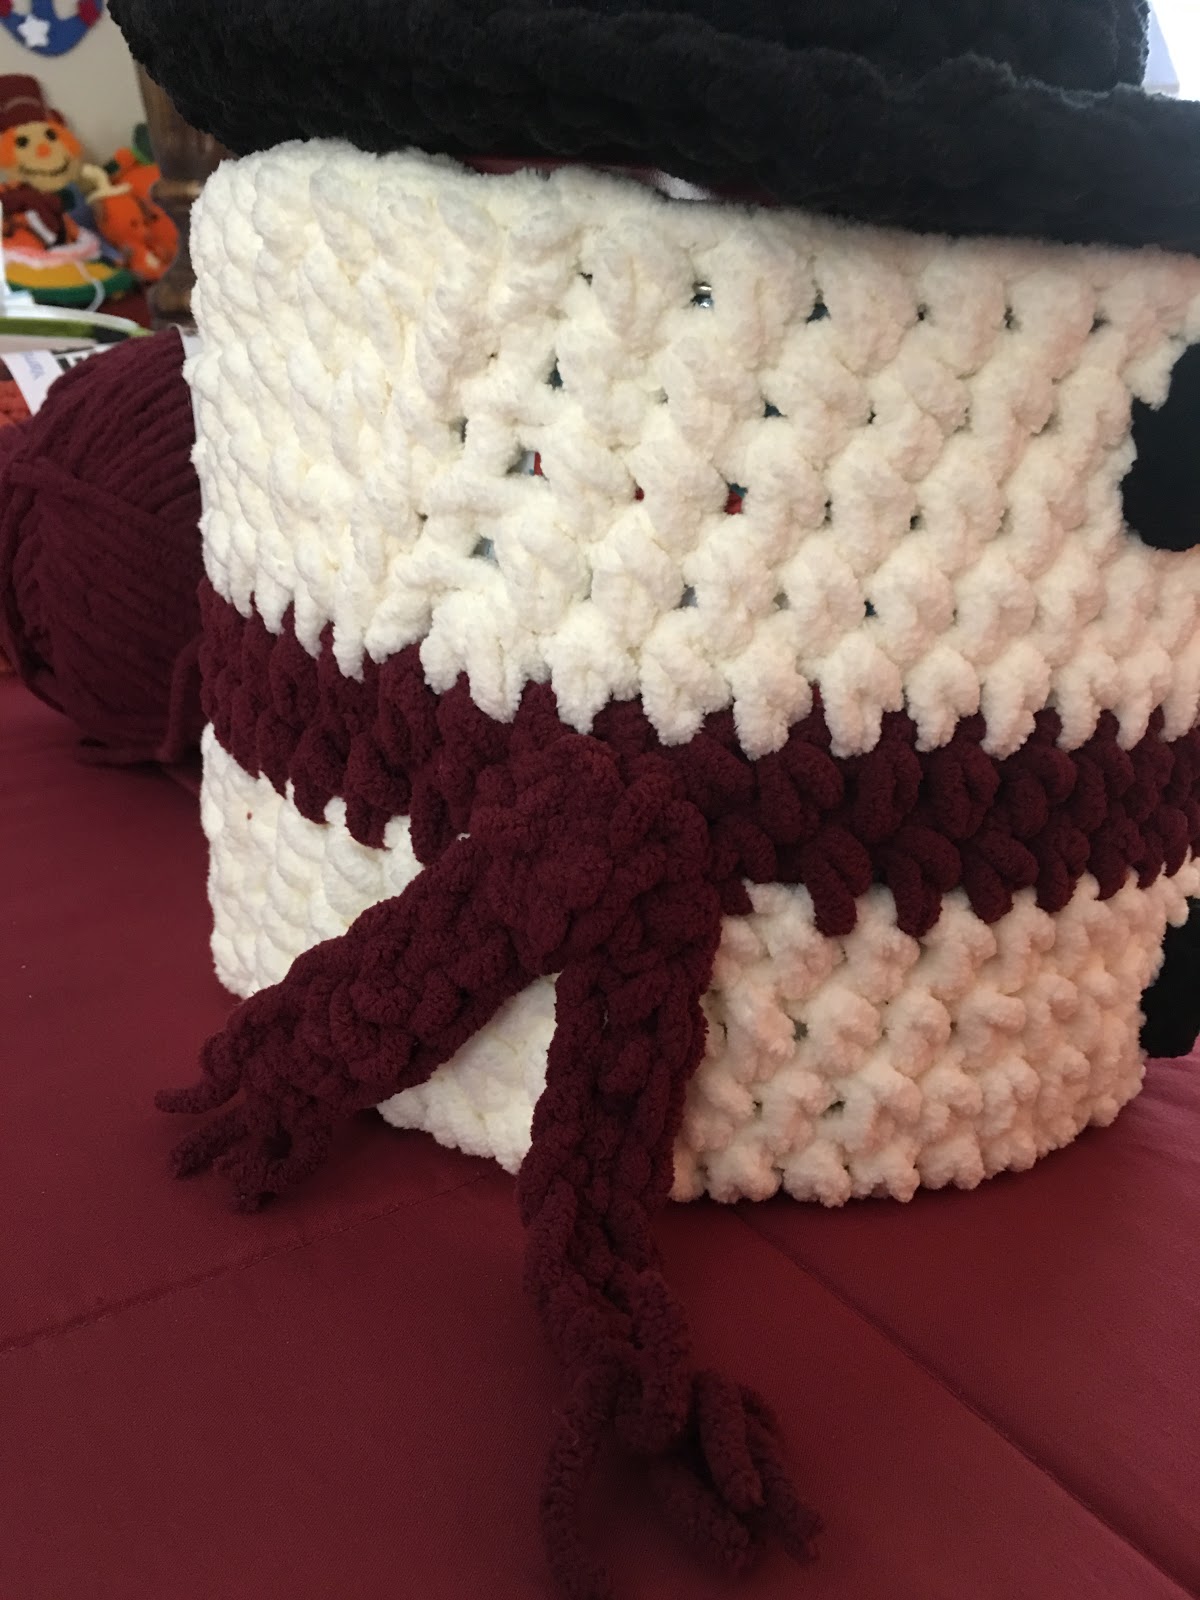
I've had this popcorn contain/tin sitting in my bedroom since last Christmas waiting for inspiration to strike on how to re-purpose this into something cute and usable. Well, this morning, I ran out of a yarn color for my C2C Snowman Blanket and I decided it was time to do something with this empty container. So, I settled on a cover - a Snowman, of course...lol.
Snowmen are just adorable, whether you're making a blanket, pillow, cozies, hot pads, softies, amigurumi, etc. -- they, simply, look good, in any fashion and form, in my opinion.
And, now, here is a perfect and easy pattern to whip up for the Popcorn Container that is already on display at most stores. I'm usually gifted one every year from someone. Well, if you are one to gift the Popcorn Container - now, you can include a little bit of crochet with it to jazz it up, plus no worries on wrapping a cylinder-shaped item. Or, if you have several of these empty - you could make the Snowman Cover and fill with your own array of goodies...
I used Bernat Blanket yarn in colors I already had on hand. So, please feel free to make and share pictures of your finished project in your colors of choice.
I hope you all will enjoy this fun project.
 Size: Approximately 13" tall from top of hat to bottom
Gauge: 6 HDC stitches x 6 Rounds = 4"
Materials:
--10.0mm hook
--(1) skein each of Bernat Blanket Yarn in Vintage White, Purple Plum, Black and Pumpkin Spice (the pattern uses very little Pumpkin Spice and Purple Plum)
--Popcorn Tin Container (18.5 oz container)
--Small amount of Polyfil (for stuffing the hat)
--7" diameter of felt or fabric (for the hat)
--Tapestry needle for weaving
U.S. Stitch Abbreviations:
Ch: chain
Sl st: slip stitch
St: stitch(es)
SC: single crochet
HDC: half double crochet
FLO: front loops only
BLO: back loops only
Rep: repeat
MR: magic ring
FO: fasten off
 Directions:
Snowman Cover:
1. With Vintage White, 8 HDC into MR. Sl st join to first st and Ch1. (8)
2. 2 HDC into each st around. Sl st join to first st and Ch1. (16)
3. 2 HDC into the first st, 1 HDC into the next st. Rep around. Sl st join to first st and Ch1. (24)
4. 2 HDC into the first st, 1 HDC into the next 2 st. Rep around. Sl st join to first st and Ch1. (32)
5. 2 HDC into the first st, 1 HDC into the next 3 st. Rep around. Sl st join to first st and Ch1. (40)
6. 2 HDC into the first st, 1 HDC into the next 4 st. Rep around. Sl st join to first st and Ch1. (48)
7. Working in the BLO, 1 HDC in each st around. Sl st join to first st and Ch1. (48)
8-10. 1 HDC in each st around. Sl st join to first st and Ch1. At the end of Round 10, FO Vintage White. Join Purple Plum and Ch1. (48)
11-12. With Purple Plum, 1 HDC in each st around. Sl st join to first st and Ch1. At the end of Round 12, FO Purple Plum. Re-join Vintage White and Ch1. (48)

13-17. 1 HDC in each st around. Sl st join to first st and Ch1. At the end of Round 17, FO and weave ends. (48)

Eyes (make 2):
1. With Black yarn, 6 SC into MR. Sl st join to first st and FO. Leave a long tail for attaching. (6)
Nose:
1. With Pumpkin Spice yarn, Ch2. 1 SC in 2nd ch from hook. Ch1 and turn. (1)
2. 2 SC in st. Ch1 and turn. (2)
3. 2 SC in first st, 1 SC in next st. FO and leave a long enough tail for attaching. (3)
Belly Button (1):
1. With Black yarn, 6 SC into MR. Sl st join to first st and FO. Leave a long enough tail for attaching. (6)
See my pictures for help with Eyes, Nose and Belly button placement. Eyes at Rounds 15-17, with 5 stitch space between the eyes. The Nose is at Rounds 13-14. The Belly Button is at Rounds 8-9.
Scarf End:
1. With Purple Plum, Ch19. 1 SC in 2nd ch from hook and across. FO and weave ends. (18)
2. I weaved strands of yarn on each end to make fringe. I made 5 fringe for each end.
3. I folded in half at the center and whipstitch attached to the left side of my Snowman Cover at Rounds 11-12.


Legal:
Snowmen are just adorable, whether you're making a blanket, pillow, cozies, hot pads, softies, amigurumi, etc. -- they, simply, look good, in any fashion and form, in my opinion.
And, now, here is a perfect and easy pattern to whip up for the Popcorn Container that is already on display at most stores. I'm usually gifted one every year from someone. Well, if you are one to gift the Popcorn Container - now, you can include a little bit of crochet with it to jazz it up, plus no worries on wrapping a cylinder-shaped item. Or, if you have several of these empty - you could make the Snowman Cover and fill with your own array of goodies...
I used Bernat Blanket yarn in colors I already had on hand. So, please feel free to make and share pictures of your finished project in your colors of choice.
I hope you all will enjoy this fun project.
Snowman Popcorn Tin Cover Pattern

Gauge: 6 HDC stitches x 6 Rounds = 4"
Materials:
--10.0mm hook
--(1) skein each of Bernat Blanket Yarn in Vintage White, Purple Plum, Black and Pumpkin Spice (the pattern uses very little Pumpkin Spice and Purple Plum)
--Popcorn Tin Container (18.5 oz container)
--Small amount of Polyfil (for stuffing the hat)
--7" diameter of felt or fabric (for the hat)
--Tapestry needle for weaving
U.S. Stitch Abbreviations:
Ch: chain
Sl st: slip stitch
St: stitch(es)
SC: single crochet
HDC: half double crochet
FLO: front loops only
BLO: back loops only
Rep: repeat
MR: magic ring
FO: fasten off

Snowman Cover:
1. With Vintage White, 8 HDC into MR. Sl st join to first st and Ch1. (8)
2. 2 HDC into each st around. Sl st join to first st and Ch1. (16)
3. 2 HDC into the first st, 1 HDC into the next st. Rep around. Sl st join to first st and Ch1. (24)
4. 2 HDC into the first st, 1 HDC into the next 2 st. Rep around. Sl st join to first st and Ch1. (32)
5. 2 HDC into the first st, 1 HDC into the next 3 st. Rep around. Sl st join to first st and Ch1. (40)
6. 2 HDC into the first st, 1 HDC into the next 4 st. Rep around. Sl st join to first st and Ch1. (48)
7. Working in the BLO, 1 HDC in each st around. Sl st join to first st and Ch1. (48)
8-10. 1 HDC in each st around. Sl st join to first st and Ch1. At the end of Round 10, FO Vintage White. Join Purple Plum and Ch1. (48)
11-12. With Purple Plum, 1 HDC in each st around. Sl st join to first st and Ch1. At the end of Round 12, FO Purple Plum. Re-join Vintage White and Ch1. (48)

13-17. 1 HDC in each st around. Sl st join to first st and Ch1. At the end of Round 17, FO and weave ends. (48)

Eyes (make 2):
1. With Black yarn, 6 SC into MR. Sl st join to first st and FO. Leave a long tail for attaching. (6)
Nose:
1. With Pumpkin Spice yarn, Ch2. 1 SC in 2nd ch from hook. Ch1 and turn. (1)
2. 2 SC in st. Ch1 and turn. (2)
3. 2 SC in first st, 1 SC in next st. FO and leave a long enough tail for attaching. (3)
Belly Button (1):
1. With Black yarn, 6 SC into MR. Sl st join to first st and FO. Leave a long enough tail for attaching. (6)
See my pictures for help with Eyes, Nose and Belly button placement. Eyes at Rounds 15-17, with 5 stitch space between the eyes. The Nose is at Rounds 13-14. The Belly Button is at Rounds 8-9.
Scarf End:
1. With Purple Plum, Ch19. 1 SC in 2nd ch from hook and across. FO and weave ends. (18)
2. I weaved strands of yarn on each end to make fringe. I made 5 fringe for each end.
3. I folded in half at the center and whipstitch attached to the left side of my Snowman Cover at Rounds 11-12.
Top Hat:
1. With Black yarn, 10 HDC st into MR. Sl st join to first st and Ch1. (10)
2. 2 HDC in each st around. Sl st join to first st and Ch1. (20)
3. 2 HDC in first st, 1 HDC in next st. Rep around. Sl st join to first st and Ch1. (30)
4. Work this round in the BLO. 1 HDC in each st around. Sl st join to first st and Ch1. (30)
5-9. 1 HDC in each st around. Sl st join to first st and Ch1. (30)
10. Work this round in the FLO. 2 HDC in first st, 1 HDC in next st. Rep around. Sl st join to first st and Ch1. (45)
11. 2 HDC in first st, 1 HDC in next 2 st. Rep around. Sl st join to first st and Ch1. (60)
12. 2 HDC in first st, 1 HDC in next 3 st. Rep around. Sl st join to first st and FO. Weave ends. (75)
13. I stuffed the center portion of the hat with Polyfil so it would stand tall and firm.
14. Now, you will need a piece of felt or fabric or make a crochet ring. Whatever medium you decide to use, you will need to cut it circular - approx. 7" diameter. You will then need to either glue or sew it to the inside of your hat - this is to keep the Polyfil secure.
15. I haven't secured my hat to the Tin lid yet. I'm not sure if I want to glue it to the lid or if I want to add Velcro dots to the center. Or, you could opt to leave it freestanding.
Now, you could add a little more detail to the hat if you so desired - flowers, holly, a little bird. I'd
love to see what you all do with this pattern. So, please share your pictures. If you're on Instagram, then please HASHTAG to #rilla2u.


**********
I received this gorgeous picture of the Snowman Popcorn Tin Cover from Debbie Semones Bowman in Maryland. I absolutely love her Snowman...
Debbie stated, “Snowman I made following your pattern....Love how it turned out!”
**********
Happy Crocheting...
Legal:
--don't use/claim my design as your own
--don't use/claim my pics as your own
--okay to make and sale your finished work
--don't share my pattern electronically or in print format (without prior consent) but provide a link to my blog
Social Media:
If you are on the following sites, let's connect and hook up...
--don't share my pattern electronically or in print format (without prior consent) but provide a link to my blog
Social Media:
If you are on the following sites, let's connect and hook up...
- Instagram: Rilla2u
- Pinterest: Rilla2u
- Twitter: Rilla2u
- Facebook: /rilla.edwards
No comments:
Post a Comment