Sunday, October 31, 2021

Hocus Pocus Washcloth

 Hocus Pocus Washcloth 

Here’s my simple “Hocus Pocus Washcloth” in Peaches & Creme yarn in Orange, Purple and Black and a 5.0mm hook.  

I started with a chain 32.  I used single crochet (SC) stitches.  31 SC stitches across. I completed 31 rows.  


Here’s the graph pattern I made for this washcloth if you would like to make one for yourself.
Happy Crocheting…

Legal:

--don't use/claim my design as your own
--don't use/claim my pics as your own
--okay to make and sale your finished work
--don't share my pattern electronically or in print format (without prior consent) but provide a link to my blog

Social Media:

If you are on the following sites, let's connect and hook up...

  • Pinterest:  Rilla2u
  • Twitter:  Rilla2u
  • Facebook:  /rilla.edwards 
  • Instagram:  Rilla2u

Sunday, October 10, 2021

Frankenstein Tissue Box Cover

Frankenstein Tissue Box Cover 

I whipped up this tissue box cover within 2 hours last night to add to my fall decor collection. 

I used Red Heart Super Saver yarn in Spring Green and Black and a 5.0mm hook. I used 2 plastic eyes but you can crochet your eyes, if so desired. 

The cover is made using the HDC (Half Double Crochet) stitch, except for one row, in which I rotated between HDC and DC (Double Crochet) for the hair. 

1.  The sides are all made in one piece. With Spring Green, I chain 55.  From 2nd chain and across, HDC. Ch1 and turn. (54)

2.-11. HDC across. Ch1 and turn. At the end of Row 11, fasten off Spring Green yarn. (54)

12.  Hair Row!!!  “HDC, HDC, 3DC dropped down into previous row stitch, skip 2 stitches, and repeat across.”  At the end of this Row, fasten off.  With right side together, you will slip stitch close the short ends together.  Weave ends. 

Top:

1.  With Black yarn, chain 14.  HDC in 2nd chain from hook and across.  Ch1 and turn. (13)

2-6.  HDC across.  Ch1 and turn.  (13)

7.  HDC in the first 4 stitches, chain 5 and skip 5 stitches (for opening), HDC in last 4 stitches.  Ch1 and turn.  (8 st and 5 ch = 13)

8.  HDC in first 4 stitches, HDC 5x in the chain space, HDC in the last 4 stitches.  Ch1 and turn.  (13)

9-13.  HDC across.  Ch1 and turn.  At the end of row 13, leave a long tail for attaching the top.

Assembly:

1.  Use tapestry needle to attach the top to the sides with a whip stitch around. 

2.  I added my eyes at Row 7 from the bottom  going up with 4 stitches between them.

3.  With Black yarn, I added a little stitch on the side and a smile.  For this part, you can do whatever you like.  

And, that’s it for my “Frankenstein Tissue Box Cover!!!”

Happy Crocheting…

Legal:

--don't use/claim my design as your own
--don't use/claim my pics as your own
--okay to make and sale your finished work
--don't share my pattern electronically or in print format (without prior consent) but provide a link to my blog

Social Media:

If you are on the following sites, let's connect and hook up...

  • Pinterest:  Rilla2u
  • Twitter:  Rilla2u
  • Facebook:  /rilla.edwards 
  • Instagram:  Rilla2u


Saturday, October 9, 2021

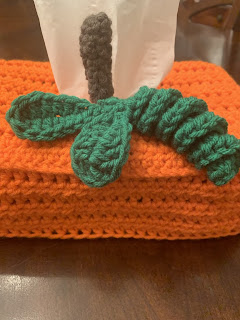
Rectangle Tissue Box Cover

Rectangle Tissue Box Cover 


Happy Crocheting…

Legal:

--don't use/claim my design as your own
--don't use/claim my pics as your own
--okay to make and sale your finished work
--don't share my pattern electronically or in print format (without prior consent) but provide a link to my blog

Social Media:

If you are on the following sites, let's connect and hook up...

  • Pinterest:  Rilla2u
  • Twitter:  Rilla2u
  • Facebook:  /rilla.edwards 
  • Instagram:  Rilla2u

Monday, October 4, 2021

Football Time

Football Time 


At my home, fall means time for football!!! So I had to do a craft to honor my hubby’s love of the game of football…

You can use this as a wall or door hanging.  Here’s what I used:

From Hobby Lobby -

-chipboard

-1 sheet of scrapbook paper 

-variety of fall ribbons

From Dollar Tree -

-modpodge 

-football (removed it from a yard sign)

-rope

-acorns

-scrabble tiles

-3 wood cubes

You will also need a hot glue gun.  

Directions:

1.  Complete Modpodge steps to adhere paper.  

2.  Hot glue rope around border.

3.  Hot glue wood cubes to football and then hot glue cubes to center of chipboard. 

4.  Hot glue scrabble tiles to say, “Football Time.”

5.  Trim a variety of fall ribbons, attach in center with a toe and then hot glue to corner top.

6.  Hot glue acorns to center of ribbons. 

7.  Hot glue rope to the top, backside ends to create a hanger.

That’s it!!!!  Simple, inexpensive and super cute project fir your football fan!!!!

Happy Crafting…

Legal:

--don't use/claim my design as your own
--don't use/claim my pics as your own
--okay to make and sale your finished work
--don't share my pattern electronically or in print format (without prior consent) but provide a link to my blog

Social Media:

If you are on the following sites, let's connect and hook up...

  • Pinterest:  Rilla2u
  • Twitter:  Rilla2u
  • Facebook:  /rilla.edwards 
  • Instagram:  Rilla2u


Tammy!!!

This past week I had to say goodbye to my friend and sister-in-law, Tammy.  It has been an extremely emotional, physical and mentally draining week. 

Tammy was a beautiful soul - inside and out - always smiling, laughing and trying to make the world a better place. 

I know I’m behind on updating my blog with patterns but I hope to update soon when I’m feeling up to it. 

In the mean time, please remember my family during this time of grief.