Monday, June 5, 2017

Patriotic Garden Flag....

First, I want to say that all of the patriotic projects I've been doing lately have all come from 1 skein each of Hobby Lobby's, I Love This Yarn, in red, white and blue -- and, I still have some left for something else.   

Today, I wanted to make a Patriotic Garden Flag.  It measures approximately 15" x 19 1/2".  And, I also made a hanger and bow so it can be used at the front door or as a wall hanging!!!

Patriotic Garden Flag Pattern

Difficulty Level:  Easy

Measures:  15" x 19 1/2"

Materials:
--5.5mm hook
--"I Love This Yarn" in Red, White and Blue (#4) - a different brand of yarn can and will likely altar the size somewhat 
--tapestry needle for weaving 
--dowel rod, if using to hang on the door or wall 

Abbreviations: 
Ch: chain
Sl st: slip stitch
St: stitch(es)
HHDC: Herringbone half double crochet
HDC: half double crochet
DC: double crochet
MR: magic ring
FO: fasten off 

Special stitches:
Picot: chain 3 and sl st into first chain
HHDC:  Here is my short video link on YouTube for this stitch:

Directions:
1.  With blue yarn, ch 50. 1 HHDC in 2nd ch from hook and across.  Ch1 and turn.  (49)
2-24.  1 HHDC in each st across. Ch1 and turn.  At the end of Row 24, FO.  (49)

Now, to make the pocket, you will turn 4 rows down on the wrong side and whipstitch across the first row.  

I wanted my red and white stripes to be vertical so I made it separate and then, whipstitched it to row 24. 

1.  With red yarn, ch41. 1 HHDC in 2nd ch from hook and across.  Ch1 and turn.  (40)
2-38.  1 HHDC in each st across.  Ch1 and turn.  
Note:  You will be doing 2 rows red, 2 rows white...keep alternating until you have 20 rows of red and 18 rows of white.  FO and weave ends.  

Now, with the red and white stripes vertical, whipstitch to attach the end to row 24 of the blue. 

Stars (make 3):
1.  6 HDC into MR.  Sl st to first st to join and Ch1. Pull tail to tighten. (6) 
2. 2 HDC in each st around.  Sl st to first st to join and Ch1. (12) 
3. 2 HDC in first st, 1 HDC in next 3 st.  Repeat around.  Sl st to first st to join.  Do not Ch1.  (15) 
4. Sl st into next st, *ch2, 2 HDC, picot, 3 HDC all in the same st.  Sl st next 3 st.* Repeat from * to * until you have 5-point star.  After last point is made, sl st in next 3 st and then FO.  Leave a long tail for attaching. 

Optional:
For hanger, I used red yarn and ch151.  Then 1 DC in 3rd ch from hook and across.  FO and weave ends.  To pull through the pocket, I attached a safety pin at one end and it was easy to pull through.  
I joined the 2 ends together and tied a knot, then attached a bow.  

Bow:  
I started with white yarn, and MR, ch4.  9 TC.  Before completing the last step of the last stitch, I switched to blue yarn.  (Do not FO white yarn).  Now, Sl st into MR.  Ch4 and make 9 TC.  Turn.  Ch4 and 1 TC in each of the next 9 st.  Before completing the last TC, switch back to white yarn, and then 1 TC in each of the remaining st.  FO.  With white and blue tails, I wrapped them around the center.  I then wrapped the center with red yarn, tied in a knot and weaved ends on the backside of the bow.  And, then attached to the top of the hanger with a safety pin. 

Happy Crocheting!!!

Legal:
--don't claim pattern as your own
--freely make and sale your finished work
--don't use my pics
--don't share my pattern but provide a link to my blog 


Sunday, June 4, 2017

Patriotic Decor Skirt Cozy...

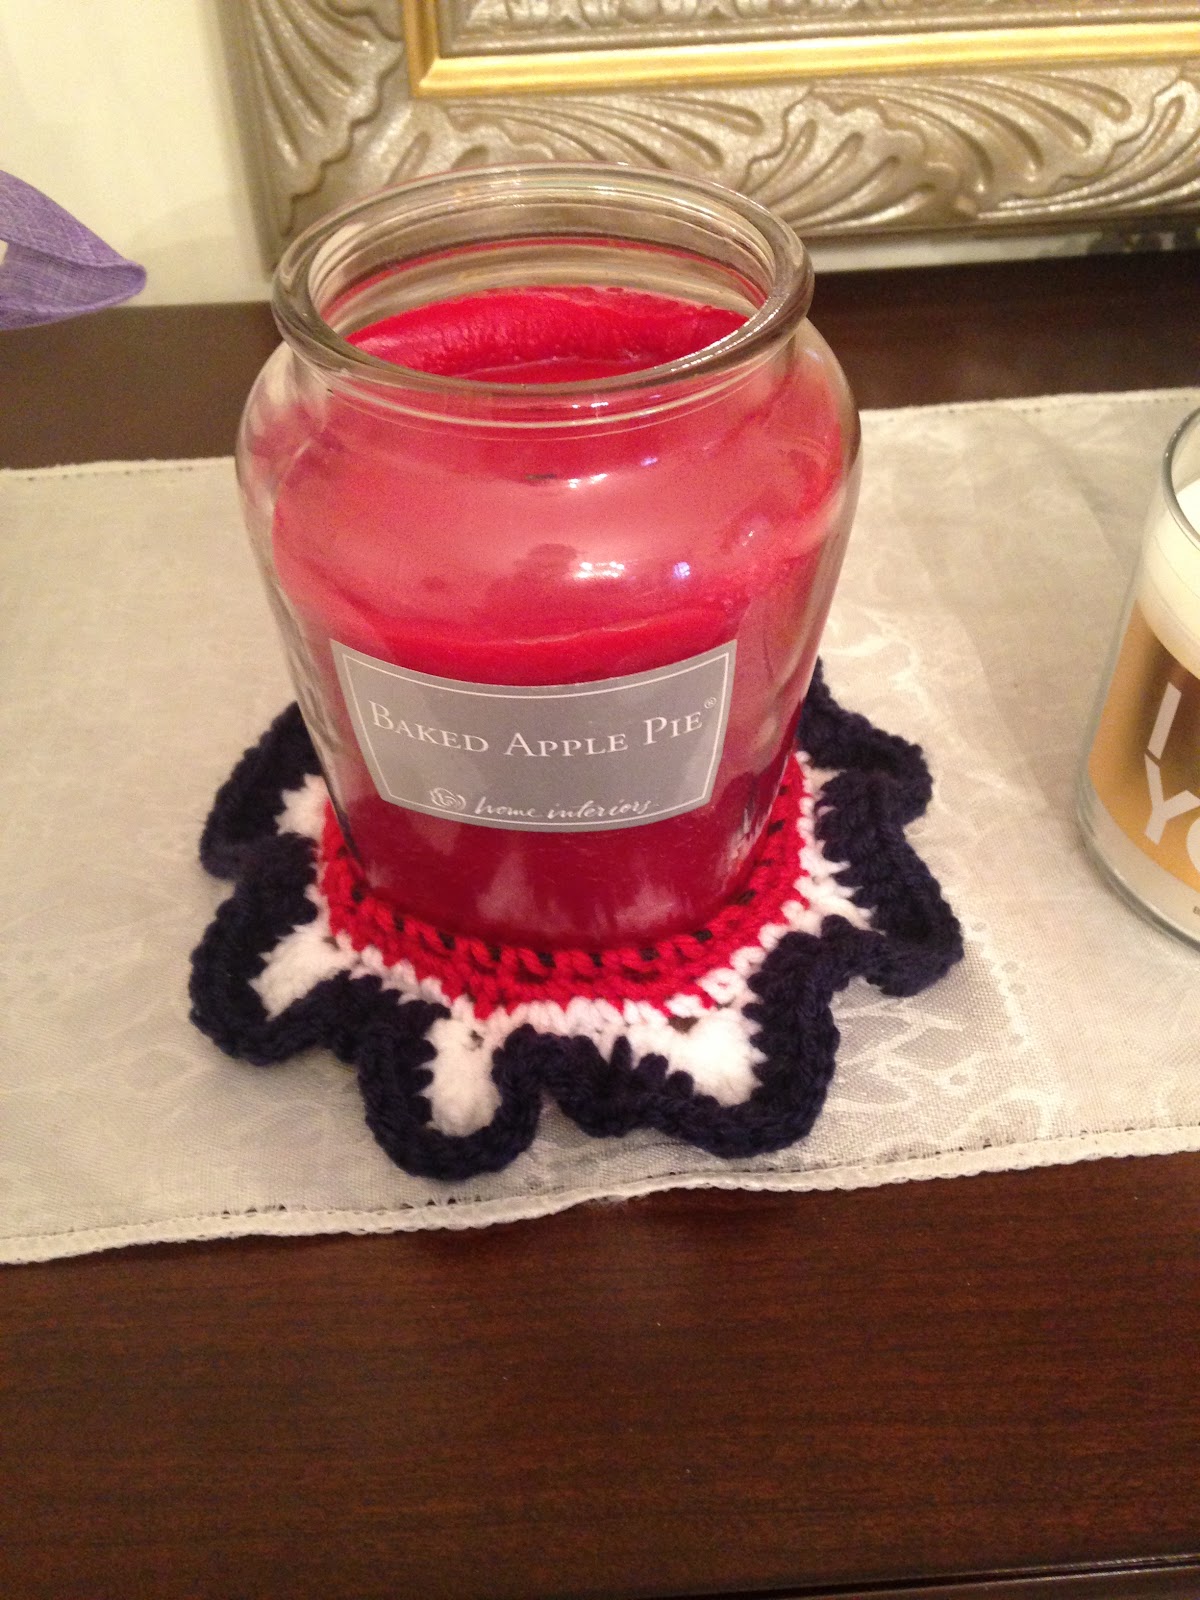
How cute and simple is this red, white and blue skirt cozy?  So many decor items you could easily put this around or to let an item sit on it at the table.  As you can see in my pics, I used it in a variety of ways.  I especially like it around one of my canning jars.

With canning season upon us, how cute it would be to include this little skirt cozy around a jar of jam/jelly and gift to someone?  I think this cozy would look super cute in any range of colors.

So, here's the pics and pattern.  Enjoy!!!

P
 
Patriotic Decor Skirt Cozy Pattern 

Difficulty Level:  Easy

Materials:
-4.0 mm hook
-small amount of worsted weight yarn in red, white and blue (I used "I Love This Yarn" from Hobby Lobby)
-ponytail holder
-tapestry needle for weaving ends 

Abbreviations:
Ch: chain
Sl st: slip stitch
St: stitch(es) 
Sc: single crochet
HDC: half double crochet
DC: double crochet
TC: triple crochet 
FO: fasten off 

Directions:
1.  With red yarn, sl st to join to ponytail holder and Ch1. Work 30 Sc around the holder.  Sl st to first stitch to join and Ch1.  (30)
2.  2 sc in first st, 1 sc in next st.  Repeat around.  Before completing last st, FO red and join white yarn.  Sl st to first st to join.  Do not Ch1.  (45) 
3.  With white yarn, sl st in the first 3 st.  Then Ch1. Into same st, you will *Sc, HDC, DC, TC, DC, HDC, Sc.  Then, Sl st into next five st.* Repeat from * to * around.  After last cluster of stitches is made, you will sl st into the last 2 st.  FO white yarn.  Weave ends. 
4. Join blue yarn with a sl st and Ch1 to the first sl st of the previous round.  Into same st, 1 DC.  Into each of the sl st and st of previous round, you will put 1 DC stitch, except for the TC st - into each of the TC, you will put 3 DC.  Complete round.  Sl st to first st and FO.  Weave ends.  

And, that's it!!!

Happy Crocheting!!! 

Legal:
--okay to sale whatever you make 
--don't claim pattern as your own
--don't use my pics
--don't share my pattern on any social media but provide a link to my blog 

Simple Message So Inspiring....

Happy Sunday, Y'all.  I wanted to share a story with you before heading out the door for church.  I logged into Ravelry -- like I do every morning as soon as I get up...lol -- and to my surprise, I received a wonderful message from a fellow crafter, canner and crocheter.  I wanted to share her message with y'all.  So, please take the time and read it.  

And, remember, help others, encourage others and be that stepping stone to inspire others to leave their comfort zone and aspire to learn something new, to create, to share and to be a voice in the world we live in....

Happy Crocheting!!!!

Saturday, June 3, 2017

Summer Blues Shawl...

I'm so excited to share pics and the pattern for my Summer Blues Shawl.  I think it turned out gorgeous, sophisticated and versatile in that you can wear it many ways.  As you will see in the pics, I used one of my favorite pins to accessorize and join the shawl together.  This Shawl was made using the Global Connection Stitch..,

Summer Blues Shawl Pattern

Difficulty Level:  Easy

Materials:
--5.5mm hook
--2 of the Yarn Bee Sugarwheel in Peppermint to be (Hobby Lobby) - I did not use all of the second one.  There's about a 1/3 of it leftover.  Each Sugarwheel is 355 yards
--tapestry needle for weaving

Measurement:  17" wide x 42" long

Abbreviations:
Ch: chain
SC: single crochet
DC: double crochet
Sk: skip
St: stitch(es)

Popcorn Stitch:  work 4 DC in same stitch, then remove your hook from loop (being careful not to pull out any stitches) and work hook through (from front to back) the first DC you made and then back through the loop, yarn over and pull through 2 loops on hook

The foundation row is worked in multiples of 8 + 2.  So, keep this in mind if you want your Shawl longer or shorter.  

(Global Connection Stitch)
Directions:
1.  Ch170.  SC in 2nd ch from hook and Ch1.  *Sk 3 ch.  Into next ch, (DC, Ch1, DC, Ch1, DC, Ch1).  Sk 3 ch.  Into the next ch, SC, Ch1.*. Repeat from * to * across.  Turn.  
2.  Ch6 (counts as a DC and Ch3), *sk 1 DC.  1 SC into next DC st and Ch3.  Popcorn stitch into the next SC stitch and Ch3.* Repeat from * to * until the last Popcorn stitch is made.  Ch 3 and 1 DC into  the last SC st.  Turn.  
3.  Ch1, 1 SC, Ch1 into first st.  *1 DC, Ch1, 1 DC, Ch1, 1 DC, Ch1 into the next SC stitch.  Then, 1 SC, Ch1 into the top of the Popcorn Stitch.* Repeat from * to * across, placing 1 SC into the Ch3 of the previous row's Ch6.

Repeat steps 2 and 3 until you reach your desired length, ending with step 3.

Here's more pics, showing you different ways of wearing this Shawl...


What's on the Hook?

Happy, Saturday!!!  I've spent my morning working on a gorgeous shawl in varying shades of aqua, turquoise and blue in a gorgeous pattern.  Here's a sneak peek at it...

Loving the new Yarn Bee Sugarwheel from Hobby Lobby.  They have lots of gorgeous colors -- so be sure to check it out.

I was cleaning out my email this morning and wanted to share this pic I received from fellow crocheter, Linda Bowers, who used my Messy Bun - Woodland Hats pattern.  Isn't her hats so lovely?


Whatever is on your hook today, I hope you're having fun and enjoying the beautiful craft of Crocheting....


Thursday, June 1, 2017

Uncle "Sammy"...


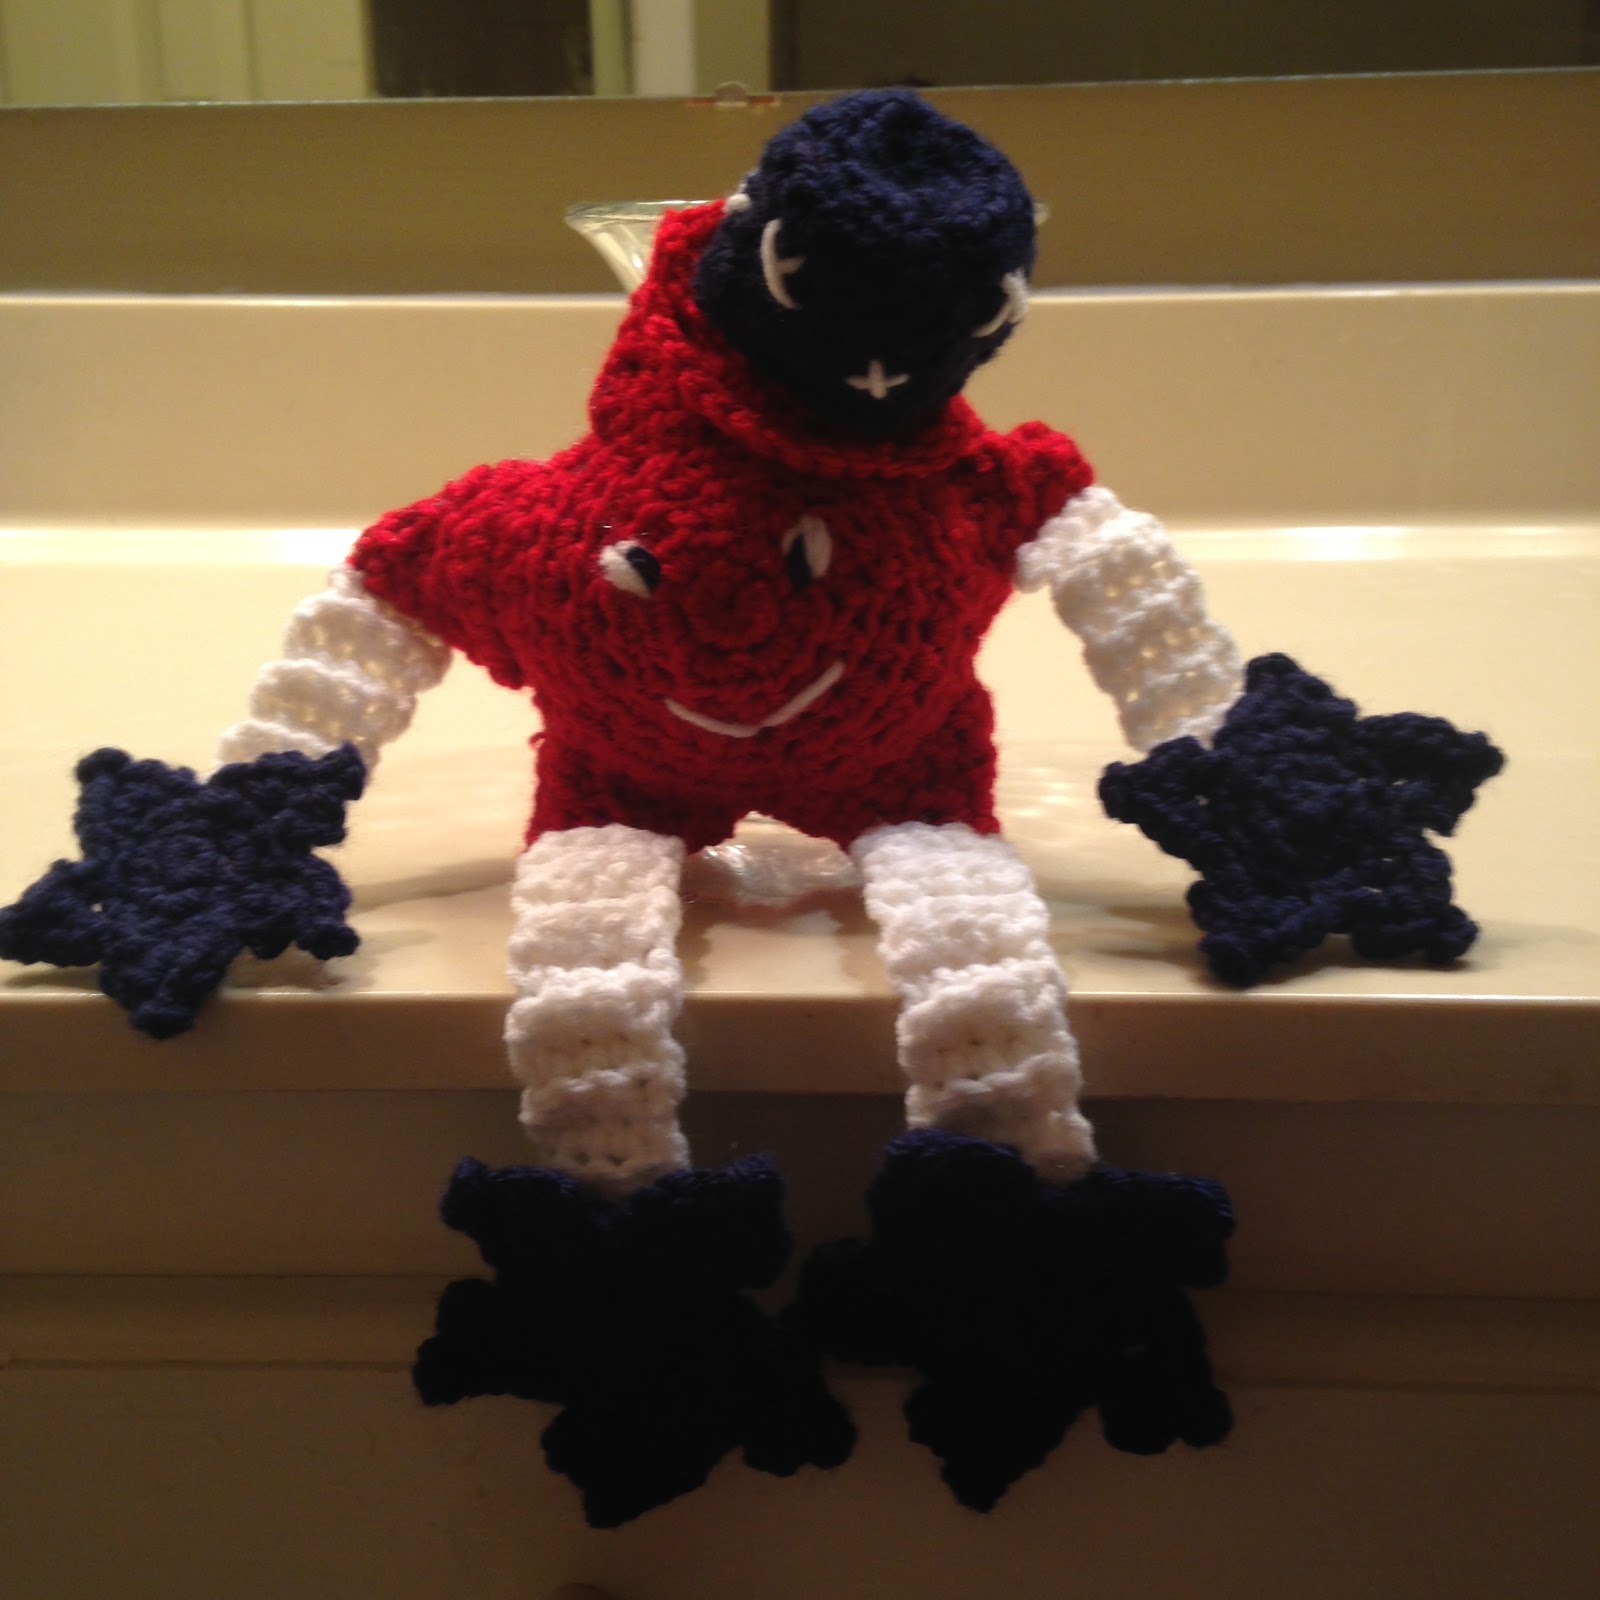
Okay, how cute is this little fella?  I aptly named him Uncle "Sammy"...lol!!!  He works up fairly quick and can be used in a variety of ways throughout the summer months.  He can sit on a shelf, sit on a wreath, given as a toy or reclined on a bed/sofa.  Lots of different ways to use him.  And, it doesn't require much yarn...yay!!!

Uncle "Sammy" Pattern

Difficulty Level:  Easy

Materials:
--3.5 mm hook
--#4 worsted weight yarn in red, white & blue (I used "I Love This Yarn" from Hobby Lobby)
--small amount of polyfil
--tapestry needle for weaving

Abbreviations:
Ch: chain
Sl st: slip stitch
St: stitch(es)
MR: magic ring
FO: fasten off
BLO: back loops only
SC: single crochet
HDC: half double crochet
SC2TOG: single crochet 2 stitches together

Directions:
Main Star (red; make 2)
1.  With red yarn, 6 HDC into MR.  Sl st to join to first st and Ch1.  (6)
2.  2 HDC in each st around.  Sl st to join to first st and Ch1.  (12)
3.  2 HDC in first st, 1 HDC in next st.  Repeat around.  Sl st to join to first st and Ch1.  (18)
4.  2 HDC in first st, 1 HDC in next 2 st.  Repeat around.  Sl st to join to first st and Ch1.  (24)
5.  2 HDC in first st, 1 HDC in next 3 st.  Repeat around.  Sl st to join to first st and Ch1.  (30)
Now we will start making the points.
6.  1 SC in each of the first 6 st.  Ch1 and turn.  (6)
7-8.  Repeat #6.  (6)
9.  SC2tog, 1 sc in the next 2 st and then SC2tog.  Ch1 and turn.  (4)
10.  SC2tog, SC2tog.  Ch1 and turn.  (2)
11.  1 sc in each st.  Ch1 and turn.  (2)
12.  SC2tog.  Ch1 and turn.  (1)
13. 1 SC.  Ch1 and work sl st down the side, until your next st is st #7 of Round 5. (1)
Repeat steps 6-13 (4) more times to make your 5-point star.  FO.  Leave a long tail.

After you make 2, place right sides together and whipstitch.  Before you whipstitch your last point together, turn right sides out and stuff with polyfil.  I also went ahead and embroidered my eyes and mouth before completing the last point.  Once it's whipstitched, weave ends.

Arms (make 2) and Legs (make 2):
1.  With white yarn, ch5.  1 SC in 2nd ch from hook and across.  Ch1 and turn.  (4)
2.  Now, and throughout, you will be working in the BLO.  1 SC in each st across.  Ch1 and turn.  (4)
For the arms, you will complete 12 rows.
For the legs, you will complete 18 rows.

Star Hands (make 2) and Star Feet (make 2):
Hands:
1.  With blue yarn, 6 SC in MR.  Sl st to join and Ch1.  (6)
2.  2 SC in each st around.  Sl st to join and Ch1.  (12)
3.  2 SC in first st, 1 SC in next 3 st.  Sl st to join and Ch1.  (15)
Now, you will make the 5 points:
4.  Sl st into next st.  Into same st, *Ch2, SC 2 times, Ch3 and Sl st into first ch (picot stitch made), then SC 3 more times into same st.* First point made.
5.  Sl st in next 3 st.  Into last sl st, repeat from * to * of #4.  Repeat a total of 4 times until your 5-point star is made.

Feet:
Repeat as for the hands, except substitute the SC st with the HDC st.  This way it will make the star feet slightly bigger.

Whipstitch the star hands to the ends of the arms and the star feet to the ends of the legs.  Then, attach arms and legs to main star.  (See pic on placement)

Top Hat:
1.  With blue yarn, 6 HDC into MR.  Sl st to join and Ch1.  (6)
2.  2 HDC in each st around.  Sl st to join and Ch1.  (12)
3.  2 HDC in first st, 1 HDC in next st.  Repeat around.  Sl st to join and Ch1.  (18)
4-7.  1 HDC in each st around.  Sl st to join and Ch1.  At the end of Round 7, FO blue yarn and join red yarn.  (18)
8.  With red yarn, working this round only in BLO, 1 HDC in each st around.  Sl st to join and Ch1.  (18)
9.  2 SC in first st, 1 SC in next st.  Repeat around.  Sl st to join and Ch1.  (27)
10.  1 SC in each st around.  Sl st to join.  FO.  Leave a long tail to attach.

With white yarn, I embroidered "x" around the blue portion of the hat.  I then placed hat to the side of the top point at a slant and whipstitched.

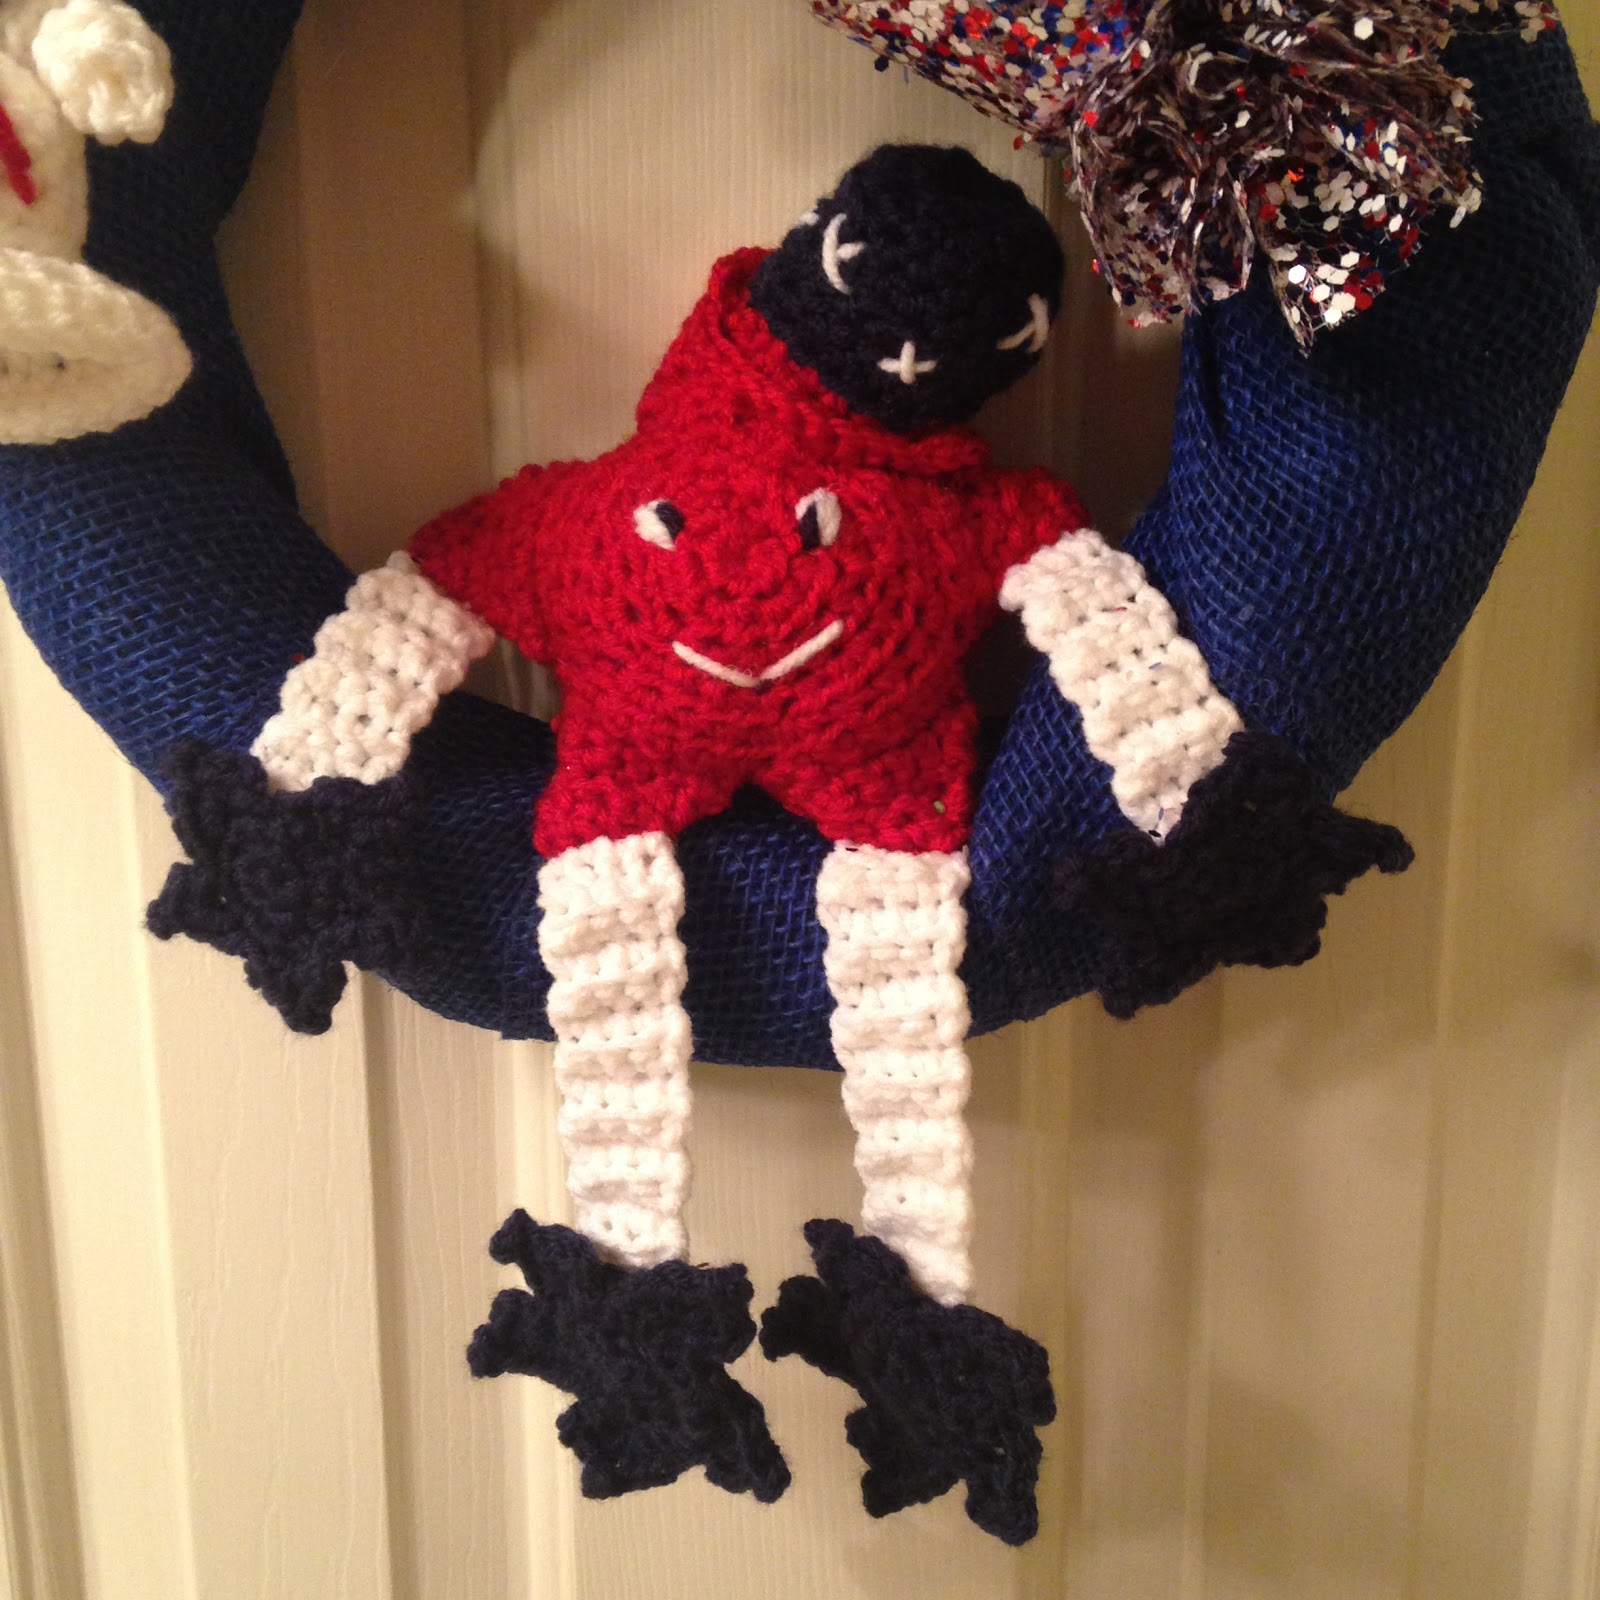
Here's what he looks like on my wreath:


And that's it for Uncle "Sammy".  I think he's super cute.  Enjoy...

Happy Crocheting!!! 

Legal:
--don't claim pattern as your own
--don't use my pics
--you can make and sale your finished work
--do not copy my pattern to any social media sites, but provide a link to my blog


Patriotic/Summer Mobile....

Hi, all!  I've been excited about completing this project for several weeks now.  I wanted something whimsical and fun...and that makes noise, hence 9 small bells are used.  

If you haven't noticed yet, I have been in a red, white and blue inspiration mode lately...lol.  Good thing is:  colors aren't just for Fourth of July but can be used all summer for your decor.....

I hope you all enjoy this pattern as much as I did in designing it.

Patriotic/Summer Mobile....


Patriotic/Summer Mobile Pattern

Difficulty Level:  Easy

Materials:  
--5mm hook and a 2.5mm hook
--inner portion of an 8" circular hoop (I bought a wood one from Hobby Lobby)
--#4 worsted weight yarn in red, white and blue (I used "I Love This Yarn" from Hobby Lobby)
--9 small bells
--small plastic ring for hanging
--polyfil
--tapestry needle for weaving 

Abbreviations:
Ch: chain
Sl st: slip stitch
St: stitch(es)
MR: magic ring
FO: fasten off
SC: single crochet
HDC: half double crochet
BLO: back loops only 

Directions:
1.  Join red yarn to hoop with a sl st and Ch1.  SC around the hoop.  I made 140 SC stitches.  Sl st to first st.  Do not fasten off.  

Now, you will make the 3 hangers.
2.  Make a Ch30.  Leave a long tail and FO.
3.  Count over and join yarn in stitch 46.  Ch30.  Leave a long tail and FO.  
4.  And, again, count over and join yarn in stitch 46.  Ch30.  Leave a long tail and FO.  

Join the 3 tails together, and tie a double knot at the last ch made.  I wanted about a 4" gap from the double knot to where I attached the plastic ring for the hanger, but you can do this part as long or as short as you want it.  

Stars:
I made 3 stars of each color (1 large and 2 small).  This means, I had to make 4 small of each color and 2 large of each color since I wanted mine to be puffy by joining 2 stars together and adding the polyfil. Now, if you don't want puffy stars, then adjust accordingly.  

To make the stars:
Small: 
1.  With 5mm hook and yarn, 15sc into MR. Sl st to first st.  Pull tail to tighten/close opening.  Sl st into next st.  *Ch2.  Into same st, make 2 sc st and then ch3 and sl st into first ch (picot stitch made), add 3 more sc st into same st.  Sl st into next 3 st.*  Into the last st you made a sl st, repeat from * to *.  Repeat 3 more times until you have a 5-point star made.  Sl st into first st and FO.  Leave a long tail for assembly.  

Large:
To make the large stars, follow the instructions for the small.  The only difference is that you replace the SC stitches with HDC stitches.  

Assembly of stars:  
I joined coordinating yarn with a sl st to the hoop and made a ch8. Then I sl st to join the small star at one of the points to the ch.  I then FO and weaved ends.  I then joined yarn with a sl st at the opposite end point of the star and made a ch15, then Sl st to join the large star at one of the points.  FO and weave ends.  Then, join yarn with a sl st to the opposite end point of the star.  Now, ch15 again and sl st to join the last small star at one of the points.  FO and weave ends.  Repeat this process 2 more times for the other 2 colors.  I just evenly spread around where I attached my yarn on the hoop.  Now, you can mix and match your stars if you so choose.  I think it would look really pretty like that as well.  

Curlicues:
I made 1 of each color.  For this part, I decided to use a 2.5mm hook.  I didn't want my curlicues to be too bulky.  But, you can use whatever size hook you have available.  

1.  I made a ch75.  Into the 2nd ch from the hook and across, I added 3 sc stitches per chain.  FO.  Leave a long enough tail to attach 2 bells to each one and then join to the hoop and weave ends. 

I just evenly sl st to the hoop and FO.  

USA Bell:
1.  With 5mm hook and white yarn, 6 sc into MR.  Sl st to join and Ch1.  (6) 
2.  2 sc in each st around.  Sl st to join and Ch1.  (12)
3.  2 sc in first st, 1 sc in next st.  Repeat around.  Sl st to join and Ch1.  (18) 
4-6. 1 sc in each st around.  Sl st to join and Ch1. (18) 
7.  1 HDC in each st around.  Sl st to join and Ch1. (18) 
8.  1 sc in BLO of each st around.  Sl st to join and Ch1. (18) 
9.  2 sc in BLO of each st around.  Sl st to join and Ch1. (36) 
10. 1 sc in each st around.  Sl st to join and FO.  Weave ends.  (36)

To add bells and make a hoop:
I used white yarn and added 3 bells to the center of the yarn.  Tied double knot.  I then used my tapestry needle to weave ends up through top of bell to make a hoop/hanger since I only wanted my bell draped over where I joined the 3 hangers.  (See pic) 

The letters USA:
I just used my tapestry needle and red yarn and embroidered the letters on.  

I made 3 smaller curlicues (1 of each color) for the top of my bell.  On these 3, I did use the 5mm hook and started with a ch19.  And, then 3 sc stitches into the 2nd ch from the hook and across.  Leave a long enough tail to attach to top and weave ends.

And, that's it!!!  A cute, summery mobile for your home decor...

Happy Crocheting!!!

Legal:
--don't claim pattern as your own
--make and sale whatever you make
--don't use my pics
--link back to my blog as designer of pattern

If you haven't done so yet, join and follow me on social media:
Pinterest, Instagram, Ravelry, Twitter:  Rilla2u
Facebook Page:  Crocheting & Crafting and follow me on Google -
--don't miss out on some great patterns-- 
Rilla2u@gmail.com

And, if you make any of my patterns, please hashtag me on Instagram - #rilla2u