


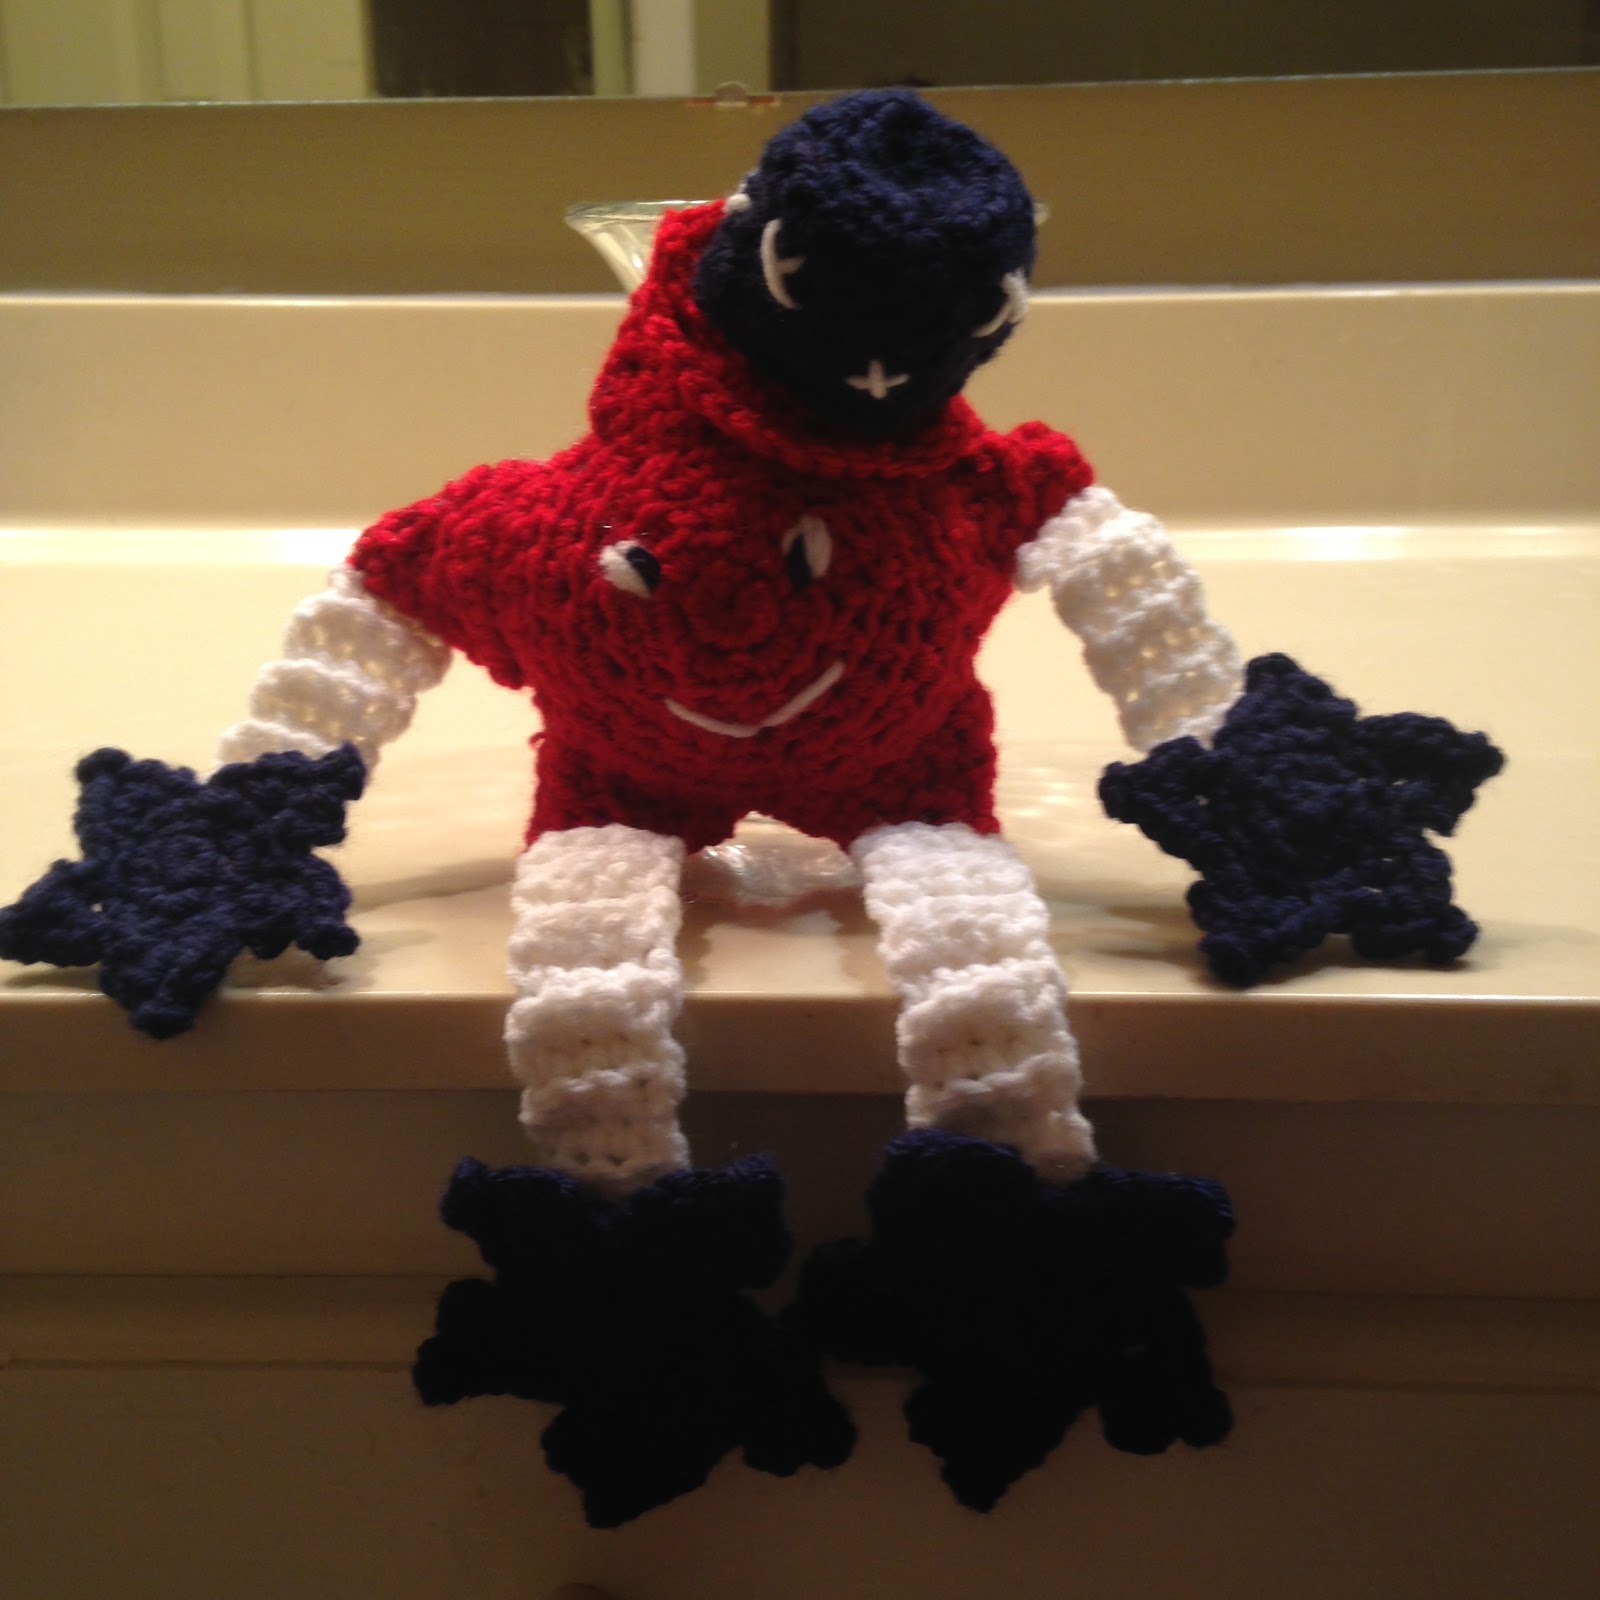
Okay, how cute is this little fella? I aptly named him Uncle "Sammy"...lol!!! He works up fairly quick and can be used in a variety of ways throughout the summer months. He can sit on a shelf, sit on a wreath, given as a toy or reclined on a bed/sofa. Lots of different ways to use him. And, it doesn't require much yarn...yay!!!


Uncle "Sammy" Pattern
Difficulty Level: Easy
Materials:
--3.5 mm hook
--#4 worsted weight yarn in red, white & blue (I used "I Love This Yarn" from Hobby Lobby)
--small amount of polyfil
--tapestry needle for weaving
Abbreviations:
Ch: chain
Sl st: slip stitch
St: stitch(es)
MR: magic ring
FO: fasten off
BLO: back loops only
SC: single crochet
HDC: half double crochet
SC2TOG: single crochet 2 stitches together
Directions:
Main Star (red; make 2)
1. With red yarn, 6 HDC into MR. Sl st to join to first st and Ch1. (6)
2. 2 HDC in each st around. Sl st to join to first st and Ch1. (12)
3. 2 HDC in first st, 1 HDC in next st. Repeat around. Sl st to join to first st and Ch1. (18)
4. 2 HDC in first st, 1 HDC in next 2 st. Repeat around. Sl st to join to first st and Ch1. (24)
5. 2 HDC in first st, 1 HDC in next 3 st. Repeat around. Sl st to join to first st and Ch1. (30)
Now we will start making the points.
6. 1 SC in each of the first 6 st. Ch1 and turn. (6)
7-8. Repeat #6. (6)
9. SC2tog, 1 sc in the next 2 st and then SC2tog. Ch1 and turn. (4)
10. SC2tog, SC2tog. Ch1 and turn. (2)
11. 1 sc in each st. Ch1 and turn. (2)
12. SC2tog. Ch1 and turn. (1)
13. 1 SC. Ch1 and work sl st down the side, until your next st is st #7 of Round 5. (1)
Repeat steps 6-13 (4) more times to make your 5-point star. FO. Leave a long tail.
After you make 2, place right sides together and whipstitch. Before you whipstitch your last point together, turn right sides out and stuff with polyfil. I also went ahead and embroidered my eyes and mouth before completing the last point. Once it's whipstitched, weave ends.
Arms (make 2) and Legs (make 2):
1. With white yarn, ch5. 1 SC in 2nd ch from hook and across. Ch1 and turn. (4)
2. Now, and throughout, you will be working in the BLO. 1 SC in each st across. Ch1 and turn. (4)
For the arms, you will complete 12 rows.
For the legs, you will complete 18 rows.
Star Hands (make 2) and Star Feet (make 2):
Hands:
1. With blue yarn, 6 SC in MR. Sl st to join and Ch1. (6)
2. 2 SC in each st around. Sl st to join and Ch1. (12)
3. 2 SC in first st, 1 SC in next 3 st. Sl st to join and Ch1. (15)
Now, you will make the 5 points:
4. Sl st into next st. Into same st, *Ch2, SC 2 times, Ch3 and Sl st into first ch (picot stitch made), then SC 3 more times into same st.* First point made.
5. Sl st in next 3 st. Into last sl st, repeat from * to * of #4. Repeat a total of 4 times until your 5-point star is made.
Feet:
Repeat as for the hands, except substitute the SC st with the HDC st. This way it will make the star feet slightly bigger.
Whipstitch the star hands to the ends of the arms and the star feet to the ends of the legs. Then, attach arms and legs to main star. (See pic on placement)
Top Hat:
1. With blue yarn, 6 HDC into MR. Sl st to join and Ch1. (6)
2. 2 HDC in each st around. Sl st to join and Ch1. (12)
3. 2 HDC in first st, 1 HDC in next st. Repeat around. Sl st to join and Ch1. (18)
4-7. 1 HDC in each st around. Sl st to join and Ch1. At the end of Round 7, FO blue yarn and join red yarn. (18)
8. With red yarn, working this round only in BLO, 1 HDC in each st around. Sl st to join and Ch1. (18)
9. 2 SC in first st, 1 SC in next st. Repeat around. Sl st to join and Ch1. (27)
10. 1 SC in each st around. Sl st to join. FO. Leave a long tail to attach.
With white yarn, I embroidered "x" around the blue portion of the hat. I then placed hat to the side of the top point at a slant and whipstitched.
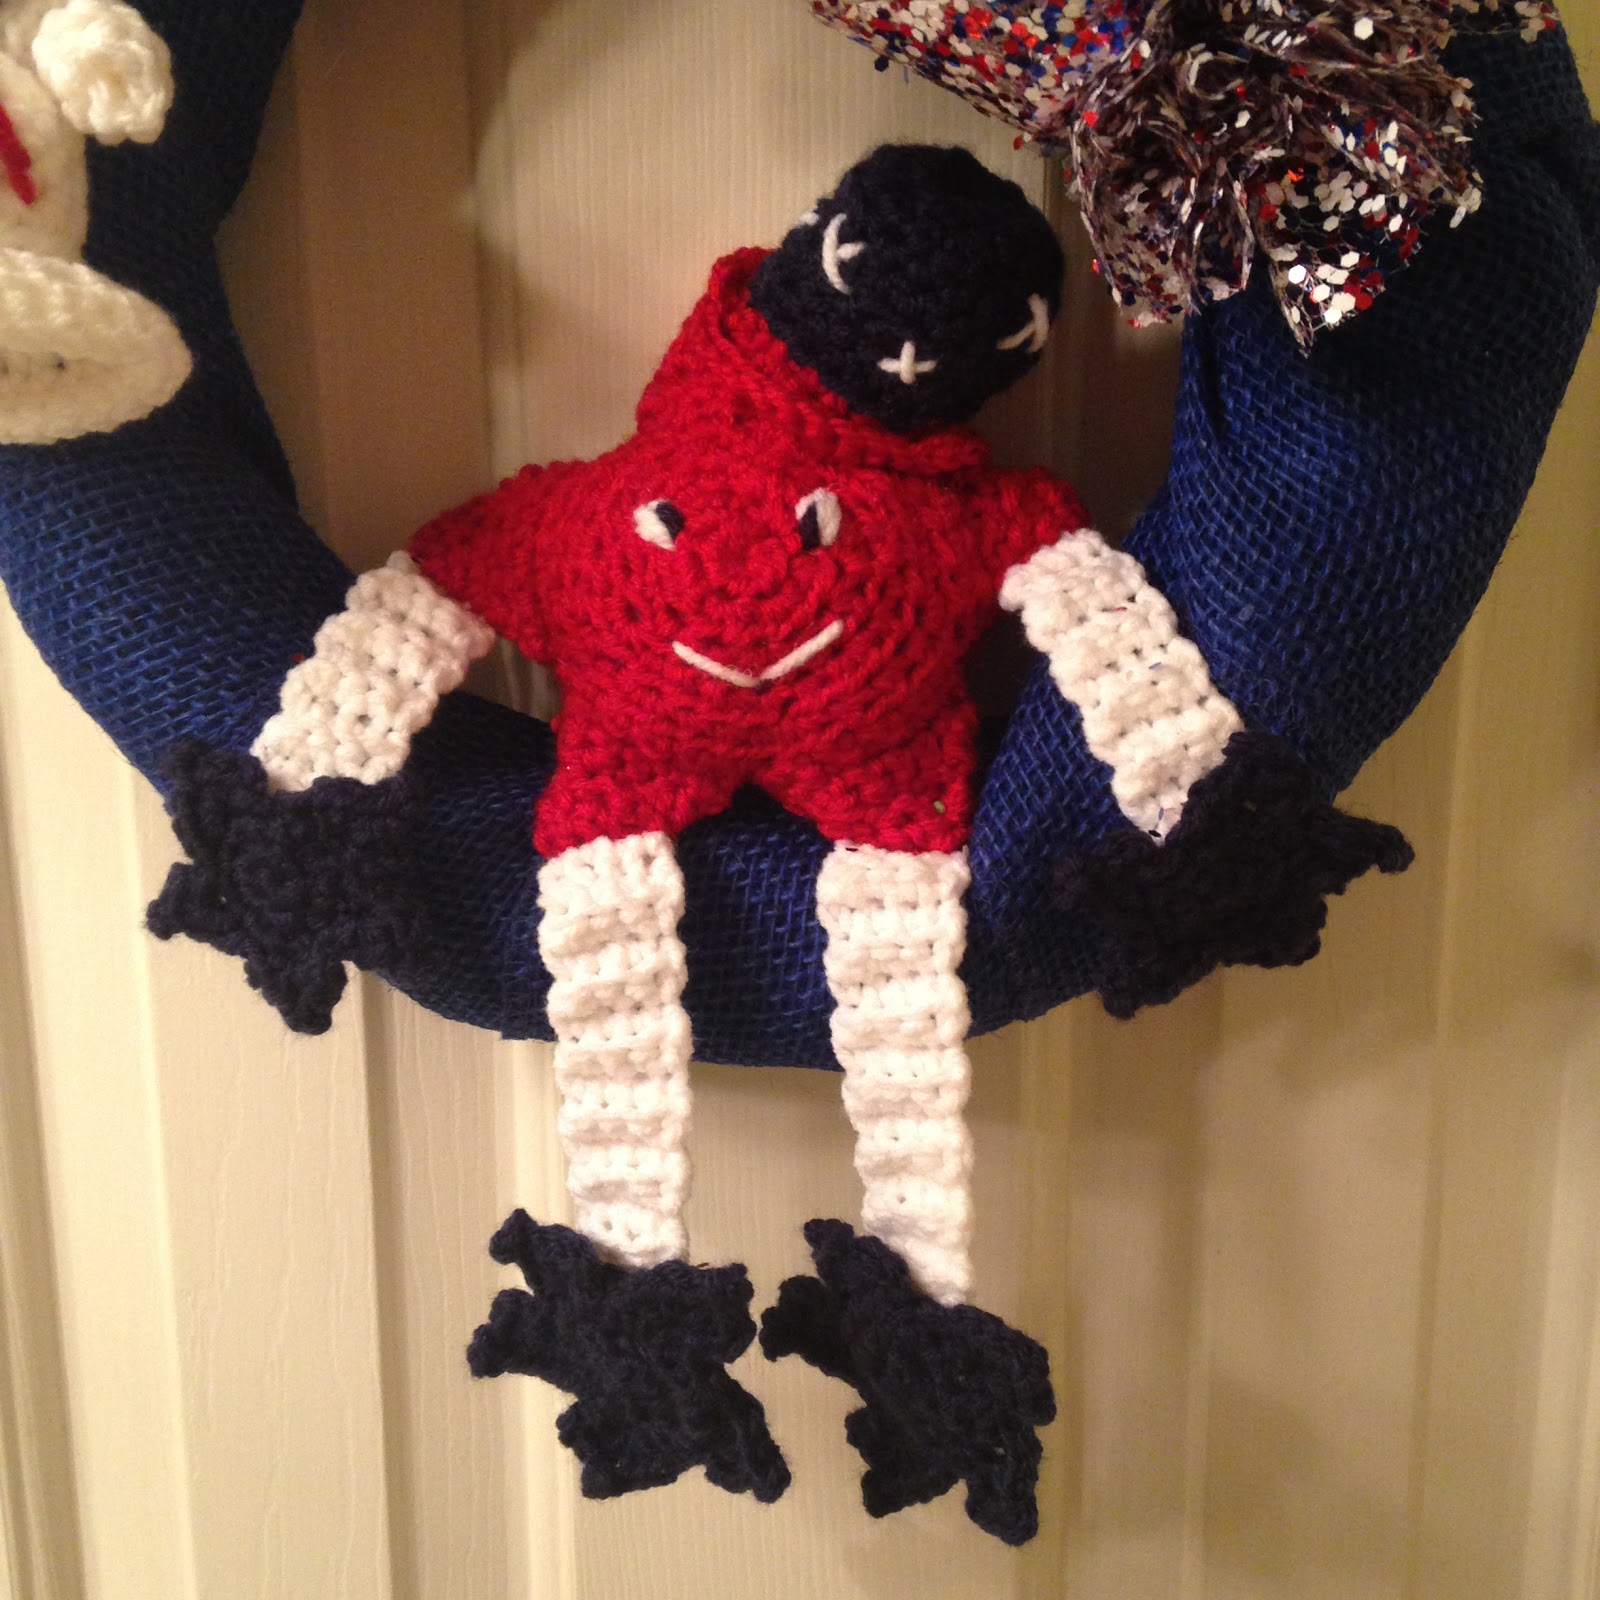
Here's what he looks like on my wreath:


And that's it for Uncle "Sammy". I think he's super cute. Enjoy...
Happy Crocheting!!!
Legal:
--don't claim pattern as your own
--don't use my pics
--you can make and sale your finished work
--do not copy my pattern to any social media sites, but provide a link to my blog
No comments:
Post a Comment