Thursday, April 21, 2022

Ms. Carrot Ornament

 Ms. Carrot


Cute and easy ornament, using Hobbii cotton yarn, to go with my Mr. Pea Ornament - Ms. Carrot Ornament.

Measures:  approximately 2” tall

Materials:

-3.5mm hook

-Orange, green, black and pink cotton yarn

-(2) black safety eyes

-Polyfil

-Tapestry needle


 Happy Crocheting...


Legal:
--don't use/claim my design as your own
--don't use/claim my pics as your own
--okay to make and sale your finished work
--don't share my pattern electronically or in print format (without prior consent) but provide a link to my blog

Social Media:
If you are on the following sites, let's connect and hook up...
  • Instagram:  Rilla2u
  • Pinterest:  Rilla2u
  • Twitter:  Rilla2u
  • Facebook:  /rilla.edwards 
  • Etsy:  rilla2u 
  • TikTok:  rillae2u 


Tuesday, April 19, 2022

Mr. Pea Ornament

Mr. Pea Ornament 

Here’s a quick and easy project to make. I have a faux tree in my sunroom that I love to make and hang ornaments on.  This project took about 30 minutes start to finish. 


Materials:

-3.5mm hook

-Cotton yarn in green and black (I used Hobbii yarn)

-2 black safety eyes

-Polyfil

-tapestry needle


U.S. Stitch Abbreviations:

St:  stitch

Ch:  chain

Sl st:  slip stitch 

MR:  magic ring

Dec:  decrease (join 2 st together to create a decrease)

Rep:  repeat

FO:  fasten off


Note:  use a stitch marker and work in the round

Directions:

1.  6SC MR.  (6)

2.  2SC in each st around.  (12)

3.  *2SC, 1SC,* rep around.  (18)

4.  *2SC, 1SC next 2 St,* rep around.  (24)

5.  *2SC, 1SC next 3 St,* rep around.  (30)

6-9.  1SC in each St around.  (30)

10.  *Dec, 1SC next 3 St,* rep around. (24)

11.  *Dec, 1SC next 2 St,* rep around. (18)

12.  *Dec, 1SC,* rep around. (12)

Add eyes round 6; 3 spaces between them. 

Embroider mouth with black yarn. 

Firmly stuff with Polyfil. 

13.  Dec 6 times around. FO and leave a tail for weaving in and out of last six stitches to close up. (6)

Hanger:

1.  Sl st join yarn at center top.  Ch20 and FO.  With tapestry needle, weave ends to secure hanger.


 Happy Crocheting...


Legal:
--don't use/claim my design as your own
--don't use/claim my pics as your own
--okay to make and sale your finished work
--don't share my pattern electronically or in print format (without prior consent) but provide a link to my blog

Social Media:
If you are on the following sites, let's connect and hook up...
  • Instagram:  Rilla2u
  • Pinterest:  Rilla2u
  • Twitter:  Rilla2u
  • Facebook:  /rilla.edwards 
  • Etsy:  rilla2u 
  • TikTok:  rillae2u 

Monday, April 18, 2022

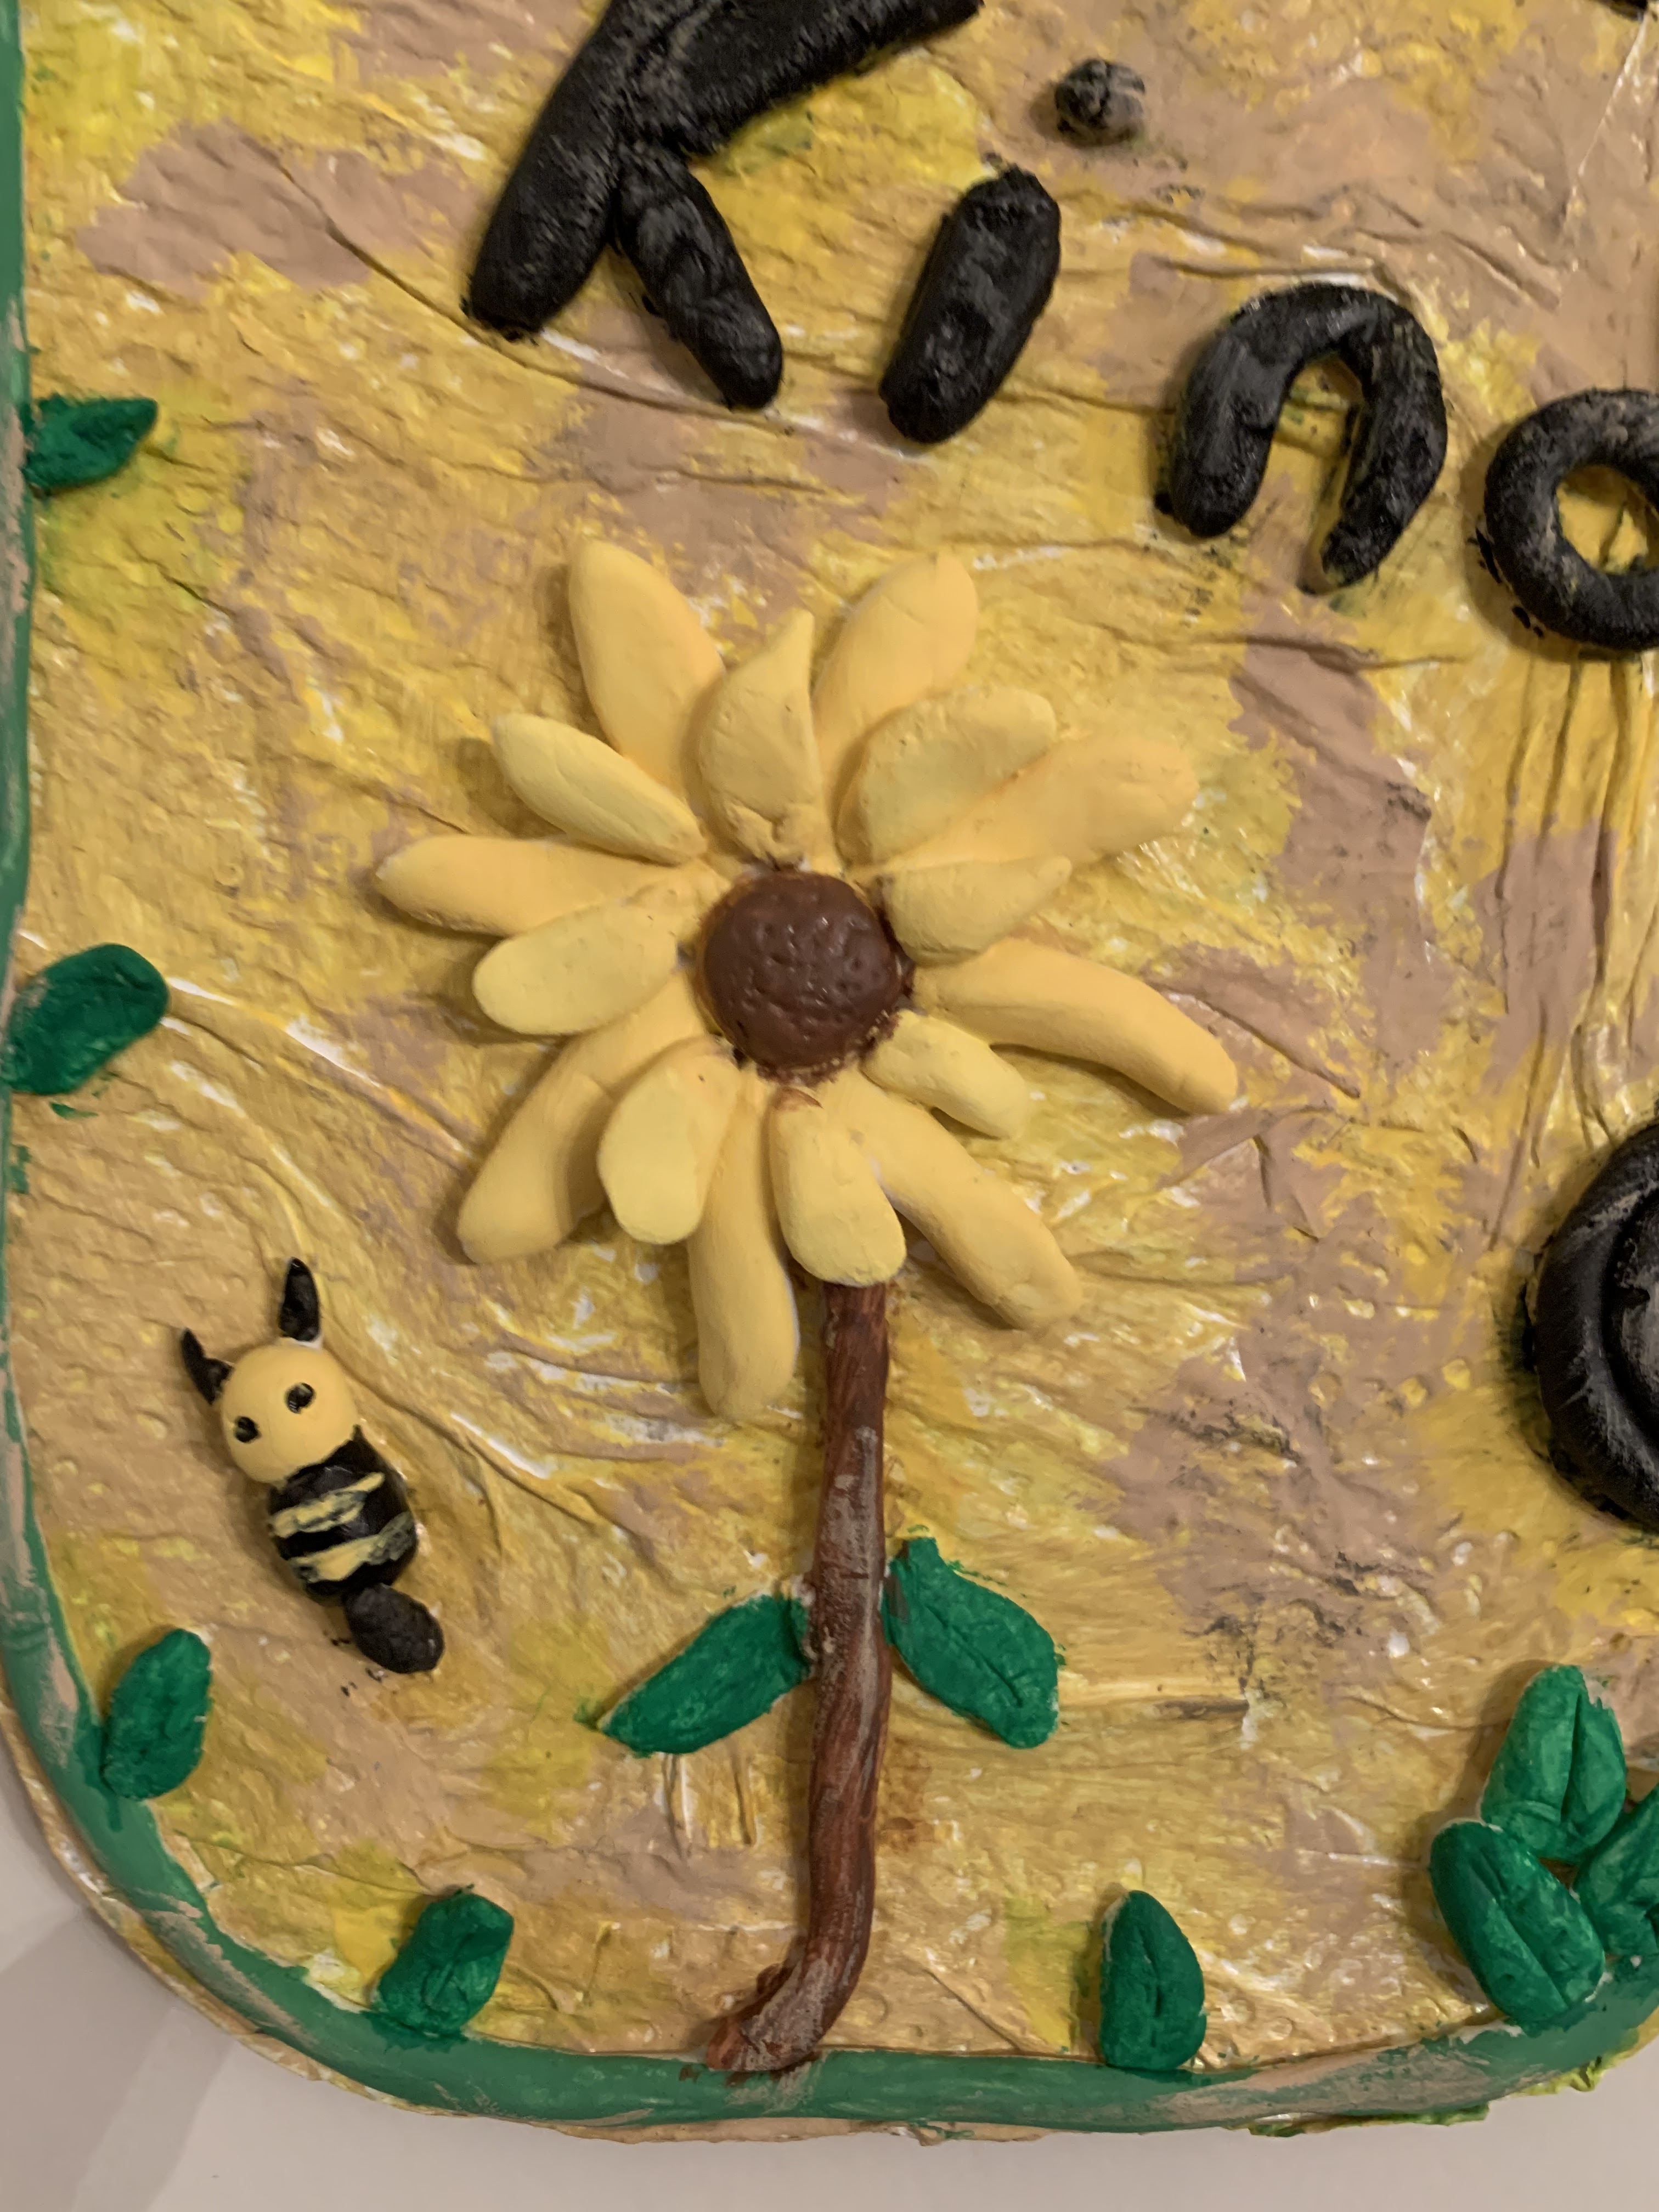
Bee Kind DIY Project

 Bee Kind DIY Project

I absolutely love the craft section of Dollar Tree. You can find some amazing items at great prices. Plus they have a wide variety of seasonal decor that you can use as is OR as your basis to convert into something uniquely your own. 

Materials:

-metal tin mason jar hanger

-modpodge 

-paper towels 

-small piece of cardboard box

-1.0 oz model magic clay

-paint and brush

-jute twine

-craft glue


Directions:

1.  I added modpodge and paper towels to the piece and allowed to completely dry. 

2.  I had to remove the rope that came on the hanger.  I then removed the thin top layer of the box (to expose the ridges) and cut it in a semi-like circle to place at the top with glue to look like a lid.  I painted the box portion gray with dabs of white to distress.

3.  The jar portion I painted with two shades of yellow.

4.  I free-style made my lettering, flower, bee, leaves and stem and attached with glue.  Then painted.  

5.  Once completely dried, I added jute twine for hanging.  I glued it on the backside on each end.


Happy Crafting…


Saturday, April 16, 2022

Medical Supplies

I have completed a few items to add to my “Medical Collection” project from a few years back. 

Materials:

—2.0, 3.0 and 3.5mm hooks

—#4 worsted weight yarn in your choice of colors

—small amount of Polyfil (for thermometer)

—stitch marker

—tapestry needle for weaving


U.S. Stitch Abbreviations:

Ch:  chain

St:  stitch 

Sl st:  slip stitch

SC:  single crochet

SC2tog: single crochet 2 stitches together (decrease)

MR:  magic ring

BLO:  back loops only

FO:  fasten off

Rep:  repeat

Note:  When using the MR to work in the round, use a stitch marker to keep track of the start of a new round.

Directions:

Band-Aid:


1.  With light brown yarn and a 3.5mm hook, ch4.  SC in 2nd ch from hook and across. Ch1 and turn. (3)

2.  SC across.  Ch1 and turn. (3)

3-14.  Rep #2.  At the end of Row 14, SC evenly around. FO and weave ends.  

Center Pad:

1.  With white yarn and a 3.5mm hook, ch3.  SC in 2nd ch from hook and next ch. Ch1 and turn. (2)

2.  SC across. Ch1 and turn. (2)

3.  SC across. Then, SC evenly around.  FO and weave ends. 


Wednesday, April 13, 2022

Pikachu Keychain

 Pikachu Keychain 

Here’s a project for the Pokémon fans out there or if you know someone who’s a fan. A quick and cute project using cotton yarn and a 2.5mm hook. 


Pattern coming SOON!!!!

Happy Crocheting…


Monday, April 11, 2022

Fox Donut

Fox Donut

I made this super cute Fox Donut to hang on my tree in the sunroom. 

Materials:

-3.0mm hook

-#4 worsted weight yarn in Terra Cotta, Black and White

- 2 black eyes

-Polyfil

-tapestry needle for weaving


U.S. Stitch Abbreviations:

Ch:  chain

St:  stitch

Sl st:  slip stitch

SC:  single crochet 

Inc: 2 SC in same stitch (increase)

SC2tog:  SC 2 st together (decrease)

SC3tog:  SC 3 st together

FO:  fasten off


Directions:

Coming soon…..

Happy Crocheting…

Legal:
--don't use/claim my design as your own
--don't use/claim my pics as your own
--okay to make and sale your finished work
--don't share my pattern electronically or in print format (without prior consent) but provide a link to my blog

Social Media:
If you are on the following sites, let's connect and hook up...
  • Instagram:  Rilla2u
  • Pinterest:  Rilla2u
  • Twitter:  Rilla2u
  • Facebook:  /rilla.edwards 
  • Etsy:  rilla2u 
  • TikTok:  rillae2u 

Wednesday, March 30, 2022

Spring Wreath

Dollar Tree DIY:

Spring Wreath


Dollar Tree has a great selection of floral items.  Here is the link to help you with ordering what you need to make this project: 


This is an absolutely gorgeous spring wreath made on a budget of about $12.00 from the Dollar Tree.  By simply, filling in with greenery and smaller buds, you’re able to produce a fuller, more beautiful wreath for your front door or wall decor. 

I add hot glue to the tips of the stems prior to inserting into the wreath. This is optional but I like the extra little security measure. 

Let’s get started…

Supplies:
12” foam wreath
(3) fern greenery
(2) eucalyptus greenery
6-8 floral bunches 
Hot glue gun


Directions:
First, I add the greenery, dipped in hot glue and then pushed into the wreath. 

Second, I add the main flower color as the greenery. 


Third, I add the smaller bunches of floral. And then, I continue until the wreath is as full as I want it to be. 

And voila — look how gorgeous it looks?  Quick, simple and inexpensive…


Happy Crafting…