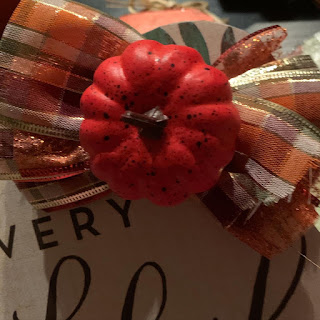
Thankful Plaque
This project literally takes less than 30 minutes from start to finish to complete. It has two openings in the back if you want to hang on the wall. You can simply place on your mantel or sit it on a photo picture holder. No matter how you choose to place this in your home it’s sure to draw attention. I added a few pumpkins to complete the look
Simple. Elegant. Beautiful.
Materials:
—The chipboard was purchased from Hobby Lobby at 40% off. So, $2.00.
—The “So Very Thankful” paper placemats came in a pack of 24 and was 40% off. So, just a couple dollars for the whole pack.
—2 Fall ribbon colors I had on hand
—1 mini pumpkin (I purchased pack of four from Dollar Tree for a $1.00)
—Hot glue gun and a can of spray glue or any glue to attach paper to chipboard
—Sharpie or pencil
—Scissors
Directions:
1. Lie the chipboard, centered on the placemat to assure you get the wording. Use your Sharpie to trace around the chipboard.
2. Use scissors and cut out the traced outline.
3. I used all-purpose spray glue and sprayed the chipboard. Place the paper cut-out on top. Smooth out and allow to dry. You will see the glue through the paper until it dries.
4. For the ribbon. I used 2 colors and cut 4 pieces, approximately 6” long, of each color. I bunched up in center and used ribbon to secure center.
5. Last, with the hot glue gun, I attached the ribbon to the top corner with hot glue. I then removed the clip from the back of the pumpkin, added hot glue and centered on bow.
THAT’S IT!!! How simple? It looks store-bought.
Total cost: $2.35
And, here’s a few pictures of the Sunflower Plaque I made for my daughter-in-law, basically following the same above steps...


No comments:
Post a Comment