Saturday, March 9, 2019

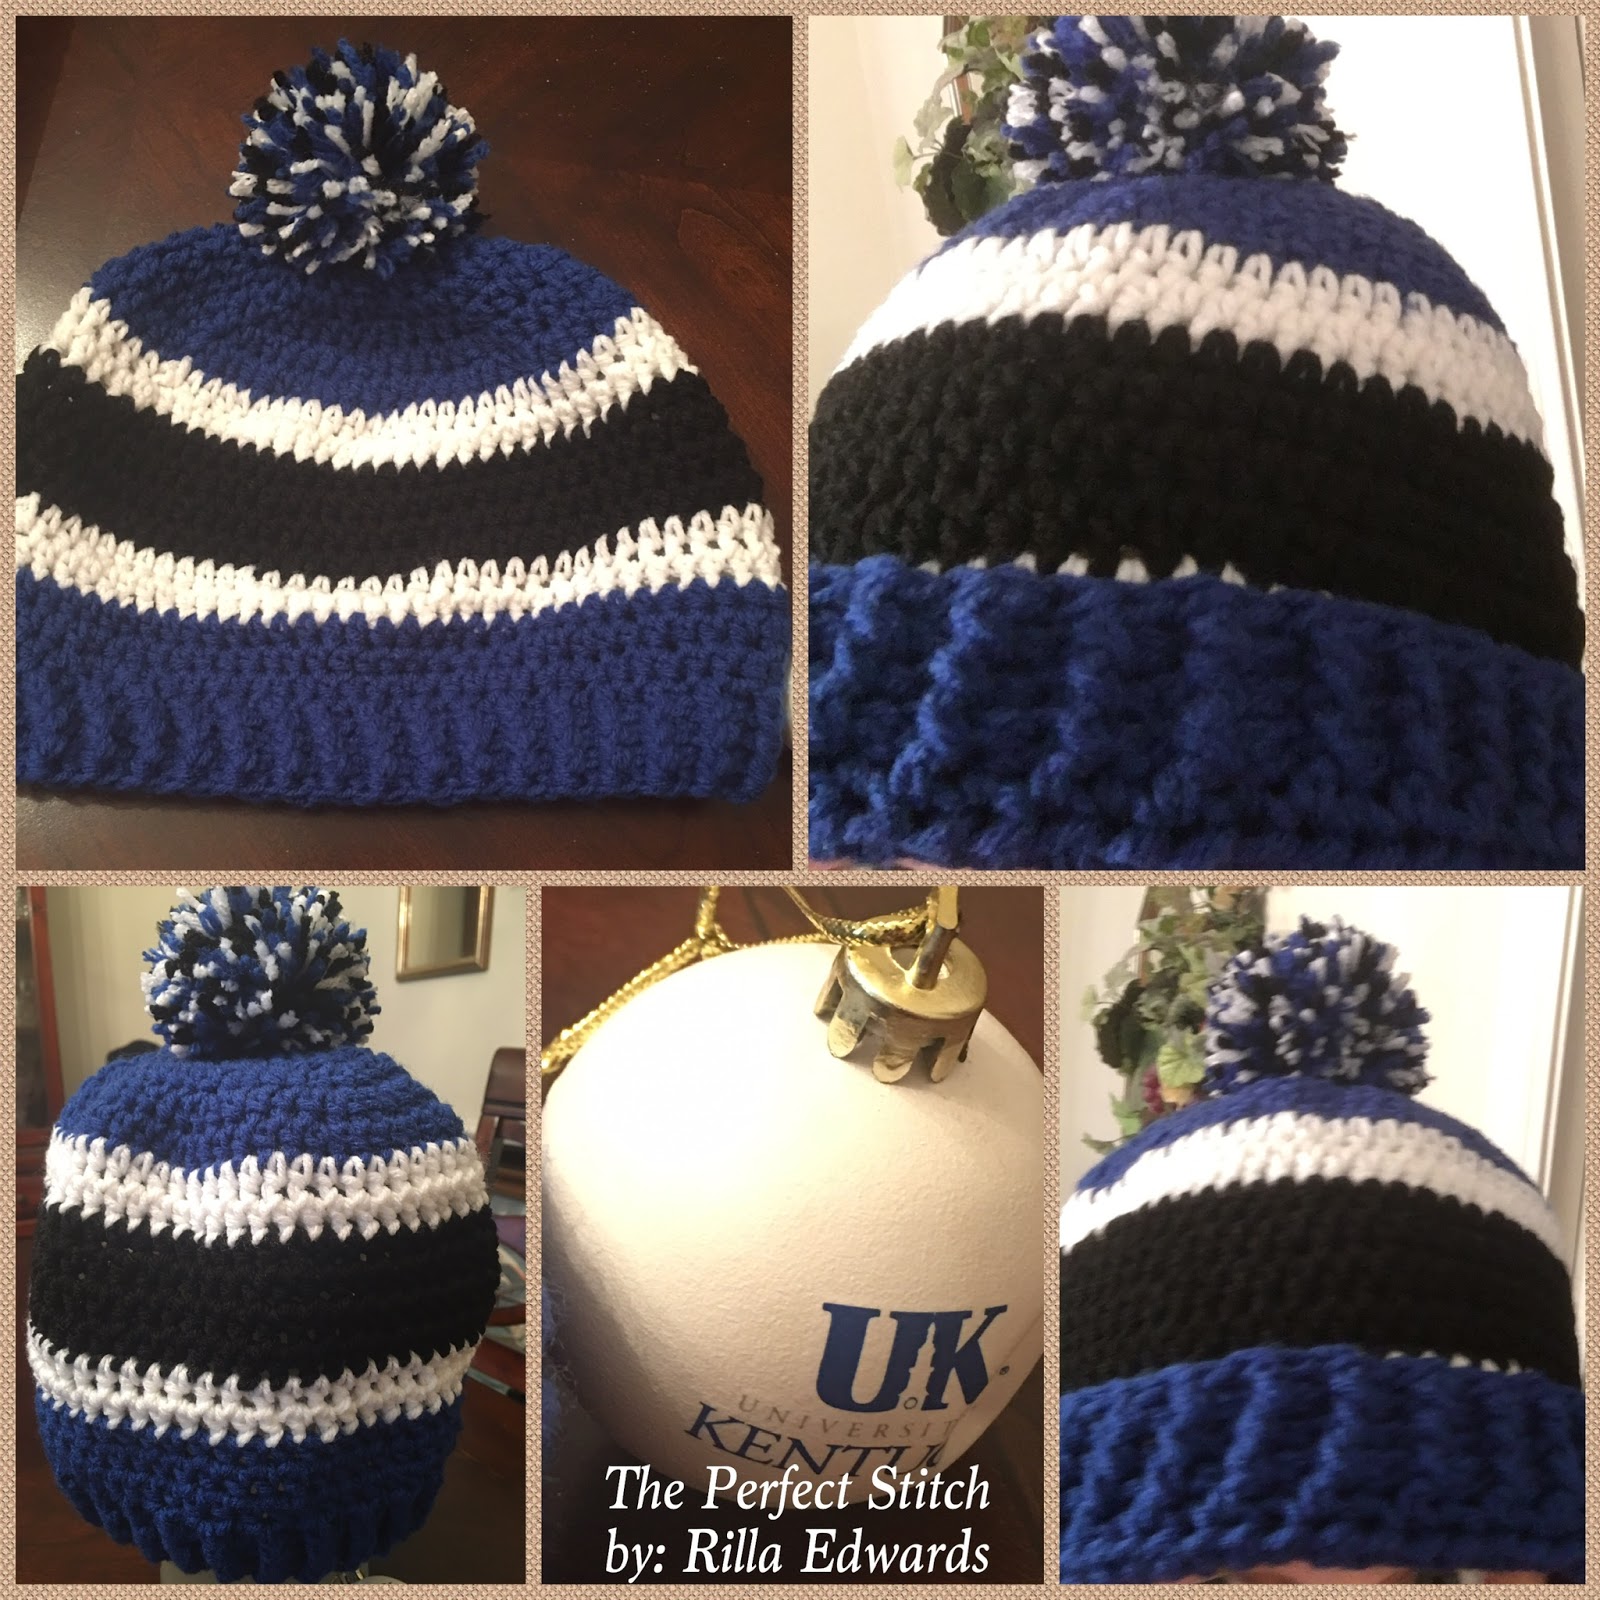
Men's "UK Wildcats" Hat

This hat was inspired by my love for the "UK Wildcats" Men's Basketball program.  My hubby and youngest brother are also big UK fans.  We love watching and playing basketball.

The pattern is enough to alter the colors to into your favorite team.  I used Red Heart Super Saver yarn for this project.  However, you can use any #4 worsted weight yarn; just note there may be a slight variation in overall size.

So, enjoy the pattern and support your favorite team!!!!
Men's "UK Wildcats" Hat

Size: 22" - 24" head circumference

Gauge:  I did not gauge pattern

Materials:
--6.0mm hook
--RHSS yarn in Royal, Black and White
--tapestry needle for weaving ends

U.S. Stitch Abbreviations:
Ch:  chain
St:  stitch(es)
Sl st:  slip stitch
HDC:  half double crochet
FPHDC:  front post half double crochet
BPHDC:  back post half double crochet
Rep:  repeat
MR:  magic ring
FO:  fasten off

Note:
I worked the first 6 rounds of this hat in the round.  Thereafter, I sl st join to the first st and Ch1. 

Directions:
1.  With Royal yarn, 10 HDC into MR.  (10)
2.  2 HDC into each st around.  (20)
3.  2 HDC into first st, 1 HDC in next st.  Rep around.  (30)
4.  2 HDC into first st, 1 HDC in next 2 st.  Rep around.  (40)
5.  2 HDC into first st, 1 HDC in next 3 st.  Rep around.  (50)
6.  2 HDC into first st, 1 HDC in next 4 st.  Rep around.  (60)
-- NOTE:  at the end of Round 6, your diameter will be 6.5" (this is the right diameter for a 19" - 21" head circumference) --
7.  2 HDC into first st, 1 HDC in next 5 st.  Rep around.  Sl st join to first st and FO.  Weave ends.  (70)
8.  Join White yarn into any st and Ch1.  1 HDC into each st around.  Sl st join and Ch1.  (70)
9.  1 HDC in each st around.  Sl st join to first st and FO.  Weave ends.  (70)
10.  Join Black yarn into any st and Ch1.  1 HDC into each st around.  St st join and Ch1.  (70)
11-13.  1 HDC into each st around.  Sl st join and Ch1.  At the end of Round 13, FO and weave ends.  (70)
14.  Rep #8.
15.  Rep #9.
16.  Join Royal yarn into any st and Ch1.  1 HDC into each st around.  Sl st join and Ch1.  (70)
17-19.  1 HDC into each st around.  Sl st join and Ch1.  (70)

At the end of Round 19, your hat will measure approximately 8" in length.  If desired, you can FO at the end of Round 19 and weave ends.  However, if you would like to add a band to flip up, then proceed below.

Band:
20-22.  FPHDC around first post, BPHDC around next post.  Rep around.  Sl st join and Ch1.  At the end of Round 22, FO and weave ends.  (70)

Pompom (optional):
I held all 3 color strands together.  I wrapped around 4 of my fingers 50 times.  I then tied a double knot in the center to secure.  I then trimmed the ends, fluffed and attached to the center top of the hat.
I hope you will enjoy this easy pattern.  Support your favorite team by making this in their team colors.
 Happy Crocheting...

Legal:
--don't use/claim my design as your own
--don't use/claim my pics as your own
--okay to make and sale your finished work
--don't share my pattern electronically or in print format (without prior consent) but provide a link to my blog

Social Media:
If you are on the following sites, let's connect and hook up...
  • Instagram:  Rilla2u
  • Pinterest:  Rilla2u
  • Twitter:  Rilla2u
  • Facebook:  /rilla.edwards 


Friday, February 1, 2019

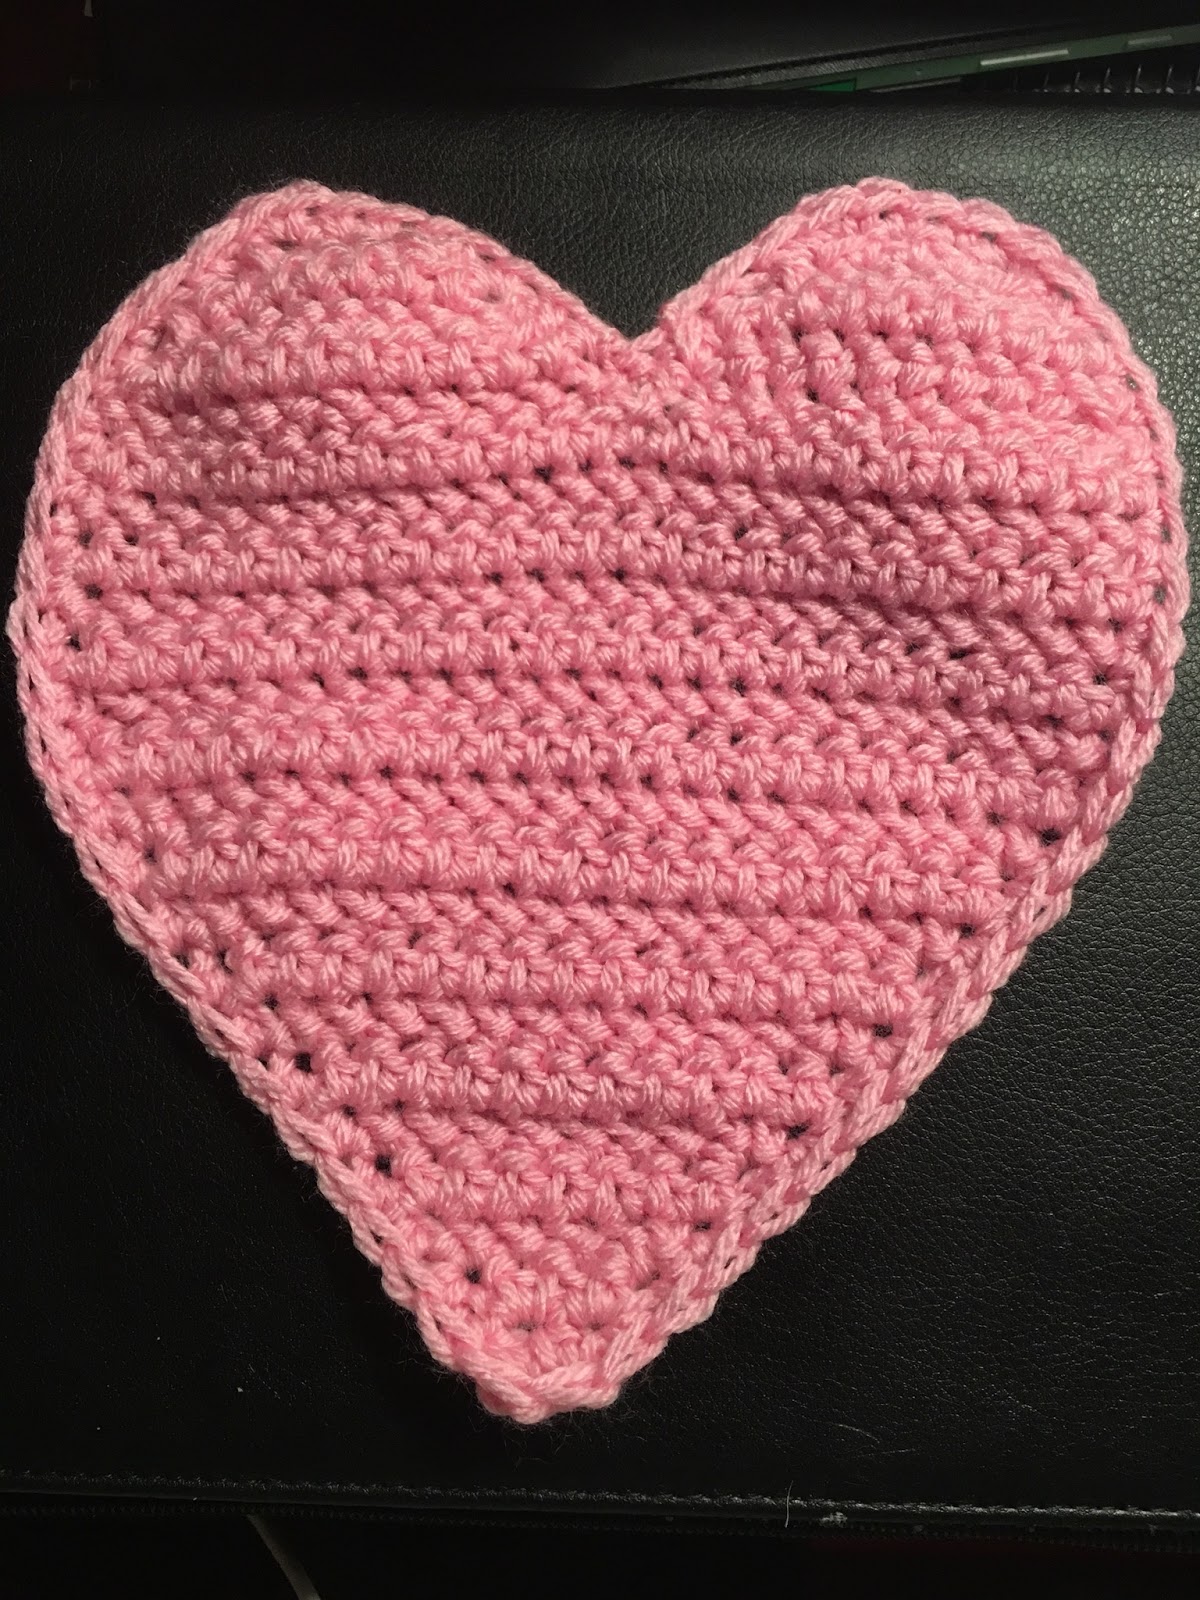
Happy Valentine Pillow Pal

With allergies reeking havoc on my body this week, I was slow completing my “Valentine’s” project. Seems the start of this year has been filled with more sickness than creativity.  I’m praying the remainder of this year proves better.

I wanted something easy, cute and fun. This project doesn’t use a lot of yarn and is the perfect size for kiddos, measuring approximately 7” x 7”.  I added a pocket on the backside for goodies. This would make a great little pillow to secure fallen baby teeth for the Tooth Fairy.

I used “I Love This Yarn” in red, pink and pink.  The safety eyes are 15mm.  I surfaced crocheted with a slip stitch for the red border, the eyebrows and the mouth. Of course, you could embroider this or make chain stitches and attach.

Happy Valentine Pillow Pal Pattern

Size:  7” x 7”

Materials:
—4.0mm & 5.5mm hooks
—“I Love This Yarn” in red, pink and white
—poly-fil
—1 set of 15mm safety eyes
—tapestry needle

U.S. Stitch Abbreviations:
Ch:  chain
Sl St:  slip stitch
St:  stitch(es)
SC:  single crochet
HDC:  half double crochet
HDC2tog:  half double crochet 2 stitches together (creates a decrease) 
Rep:  repeat
MR:  magic ring
FO:  fasten off

Directions:

(make 2 heart panels):
1.With Pink yarn, Ch3.  HDC in 2nd ch from hook and next ch.  Ch1 and turn.  (2)
2.  2 HDC in each st across.  Ch1 and turn.  (4)
3.  2 HDC in first st, 1 HDC in next 2 st, 2 HDC in last st.  Ch1 and turn.  (6)
4.  2 HDC in first st, 1 HDC in next 4 st, 2 HDC in last st.  Ch1 and turn.  (8)
5.  2 HDC in first st, 1 HDC in next 6 st, 2 HDC in last st.  Ch1 and turn.  (10)
6.  2 HDC in first st, 1 HDC in next 8 st, 2 HDC in last st.  Ch1 and turn.  (12)
7.  2 HDC in first st, 1 HDC in next 10 st, 2 HDC in last st.  Ch1 and turn.  (14)
8.  2 HDC in first st, 1 HDC in next 12 st, 2 HDC in last st.  Ch1 and turn.  (16)
9.  2 HDC in first st, 1 HDC in next 14 st, 2 HDC in last st.  Ch1 and turn.  (18)
10.  2 HDC in first st, 1 HDC in next 16 st, 2 HDC in last st.  Ch1 and turn.  (20)
11.  2 HDC in first st, 1 HDC in next 18 st, 2 HDC in last st.  Ch1 and turn.  (22)
12.  2 HDC in first st, 1 HDC in next 20 st, 2 HDC in last st.  Ch1 and turn.  (24)
13-19.  1 HDC in each st across.  Ch1 and turn.  (24)
Forming first lobe:
20.  HDC2tog, 1 HDC in next 8, HDC2tog.  Ch1 and turn.  (10)
21.  HDC2tog, 1 HDC in next 6, HDC2tog.  Ch1 and turn.  (8)
22.  HDC2tog, 1 HDC in next 4, HDC2tog.  Ch1 and turn.  (6)
23.  HDC2tog, 1 HDC in next 2, HDC2tog.  FO and weave ends.  (4)
Forming second lobe:
Rep steps 20-23 on the opposite side of Row 19.

Make a 2nd panel piece.

(This STEP is optional):
Once I had the panels made.  I wanted to give them a clean look.  So, I joined Pink yarn in any stitch and SC evenly around the perimeter of each panel.  Of course, this is optional, since the 2 panel pieces will be joined together and either SC together or whipstitched.
Now, we are ready to make one panel the front side for the face.  But first:

SPECIAL NOTE:  If you don't know how to surface crochet, you can opt to just embroider the features on or you could make chain stitches and attach. 


So, let's proceed with what I did:
1.  With a 4.0mm hook and Red yarn, I surfaced sl st crocheted around the heart.  I worked mine 1 stitch in all the way around.  FO and weave ends.

2.  Eyes:  I used a set of 15mm black safety eyes.  The eyes are added at Row 13, center, with a 5 stitch gap between the 2.  (see below pic)
3.  Cheeks (make 2):  With 4.0mm hook and Red yarn, 6 SC into MR.  Pull center to tighten.  And, then for the 2nd round, place 2 SC in each st around.  Sl st join to the first st and FO.  Leave a long enough tail for attaching each cheek.  (see above pic)

4.  Eyebrows:  With 4.0mm hook and Red yarn, I surface sl st crochet 7 st for each eyebrow.  FO and weave ends.  Rep for 2nd eyebrow.  (see below pic)
5.  Mouth:  With 4.0mm hook and Red yarn, I surface sl st crochet 7 st for my slightly lopsided-grin.  FO and weave ends.  (see above pic)


Tag (make 2):
1.  With 4.0mm hook and White yarn, Ch8.  SC in 2nd ch from hook and across.  Ch1 and turn.  (7)
2-4.  1 SC in each st across.  Ch1 and turn.  (7)
5.  When you turn, you will be working down the short side (the end).  1 SC in each end st.  Ch1 and turn.  (4)
6.  1 SC in each st across.  Ch1 and turn.  (4)
7.  1 SC in first st.  SC2tog.  1 SC in last st.  Ch1 and turn.  (3)
8.  1 SC in each st across.  Ch1 and turn.  (1)
9.  SC3tog.  Ch1 and turn.  (1)
10.  1 SC in st.  FO and leave a long tail for attaching.
Rep 1 - 10 for 2nd tag.

XOX:
1.  First, you are going to use one Tag to place XOX.  I used pink embroidery thread for this.  Any lightweight yarn will work.  I freehand embroidered the XOX and tied double and triple knots on the backside to secure.

2.  Now, join the second tag to the first tag and whipstitch around to secure the 2 together, hiding the backside of your embroidering.
3.  Now use a few whipstitches to join your tag to the heart lobe.  (see below pic)

Pocket:
1.  With 5.5mm hook and Pink yarn, Ch16.  SC in 2nd ch from hook and across.  Ch1 and turn.  (15)
2-12.  SC across.  Ch1 and turn.  However, at the end of Row 12, FO and leave a long tail for attaching the sides and bottom to the center, back side of the heart.  Leave the top of the pocket open.

  And, that's it for this super cute, quick and easy project for Valentine's Day!!!!  I think this "Happy Valentine Pillow Pal" would also make a great accessory to use for any baby tooth that may fall out in the month of February.  The pocket is a great place to secure the baby tooth for the Tooth Fairy to retrieve and to leave a surprise...

Few ideas:
1.  This would be cute in yellow, blue, green - basically any color if you want to use it as a Tooth Fairy Pillow....
2.  Make the front panel and use as an Applique.
3.  Make the tag portion circular and then you can hang this heart on a door, in a bathroom around a knob for kids to have easy access to their toothbrushes and toothpaste in the back side pocket.
4.  I'm sure there's lots of different ways to use this cute Pillow Pal.  I'd love to see your creations and ideas from this!!!

Enjoy!!!
Happy Crocheting...

Legal:
--don't use/claim my design as your own
--don't use/claim my pics as your own
--okay to make and sale your finished work
--don't share my pattern electronically or in print format (without prior consent) but provide a link to my blog

Social Media:
If you are on the following sites, let's connect and hook up...
  • Instagram:  Rilla2u
  • Pinterest:  Rilla2u
  • Twitter:  Rilla2u
  • Facebook:  /rilla.edwards  


Sunday, January 27, 2019

Andrew’s Hat

This super cute, quick and easy hat was made with Red Heart Super Saver yarn.  I used a small amount of multiple colors I had in my stash.

I plan on making the matching mittens, booties and a blanket to go with this hat for my daughter-in-law's newest addition to her family, a beautiful little nephew, named Andrew.

So, click on the PIN button below and SAVE so you won't forget to come back to make this complete set.

Enjoy!!!
Andrew’s Hat Pattern

Size:  0 - 3 months (15”-16” Head Circumference)

Materials:
—5.5mm hook
—RHSS yarn in Aran, Turquoise, Yellow and Red (or colors in your stash) - total of 60-80 yds
—tapestry needle for weaving

U.S. Stitch Abbreviations:
Ch:  chain
Sl St:  slip stitch
St:  stitch(es)
SC:  single crochet
DC:  double crochet
FPDC:  front post double crochet
BPDC:  back post double crochet
Rep:  repeat
MR:  magic ring
FO:  fasten off

Special Note:
At the end of each round, slip stitch join the last stitch to the first stitch and Ch1.

Directions:
1.  With Aran yarn, 6 SC into MR.  (6)
2.  2 SC in each st around.  (12)
3.  2 SC in first st, 1 SC in next st.  Rep around.  (18)
4.  2 SC in first st, 1 SC in next 2 st.  Rep around.  (24)
5.  2 SC in first st, 1 SC in next 3 st.  Rep around.  (30)
6.  2 SC in first st, 1 SC in next 4 st.  Rep around.  (36)
7.  2 SC in first st, 1 SC in next 5 st.  Rep around.  (42)
8.  2 SC in first st, 1 SC in next 6 st.  Rep around.  FO Aran yarn.  (48)

— 48 SC stitches = a little over a 5” diameter —

9.  Join Turquoise yarn in any st and Ch1.  DC in each st around.  FO yarn.  (48)
10.  Join Aran yarn in any st and Ch1.  SC in each st around.  (48)
11.  SC in each st around.  FO yarn.  (48)
12.  Join Yellow yarn in any st and Ch1.  DC in each st around.  FO yarn.  (48)
13-14.  Rep 10-11.  (48)
15.  Join Red yarn in any st and Ch1.  DC in each st around.  FO yarn.  (48)
16.  Join Aran yarn, SC in each st around.  (48)
17.  SC in each st around.  (48)
18.  DC in each st around.  (48)
19.  This round you will be work your DC st around the post of the precious round.  You will FPDC, FPDC, then BPDC.  Rep around.  Join.  FO.  Weave ends.  (48)

Pom (optional):
I wrapped Aran yarn around 3 of my fingers 50 times.  Tied double knot in center.  Trimmed ends and attached to the center top.
 
Happy Crocheting...

Legal:
--don't use/claim my design as your own
--don't use/claim my pics as your own
--okay to make and sale your finished work
--don't share my pattern electronically or in print format (without prior consent) but provide a link to my blog

Social Media:
If you are on the following sites, let's connect and hook up...
  • Instagram:  Rilla2u
  • Pinterest:  Rilla2u
  • Twitter:  Rilla2u
  • Facebook:  /rilla.edwards 


Wednesday, January 23, 2019

Speckled Sand Hat

Happy Monday!!!  I’m not sure how the weather is where you are, but here in North Carolina it was so cold today, down in the 20’s.  I know a lot of places has it worse than here, but I’m just not used to 20’s temperature...

Here’s a new hat design for you all.  I named it, “Speckled Sand.”  The yarn is Lion Brand’s Vanna’s Choice in Oatmeal.  It’s a #4 worsted weight yarn.  I used a 5mm hook.  The pom is optional.  But, I truly think this pom looks so good on this hat top.

I hope you all will enjoy this beautiful textured hat as much as I do.  

Speckled Sand Hat Pattern
Size:  20”- 22” Head Circumference

Materials:
—5.0mm hook
—1 skein of Lion Brand’s Vanna’s Choice In Oatmeal
—1 pom (optional)
—tapestry needle (for weaving)

U.S. Stitch Abbreviations:
Ch:  chain
Sl St:  slip stitch
St:  stitch(es)
HDC:  half double crochet
Rep:  repeat
MR:  magic ring
FO:  fasten off

Special Stitches:
1.  HDC Crossover Stitch:  Skip first stitch and place half double crochet into the next stitch.  Then, place half double crochet into the skipped stitch.  Continue to repeat around.


2.  HDC in 3rd loop of HDC stitch:  If you look at the HDC stitch, you will see the front and back stitches on top; if you look on the backside you will see a 3rd loop.  This is where you will want to place your HDC stitches. 

Directions:
1.  10 HDC st in MR.  Sl St join to first st and Ch1.  (10)
2.  2 HDC st in each st around.  Sl St join to first st and Ch1.  (20)
3.  2 HDC st in first st, 1 HDC st in next st.  Rep around.  Sl St join to first st and Ch1.  (30)
4.  2 HDC st in first st, 1 HDC st in next 2 st.  Rep around.  Sl St join to first st and Ch1.  (40)
5.  2 HDC st in first st, 1 HDC st in next 3 st.  Rep around.  Sl St join to first st and Ch1.  (50)
6.  2 HDC st in first st, 1 HDC st in next 4 st.  Rep around.  Sl St join to first st and Ch1.  (60)
7.  2 HDC st in first st, 1 HDC st in next 5 st.  Rep around.  Sl St join to first st and Ch1.  (70)
8-10.  1 HDC in the 3rd loop of the previous row's HDC st.  Sl St join to first st and Ch1.  (70)
11-12.  1 HDC, using the Crossover St in each st around.   Sl St join to first st and Ch1.  (70)
13-15.  Rep #8-10.  (70)
16-17.  Rep #11-12.  (70)
18-20.  Rep #8-10.  At the end of Round 20, FO and weave ends.  (70)


Pom (optional):
You can add a faux fur pom, like mine, or you can make a yarn pom to add.  The hat will look good without a pom.  I just so happened to have found this pom in my craft drawer and thought it was perfect to top off this hat.  
And look how cute my grandson, Gabriel, looks wearing my Speckled Sand Hat!!!!


Happy Crocheting...
Legal:
--don't use/claim my design as your own
--don't use/claim my pics as your own
--okay to make and sale your finished work
--don't share my pattern electronically or in print format (without prior consent) but provide a link to my blog

Social Media:
If you are on the following sites, let's connect and hook up...
  • Instagram:  Rilla2u
  • Pinterest:  Rilla2u
  • Twitter:  Rilla2u
  • Facebook:  /rilla.edwards 


Monday, January 14, 2019

Parisian-Style Hat and Scarf

I hope each of you are starting the new year off with your creative juices flowing.  As for me, I cut about 10-12 inches off my hair and dyed it a brownish/black color.  I wanted to change things up.  This is my first time with this hair color and I'm liking the color.

I've also found myself with a gym membership at "Planet Fitness" with a few ladies.  We have been faithfully going for the past 3 weeks, at least 3 times a week.  I'm really hoping to get in shape, tone the body and shed some pounds.

I must admit my inspiration has been a little dull lately.  I think I've hit a rut or maybe just a lazy spell with the cold winter weather.  I have quite a few new project ideas.  I just haven't felt like crocheting.  

Into our home, we added a new family member.  A pure-bred, German Shepherd, that I have named Riley Brooke.  She's about 13 weeks old now.  I'm keeping her in our sunroom until she gets fully trained.  She is as much work as a baby, with her potty training, feeding and teething.  

The new year has definitely proven to be about change and being busy on my homefront.  Below, is a selfie picture of myself.  I usually don't like to model my own projects.  I can't seem to take good pics, but I wanted to share my "Parisian-Style Hat and Scarf" set that I made using Lion Brand's Homespun yarn in Edwardian.  This pattern sorta evolved into itself.  

I hope each of you have a wonderful, blessed and productive 2019....   

Parisian-Style Hat and Scarf Set 
Happy Crocheting...
Legal:
--don't use/claim my design as your own
--don't use/claim my pics as your own
--okay to make and sale your finished work
--don't share my pattern electronically or in print format (without prior consent) but provide a link to my blog

Social Media:
If you are on the following sites, let's connect and hook up...
  • Instagram:  Rilla2u
  • Pinterest:  Rilla2u
  • Twitter:  Rilla2u
  • Facebook:  /rilla.edwards 


Sunday, January 13, 2019

Stylish Denim-Look Hat

I was yarn shopping at Hobby Lobby on Saturday and came across this “Marbled Denim” yarn by "I Love This Yarn" and immediately knew I wanted to use it to design a new hat pattern.  It’s #4 acrylic yarn, 252 yarns per skein.

It looks gorgeous with or without a pom.  I used approximately 1/2 a skein of yarn.

Stylish Denim-Look Hat
Size:  Average Adult-Sized Woman's Head

Materials:
--5.0mm hook
--1 skein of "I Love This Yarn," in Marbled Denim
--1 faux fur pom (optional)
--tapestry needle  

U.S. Stitch Abbreviations:
Ch:  chain
Sl st:  slip stitch
St:  stitch(es)
SC:  single crochet
DC:  double crochet
FPDC:  front post double crochet
BPDC:  back post double crochet 
BLO:  back loops only
Rep:  repeat
MR:  magic ring
FO:  fasten off

Note:  
1.  Ch2 does not count as a stitch.
2.  Sl st join into the first st of each round and not into the Ch2.
Directions:
1.  10 DC into MR.  Sl st join to first st and Ch2.  (10) 
2.  2 DC in each st around.  Sl st join and Ch2.  (20)
3.  2 DC in first st, 1 DC in next st.  Rep around.  Sl st join and Ch2.  (30)
4.  2 DC in first st, 1 DC in next 2 st.  Rep around.  Sl st join and Ch2.  (40) 
5.  2 DC in first st, 1 DC in next 3 st.  Rep around.  Sl st join and Ch2.  (50)
6.  2 DC in first st, 1 DC in next 4 st.  Rep around.  Sl st join and Ch2.  (60)  
7.  2 DC in first st, 1 DC in next 5 st.  Rep around.  Sl st join and Ch2.  (70)  
8.  FPDC around the post of the first 2 st.  1 BPDC around the post of the next st.  Rep around.  Sl st join and Ch2.  (70)
9-16.  Rep #8.  (70)
17.  1 SC in the BLO of each st around.  Sl st join and Ch1.  (70)
18-19.  Rep #17.  (70)
20.  1 SC in the BLO of each st around.  Sl st join and FO.  Weave ends.  

Optional:
1.  Attach faux fur pom to the top center.  
2.  You could make your own yarn pom.
3.  Or no pom at all.  It looks just as great without a pom.  


I hope you will enjoy this very stylish and FREE pattern.  If you make this, I would love to see your finished work.  Please hashtag:  #rilla2u.  I welcome any questions and/or comments.

Happy Crocheting...
Legal:
--don't use/claim my design as your own
--don't use/claim my pics as your own
--okay to make and sale your finished work
--don't share my pattern electronically or in print format (without prior consent) but provide a link to my blog

Social Media:
If you are on the following sites, let's connect and hook up...
  • Instagram:  Rilla2u
  • Pinterest:  Rilla2u
  • Twitter:  Rilla2u
  • Facebook:  /rilla.edwards 


Thursday, January 3, 2019

DIY: Bed for Large Puppy/Dog

Well, my home has welcomed a 10-week old German Shepherd this past Sunday.  She's a beautiful girl puppy, weighing in at almost 25 pounds right now.  She is going to easily double this weight once she's full grown.  It has taken me from Sunday until this morning to finally settle on her name - Riley Brooke.

Anyway, we went to Wal-Mart and Pet Smart and, gee, dog beds are expensive.  Wow!!!  So, I sent my hubby back to Wal-Mart to buy supplies so I could DIY a pet bed.  All that was needed was:  a fleece holiday blanket on Clearance Sale ($2.50 and it's dog-themed - yay!!!) and 2 jumbo pillows ($3.97 each).

Total cost for my Puppy/Dog Bed:  $11.00...

Below, I will explain how I made mine.  Added bonus, mine easily comes apart so you can launder the blanket and the pillows and then reassemble.

Large Puppy/Dog Bed

Size:  Approximately 24" x 32"

Materials:
--1 Fleece Blanket, measures 50" x 60"
--2 Jumbo Pillows, measures 20" x 28"
--(4) 1" buttons
--(6) elastic ponytail holders
--pins to keep border on one side secure while sewing
--Needle and thread (I used turquoise so it would show up in the pics)

Directions:
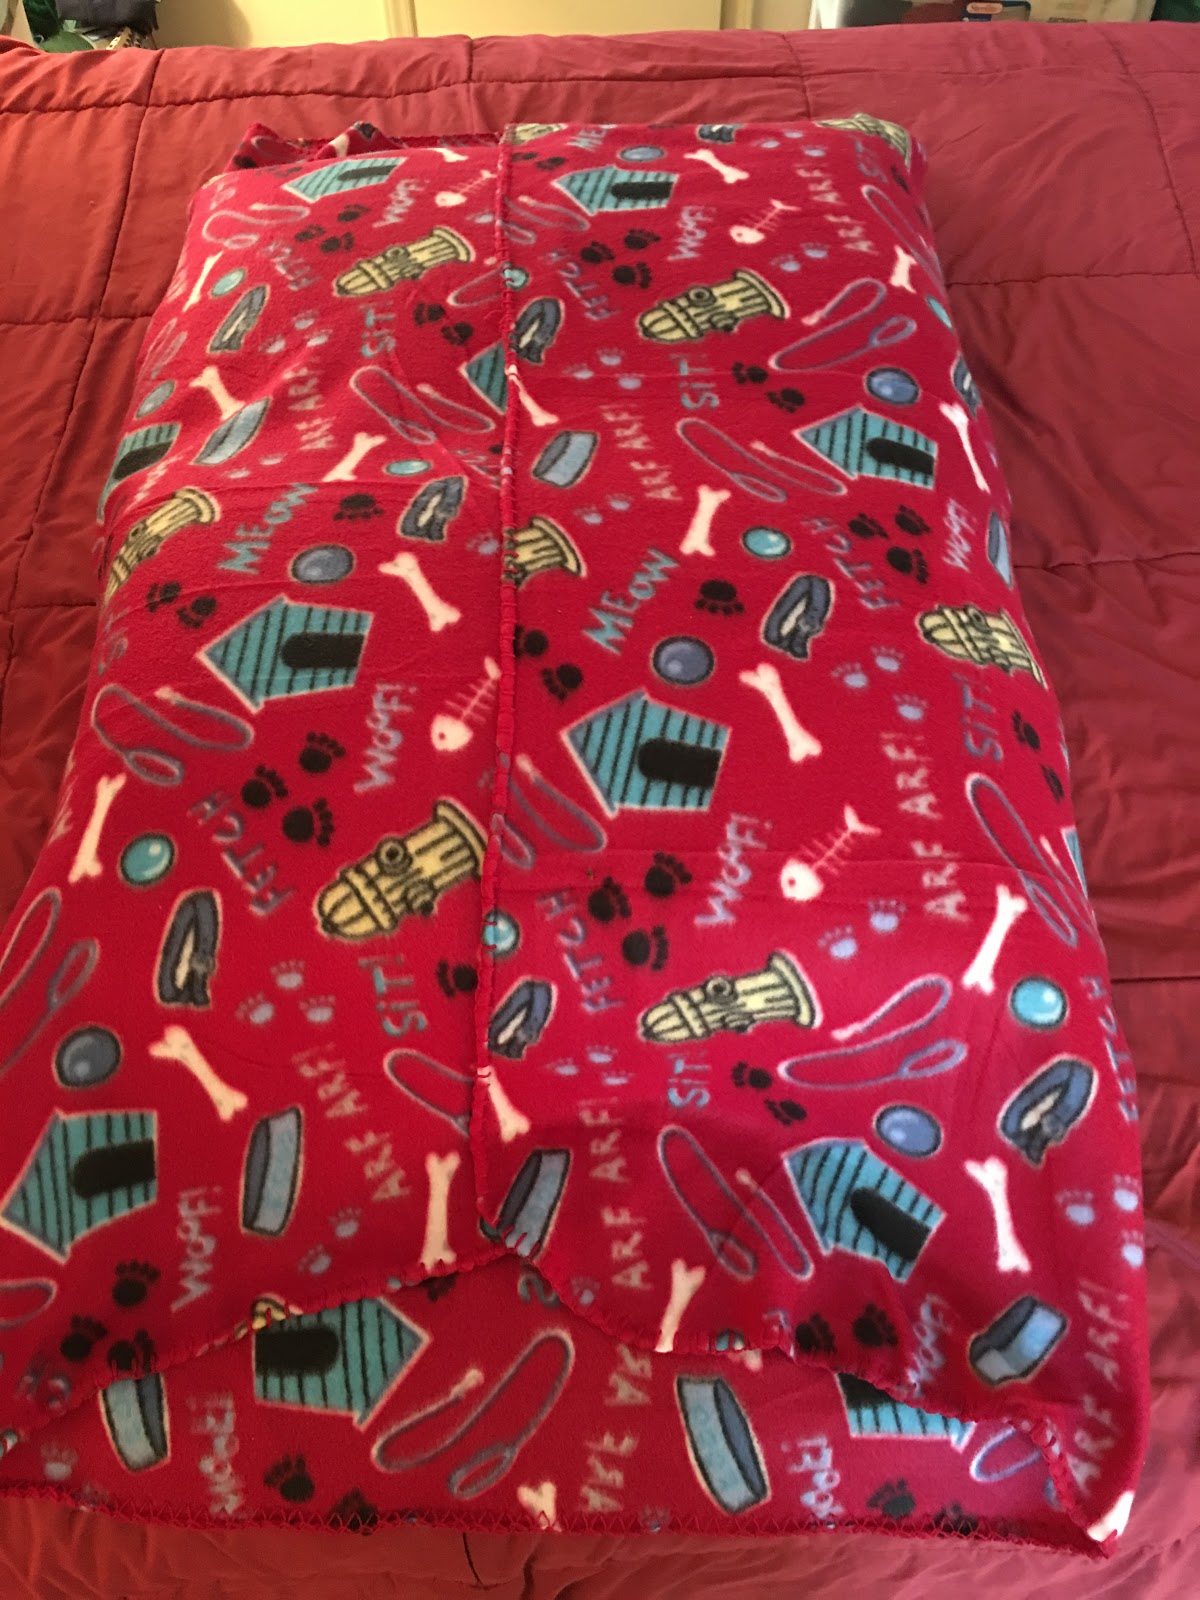
1.  First you will want to lay your blanket flat and place the pillows in the center.  (see my pic)
2.  Fold the left side and right side inward to make sure you have about a 2" overlap.
Now, you will open the right side back out, flat.  I turned the side 2" in to sew edging.  I sewed by hand.  You can use your sewing machine if wanted.  With only sewing in 1 (one) side, I just found it simpler to complete by hand.  It only took me a few minutes to complete this.  I used pins to secure and removed as I sewed edging.

Now on the left side panel, I added my 4 buttons about 7-8" apart.  (see my pic)
 3.  At this point, you are ready to attach the ponytail holders.  4 ponytail holders are going to be placed on the right side, on top, attached 2" inward (where you can fill the rough edge), directly across from the 4 buttons.  (see my pic)

The 2 remaining ponytail holders will be placed - one on each end, at the center.  (see my pic)
 
 And, that's it for attaching and sewing on everything.  Easy, peasy, right?

Now, for the assembly.
1.  First you are going to secure the ponytail holders around the buttons.  Depending on the size of your ponytail holders, you may have to wrap it multiple times around the buttons.  I think for mine, it may have been 5 or 6 times.  I just used ponytail holders I had on hand. 
2.  Next, you are going to fold the ends - just like when you're wrapping a present.  Fold left side in to the center, fold right side in to the center, and then bring the center ponytail holder up to secure to the nearest button.  Again, you may have to wrap this ponytail holder multiple times to secure.
3.  Complete #2 on the opposite end.

And, that's it for a quick, simple and CHEAP way of making a Puppy/Dog Bed for larger animals.

Here's a completed pic of the bottom of the bed.  
Flip it over and you're done!!!  To launder, unwrap ponytail holders from buttons.  Wash gentle and air dry.  Reassemble and it's ready to use again...

And, here are a few pics of my puppy, Riley Brooke, enjoying her new bed.  The finished bed measures 24" x 32". 


I'd love to hear your feedback/thoughts on this simple project for your new canine family member.  If you make this, please hashtag (#rilla2u).

 PIN and SHARE this project on your boards.  

Copyright:
This is an original design by me, Rilla Edwards of The Perfect Stitch.  Please respect that and not copy/share my pattern but provide a link to my blog.