Friday, February 17, 2023

Spring Hat

 Spring Hat

I crocheted this super cute Spring Hat, using a 5.0mm hook and Crafter’s Secret yarn from Hobby Lobby. 

Quick and easy project. The brim can be turned up or down to change the look of it. I’m still trying to decide if I want to add any floral appliqués or buttons to it. 

I used double crochet and single crochet stitches for this hat project.  Beginner friendly project. 


 Happy Crocheting...


Legal:
--don't use/claim my design as your own
--don't use/claim my pics as your own
--okay to make and sale your finished work
--don't share my pattern electronically or in print format (without prior consent) but provide a link to my blog

Social Media:
If you are on the following sites, let's connect and hook up...
  • Instagram:  Rilla2u
  • Pinterest:  Rilla2u
  • Twitter:  Rilla2u
  • Facebook:  /rilla.edwards 
  • Etsy:  rilla2u 
  • TikTok:  rillae2u 
  • YouTube:  Rilla2u 

Thursday, February 16, 2023

Pencil Scarf

Pencil Scarf

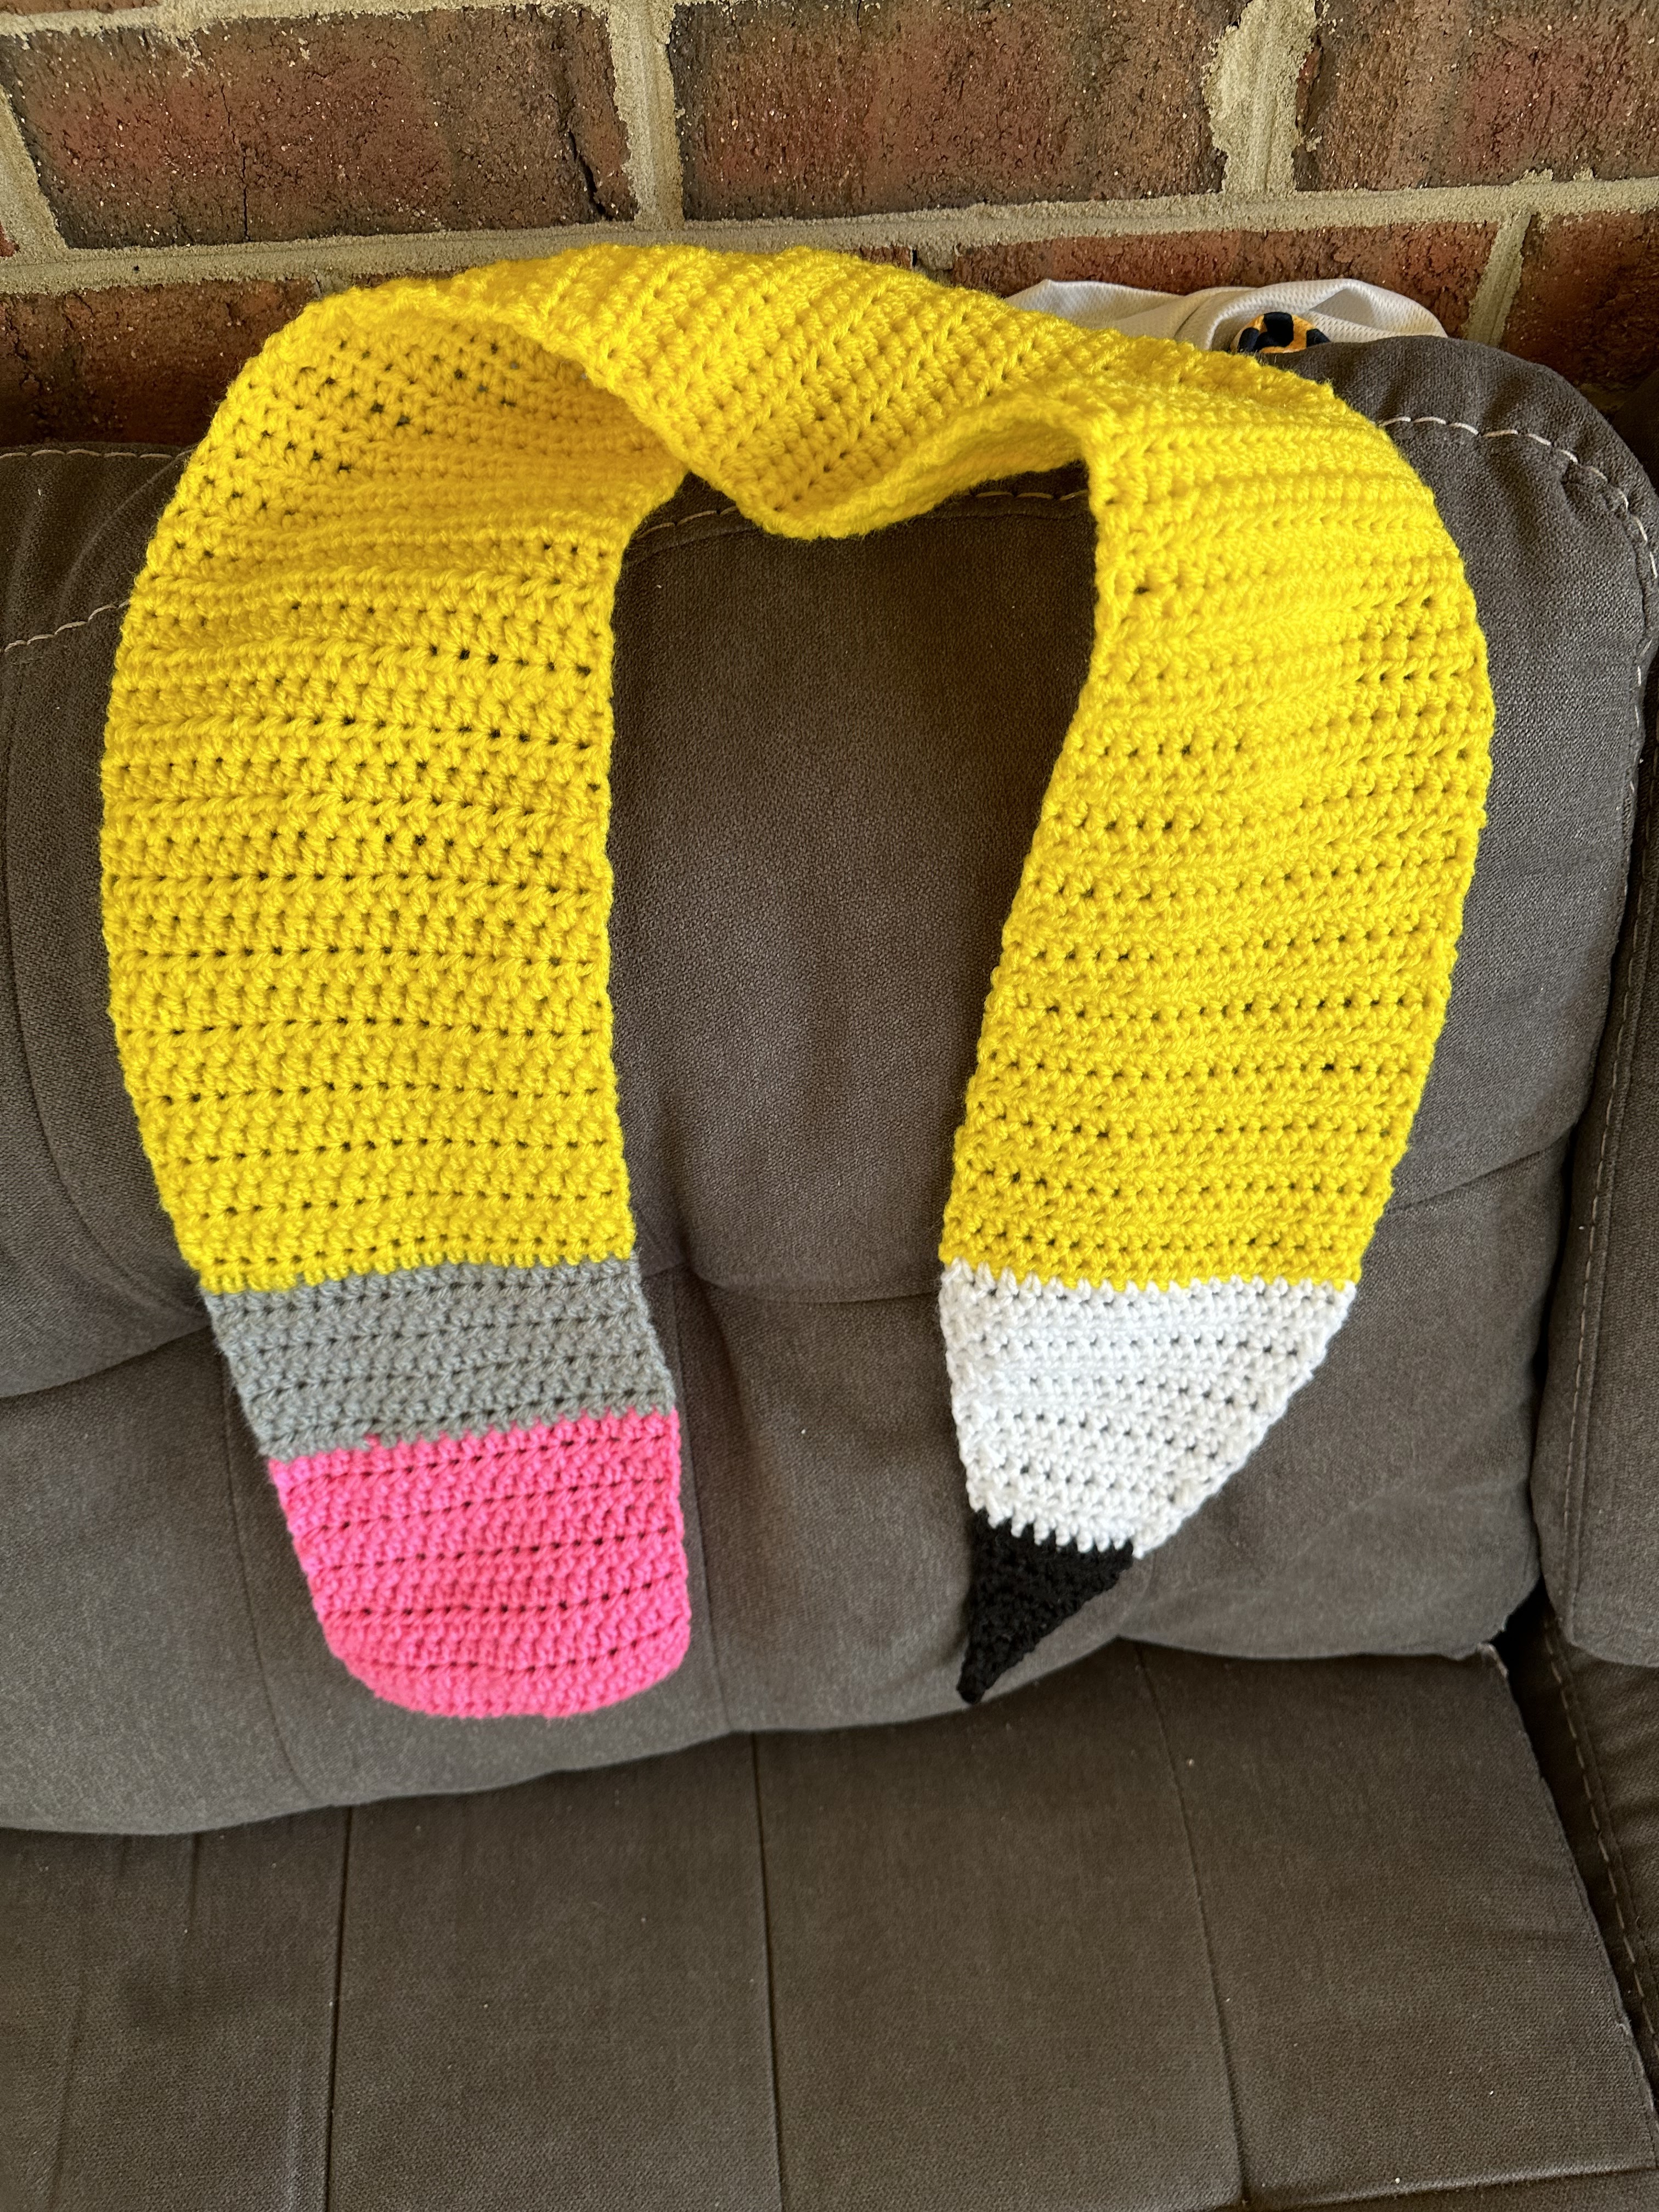
I crocheted this “Pencil Scarf” in less than two hours last night for my daughter-in-law, Laurel, who’s an elementary teacher.  I figured her kiddos would love seeing her wearing this.  

I used a 5.0mm hook and Red Heart Super Saver yarn I had on hand.  I made this approximately 5.5” wide and 52” long.  You can make this as wide or as long as you would like.

For mine, I started with a Chain 19. Each row had 18 HDC (half double crochet) stitches.  I worked 12 rows pink, 8 rows grey, 80 rows of grey, 11 rows of white and 9 rows of black. From the white through the black rows, I worked decrease rows.  

If you want to make this longer, then complete more than 80 rows of yellow. 

This is a cute and easy project to make for teachers. 


 Happy Crocheting...


Legal:
--don't use/claim my design as your own
--don't use/claim my pics as your own
--okay to make and sale your finished work
--don't share my pattern electronically or in print format (without prior consent) but provide a link to my blog

Social Media:
If you are on the following sites, let's connect and hook up...
  • Instagram:  Rilla2u
  • Pinterest:  Rilla2u
  • Twitter:  Rilla2u
  • Facebook:  /rilla.edwards 
  • Etsy:  rilla2u 
  • TikTok:  rillae2u 
  • YouTube:  Rilla2u 

Monday, February 13, 2023

USMC Beanie Hat

 USMC Beanie Hat

I crocheted this custom USMC beanie hat for a customer. I used my basic beanie pattern, added a black faux fur pom and attached a Marine logo patch to the center front. 

I used a 5.0mm hook and Mainstays Yarn in the color of Red.  I bought the Marine logo patch on Amazon.

This is an intermediate pattern.  It requires knowledge of double crochet front post and back post stitches for the border.  The hat itself is made with double crochet stitches.

 Happy Crocheting...


Legal:
--don't use/claim my design as your own
--don't use/claim my pics as your own
--okay to make and sale your finished work
--don't share my pattern electronically or in print format (without prior consent) but provide a link to my blog

Social Media:
If you are on the following sites, let's connect and hook up...
  • Instagram:  Rilla2u
  • Pinterest:  Rilla2u
  • Twitter:  Rilla2u
  • Facebook:  /rilla.edwards 
  • Etsy:  rilla2u 
  • TikTok:  rillae2u 
  • YouTube:  Rilla2u 


My Logo


Sunday, February 12, 2023

Super Bowl Wall Hangings…

Super Bowl Wall Hangings…

With today being Super Bowl Sunday, I wanted to share my two new Wall Hangings - Philadelphia Eagles and KC Chiefs!!!!

The wall hanging itself was easy to make.  A 5.0mm hook and worsted weight yarn of your color choice. I completed 30 HDC stitches per row for a total of 27 rows.  I then used a secondary color to evenly SC in each stitch around. Finally, I used a third color, with a wood skewer, and SC across the top.  Last, for the hanger, chain 65 and slip stitch attach to the opposite side and fasten off. Weave ends. To the base row, I added yarn pieces to make fringe.

Eagles


Chiefs

I surface crocheted “GO” onto each Wall Hanging.  I appliquéd a football for the lower right corner of each one. And, last, I added the team’s logo to the center of each one!!!

 Happy Crocheting...


Legal:
--don't use/claim my design as your own
--don't use/claim my pics as your own
--okay to make and sale your finished work
--don't share my pattern electronically or in print format (without prior consent) but provide a link to my blog

Social Media:
If you are on the following sites, let's connect and hook up...
  • Instagram:  Rilla2u
  • Pinterest:  Rilla2u
  • Twitter:  Rilla2u
  • Facebook:  /rilla.edwards 
  • Etsy:  rilla2u 
  • TikTok:  rillae2u 
  • YouTube:  Rilla2u 


Wednesday, February 8, 2023

Back from the Bahamas…

Amazing Girl’s Trip!!!!

After a 5- night cruise on the Carnival Sunshine to Nassau and Half Moon Cay, I thought I would return home motivated, inspired and energetic. However, my body had other plans. 

I return home and get diagnosed with Type A Flu. 

My girl’s trip was so much fun. It was my first time taking a cruise so I learned a lot of what to do and not to do for the next time. There was so much food - and it was soooo good. 

How wonderful it was to do no cooking, cleaning, absolutely nothing but enjoy the beautiful sounds of the ocean, the music, the laughter, being in the moment.  Wow!!!!

I could sit and stare at the blue water all day. It was simply breathtaking. Living on the east coast, this was my first time, and dream for me, to see and to swim, in a blue ocean. 

This pic of me is on Half Moon Cay. I had my hair done in Nassau. 

Carnival Sunshine made my trip so memorable. 


Happy Sailing…


Thursday, January 26, 2023

Easter Eggs to Dye

 Easter Eggs to Dye 

With the rising cost of eggs this year, I decided to make my own Easter eggs to dye, using 100% cotton yarn.  Plus, I love that these are Eco-friendly and vegan-friendly. 

The eggs are quick and easy to make. So, you can complete one in less than 10 minutes.  

How to Make the Eggs:

Materials:

-3.0mm hook

-cotton yarn, white

-Polyfil

-tapestry needle

U.S. Stitch Abbreviations:

Ch:  chain

Sl st:  slip stitch

St:  stitch(es)

Sc:  single crochet

MR:  magic ring

Dec:  decrease

Rep:  repeat

FO:  fasten off

Note:  pattern is worked in the round.  Use a stitch marker to keep track of the start of each new round and move stitch marker up accordingly.

Directions:

1.  6 SC into MR.  (6)

2.  2 SC in each st around.  (12)

3.  1 SC in each st around.  (12)

4.  1 SC in first st, 2 SC in the next st. Rep around.  (18)

5.  1 SC in each st around.  (18)

6.  1 SC in each of the first 2 st, 2 SC in the next st.  Rep around.  (24)

7-8.  1 SC in each st around.  (24)

9.  1 SC in each of the first 2 st, then dec st.  Rep around.  (18)

10.  1 SC in each st around.  (18)

11.  1 SC in first st, then dec st.  Rep around.  (12)

12.  1 SC in each st around.  (12)

Stuff with Polyfil or cotton yarn. (UPDATE:  the eggs dry faster stuffed with Polyfil, but you can use either or for stuffing)

13.  Dec 6x.  Sl st to first st and FO.  Weave tail in and out of last 6 st.  Pull tail to close up opening.  Weave ends. 


I’ve completed my first trial run - I stuffed 6 with cotton yarn and 6 with Polyfil.  I wanted to see if the filling used made any difference in the depth of the color and drying time.  

I will update this post later with the results I get.  

For the dye:

(Note:  you can buy the Easter Egg dye kit to use)

I used 4 of my canning jars in pint size.  You can use cups, bowls, whatever you have.

I boiled water.

Into each jar, I dropped approximately 18-20 drops of food coloring and 1-1/2 teaspoons of white vinegar.  Then, I filled with boiled water about 1/2 way up each jar.  

I used a pair of black plastic tongs from the Dollar Tree to put my eggs in and out of the jars.  Plus the tongs are great for squeezing excess liquid back into the jar.  This is a very important step; make sure you get as much of the excess liquid out as you can.

I placed each of my eggs in a cupcake liner.  Underneath the liner, I laid out a piece of wax paper - just to be safe!!! 


Look how gorgeous and vibrant they turned out!!!!! I’m so excited to make more eggs and try more colors….

 Happy Crocheting...


Legal:
--don't use/claim my design as your own
--don't use/claim my pics as your own
--okay to make and sale your finished work
--don't share my pattern electronically or in print format (without prior consent) but provide a link to my blog

Social Media:
If you are on the following sites, let's connect and hook up...
  • Instagram:  Rilla2u
  • Pinterest:  Rilla2u
  • Twitter:  Rilla2u
  • Facebook:  /rilla.edwards 
  • Etsy:  rilla2u 
  • TikTok:  rillae2u 
  • YouTube:  Rilla2u