

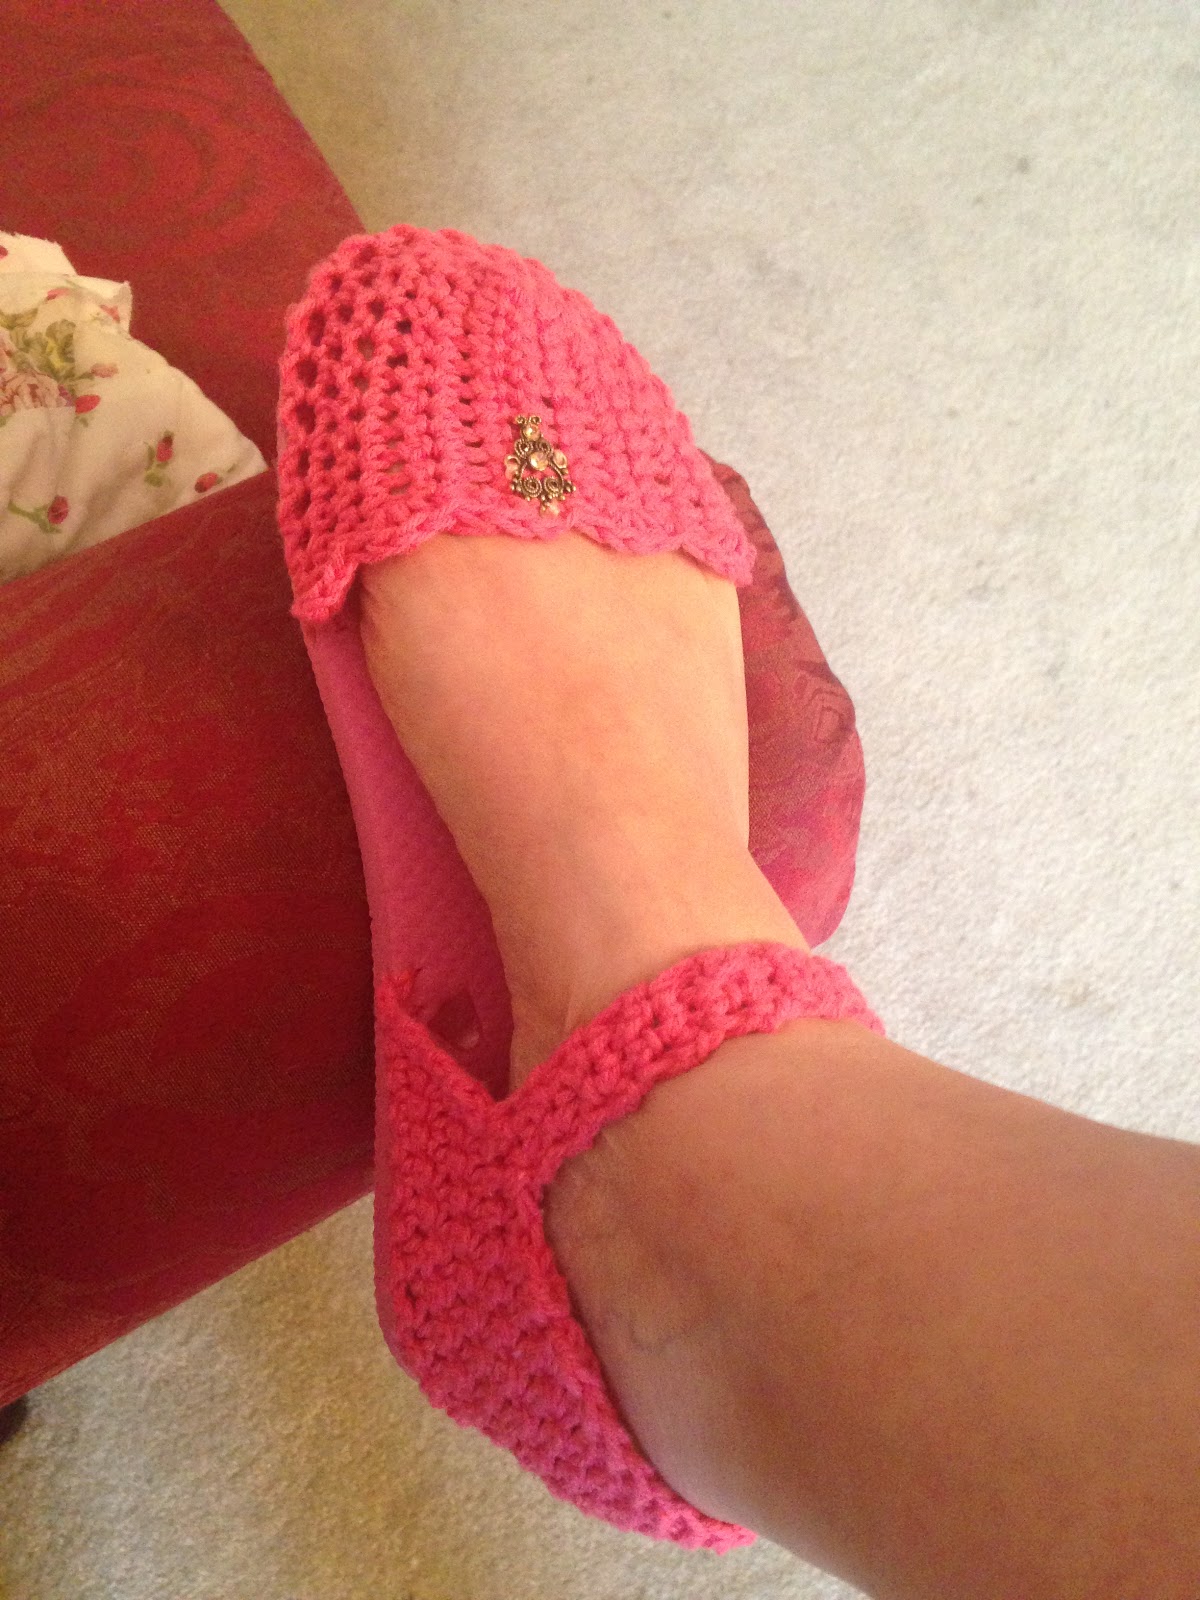
In designing these sandals I wanted to keep the pattern simple and easy to understand, and of course, for them to be cute and quick to make. And, I think I achieved this. I added little owl embellishments to the front, top center of mine, but this is completely optional.
"Pretty In Pink" Sandals


"Pretty In Pink" Sandals Free Pattern
Difficulty Level: Easy
Materials:
--2.5 and 3.0 mm hooks
--Awl or sharp needle for puncturing holes into soles
--1/2 skein of cotton yarn (I used "I Love This Cotton" from Hobby Lobby)
--2 small buttons for the clasps
--embellishments (optional)
--1 pair of flip-flops (I wear a size 10 in shoes; so, I bought a pair of Medium, instead of Large)
--Tapestry needle for weaving
Stitch Abbreviations:
Ch: chain
Sl st: slip stitch
St: stitch(es)
Sk: skip
SC: single crochet
HDC: half double crochet
FO: fasten off
Special Note: I wear a size 10 (and sometimes 11) in shoes. I bought a Medium pair of flip-flops to make my sandals with. I think with the yarn and the give/flexibility it has, you need to size down on the flip-flops.
Directions:
Sole Preparation:
1. Before you can even begin to crochet your sandals, you have to prepare your soles. Cut off the
plastic toe divider and remove the plastic from the holes. Now, if you can trim down enough and not distort the shape of the sole, then you could possibly leave the plastic in the holes - as you can see in the pics I did with mine.
2. Making the holes: with an awl or needle - for the heels: I started a 1/4" above on each side of the back holes. I then measured 1/4" from the first hole to make my 2nd hole and remaining holes around. You will want to make your hold from the side, holding your awl or needle slanted to puncture through the top. Be careful not to tear through the sole. You will want to take your time and make your holes carefully and evenly around.
3. For the holes at the front of the sole, I placed the last holes on each side where the sole's rounded portion started to taper off into a straight line (which would be the area of the sole where the base of your toes would be - you would want your holes from there forward) - if this is confusing, please comment or message me!!!!
So, now the holes are made and you're ready to begin. For my shoes, I have 29 holes in the back section and 24 holes in the front section.
Heel Portion:
1. With your 2.5mm hook, starting with the heel section, you will want to take your time, as not to puncture through your soles, working your hook from the side, into the top, you will want to join your yarn with a sl st and ch1. Work a SC st through each hole around. Ch1 and turn. (29)
2. Switch to 3.0mm hook. 1 SC in each st around. Ch1 and turn. (29)
3-7. 1 SC in each st around. Ch1 and turn.
8. Sl st into the 1st st (place a stitch marker here - this is where you will make your strap on one side and the button placement for the opposite side) and the following st. SC into the 3rd st and into the next 24 st. Leave last st unworked (place a stitch marker here - this is where you will make your strap on one side and the button placement for the opposite side). Ch1 and turn. (25)
9. Sl st into the 1st st, SC in the next 23 st. Leave last st unworked. Ch1 and turn. (23)
10. Sl st into the 1st st, SC in the next 21 st. Leave last st unworked. Ch1 and turn. (21)
11. Sl st into the 1st st, SC in the next 19 st. Leave last st unworked. Ch1 and turn. (19)
12. Sl st into the 1st st, SC in the next 17 st. Leave last st unworked. Ch1 and turn. (17)
13. Sl st into the 1st st, SC in the next 15 st. Leave last st unworked. Ch1 and turn. (15)
14. Sl st into the 1st st, SC in the next 13 st. Leave last st unworked. At the end of Round 14, I worked a sl st down the side until I was at my stitch marker on Round 8.
15. Sl st into the st that has the stitch marker, Ch1 and turn. Into the same st, 1 SC st and then 1 SC in the next 2 st. Ch1 and turn. (3)
16-35. 1 SC in each st across. Ch1 and turn. (3)
36. At the end of Round 35, Ch6 and sl st into stitch 3 of Round 35. This makes the buttonhole loop. FO and weave ends. Attach button to the opposite side - make sure to place the button where the strap meets and it feels snug, to fit, but not too tight, nor too loose.
Top Portion:
Please see above for instructions on how and where I placed the holes.
1. With the 2.5mm hook, you will repeat step #1 of the heel portion. (24)
2-8. With 3.0mm hook, 1 SC st in each st around. Ch1 and turn. (24)
10. Now, join your yarn in the right corner and ch1. You will work *3 HDC st into the same st as the Ch1, then sl st into the next st, then skip a stitch.* Repeat this 4 more times across. However, after you make the last 3 HDC st, then sl st into the same st as the 3 HDC st and FO. Weave ends.
To the tops of mine, I added a cute jewelry owl embellishment. Adding an embellishment is completely optional.
I'm really happy with the end result of my "Pretty In Pink" Sandals and look forward to taking them with me to Hilton Head in a few weeks. I hope this pattern inspires you to make yourself a cute pair of sandals for the summer.
If you have any questions or comments about my pattern, please feel free to message me and I will respond as quickly as possible. I try to check for messages throughout the day on my blog, Ravelry, Facebook and Instagram so that I can respond in a timely manner.
And, again, if you decide to make a pair, I'd love to see and share your pics on my blog.
Legal:
--don't claim my pattern as your own
--don't use my pics as your own
--okay to make and sale your finished work
--don't share my pattern electronically or in print format but provide a link to my blog
plastic toe divider and remove the plastic from the holes. Now, if you can trim down enough and not distort the shape of the sole, then you could possibly leave the plastic in the holes - as you can see in the pics I did with mine.
2. Making the holes: with an awl or needle - for the heels: I started a 1/4" above on each side of the back holes. I then measured 1/4" from the first hole to make my 2nd hole and remaining holes around. You will want to make your hold from the side, holding your awl or needle slanted to puncture through the top. Be careful not to tear through the sole. You will want to take your time and make your holes carefully and evenly around.
3. For the holes at the front of the sole, I placed the last holes on each side where the sole's rounded portion started to taper off into a straight line (which would be the area of the sole where the base of your toes would be - you would want your holes from there forward) - if this is confusing, please comment or message me!!!!
So, now the holes are made and you're ready to begin. For my shoes, I have 29 holes in the back section and 24 holes in the front section.
Heel Portion:
1. With your 2.5mm hook, starting with the heel section, you will want to take your time, as not to puncture through your soles, working your hook from the side, into the top, you will want to join your yarn with a sl st and ch1. Work a SC st through each hole around. Ch1 and turn. (29)
2. Switch to 3.0mm hook. 1 SC in each st around. Ch1 and turn. (29)
3-7. 1 SC in each st around. Ch1 and turn.
8. Sl st into the 1st st (place a stitch marker here - this is where you will make your strap on one side and the button placement for the opposite side) and the following st. SC into the 3rd st and into the next 24 st. Leave last st unworked (place a stitch marker here - this is where you will make your strap on one side and the button placement for the opposite side). Ch1 and turn. (25)
9. Sl st into the 1st st, SC in the next 23 st. Leave last st unworked. Ch1 and turn. (23)
10. Sl st into the 1st st, SC in the next 21 st. Leave last st unworked. Ch1 and turn. (21)
11. Sl st into the 1st st, SC in the next 19 st. Leave last st unworked. Ch1 and turn. (19)
12. Sl st into the 1st st, SC in the next 17 st. Leave last st unworked. Ch1 and turn. (17)
13. Sl st into the 1st st, SC in the next 15 st. Leave last st unworked. Ch1 and turn. (15)
14. Sl st into the 1st st, SC in the next 13 st. Leave last st unworked. At the end of Round 14, I worked a sl st down the side until I was at my stitch marker on Round 8.
15. Sl st into the st that has the stitch marker, Ch1 and turn. Into the same st, 1 SC st and then 1 SC in the next 2 st. Ch1 and turn. (3)
16-35. 1 SC in each st across. Ch1 and turn. (3)
36. At the end of Round 35, Ch6 and sl st into stitch 3 of Round 35. This makes the buttonhole loop. FO and weave ends. Attach button to the opposite side - make sure to place the button where the strap meets and it feels snug, to fit, but not too tight, nor too loose.
Top Portion:
Please see above for instructions on how and where I placed the holes.
1. With the 2.5mm hook, you will repeat step #1 of the heel portion. (24)
2-8. With 3.0mm hook, 1 SC st in each st around. Ch1 and turn. (24)
Note: I have skinny feet/toes, so before you complete the next step, make sure 8 rows is enough for you. You may have to add 1 or more rows; or you may need 1 or less rows.
9. At this point, you will FO and leave a long tail for whipstitching the middle section together. You have 24 st, so you will whipstitch 12 stitches to 12 stitches - this will join the top together. Weave ends.10. Now, join your yarn in the right corner and ch1. You will work *3 HDC st into the same st as the Ch1, then sl st into the next st, then skip a stitch.* Repeat this 4 more times across. However, after you make the last 3 HDC st, then sl st into the same st as the 3 HDC st and FO. Weave ends.
To the tops of mine, I added a cute jewelry owl embellishment. Adding an embellishment is completely optional.
I'm really happy with the end result of my "Pretty In Pink" Sandals and look forward to taking them with me to Hilton Head in a few weeks. I hope this pattern inspires you to make yourself a cute pair of sandals for the summer.
If you have any questions or comments about my pattern, please feel free to message me and I will respond as quickly as possible. I try to check for messages throughout the day on my blog, Ravelry, Facebook and Instagram so that I can respond in a timely manner.
And, again, if you decide to make a pair, I'd love to see and share your pics on my blog.
Happy Crocheting...
Legal:
--don't claim my pattern as your own
--don't use my pics as your own
--okay to make and sale your finished work
--don't share my pattern electronically or in print format but provide a link to my blog
No comments:
Post a Comment