

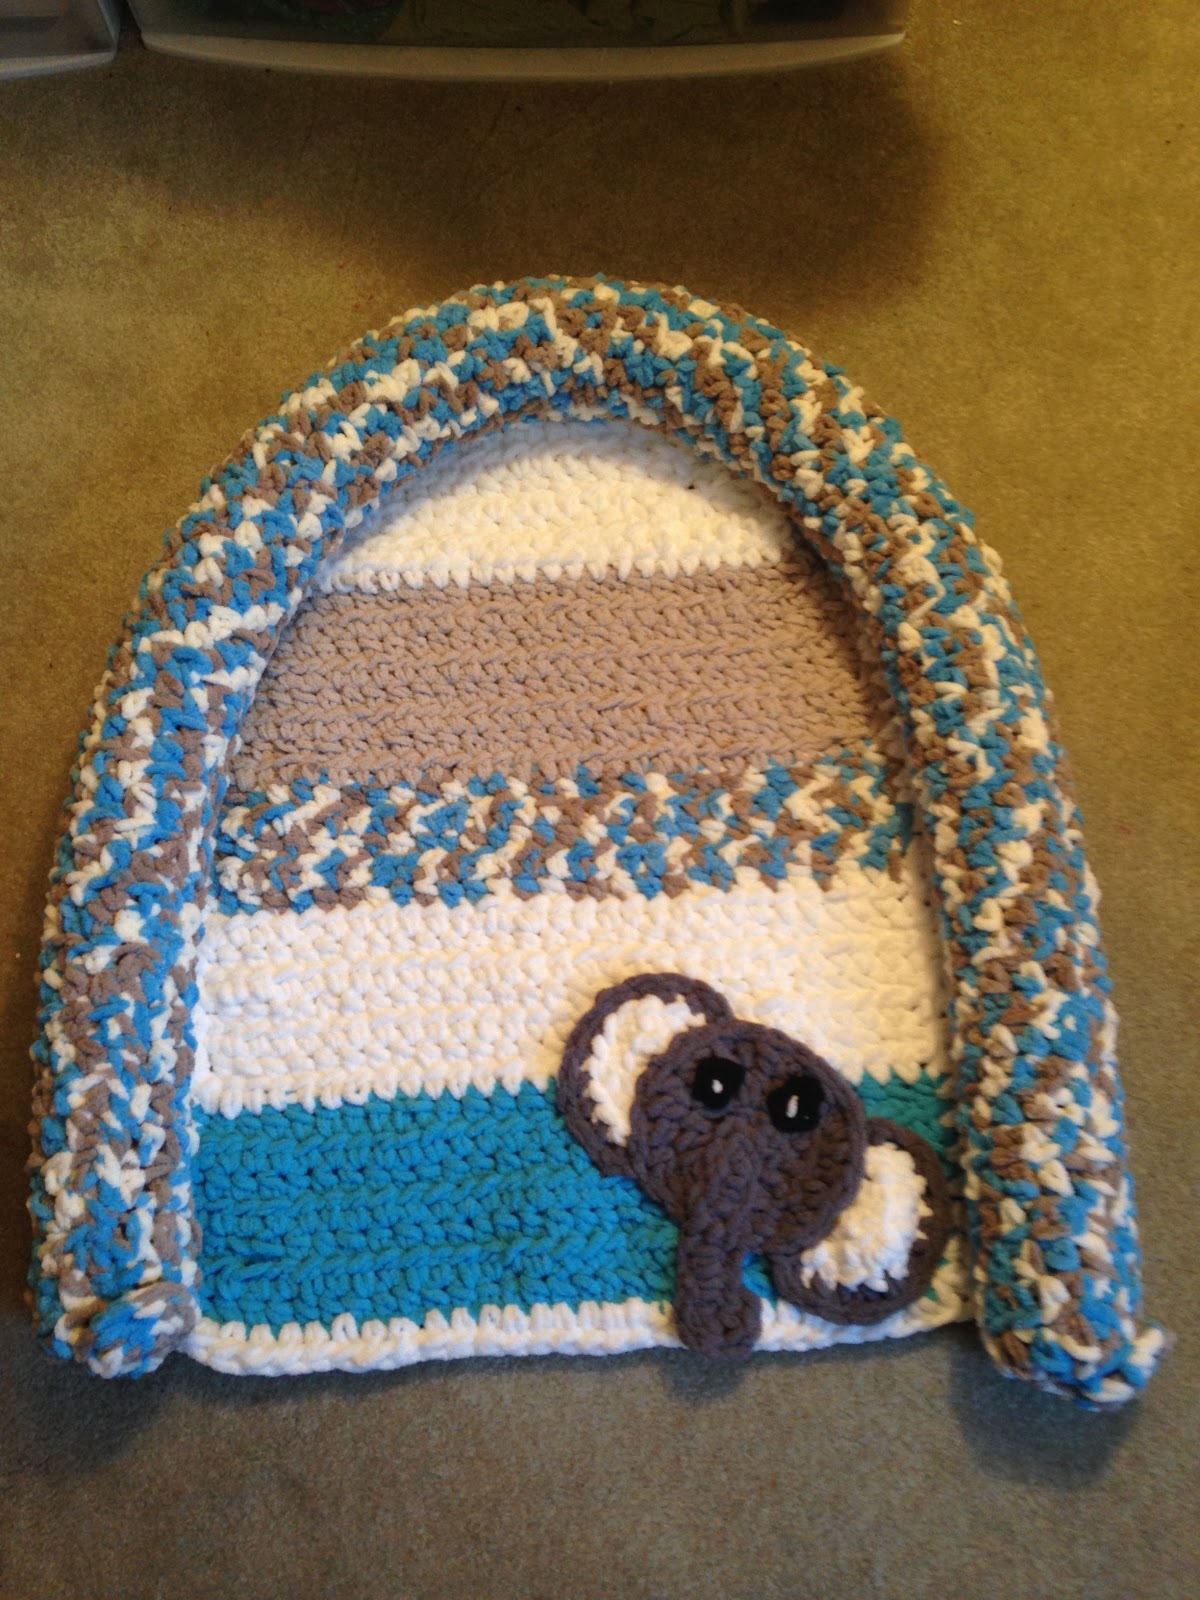
The Baby Nest is great for the floor, on the changing table or in the crib -- securely keeps baby in place. I used Bernat Blanket Yarn so it's super soft, cozy and thick.
Baby Nest/Lounger


Baby Nest/Lounger Pattern
Difficulty Level: Easy
Size: 25" long and 23" at the widest point
Materials:
--10mm hook
--Bernat Blanket Yarn (approx 205 yd to cover the noodle; approx 100-120 yds for remainder)
--pool noodle (I bought one at Dollar Tree); you could opt to use polyfil if you preferred
--tapestry needle for weaving
--Velcro tabs (1 for each noodle end)
Gauge: 7 HDC stitches & 5 rows = 4"
Stitch Abbreviations:
Ch: chain
Sl st: slip stitch
St: stitch(es)
SC: single crochet
HDC: half double crochet
HDC2tog: half double crochet 2 stitches together
MR: magic ring
FO: fasten off
Directions:
Noodle Cover:
1. I used a 220 yd skein of "Little Royales." I used approx 200-205 yds. Ch15. HDC in 2nd ch and across. Ch1 and turn. (14)
2. HDC across. Ch1 and turn. (14)
3-80. Repeat #2. At the end of Row 80, FO and leave a long tail for whipstitching cover around noodle. I did not whipstitch too tight because I want the noodle to be removable for washing the Baby Nest. Check your number of rows with your noodle as you go - just in case yours is a different size than mine - increase or decrease the number of rows accordingly.
Note: you can stuff firmly with polyfil if you so desire...


Noodle Cover Ends (make 2):
1. 6 HDC into MR. Sl st join and Ch1. (6)
2. 2 HDC in first st, 1 HDC in next. Repeat around. Sl st join and FO. Leave tail for attaching.
Attaching: when attaching each end, only whipstitch halfway around. For the stitches left unworked, you will place a Velcro tab. This is so you will have a way to open the end to remove the noodle for washing the Baby Nest.
Blanket Portion:
I used various coordinating yarn for this portion. You can use one color or as many as you want.
1. Ch30. HDC in 2nd ch from hook and across. Ch1 and turn. (29)
2-27. HDC in each st across. Ch1 and turn. (29)
28. With white yarn, HDC around the perimeter, placing 2 HDC in each corner. Sl stoning and Ch1.
29. Working across top, HDC2tog - 3 times. 1 HDC in each of the next 17 st. HDC2tog- 3 times. Ch1 and turn. (23)
30. HDC2tog - 3 times. 1 HDC in each of the next 11 st. HDC2tog- 3 times. Ch1 and turn. (17)
31. HDC2tog - 1 time. 1 HDC in each of the next 13 st. HDC2tog- 1 time. Ch1 and turn. (15)
32-33. HDC in each st across. Ch1 and turn. (15)
34. HDC2tog, 1 HDC in each of the next 11 st, HDC2tog. FO, leaving a long tail to attach to noodle. (13)
Lay noodle in a semicircle around perimeter of blanket portion. Pin, if needed. Turn over and whipstitch together.

View from backside:

And, that's it. This worked up fairly quick. I think it would make a great gift for mommy-to-be. Use in the floor, changing table or in the crib for baby to nestle in...
I added an elephant appliqué to mine.
Head:
1. With dark gray yarn, 8 HDC in MR. (8)
2. 2 HDC in each st around. (16)
3. 2 HDC in first st, 1 HDC in next. Repeat around. Sl st join and FO. Leave tail for attaching. (24)
Eyes (make 2):
1. With black yarn, ch3. Sl st in first ch. FO. Leave tail for attaching. Embroider pupil with white yarn.
Tusk:
1. Ch9. SC in 2nd ch from hook and next 6 ch. 6 SC in last ch. FO. Leave tail for attaching.
Ears (make 2):
1. With white yarn, 8 HDC into MR. Tighten, but DON'T join. Turn and Ch1. (8)
2. 2 HDC in first st, 1 HDC in next. Repeat across. FO white yarn and join dark gray yarn. Ch1 and turn. (12)
3. 1 SC in each st across. FO. Leave tail for attaching to side of head. (12)
See pics for help with assembly.
Happy Crocheting!!!
PIN this pattern and share with your friends....
Legal:
--don't claim my pattern design as your own
--don't use my pics as your own
--don't share my patterns electronically or in print format (without my prior consent) but provide a link to my blog
No comments:
Post a Comment