

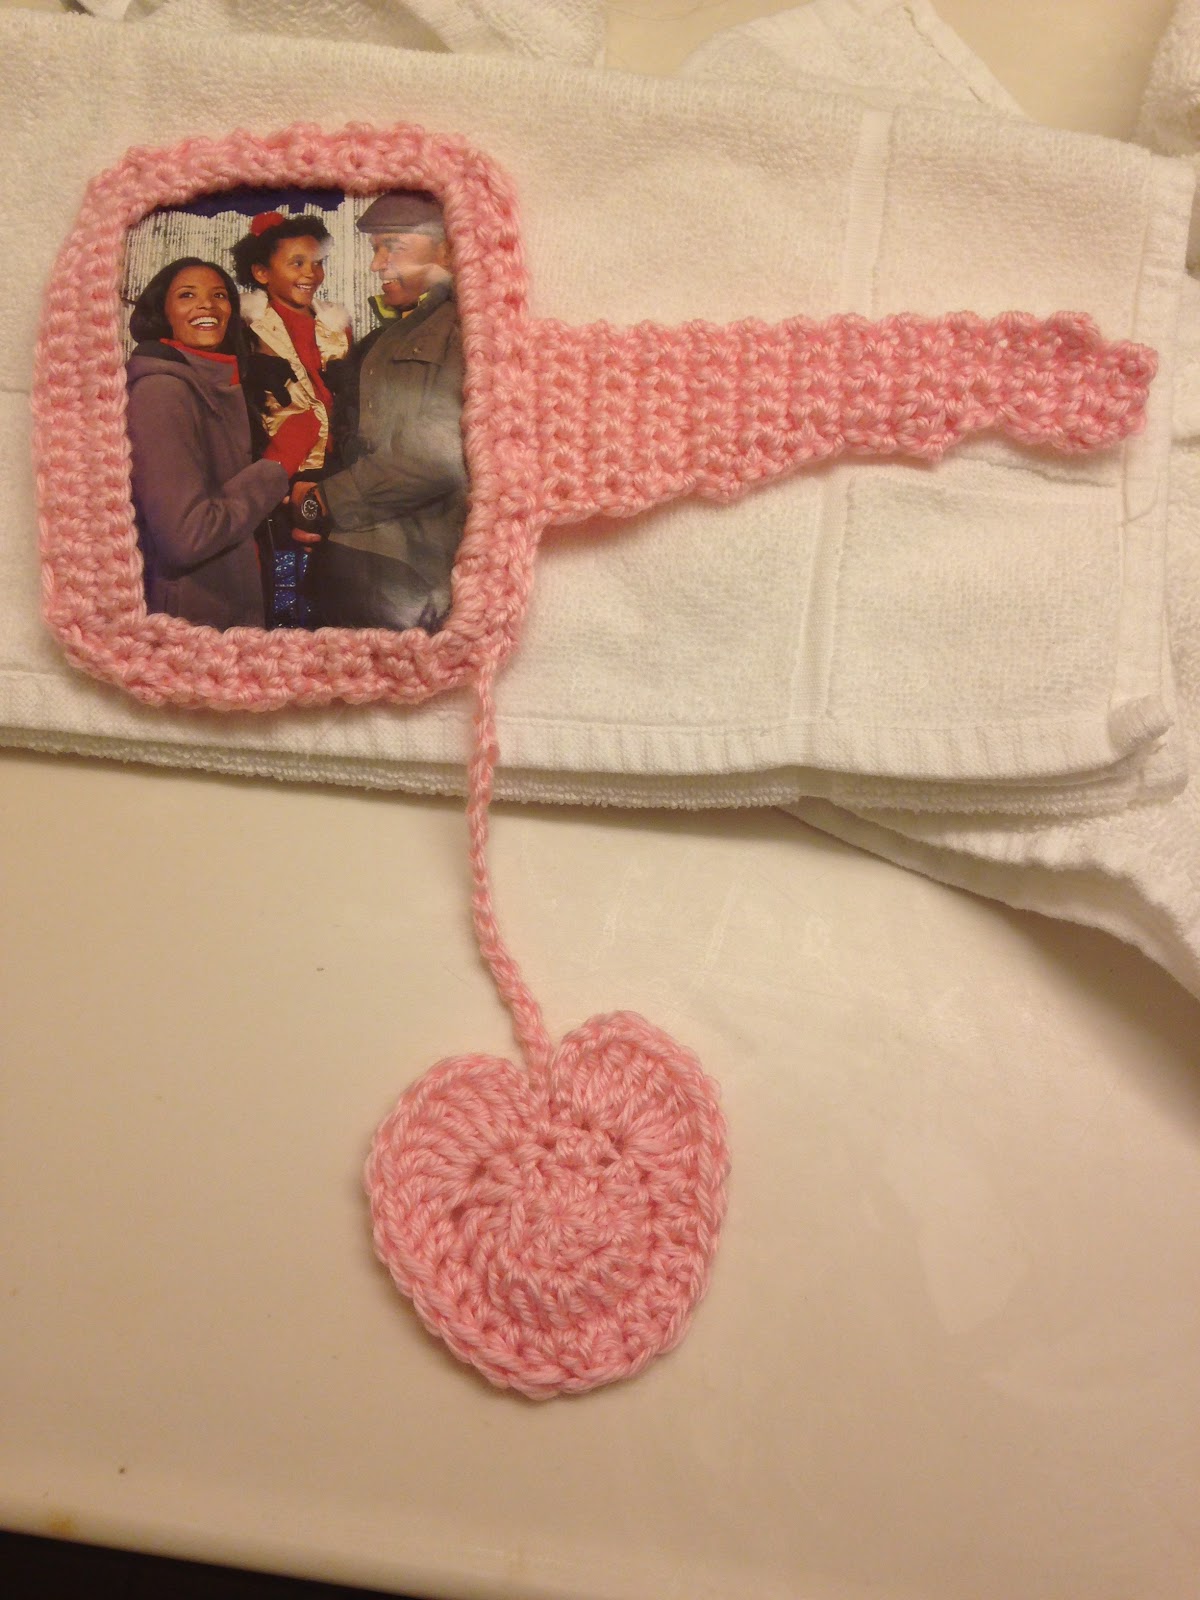
So, here it is!!! "Key To My Heart" Photo Wall Hanging! I don't have any pics with me of myself and hubby - but, I cut a pic from a tourism brochure...lol. And, of course, I was running out of colors that I had on hand with me but I think pink works really well.
Enjoy this cute and fun design...
"Key To My Heart" Photo Wall Hanging


Key To My Heart Photo Wall Hanging
Difficulty Level: Easy
Measurement:
The key measures 10" in width. The photo frame portion measures 6" long.
Materials:
--4.5mm hook
--#4 worsted weight yarn (I used Red Heart's Soft in Pink); approximately 100 yds
--tapestry needle for weaving
Stitch Abbreviations:
Ch: chain
Sl st: slip stitch
St: stitch(es)
SC: single crochet
SC2tog: single crochet two stitches together
DC: double crochet
DC2tog: double crochet two stitches together
TC: triple crochet
MR: magic ring
FO: fasten off
Directions:
Front Portion:
1. Ch18, SC in 2nd ch and across. Ch1 and turn. (17)
2. 2 SC in first st, 1 SC in next 15 st and 2 SC in last st. Ch1 and turn. (19)
3. 2 SC in first st, 1 SC in next 17 st and 2 SC in last st. Ch1 and turn. (21)
4-16. 1 SC in first 2 st. Ch1 and turn. (2)
At the end of row 16, FO and weave ends. Join yarn on opposite side and Ch1. Repeat rows 4-16 on the opposite side.
17. 1 SC in the first 2 st, Ch17 and skip 17 st, 1 SC in the last 2 st. Ch1 and turn.
18. SC2tog, 17 SC into the Ch17 space and SC2tog. Ch1 and turn. (19)
19. SC2tog, 1 SC in next 15 st and SC2tog. Do not Ch1. Turn. (17)
20. Sl st into the first 5 st; 1 SC in the next 7 st. Ch1 and turn. (7)
21-24. 1 SC in each st across. Ch1 and turn. (7)
25. 1 SC in the first 5 st; SC2tog. Ch1 and turn. (6)
26. SC2tog; 1 SC in the next 4 st. Ch1 and turn. (5)
27. 1 SC in the next 4 st; 2 SC in the last st. Ch1 and turn. (6)
28. 1 SC in each st across. Ch1 and turn. (6)
29. 1 SC in the next 4 st; SC2tog. Ch1 and turn. (5)
30. 1 SC in each st across. Ch1 and turn. (5)
31. 1 SC in the next 3 st; SC2tog. Ch1 and turn. (4)
32-34. 1 SC in each st across. Ch1 and turn. (4)
35. 1 SC in next 3 st; 2 SC in the last st. Ch1 and turn. (5)
36. SC2tog; 1 SC in next 3 st. Ch1 and turn. (4)
37. 1 SC in next 2 st; SC2tog. Ch1 and turn. (3)
38. 1 SC in each st across. Ch1 and turn. (3)
39. 1 SC in next 2 st; 2 SC in last st. Ch1 and turn. (4)
40. 1 SC in each st across. Ch1 and turn. (4)
41. 1 SC in next 3 st; 2 SC in last st. Do not ch1. Turn. (5)
42. Sl st into the first st; 1 SC in the next 3 st. Do not ch1. Turn. (3)
43. Sl st into the first st; 1 SC in the next 2 st. FO and weave ends. (2)
Back Portion:
1. Ch18, SC in 2nd ch and across. Ch1 and turn. (17)
2. 2 SC in first st, 1 SC in next 15 st and 2 SC in last st. Ch1 and turn. (19)
3. 2 SC in first st, 1 SC in next 17 st and 2 SC in last st. Ch1 and turn. (21)
4-16. 1 SC in each st across. Ch1 and turn. (21)
17. SC2tog; 1 SC in next 17 st; SC2tog. Ch1 and turn. (19)
18. SC2tog; 1 SC in next 15 st; SC2tog. FO and leave a long tail for attaching to the front portion. (17)
Assembly:
With the key placed in a horizontal position, lie the front on top of the back. Whipstitch across the bottom, up the right side and across the top. Do not whipstitch down the left side - leave this open to insert photo.
For the heart:
String Portion:
1. Leave a tail for attaching to the heart. Then, Ch 24. FO, leaving a tail to attach to bottom right corner of the key.
Heart:
1. 8 DC into MR. Sl st to join to first st and ch1. (8)
2. 2 DC in each st around. Sl st to join. (16)
3. Ch4 (counts as first TC) and 3 TC into same st; 4 TC into next st; 1 DC in each of the next 5 st; DC2tog; 1 DC in each of the next 5 st; 4 TC in next st; 3 TC and Ch 4 in the last st; sl st into last st and FO. Weave ends.
And, that's it!!! This would look great in so many different colors.
Variations:
1. As a variation, you could work the front portion (the first 18 rows) as the back portion, omitting a photo to just make it as a wall hanging.
2. Or, you could make 2 keys (using the back portion for the first 18 rows), stuff and make this into a pillow...
Lots of options with this pattern....
Enjoy!!! Share your photos if you decide to make this...
Happy Crocheting....
Legal:
--don't claim pattern/design as your own
--don't use my pics
--okay to sale your finished work
--don't share my pattern in any form but reference me and a link to my blog
No comments:
Post a Comment